DACE OMEGA-HB User manual

- - - - - - - - - - - - - - - - - - - - - - - - - - - - - - - - - - - - - - - - - - - - - - - - - - ▲INSTRUCTION MANUAL
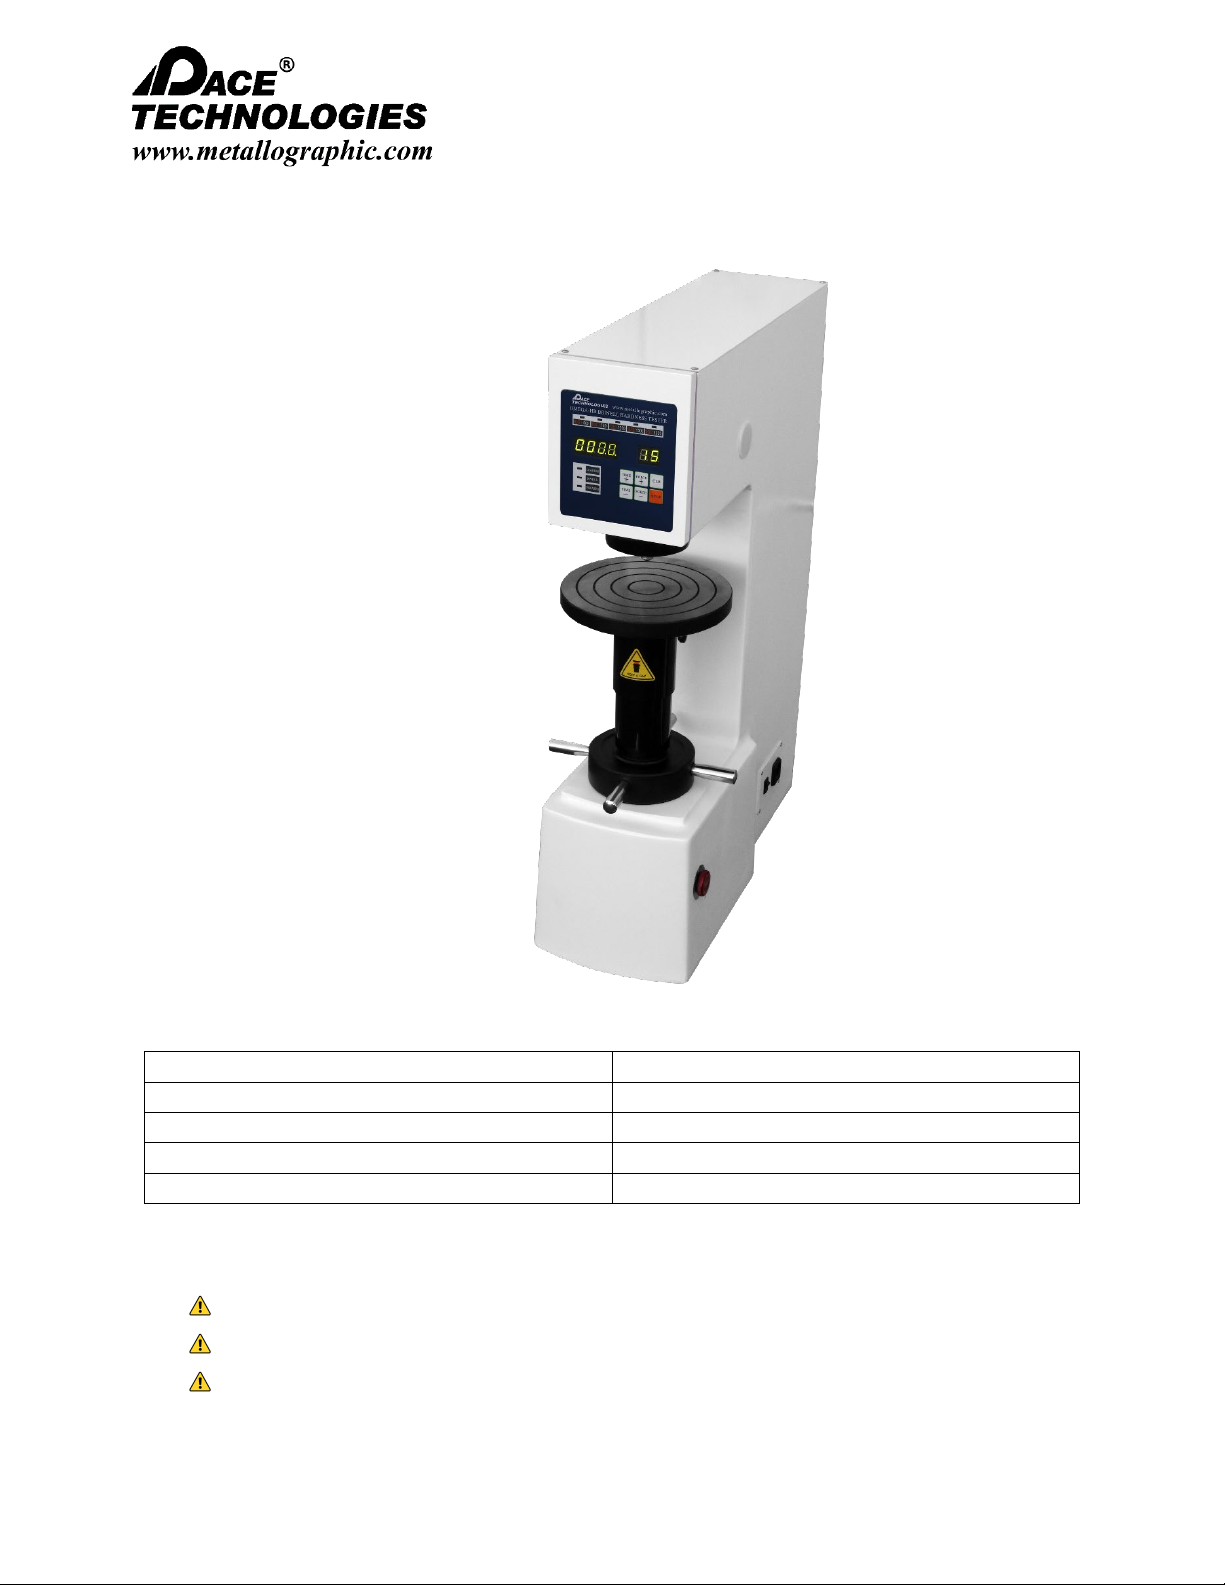
OMEGA-HB Brinell
Hardness Tester
3601 E. 34th St. Tucson, AZ 85713 USA Tel. +1-520-882-6598 Fax +1-520-882-6599 email: pace@metallographic.com Web: https//www.metallographic.com
VERSION 1.0
Equipment type
Brinell Hardness Tester
Model
OMEGA-HB
Electrical Requirements
110 Volts (Single-phase)
Frequency
50/60 Hz
Manual Revision Date
April 24, 2022
WARNINGS
Please read the instructions carefully before turning on the machine.
Supplying the wrong voltage will cause severe damage to the electrical system.
Do not disassemble.

2

3
CONTENTS
Section 1: Warranty............................................................................................................... 5
Section 2: Technical Specifications......................................................................................... 7
Section 3: Unpacking, Shipping, and Installation .................................................................. 10
3.1 Operational Conditions ....................................................................................................... 10
3.1 Unpacking When moving the box, lift from the bottom using appropriate lifting
techniques................................................................................................................................. 10
3.3 Installation........................................................................................................................... 10
3.3.1 Table Location ...................................................................................................................................10
3.3.2 Install leveling feet.............................................................................................................................11
3.3.3 Leveling unit ......................................................................................................................................11
3.3.4 Remove shipping tie downs...............................................................................................................11
3.3.5 Lever Positioning ..............................................................................................................................12
3.3.6 Installing Anvil Stage..........................................................................................................................12
Section 4: Control Board and Its Functions............................................................................... 13
Section 5. Safety Guidelines................................................................................................. 14
5.2 Safety Precautions............................................................................................................... 14
5.3 Emergency Statement......................................................................................................... 14
6. Start-up and Operation.................................................................................................... 15
6.1 Preparatory work ................................................................................................................ 15
6.2 Usage of the instrument ..................................................................................................... 15
Section 7: Optical Manual Microscope ................................................................................. 19
7.1 Eyepiece Components......................................................................................................... 19
7.2 Technical specifications microscope ............................................................................... 19
7.3 Usage of the reading microscope........................................................................................ 20
7.4 Maintenance of the reading microscope............................................................................ 21
Section 8. Brinell Testing Basics ........................................................................................... 22
8. 1 Technical Data for Hardness Evaluation............................................................................. 23

4
Section 9: Maintenance ...................................................................................................... 28
9.1 General ................................................................................................................................ 28
9.2 Adjustment of the Tester ................................................................................................... 28
9.3 Special Attentions............................................................................................................... 29
9.4. Working Principle of the Electric Parts .............................................................................. 30
10. Troubleshooting ............................................................................................................ 32

5
SECTION 1: WARRANTY
Terms and Conditions applying to all PACE Technologies Products
1. LIMITED WARRANTY AND DISCLAIMER:
PACE Technologies Products are warranted for two years from the purchase date to be free from
defects in material and workmanship under correct use, normal operating conditions, and proper
application. PACE Technologies obligation under this warranty shall be limited to the repair or
exchange, at PACE Technologies option, of any PACE Technologies Product or part which proves
to be defective as provided herein. PACE Technologies reserves the right to either inspect the
product at Buyer’s location or require it to be returned to the factory for inspection. Buyer is
responsible for freight to and from factory on all warranty claims. The above warranty does not
extend to goods damaged or subjected to accident, abuse or misuse after release from PACE
Technologies warehouse, nor goods altered or repaired by anyone other than specifically
authorized PACE Technologies representatives. PACE Technologies shall not in any way be
responsible for the consequences of any alteration, modification or misuse unless previously
approved in writing by an officer of PACE Technologies. Note: Corrosion is considered a
maintenance issue and not a warranty issue.
PACE TECHNOLOGIES MAKES NO EXPRESS WARRANTIES OTHER THAN THOSE WHICH
ARE SPECIFICALLY DESCRIBED HEREIN. Any description of the goods sold hereunder,
including any reference to Buyer’s specifications and any description in catalogs, circulars and
other written material published by PACE Technologies, is the sole purpose of identifying such
goods and shall not create an express warranty that the goods shall conform to such description.
THIS WARRANTY IS EXPRESSLY IN LIEU OF ALL OTHER WARRANTIES, EXPRESSED OR
IMPLIED. THERE ARE NO IMPLIED WARRANTIES OF MERCHANTABILITY OR FITNESS FOR
PARTICULAR PURPOSE. THIS WARRANTY STATES PACE TECHNOLOGIES ENTIRE AND
EXCLUSIVE LIABILITY AND BUYER’S EXCLUSIVE REMEDY FOR ANY CLAIM FOR
DAMAGES IN CONNECTIONS WITH PACE TECHNOLOGIES PRODUCTS. PACE
TECHNOLOGIES WILL IN NO EVENT BE LIABLE FOR INCIDENTAL OR CONSEQUENTIAL
DAMAGES WHATSOEVER, NOR FOR ANY SUM IN EXCESS OF THE PURCHASE PRICE.
2. LIABILITY CAP:
PACE Technologies maximum aggregate liability for loss and damage arising under, resulting
from or in connection with the supply or use of the Equipment and Consumables provided under
this purchase, or from the performance or breach of any obligation (s) imposed hereunder,
whether such liability arises from any one or more claims or actions for breach of contract, tort,
(including negligence), delayed completion, warranty, indemnity, strict liability or otherwise, unless
otherwise limited by the terms hereof, shall be limited to one hundred percent (100%) of the
purchase price.
3. DELIVERY:
Customer assumes and shall bear the risk of all loss or damage to the Products from every cause
whatsoever, whether or not insured, and title to such Products shall pass to Customer upon PACE
Technologies delivery of the Products to the common carrier of Pace Technologies choice, or the
carrier specified in writing by Customer, for shipment to Customer. Any claims for breakage, loss,
delay, or damage shall be made to the carrier by the Customer and Pace Technologies will render
customer reasonable assistance in prosecuting such claims.
6
4. ACCEPTANCE:
Customer shall inspect the Products promptly upon receipt of delivery. Unless customer objects in
writing within thirty (30) business days thereafter, customer shall be deemed to have accepted the
Products. All claims for damages, errors, or shortage in Products delivered shall be made by
Customer in writing within such five (5) business day period. Failure to make any claim timely shall
constitute acceptance of the Products.
5. PAYMENT:
Customer agrees to provide timely payment for the Products in accordance with the terms of
payment set forth on the reverse side hereof or in any proposal submitted herewith. If any payment
is not paid on or before its due date, Customer shall pay interest on such late payment from the due
date until paid at the lesser of 12% per annum or the maximum rate allowed by law.
6. DEFAULT:
If Buyer is in default (including, but not limited to, the failure by Buyer to pay all amounts due and
payable to Seller) under the work or purchase order or any other agreement between Buyer and
Seller, Buyer ’s rights under the warranty shall be suspended during any period of such default and
the original warranty period will not be extended beyond its original expiration date despite such
suspension of warranty rights.
7. MISCELLANEOUS PROVISIONS:
This agreement has been made in and shall be governed by the laws of the State of Arizona. These
terms and conditions and the description of the Products on the reverse side hereof or in any proposal
submitted herewith constitute the entire agreement and understanding of the parties with respect to this
sale and supersede all prior and contemporaneous agreements or understandings, inducements or
representations, expressed or implied, written or oral, between the parties with respect hereto. Any term
or provision of this Agreement may be amended, and any observance of any term of this Agreement
may be waived, only by a writing signed by the party to be bounds. The waiver by a party of any breach
shall not be deemed to constitute a waiver of any other breach. Should suit be brought on this
Agreement, the prevailing party shall be entitled to recover its reasonable attorneys’ fees and other
costs of suit including costs and attorneys’ fees incurred on appeal or in collection of any judgment.,
errors, or shortage in Products delivered shall be made by Customer in writing within such five (5)
business day period. Failure to make any claim timely shall constitute acceptance of the Products.
8. RESTOCKING FEE:
All Returns are subject to a restocking charge equal to 15% (fifteen percent) of the Invoice, unless the
Goods are proved to be non-conformed by PACE Technologies.

7
SECTION 2: TECHNICAL SPECIFICATIONS
The OMEGA-HB Brinell hardness tester is a ball indenter designed to evaluate metallographic
specimen hardness.
The OMEGA-HB Brinell hardness tester uses a load-cell to apply loads ranging from 62.5 kg to
3000 kg.
Electrical Specifications: 110V/220V Single Phase
Test forces
62.5 kg (612.9 N)
100 kg (980 N)
125 kg (1226 N)
187.5 kg (1839 N)
250 kg (2452 N)
500 kg (4900 N)
750 kg (7335 N)
1000 kg (9800 N)
1500 kg (14700 N)
3000 kg (29400 N)
Hardness Range (HBW) 8~650 HBW
Dwell time of test force 5-60 seconds
Max. Height of Specimen 8.7-inches (220 mm)
Max. Width of Specimen 5.3-inch (135 mm)
Minimum Division on
micrometer drum wheel 0.005 mm
Weight 275 lbs (125 kg)
Dimensions (W x D x H)
9.25 x 21.5 x 29.7-inches
(235 x 545 x 755 mm)
Working temperature 70-85° F (23-28° C)
Storage Temperature: 32 – 100° F (0 – 40° C)
Power 110V (50/60 Hz)

8
Determining the Correct Force: To determine the correct for Brinell testing the indentation
diamond should be in the range of 0.25 to 0.6 times the ball diameter (see chart below). The
maximum accuracy of the measurement is achieved when the diameter of the indent is 0.37
times the diameter of the ball indenter.
Indenter Ball
diameter
(mm)
Min. size of
indent =
(0.25xD) mm
Max. size of
indent =
(0.6xD) mm
Most accurate
size of indent =
(0.37xD) mm
2.5
0.63
1.50
0.93
5
1.25
3.00
1.85
10
2.50
6.00
3.70
The following table also help determine the correct Brinell hardness ranges, based on the
materials being tested:
Material
Brinell hardness
F/D2
Steel,
nickel alloy, titanium alloy
—
30
Cast iron <
140
10
≥140
30
Copper & copper alloy
<
35
5
35~130
10
>
130
30
Light metal & its alloy
35
2.5
35~80
5,10
>
80
10
F—test force (kg) ; D—ball diameter (mm)
Repetition and tolerance of displayed value for the hardness tester:
Standard hardness test
block Tolerance of displayed
value%
Repetition of displayed
value%
≤125
±3
3
125<HBW≤225
±2.5
2.5
>
225
±2
2

9
Correspondent relations among scale, indenter and test force:
Hardness symbol
Diameter of Indenter
mm
F/D2
Test Force
N(kg)
HBW 10/3000
10
30
29420(3000)
HBW 10/1500
10
15
14710(1500)
HBW 10/1000
10
10
9807(1000)
HBW 10/500
10
5
4903(500)
HBW 10/250
10
2.5
2452(250)
HBW 10/100
10
1
980.7(100)
HBW 5/750
5
30
7355(750)
HBW 5/125
5
5
1226(125)
HBW 2.5/187.5
2.5
30
1839(187.5)
HBW 2.5/62.5
2.5
10
612.9(62.5)

10
SECTION 3: UNPACKING, SHIPPING, AND INSTALLATION
3.1 Operational Conditions
3.1.1 Room temperature within 10~30 ℃(50-85 °F);
3.1.2 Relative room humidity inferior to 65%;
3.1.3 The environment should have minimal shock and vibration;
3.1.4 Do not place Brinell tester in an corrosive atmosphere.
3.1 Unpacking
When moving the box, lift from the bottom using appropriate lifting techniques.
The OMEGA-HB Brinell hardness tester is constructed of sensitive electronic and
mechanical components. Do not drop.
Use caution when unloading to prevent injury.
3.3 Installation
Install unit carefully! Improper installation voids warranty.
3.3.1 TABLE LOCATION
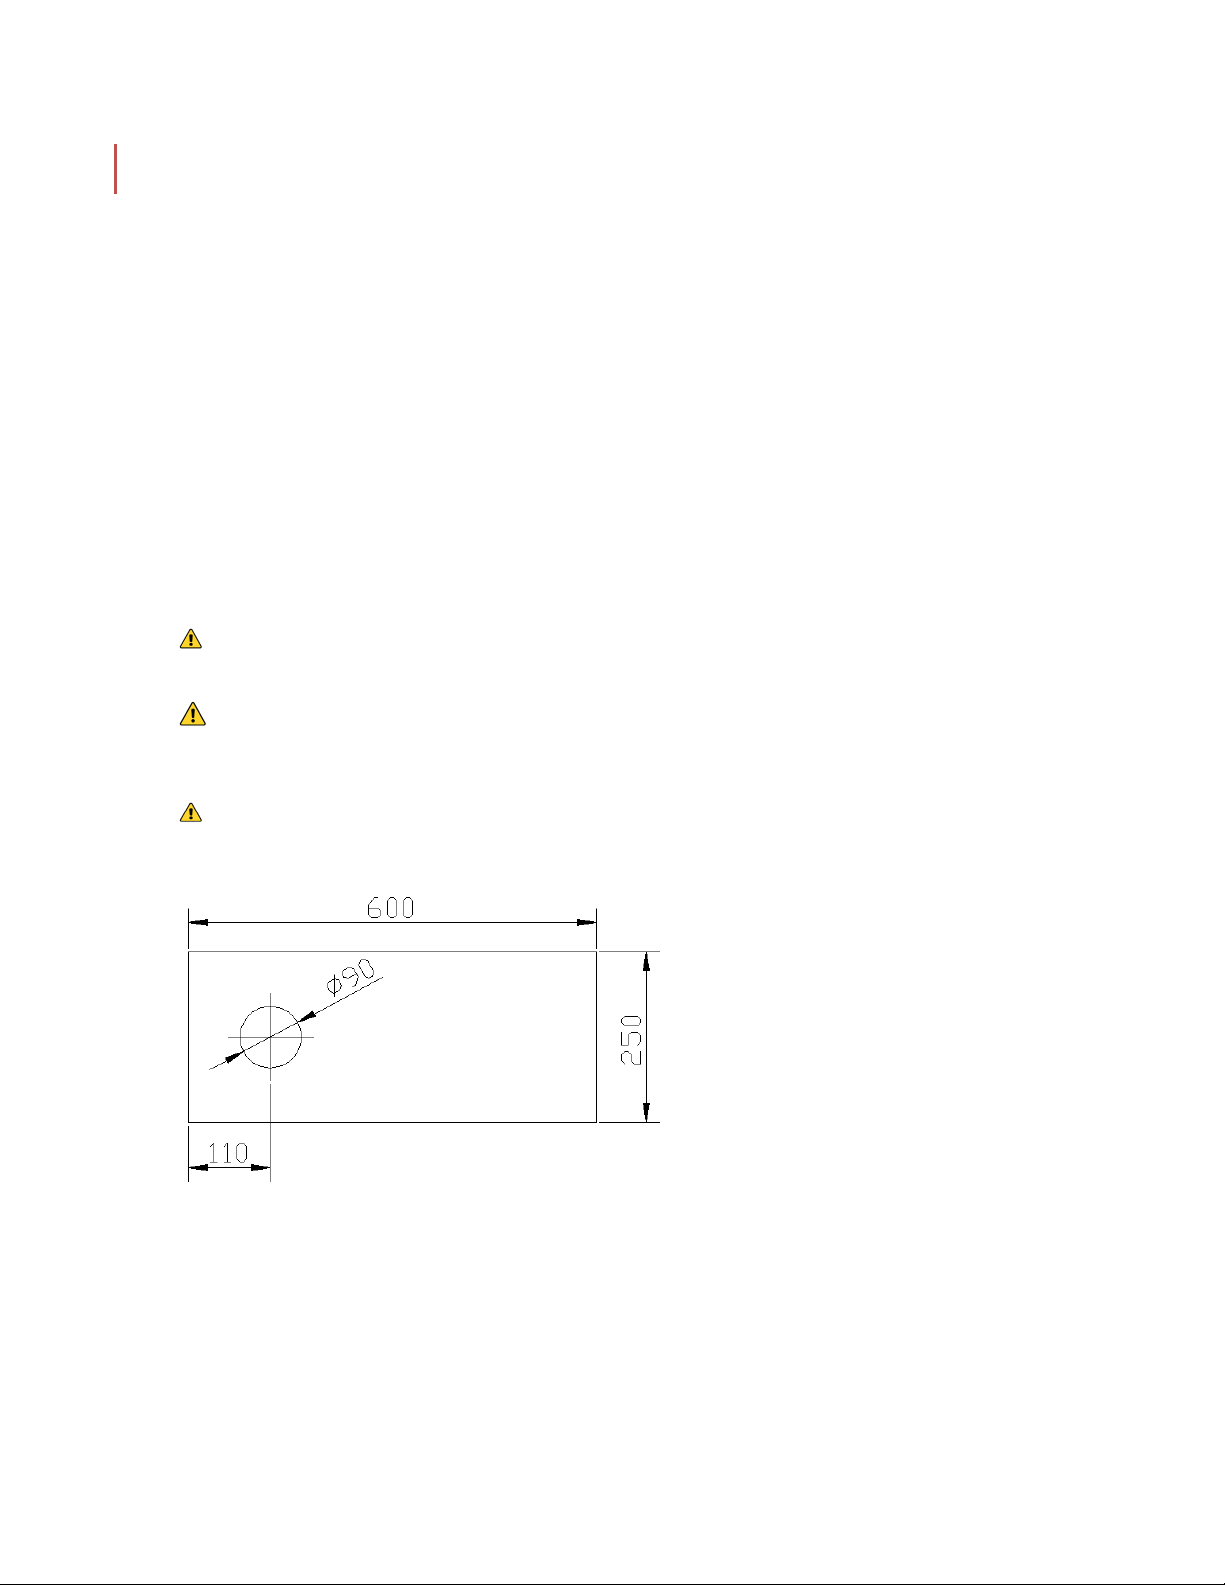
Installation of the OMEGA-HB should be on a flat sturdy surface, with easy access to
electrical connections. For maximum height adjustment it is recommended that a 90
mm hole be drilled in the supporting table as per the above diagram.

11
The OMEGA-HB Brinell hardness testee surface.
If
3.3.2 INSTALL LEVELING FEET
3.3.3LEVELING UNIT
Place bubble level on stage and adjust feet height to level
the unit.
3.3.4 REMOVE SHIPPING TIE DOWNS
Attach four
leveling feet and
use bubble level
on anvil to level
unit
Open the upper cover. Remove the tie
string
Template
Indenter
Tightening screw
Switch
Rotating wheel
Lifting screw
Power cord
Fus
Testing
Panel
Upper

12
3.3.5 LEVER POSITIONING
Check the knife support to ensure that knife blade or “V” is positioned so it is resting in the
groove of the support bar. If the blade is not being supported on the cushion (caused by severe
shaking and vibration during transport), push down the main lever by hand and slide the blade
into the groove (see image below). Replace upper cover.
3.3.6INSTALLING ANVIL STAGE
Insert anvil into up/down screw feed
3.3.7 INSTALLING INDENTER
Install the indenter so that the flat end of the shank is facing the screw. Lift the indenter all
the way into the guide and tighten the screw. It is good practice to set the indenter in place
by doing an indent on the sample and then discarding this indent from any analysis.

13
Section 4: Control Board and Its Functions
4.1 The panel board function includes six input keys and displays loading, dwell and unloading
three statuses (see Fig.5).
4.2 An LED shows the present state of operation, such as “LOADING”, “DWELL” and
“UNLOADING” during the operation of the machine.
Red and green double
color LED
Display window:
Display window:
TIME
+
TIME
-
Dwell time keys. Adjusts in 5 second increments, with a range
from 5~60 seconds. (Initial “dwell time” is set to 15 seconds)
FORCE
+
FORCE
-
Test force selection key. There are 10 force settings. The red
indicator LED is red for 62.5, 100, 125, 187.5, 250 (kg) forces and
the green LED is for 500,750, 1000, 1500, 3000 (kg) forces.
STOP
Stop key. It is necessary to stop the operation press “STOP”. The hardness tester
will go back to the starting position. To continue, press the “CLR” key.
CLR
Zero setting key. When the test force is completely unloaded (the specimen
and the indenter is separated), press this key if the display window “dwell
time” still has time remaining.

14
SECTION 5. SAFETY GUIDELINES
5. 1 Warning Sign
This symbol represents special safety precautions and warnings for the machine.
5.2 Safety Precautions
Pay careful attention to this instruction manual and the recommended safety
guidelines. This is essential for the safe operation of the OMEGA-HB Brinell hardness
tester
Turning on the machine when the voltage switch direction does not match the voltage
being supplied, will cause severe damage to the electrical system
Proper operator training is required for operation of the OMEGA-HB Brinell hardness
tester. Unauthorized mechanical and electrical changes, as well as improper operation,
voids all warranty claims. All service issues need to be reported to the manufacturer /
supplier.
Operate unit as specified in this manual.
Disconnect power before opening unit
Lower stage to avoid damaging indenter when not in use.
Cover unit with dust cover when not in use to eliminate dust contamination
5.3 Emergency Statement
Always follow proper operational guidelines and avoid contact with lubricants and abrasives.

15
6. START-UP AND OPERATION
6.1 Preparatory work
6.1.1 The surface of the specimen must be clean. Remove dirt, corrosion or oxide coatings and
avoid making the indent into any imperfections such as pits or porosity in the surface.
6.1.2 The minimum thickness of the specimen should be >10 times the depth of the
indentation. If there is visual deformation on the back of specimen after testing the load
is too high.
6.1.3 The specimen should be stable on the testing table and should be stationary during the
testing procedure. The test force must also be vertically applied on the specimen.
6.2 Usage of the instrument
6.2.1 Install the indenter into main shaft hole and align the flat edge towards the screw and
then tighten.
6.2.2 Turn on the power switch, the panel display window will count down. When the display
window shows “test force” of zero, the instrument automatically adjusts to the starting
position.
6.2.3 When starting up, the default test force is set to 2452N (250kg), the dwell time is set to 15
seconds. If you want to change the test force or dwell time, refer to Section 4.
6.2.4 When preparatory work is finished, place the specimen evenly on the testing table. Press
“CLR” to set zero and rotate the wheel to raise the anvil table. Continue rotating the
wheel until the specimen touches the indenter, and the window begins to display test
force.
NOTE: For 62.5kg~250kg forces (red LED lights), rotate the wheel to make the window display
about 30kg;
For 500kg~3000kg (green LED lights), rotate the wheel to make the window display
about 90kg.

16
6.2.5 When the instrument makes an audible beep, stop rotating the wheel and the instrument
will automatically apply the test force. If the initial manual force applied is too high, the
instrument will continuously beep and will not proceed. In this case, lower the anvil table
and select a new location for the hardness test point and repeat the preloading
procedure.
6.2.6 When loading, dwell and unloading is completed, lower the table to automatically reset
the instrument.
6.2.7 The recommended Dwell times are 10~15 seconds for ferrous metal, 30 seconds for
nonferrous metal, 60 seconds for those hardness value is less than 35HBW.
Average diameter of indentation (d)
Minimum thickness of specimen
Diameter of steel ball
D=1
D=2.5
D=5
D=10
0.2
0.08
0.3
0.18
0.4
0.33
0.5
0.54
0.6
0.8
0.29
0.7
0.4
0.8
0.53
0.9
0.67
1
0.83
1.1
1.02
1.2
1.23
0.58
1.3
1.46
0.69
1.4
1.72
0.8
1.5
2
0.92
1.6
1.05
1.7
1.19
1.8
1.34
1.9
1.5

17
2
1.67
2.2
2.04
2.4
2.46
1.17
2.6
2.92
1.38
2.8
3.43
1.6
3
4
1.84
3.2
2.1
3.4
2.38
3.6
2.68
3.8
3
4
3.34
4.2
3.7
4.4
4.08
4.6
4.48
4.8
4.91
5
5.36
5.2
5.83
5.4
6.33
5.6
6.86
5.8
7.42
6
8
6.2.8 The hardness test should be uniformly distributed on the specimen. The distance between
two adjacent indentation’s centers should be not less than 3 times the diameter of the
indentation; the distance between the indentation center and the edge of the specimen
should be not less than 2.5 times the diameter of the indentation. Failure to comply can
result in asymmetric indents resulting in incorrect hardness values.
6.2.9 Each indentation diameter is measured on two vertical directions. The ratio of the
diameter difference on two vertical directions and the shorter diameter should not be
greater than 1%.

18
6.2.10 The instrument uses and electronic loop control system; it can dynamically reflect the
real changes of the test force. During the dwell time cycle, the display window “test
force” constantly shows the instantaneous force value. When the indenter gradually
presses into the specimen the force value decreases. Once the value is reduced to the
prescribed error range, the instrument will automatically adjust and the test force will
be maintained within the specified range.

19
SECTION 7: OPTICAL MANUAL MICROSCOPE
7.1 Eyepiece Components
For manual Brinell testers a small 20X reading microscope is used to measure the size of
the indent.
7.2 TECHNICAL SPECIFICATIONS MICROSCOPE
7.2.1 Magnification of the reading microscope: 20X
7.2.2 Minimum division value of the drum wheel: 0.005mm
7.2.3 The effective measuring range of the field of view: 6mm
Eye guard
Reading drum wheel
Eyepiece
Lens barrel screw
Objective
Long lens barrel
Lens barrel base

20
7.3 Usage of the reading microscope
7.3.1 There are 100 grid lines and numbers around the reading drum wheel, each grid for 0.005
mm.
7.3.2 The eyepiece has two blocks of glass, one with 0~8 digits, digital interval for 1 mm and the
other with a movable line.
7.3.3 Example: Brinell hardness test with φ10mm ball indenter under 29420N (3000kg) test
force
7.3.3a Put the hardness block or specimen which has Brinell hardness indentation on a stable
table and place the reading microscope on the hardness block or specimen, with the long
lens barrel faced to natural light or illuminated with light. Rotate the eye guard on the
eyepiece and make the indentation edge clear.
7.3.3b Use any digit on the fixed glass of the eyepiece as the starting line (case grid 2), hold the
reading microscope in position and then rotate the drum wheel so the filar aligns with
the other side of the indent.
7.3.3c Read from the eyepiece, the integer value is
6, 6-2 = 4mm, and accumulate the remaining
fraction from the dial. For this example, the
method is as follows: read from the drum
wheel, it’s 41 grids, and each grid for
0.005mm, then 41×0.005mm = 0.205mm, the
indentation diameter is 4mm+0.205mm =
4.205mm. Check the “Brinell hardness
control table”: 205HBW10 / 3000
7.3.3d If the right tangent edge of Brinell
indentation diameter is more than half
grid and the drum wheel is 36 grid, then
plus 0.5mm when calculating the
indentation diameter and the Brinell hardness indentation diameter is:
4mm + 0.5mm + (36×0.005) mm = 4.68mm.
Fig.7
Table of contents
Popular Test Equipment manuals by other brands

InstruStar Electronic Technology
InstruStar Electronic Technology ISDS205C user manual

Tegam
Tegam 2602A Instruction and service manual

Steinberg Systems
Steinberg Systems SBS-SMD-2999 user manual

Greenlee
Greenlee CMGRT-100 instruction manual

Horotec
Horotec FLASHTEST Calibration manual

Hanna Instruments
Hanna Instruments Foodcare HI981031 user manual