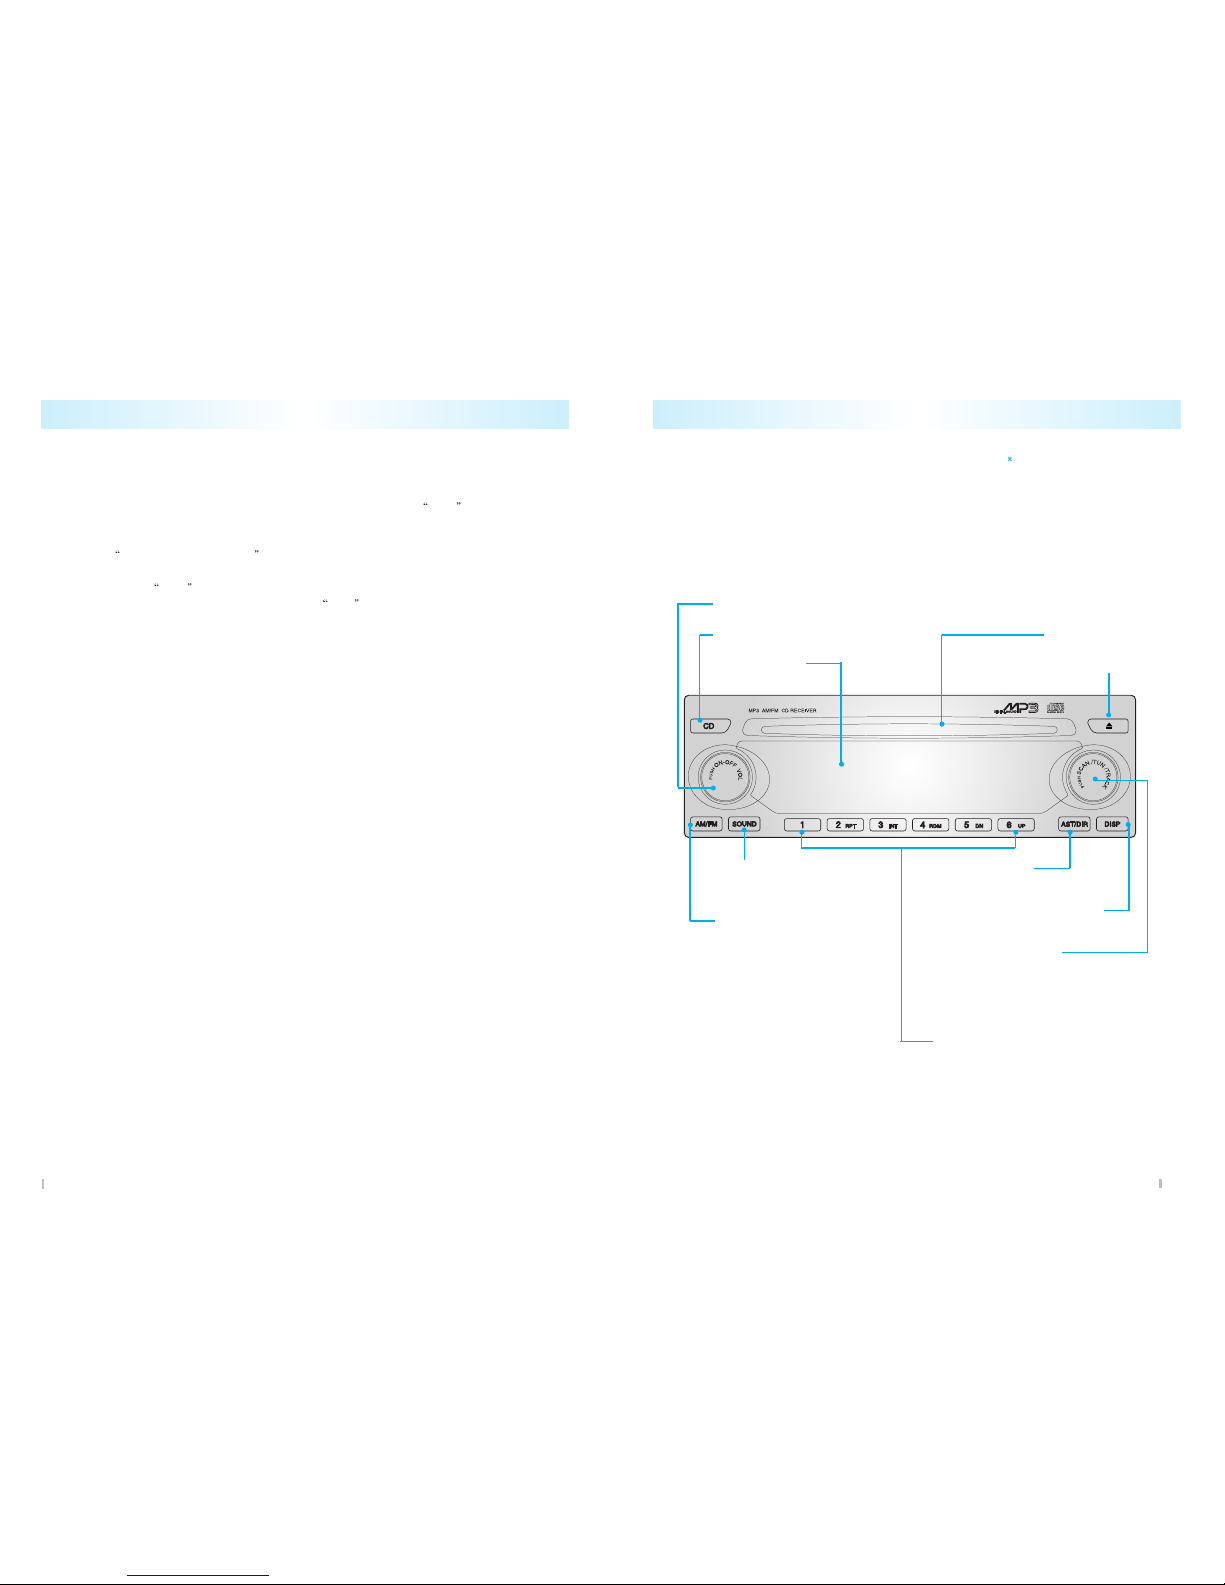
GENERAL OPERATION
Po er / Volume Control Knob(1)
Power On (1): Press this knob to ctiv te the udio system.
The r dio, CD, MP3 sign l will ppe r on the VFD.
Power Off (1): Press this knob g in to turn the system off.
All sign ls on the VFD will dis ppe r.
3
Audio system c n be oper ted with ignition key in ACC or ON position.
Audio system c n be ctiv ted by :
- Pressing the power/volume control knob.
- Inserting disc.
- Pressing the AM/FM button.
- Pressing the CD button, if disc in the unit.
When ejecting the disc, mode is utom tic lly tr nsferred to previous mode.
Ho to Adjust the Sound (2)
Sound Mode Selection (2):
To select the desired sound mode, press sound mode selector button (2).
The sound mode indic tor nd numeric sign l will ppe r on the VFD.
E ch time you press this knob, the sound mode ch nges s follows;
BAS -> TRE -> FAD -> BAL -> EQ -> LOUD -> VOL -> BAS
When the desired mode is selected, djust by rot ting the power/volume control knob. (1)
After djusting, the VFD will return to the origin l displ y fter 5 seconds.
Volume Control (1):
Rot te power/volume control knob (1) clockwise to incre se the volume nd
counterclockwise to decre se the volume. The volume level will ppe r s numeric sign l
on the VFD. After djusting, the VFD will return to the origin l displ y fter 5 seconds.
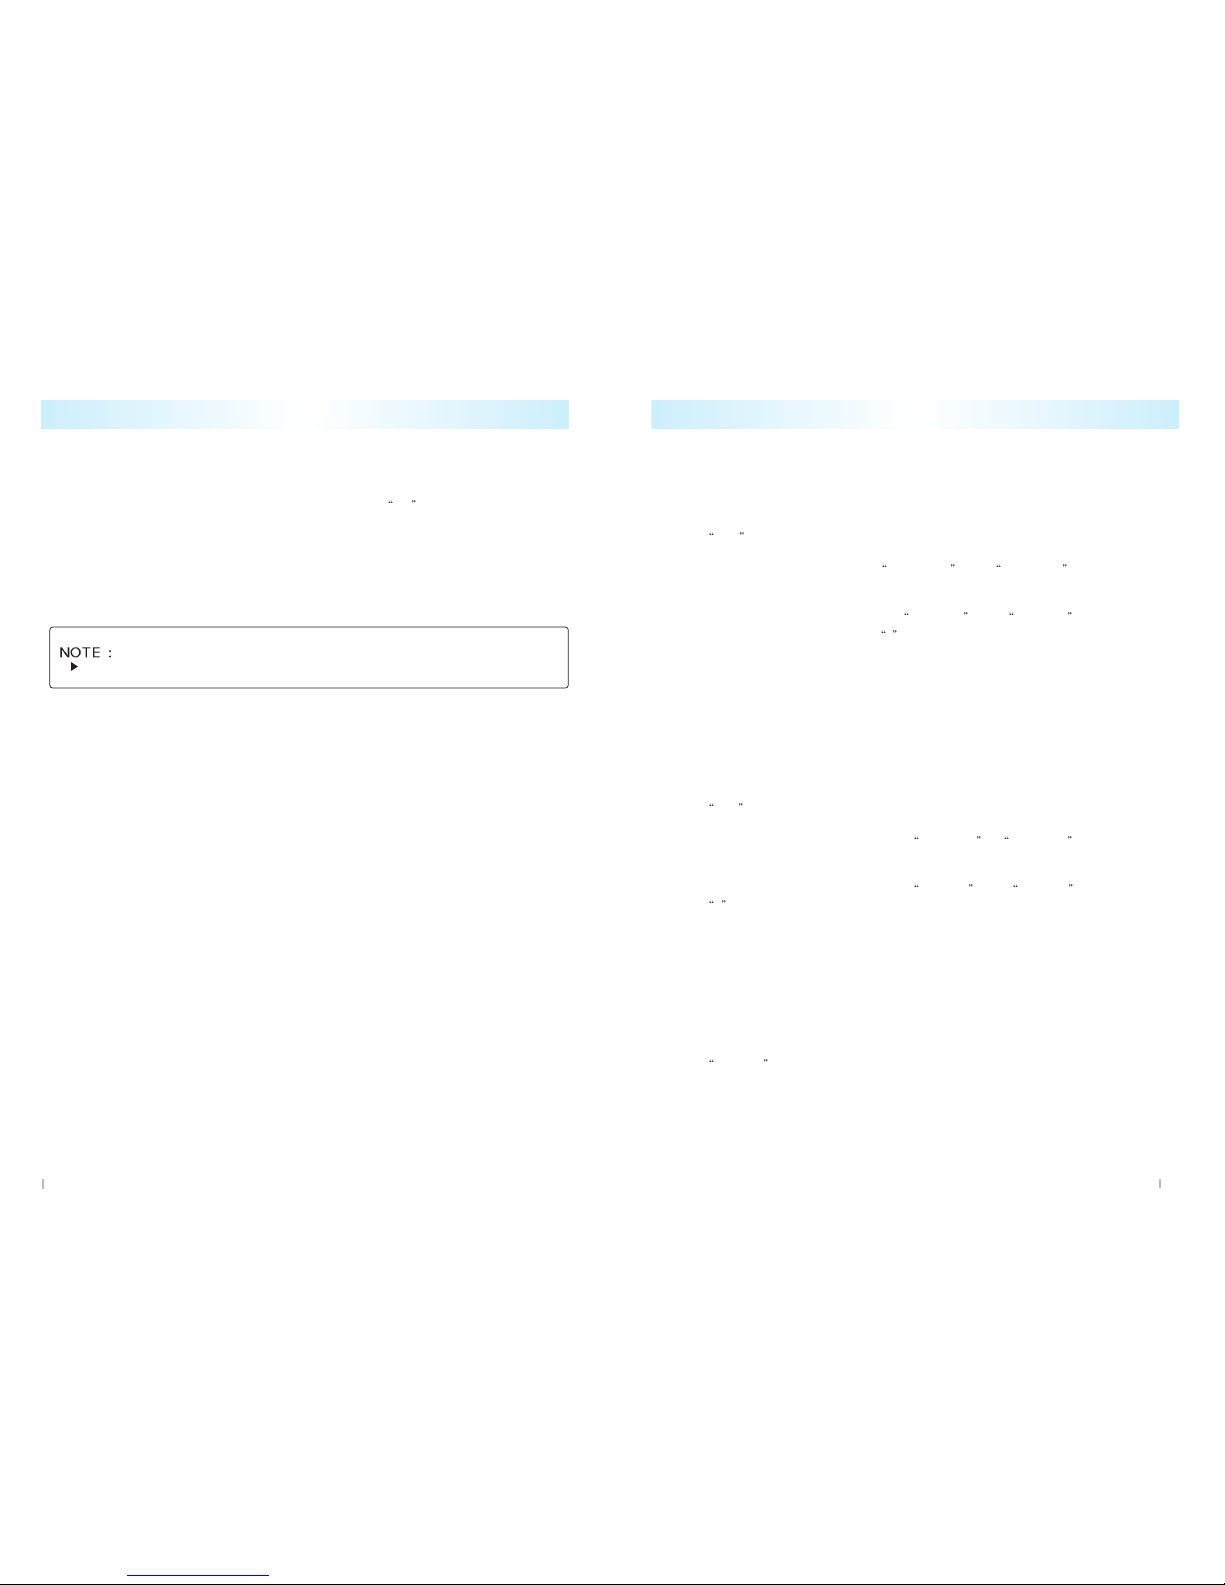
MP3 PLAYER OPERATION
Insert MP3 disc to pl y the compressed Audio form t : MP3.
Audio system ssist v rious disc form t. (M sked CD/CD-R/CD-RW)
MP3 disc is pl yed t the s me m nner of the udio CD disc.
(Lo d/Eject/Pl y & P use/RPT/INT/RDM)
[ Note ]
Pl y bility m y depend on the type of CD-R/CD-RW used, CD surf ce condition, CD
writer perform nce nd condition nd or softw re used.
When inserting CD-ROM disc without MP3 files, the unit displ ys ERROR 06 nd
returns to the previous mode.
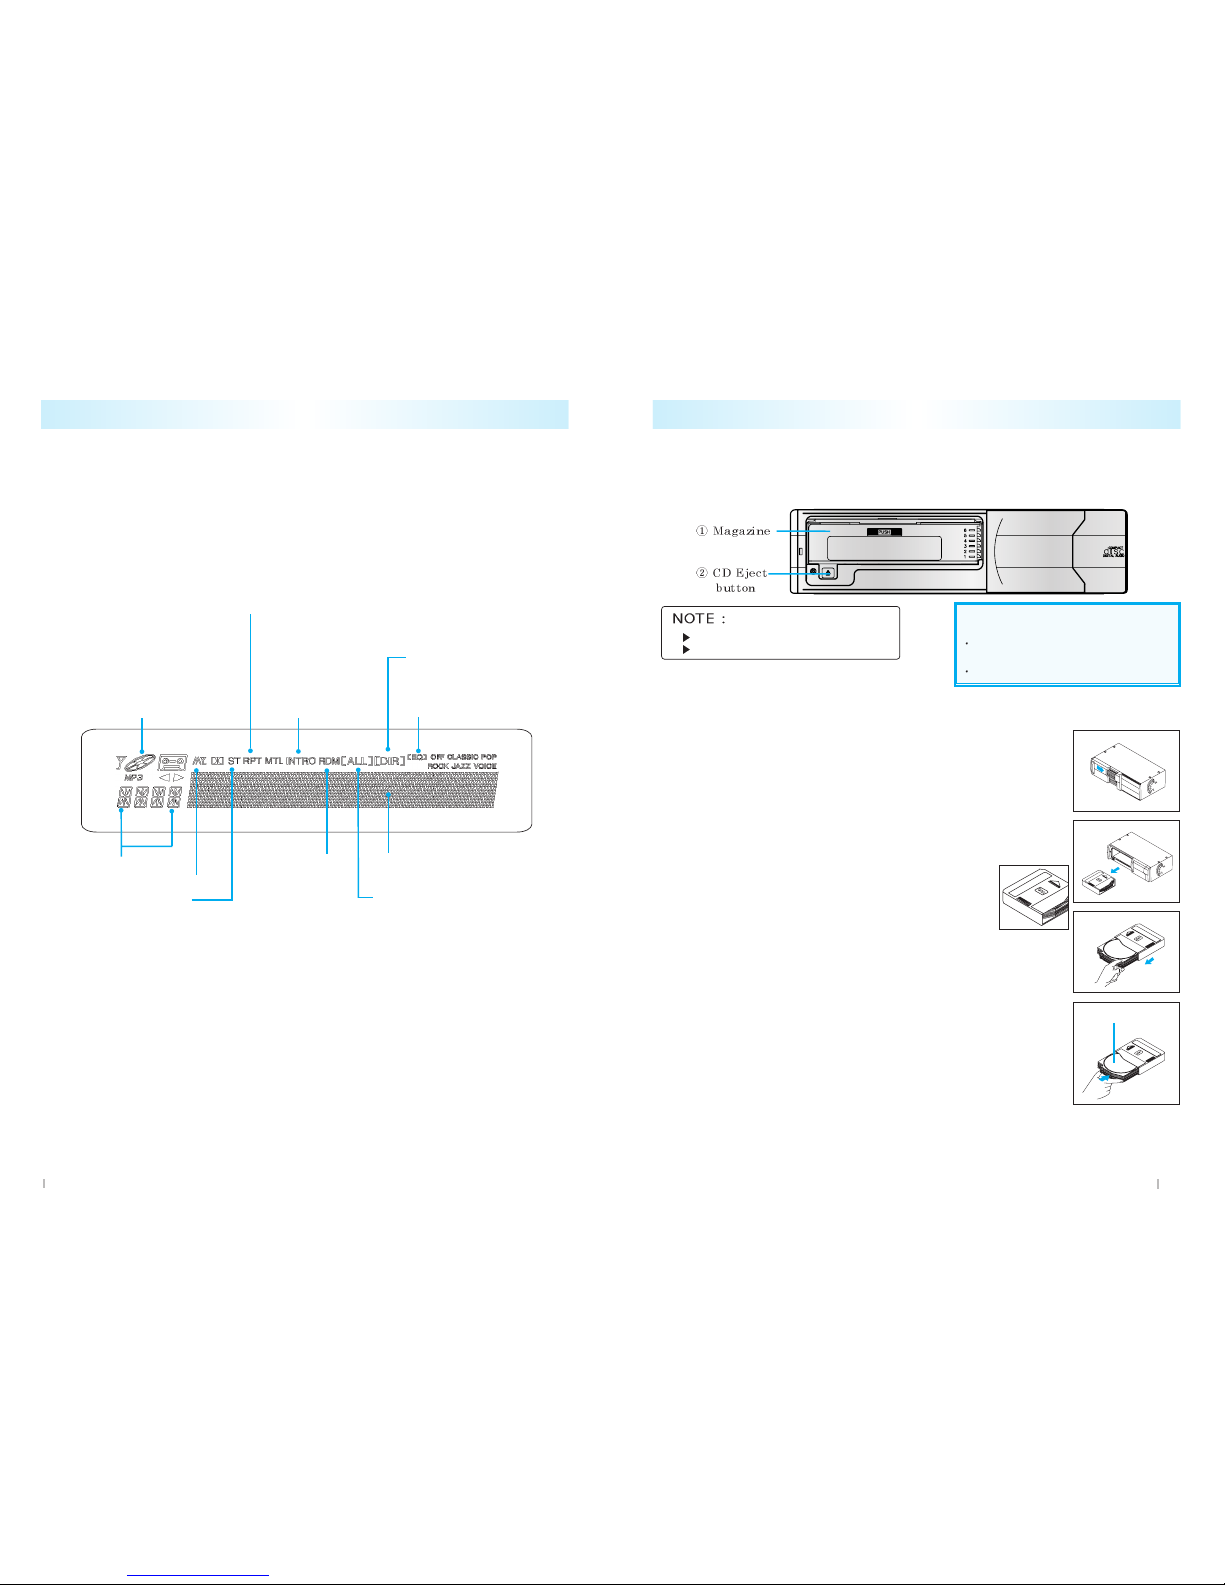
MP3 file name Display
If disc h s lo ded, udio system will detect the type of disc either udio disc or MP3 disc
nd it will be displ yed on the VFD if detected disc is MP3, the file n me will be displ yed
on VFD in scrolled m nner from the right to the left side.
Directory Mode Selection button (5) :
1. Press this button (5) to repe tedly pl y the directory of the current pl yed MP3 file.
[DIR] will be displ yed on the VFD.
2. Press this button g in to pl y over ll MP3 files of the disc.
[ALL will be displ yed on the VFD.
MP3 file up & do n (4) :
1. To pl y the next MP3 file, rot te this knob clockwise.
E ch time you rot te the knob, the disc will skip to the next file.
2. To pl y the previous MP3 file, rot te this knob counterclockwise.
E ch time you rot te the knob, the disc will skip to the previous file.
Directory up & do n (6) :
1. To se rch desired directory, press 5/DN or 6/UP button.
2. Directory n me will be displ yed on The VFD.
3. After re ches the desired directory, Audio system will utom tic lly st rts pl ying from
the first MP3 file of the directory.
10
Audio system ssist multi-session recorded disc.