Daewoo 710C User manual

Service Manual
XGA COLOR MONITOR
Model : 710C
DAEWOO ELECTRONICS CO., LTD
OVERSEAS SERVICE DEPT.

4
Electrostatically Sensitive (ES) Devices
Some semiconductor (solid state) devices can be damaged easily by static electricity.
Such components commonly are called Electrostatically Sensitive (ES) Devices.
The examples of typical ES devices are integrated circuits, some field-effect transistors and semiconductor “chip”
components. The following techniques should be used to help reduce the incidence of component damage
caused by static electricity.
1. Immediately before handling any semiconductor component or semiconductor-equipped assembly, drain off any
electrostatic charge on your body by touching a known earth ground. Alternatively, obtain and wear a
commercially available discharging wrist strap device which should be removed for potential shock reasons
prior to applying power to the unit under test.
2. After removing an electrical assembly equipped with ES devices, place the assembly on a conductive surface
such as aluminum foil to prevent electrostatic charge buildup or exposure of the assembly.
3. Use only a grounded-tip soldering iron to solder or unsolder ES devices.
4. Use only an anti-static type solder removal device. Some solder removal devices not classified as “anti-static”
can generate enough electrical charges to damage ES devices.
5. Do not use freon-propelled chemicals. These can generate enough electrical charges to damage ES devices.
6. Do not remove a replacement ES device from its protective package until immediately before you are ready to
install it. (Most replacement ES devices are packaged with leads electrically shorted together by conductive
foam, aluminum foil or comparable conductive material).
7. Immediately before removing the protective material from the leads of a replacement ES device, touch the
protective material to the chassis or circuit assembly into which the device will be installed.
8. Minimize bodily motions when handling unpackaged replacement ES devices. (Otherwise harmful motion such
as the brushing together of your clothes fabric or the lifting of your foot from a carpeted floor can generate
enough static electricity to damage an ES devices).
General Soldering Guidelines
1. Use a grounded-tip, low-wattage soldering iron with appropriate tip size and shape that will maintain tip
temperature within a 550°F-660°F (288°C-316°C) range.
2. Use an appropriate gauge of RMA resin-core solder composed of 60 parts tin/40 parts lead.
3. Keep the soldering iron tip clean.
4. Thoroughly clean the surface to be soldered. Use a small wire-bristle (0.5 inch or 1.25cm) brush with a metal
handle. Do not use freon-propelled spray-on cleaners.
5. Use the following soldering technique:
a. Allow the soldering iron tip to reach normal temperature (550°F to 660°F or 288°C to 316°C)
b. Hold the soldering iron tip and solder strand against the component lead until the solder melts.
c. quickly move the soldering iron tip to the junction of the component lead and the printed circuit foil, and hold it
there only until the solder flows onto and around both the component lead and the foil.
d. Closely inspect the solder area and remove any excess or splashed solder with a small wire-bristle brush.
CAUTION: Be sure that no power is applied to the chassis or circuit, and observe all other safety
precautions.
CAUTION: Work quickly to avoid overheating the circuit board printed foil.

5
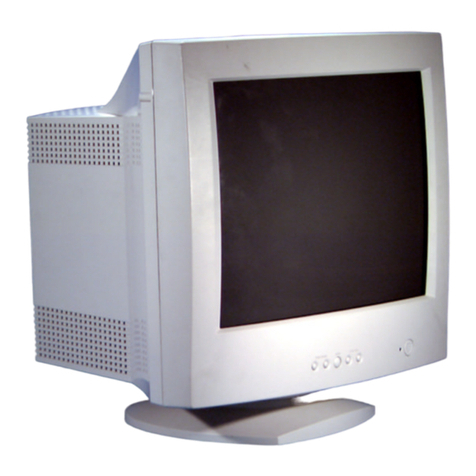
FIGURE 1. USE SOLDERING IRON TO PRY LEADS
IC Removal/Replacement
Some utilized chassis circuit boards have slotted (oblong) holes through which the IC leads are inserted and then
bent flat against the circuit foil. When holes are slotted, the following technique should be used to remove and
replace the IC. When working with boards using the familiar round hole, use the standard technique as outlined in
paragraphs 5 on the page under the title of general soldering guidelines.
Removal
1. Desolder and straighten each IC lead in one operation by gently prying up on the lead with the soldering iron tip
as the solder melts.
2. Draw away the melted solder with an anti-static suction-type solder removal device (or with desoldering braid
before removing the IC.
Replacement
1. Carefully insert the replacement IC in the circuit board.
2. Carefully bend each IC lead against the circuit foil pad and solder it.
3. Clean the soldered areas with a small wire-bristle brush. (lt is not necessary to reapply acrylic coating to the
area).
“Small-Signal” Discrete Transistor Removal/Replacement
1. Remove the defective transistor by clipping its leads as close as possible to the component body.
2. Bend the end of each of three leads remaining on the circuit board into a “U” shape.
3. Bend the replacement transistor leads into a “U” shape.
4. Connect the replacement transistor leads to the corresponding leads extending from the circuit board and crimp
the “U” with long nose pliers to insoure metal-to-metal contact, then solder each connection.

6
Power IC, Transistor or Devices Removal/Replacement
1. Heat and remove all solders from the device leads.
2. Remove the heatsink mounting screw (if applicable).
3. Carefully remove the device from the circuit board.
4. Insert new device in circuit board.
5. Solder each device lead, and clip off excess lead.
6. Replace heatsink.
Diode Removal/Replacement
1. Remove defective diode by clipping its leads as close as possible to diode body.
2. Bend the two remaining leads perpendicularly to the circuit board.
3. Observing diode polarity, wrap each lead out of the new diode around the corresponding lead on the circuit
board.
4. Securely crimp each connection and solder it.
5. Inspect the solder joints of the two “original” leads on the circuit board copper side. If they are not shiny, reheat
them and apply additional solder if necessary.
TECHNICAL INFORMATION
Picture Tube
Type : 17-inch, Flat Square Tube type
(16.2-inch, viewing area)
Dot Pitch : 0.26mm
Face Treatment : Non-glare / Anti-static
Video
Input Signal : R.G.B Analog
Amp. Bandwidth : 135 MHz
Input Sync : TTL, separate negative / positive
Scan Frequency
Horizontal : 30-86 KHz
Vertical : 50-160 Hz
Max. Resolution
1600 dots X 1200 lines (at 65Hz)
Power Source
Free Voltage (100-240 Vac, 50/60Hz)
Display Area
Standard Display Area : 310mm(H)X232mm(V)
Full Screen Size : 330mm(H)X250mm(V)
Power Consumption
Max. 120W
Dimension
424(W)X440(H)X447.2(D)mm
(set with stand)
Weight (Net/Gross)
18.7 / 21.7 kg
Operating Environment
Temperature : 10~40°C/50~104°F
Relative Humidity : 8~80%
Storage Environment
Temperature : -20~45°C/-4~113°F
Relative Humidity : 5~90%
State Recovery Time Power LED
On None Green
Stand-by 3 seconds Green : 1 second
Suspend Amber : 0.5 second
Off 7 seconds Amber

7
GENERAL INFORMATION
This color monitor automatically scans all horizontal frequencies from 30KHz to 86KHz, and all vertical
frequencies from 50Hz to 160Hz. This color monitor adopted the OSD (On Screen Display), it shows the sync
polarity and frequency and it provides that easily adjust control. This color monitor supports IBM PC, PC/XT,
PC/AT, personal System/2 (PS/2), Apple Macintosh, and compatible users crisp text and vivid color graphics
display when using the following graphics adapters : (VGA, 8514/A, Super VGA, VESA and XGA and Apple
Macintosh Video Card). And so, this color monitor has a maximum horizontal resolution of 1280 dots and a
maximum vertical resolution of 1024 lines for superior clarity of display.
By accepting analog signal inputs which level is zero to 0.7 Volts. This color monitor can display and unlimited
palette of colors depending on the graphics adapter and software being used.
Abbreviations
ADJ Adjustment
AFC Automatic Frequency Control
CRT Cathode Ray Tube
Def Deflection
D.Y Deflection Yoke
FBT Flyback Transformer
H.SYNC Horizontal Synchronization
OSC Oscillator
P.S.U Power Supply Unit
PWA Printed Circuit Board Wiring Assembly
R.G.B Red, Green, Blue
V.Sync Vertical Synchronization

8
PIN CONNECTOR
CAUTIONS FOR ADJUSTMENT AND REPAIR
• Degaussing is always required when adjusting purity or convergence.
• The white balance adjustment has been done by a color analyzer in factory. The adjustment procedure,
described in the service manual is made by a visual check.
• Allow 20 minutes warm-up time for the display before checking or adjusting only electrical specification or
function.
• Reform the leadwire after any repair work.
Caution For Servicing
• In case of servicing or replacing CRT, high voltage sometimes remains in the anode of the CRT. Completely
discharge high voltage before servicing or replacing CRT to prevent a shock to the serviceman.
Arrangement of 15-pin D-sub connector
Pin Signal
1 Red
2 Green
3 Blue
4 GND
5 GND
6 GND - Red
7 GND - Green
8 GND - Blue
9 Reserved
10 GND - H.Sync
11 GND- V.Sync
12 Bi-directional Data (SDA)
13 Horizontal Sync
14 Vertical Sync (VCLK)
15 Data Clock (SCL)
1
610
15

9
OPERATION & ADJUSTMENT
ADJUSTMENT KEY
Launch OSD(On-Screen Display) menus
Select the next function
Increase the value of any selected function
Decrease the value of any selected function

10
ADJUSTMENT PROCESS
MENU
SELECT
MENU MENU
MENU
MENU
SELECT
SELECT
SELECT
MENU
MENU
OSDOFF
CONTRAST 50% BRIGHTNESS
50%
PINCUSHION50% TRAPEZOID 50%
COLOR TEMP.
K
9300 6550 RED GAIN
K
50%
STATUS
H : +31.5KHZ
V : +70.5 HZ
Z
Z
Z
TEST
TEST PATTERN
NO
Z
Z
Z
YES
MENU MENU
R G B R G B
R G B R G B
R G B R G B
R G B R G B
When you choose the icon on the OSD window, you can exit the OSD screen.

11
OSD(On-Screen Display) Menu 1
Adjust the contrast of image, the difference between light and dark
areas on the screen.
Range : 0-100%
Adjust the brightness of the entire display.
Adjust the position of the display horizontally
(left or right).
Adjust the display width (horizontal size).
Adjust the position of the display vertically (up or down).
Adjust the display height (vertical size).
Adjust the display width & height at the same time.
Reset the screen to the Factory Preset Display Settings.
CONTRAST
50
50
BRIGHTNESS
H . POSITION
50
H . SIZE
50
V . POSITION
50
V . SIZE
50
50
IMAGE ZOOM
RECALL
NO YES

12
OSD(On-Screen Display) Menu 2
Adjust the left and right margins for more convex or more concave
margins.
•Image turns to by .
Adjust the trapezoid of the screen by moving the lines inward or outward.
•Image turns to by .
Adjust parallelogram when the screen is leaning left or right.
•Image turns to by .
Adjust the side balance when the sides of the screen are bowed towards
left or right.
•Image turns to by .
Adjust the horizontal picture moire cancellation.
Adjust the vertical picture moire cancellation.
Adjust the focus image.
PINCUSHION
50
50
TRAPEZOID
50
50
PARALLELOGRAM
PIN BALANCE
50
50
ROTATION
H .
MOIRE
50
50
V .
MOIRE
FOCUS
50
Adjust the rotation when the screen is tilted left or right.
•Image turns to by .

13
OSD(On-Screen Display) Menu 3
Choose different preset color temperatures or set your own customized
color parameters.
Adjust the red gain.
Adjust the green gain.
Adjust the blue gain.
Adjust the red bias.
Adjust the green bias.
Adjust the blue bias.
9300 6550
COLOR TEMP.
RED GAIN
50
50
GREEN GAIN
50
BLUE GAIN
RED BIAS
50
GREEN BIAS
50
BLUE BIAS
50

14
OSD(On-Screen Display) Menu 4
Self Diagnosis
Display horizontal & vertical frequency and polarity.
Display a RGB Color Bar to determine whether the screen color is
expressed normally or not.
YES : VESA DPMS operation.
NO : NO DPMS operation.
Select language for OSD.
No Signal screen is displayed when the D-Sub signal connector is not
connected or the status of the monitor is on DPMS mode.
Out of Range screen is displayed when the applied frequency is
under or over normal range.
Normal range
H : 30-86 KHz
V : 50-160 Hz
When the monitor doesn’t display, if you press any key, Self Diagnosis screen is displayed.
Self Diagnosis function checks if the status of the monitor is No Signal or Out of range.
Degauss the display and restore image quality.
Adjust the horizontal linearity.
Adjust the vertical linearity.
H 31
5
K
H
z
STATUS
V 70
5
H
z
TEST PATTERN
POWER SAVER
NO YES
DEUTSCH
ENGL SH
ESPAÑOL
FRAN
C
A S
TAL ANO
LANGUAGE
DEGAUSS
NO YES
H . LINEARITY
50
V . LINEARITY
50

15
TROUBLESHOOTING HINTS
1. No Character
Are the
Contrast &
Brightness Controls
maximum?
Change the Contrast &
Brightness control to
maximum
No Raster Refer to
No Raster
Check the peripheral circuit
of CRT Board
Check the video output
circuit and IC803 (pin 1, 3, 5)
and their ambient circuit
Trouble in 12Vdc line
of the Main PWB
Check the clamping pulse
circuit
Check the signal cable
No Character
Is whole
screen bright?
Yes
Yes
Yes
Yes
Yes
No
No
No
No
No
Yes
Yes
Rk, Gk, Bk
About 45Vpp
No
No
Is CRT
Cathode (Rk, Gk, Bk)
signal level
normal?
Is the
output signal of the
(pin 21, 24, 26) pre-amp
(IC801, KA2500)
normal?
Is clamping
pulse (pin 18 of IC801)
normal?
Is 12Vdc line
normal?
Is input signal
normal?
Trouble in IC801 and
its ambient circuit

16
2. No Raster
Trouble in
power supply
circuit
Trouble in power
supply circuit
Trouble in G1
line of Main PWB
Trouble in FBT
High Voltage
trouble in FBT
Trouble in 80
Vdc
line of power
supply unit
Refer to trouble
in P.S.U
Refer to trouble in
power supply unit.
Is CRT
heater red-hot?
No
No
No
No
No
No
NoYes
Yes
Yes
Yes
Yes
Yes
Yes
Yes
Is Heater
Voltage (CRT PWB)
about 6V?
Turn the Brightness
& Contrast control
fully Maximum
No Raster
Is whole
screen bright?
Check
G1 voltage about
-60V?
Is 80Vdc
line normal?
Does
turning the Brightness
control counterclockwise
make screen
bright?
Is CRT
G2 (screen) voltage
about 500V?
Trouble in
CRT
Trouble in FBT

17
3. A missing Color
Is input signal
normal?
One color is
missing
CRT
Cathode (Rk, Gk, Bk)
is normal?
Is video
output IC803 waveform
normal?
Each grid (G1, G2)
voltage normal?
Is the
output of pre-amp
(IC801, KA2500)
pin 21, 24, 26 all
normal?
Check video signal
cable or video card.
Trouble in IC801 or its
ambient circuit
Trouble in
video output
circuit, IC803
or ambient
Trouble in 80Vdc
line
Trouble in 80Vdc
line
Replace CRT
No
No
No No
No
Yes
Yes Yes
Yes
Yes
Rk, Gk, Bk
About 40Vpp
0.7Vpp

18
4. Abnormal OSD Font
Is menu
key selected?
Is OSD Font
exist?
* If menu key selected.
Is Heater
Voltage (CRT PWB)
about 6V?
Abnormal OSD Font
Is the
output of IC802
(pin 21, 22, 23)
normal?
Trouble in
Heater voltage
line.
Refer to trouble in P.S.U
Troubie in
IC802 or its
ambient circuit
Trouble in IC802
and its ambient
circuit
One color is
missing
Refer to Missing Color
No
No
Yes
Yes
Yes
Yes
No

19
5. Horizontal Output Circuit
Is the
drain waveform of
Q510 normal?
Is the H-out
waveform of IC501
normal?
Trouble in Step Down Circuit
(Check the Step Down of IC501,
Check Q510 and its ambient
circuit).
Trouble in IC501
Trouble in Horizontal
output circuit
Yes
No
Are the Collector
waveform of
Q503 and Q504
normal?
Yes
Yes
Yes
Trouble in Q508 and its
ambient circuit.
Trouble in Q503 and Q504
No
No
No
Trouble in Q509 and
its ambient circuit.
10V
0V
11V
0V
42V
Is the drain
waveform of
Q508 normal?
210V

20
6. Unstable Picture
6-1. Horizontal
Unstable
picture
Is H.Sync
input pin of IC501
correct?
Check H.Sync Out of
Micom or its ambient
circuits.
Is the
pin 4 of IC501
5V? Check the value of
C505, R503
Yes
Yes
No
No
Trouble in IC501

21
6-2. V.OSC/Deflection Circuit
Unstable or
Abnormal picture
Is
±12Vdc line
correct? Trouble in
power supply unit
No
Yes
Is
the output
waveform of IC401
(pin 6) normal? V.DY
failure
Trouble in V.Sync line
or IC501 failure.
Yes
No
45Vpp
Is the
output pulse
of IC501 (pin 23)
normal?
Trouble in IC401 or
its ambient circuit
Yes
No

22
7. Focus
Monitor remains
unfocused
Adjust finely
Focus VR in
FBT
Is
focus
acceptable?
Trouble in Focus
circuit (FBT)
Yes OK
No
Table of contents
Other Daewoo Monitor manuals

Daewoo
Daewoo 902D User manual

Daewoo
Daewoo L1711MN User manual

Daewoo
Daewoo 526X User manual

Daewoo
Daewoo 712B User manual

Daewoo
Daewoo 720D User manual

Daewoo
Daewoo 432X User manual

Daewoo
Daewoo DPM-42A1LBSB User manual

Daewoo
Daewoo DPP-42A2(GDBD) User manual

Daewoo
Daewoo DPC-7200N User manual

Daewoo
Daewoo 2708ED User manual

Daewoo
Daewoo 710B User manual

Daewoo
Daewoo Lucoms LXC-540X User manual

Daewoo
Daewoo 523B User manual

Daewoo
Daewoo 529B User manual

Daewoo
Daewoo L520B User manual

Daewoo
Daewoo L700C User manual

Daewoo
Daewoo DPC-7800NT User manual

Daewoo
Daewoo DSP-5014LX User manual

Daewoo
Daewoo LXL-940 User manual

Daewoo
Daewoo DP-42SM User manual