Daewoo DW-2510P User manual

§Thank you for selecting this washer-spindryer.
§Before operating this unit, please read these instructions completely.
§When you install this unit, be sure to assemble legs to base under.
Model No.:
DW-2510P
WAHSER-SPINDRYER
INSTRUCION MANUAL
`1

2
PARTS IDENTIFICATION
¤Wash Timer
¤ŁWater Inlet
¤ØWash Cover
¤ŒTub
¤ºStrainer
¤Pulsator
¤Valve Selector
¤Spin Timer
¤Door Spin Outer
¤Door Spin Inner
¤æOverflow Filter
¤Spin Basket
¤Base
¤Power Cord
¤ıLeg
Accessories
§Cover Safety
§æDrain Hose Assembly
¤
¤Ł
¤Ø
¤Œ
¤º
¤
§
§
§
§
¤
¤
¤
¤
¤æ
§æ
¤
¤
¤
¤ı
§
§
§
§
§§
§
§
§
§
§
§
§
§
`2

3
INSTALLATION
Electrical Connection
• This unit is designed to operate from an adequate supply mentioned at the
rating label sticked to the rear of it.
• In case of 3-core cord: The power cord plug must be connceted to an earthed
3-pin power point within reach of the power cord.
• In case of 2 conductor power cord: Connect the grounding wire to a water
faucet etc. Make sure that the power cord is unplugged during ground work.
• Do not connect the grounding wire end to a gas tube.
• If the power cord is damaged, it should be replaced by a repair shop appointed
by the manufacturer, because special purpose tools are required.
Connection of Hoses
• Attach the water intake hose to the water
inlet located at the left-hand side of the
control panel. Press fit the other end of the
hose to either a hot cold water tap as
required(Fig. 1).
• Attach the drain hose to the drain outlet at
the rear of the base under and secure with
the clamp provided. Hang the “U” shaped
outlet of drain hose on the edge of a sink.
• The opening must not be obstructed by carpeting when the washing machine is
installed on a carpeted floor.
OPERATING INSTRUCTIONS
Preparing the Wash
• Sort the clothes into groups-whites, colourfast, non-colourfast, delicates, lint
free, lint producers, etc., and wash according to the laundry guide.
• Clothes with worn patches or tears should first be mended. Empty out all
pockets and close all side fasteners. Treat bad stains prior to washing.
Prior to Washing
• Remove the plastic cover safety from the spin basket.
• Check that wash timer knob is set to position “0” and that the valve selector is
set to “WASH.RINSE”.
• Ensure the drain hose is in its correct position (see Installation)
• Insert power cord plug into the power point and switch on.
To Wash
• Place the wash load and detergent in the wash tub. Refer to “Preparing the
Wash” and “Points to Remember”.
• Set the valve selector to “WASH.RINSE”.
• Turn the water tap on fill the tub of your washing machine to the level
recommended in the Laundry Guide.
WATER INLET
WATER INTAKE
HOSE
Figure 1.
Caution: This unit is made of poly
propylene, use a water below 50°C
`3

OPERATING INSTRUCTIONS
• Set the wash timer to the wash period recommended in the laundry guide. Your
machine will now wash for the period selected.
• When the wash period expires, set the valve selector to the drain position to
discharge the water.
To Rinse in the Wash Tub
¡¡ÆÆRinse
• Set the valve selector to the “WASH.RINSE” position.
• Turn the water tap on.
• When the rinse water becomes high level, turn off the water tap.
• Set the valve selector the “DRAIN” position to discharge the water.
Spin Drying
• To open the door spin inner of the spin basket. lift up the door spin outer, then
pull the catch forward and lift upward.
• Transfer either the full wash load or portion to the spin basket commencing with
small articles. Ensure that the clothes are evenly distributed.
• Place the removable cover safety over the load to be dried and push lightly
downward.(To contain delicated articles within the spin basket.)
• Close the door spin inner, then the door spin outer.
• Set the spin timer to the time recommended in the Laundry Guide. The spin
basket will spin for the time selected, then stop(at position “0”).
• To remove or reposition clothes during the spin dry cycle, open the outer and
inner door spin, In this case, the spin basket will automatically stop as a brake is
supplied when the door spin outer is opened. To restart, close both lids. If
required, reset the spin timer.
• If there is any abnormal vibrating during spin drying, turn off the spin timer and
rearrange the clothes uniformly inside the spin basket.
4
Note: Before rinsing, the wash load may be transferred to the spin basket to
spin dry for 1 minutes(approx.) to remove excess suds(see Spin Drying).
On completion, transfer the wash load to the wash tub for rinsing.
Caution:Ensure that the spin basket completely stops before reaching in to
remove the wash load.
Be especially careful of children.
Note: The pump motor will operate when the valve selector the “DRAIN”
position
Note: The pump motor will operate when the spin dry timer is set, irrespective of
whether the outer lid is closed or opened.
`4

5
OPERATING INSTRUCTIONS
Simultaneous Washing and Spin Drying
• Three motors are fitted to cover washing, spin drying and drainage. This
arrangement enables spin drying of a previous wash load and washing of a new
wash load to be simultaneously effected.
• To do this set the controls for both “wash” and “spin” modes(see “To Wash” and
Spin Drying”).
Laundry Guide
Size ofWater DegreeWater
Type of Wash Level of TemperatureWash Spin
Febric Load (Volume) Soiling Wash Cycle Period Period
Fast Full High Heavy
Coloured (App. 33L) Hot 50°C
Cotton andHalf & Low NormalMax. 5-10 mins.3-5 mins.
Lines Less (App. 26L) Light
Nylon Full High Normal 4-5 mins.
(App. 33L)
Half & Low Light Warm 40°C 2-3 mins. 2 mins.
Less (App. 26L)
Delicates Half & High Normal
Less (App. 33L) to Light Warm 40°C 2-3 mins. 2 mins.
0
9
3
6
15
12
WASH TIMER
WATER INLET
DRAIN
VALVE SELECTOR(PUMP CONTROL)
0
3
1
2
5
4
SPIN TIMER
W
O
O
L
R
A
Y
O
N
W
A
S
H
-
R
I
N
S
E
Control Panel
˘`5

6
OPERATING INSTRUCTIONS
Emptying
• Set the valve selector knob to “DRAIN”.
• The machine will now empty.
• Set the valve selector knob to “WASH.RINSE”.
• Switch off the electricity at the power point.
CLEANING AFTER USE
• Cleaning after use will extend your washing machine. Before cleaning shut off
the power switch and disconnect the power cord from the electrical outlet, being
sure to take hold of the plug.
Filter
• Remove the filter by pulling it forward(Fig. 2).
• Re-install the filter: By first inserting its bottom section and then pushing the
upper part firmly into place.
Drain Strainer
• Remove the drain strainer from the bottom of the tub using a sharp tool such as
§^driver.
• Wash off the lint stuck in the strainer.
• Re-install the strainer.
Pulsator
• Dirt may also collect underneath the
pulsator.
• Clean out occasionally by remove the
screw located in the center of the
pulsator.
• Hook the pulsator and pull upwards.
• Wash off the lint stuck in the bottom of
the wash tub.
(When replacing the pulsator, make
sure that screw is firmly tightened)
Figure 2.
2
1
Figure 3.
`6

7
POINTS TO REMEMBER
• Avoid using excessive amounts of bleach, soap powder or detergent. Use the
amount recommended by the respective manufacturers.
• If the machine is installed in areass subject to freezing temperatures, ensure
that it is completely drained after use.
• To reset to the OFF position (“0”), turn anticlockwise.
• When washing delicates e.g., siks, fine nylons, lace, etc., it is advisable to place
them in a mesh bag to prevent the possibility of damage.
• Do not wash lint attraching fabrics with lint producers, e.g., black socks or dark
coloured jumpers with white fluffy towels, napkins, etc.
• Avoid placing a wet load on the control panel.
BEFORE YOU CALL FOR SERVICE
There may be times when you suspect your washing machine requires
maintenance. Before calling for a service engineer, please check the following
points, to save unnecessary cost. You may be pleasantly surprised that an
apparent malfunction can be easily rectified by following the chart below.
If you washing machine will not start, check whether.
• The house circuit breaker is tripped or a fuse is blown.
• The cord is firmly connected to the power point or the power is not switched
on.(Check with a small table lamp or toaster, etc.)
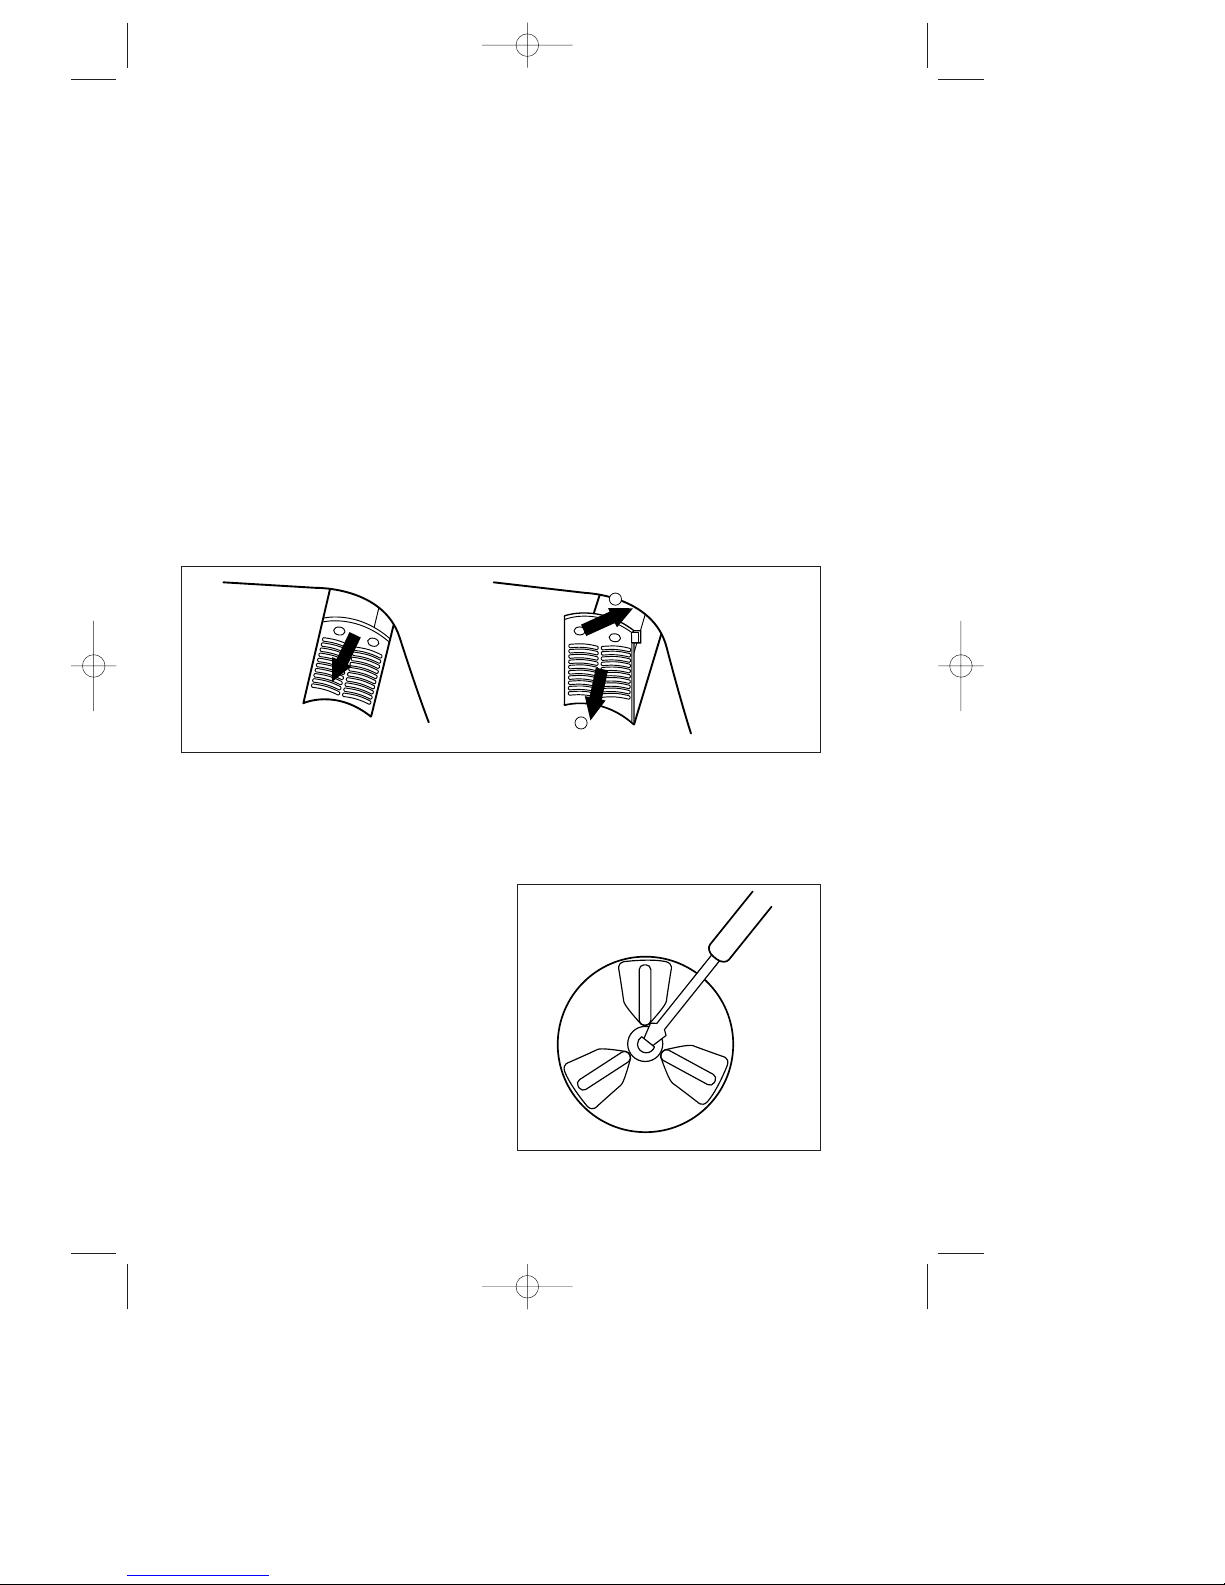
• Something is preventing the pulsator from rotating.
• The wash timer is set.
If the spin dryer will not operate, check whether.
• The door spin inner and door spin outer are closed.
• The spin dry timer is set.
If there is excessive noise, check whether.
• Something is touching the pulsator as it rotates.
• The machine is placed on a level surface.
• The wash load in the spin basket is excessively unbalanced during the spin cycle.
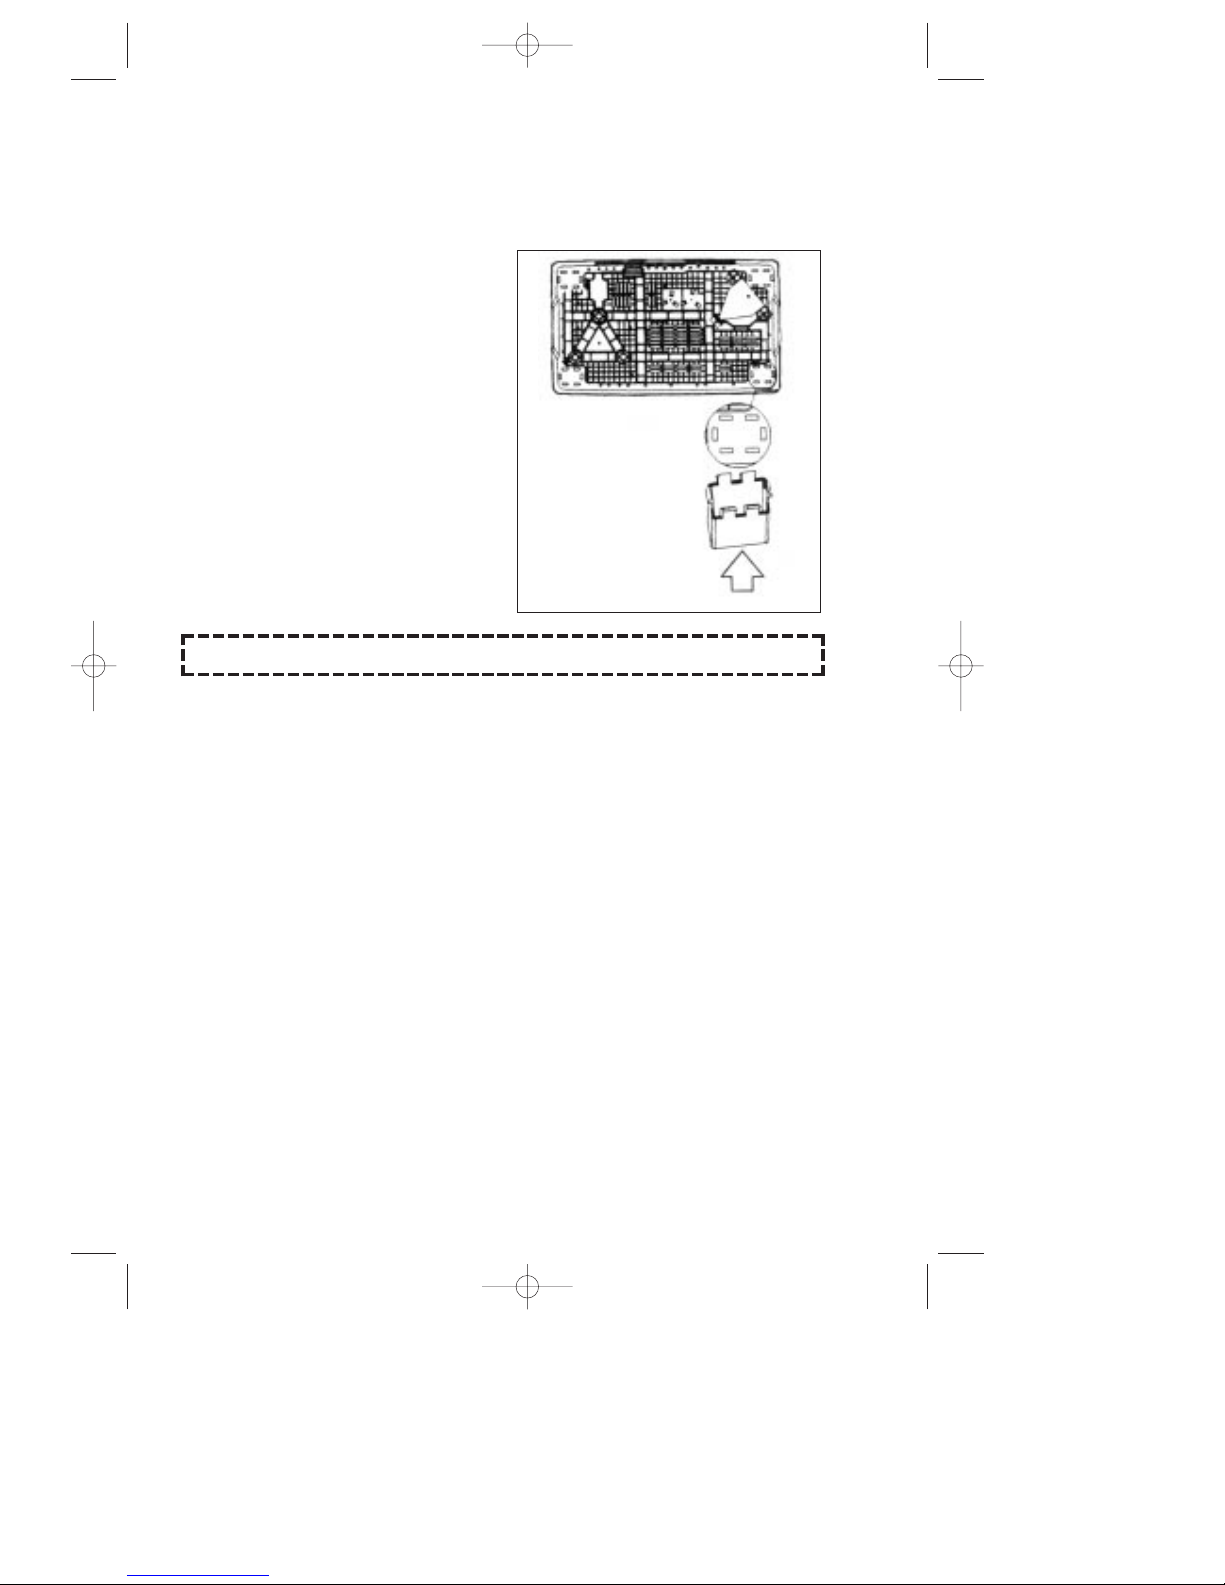
• An article is lodged between the spin basket and tub.
MAINTENANCE AFTER USE
Wash Day Maintenance
At the end of each wash day:
• Switch off the electricity at the power point.
• Check that both timers are set to the OFF position(“0”)
• Wipe off spillage from wash powder, etc., and generally wipe over the tub and
base under with a clean damp cloth.
• Remove the hose from water tap.
* Design and specifications subject to change without notice.
`7

8
HOW TO FIX LEG TO BASE-HOLE FOR
INSTALLATION
• When you install this unit, be sure to
assemble LEGS(4EA) to base under
(Fig. 4).
• Place this unit on its rear side on a
carton to prevent damage to the body.
• Insert the leg(4EA) into the base under
hole as it was. By first inserting its six
hooks and then pushing the bottom part
firmly into place.
• Make the allows of leg and base under
face with each other at each corner.
Caution: After installing, DO NOT REMOVE LEGS.
1. INSERTING
(HOOK 6EA)
2. PUSHING
Figure 4.
`8
This manual suits for next models
4
Table of contents
Other Daewoo Washer Dryer manuals
Popular Washer Dryer manuals by other brands

Electrolux
Electrolux EWX 127410 W user manual

Philco
Philco PLD 14961 WD user manual

Whirlpool
Whirlpool YLTE6234DQ6 installation instructions

Siemens
Siemens WD14H421GB Instruction manual and installation instructions

Midea
Midea MF200D100WB Series user manual

Panasonic
Panasonic NA-S106FX1 Operating & installation instructions