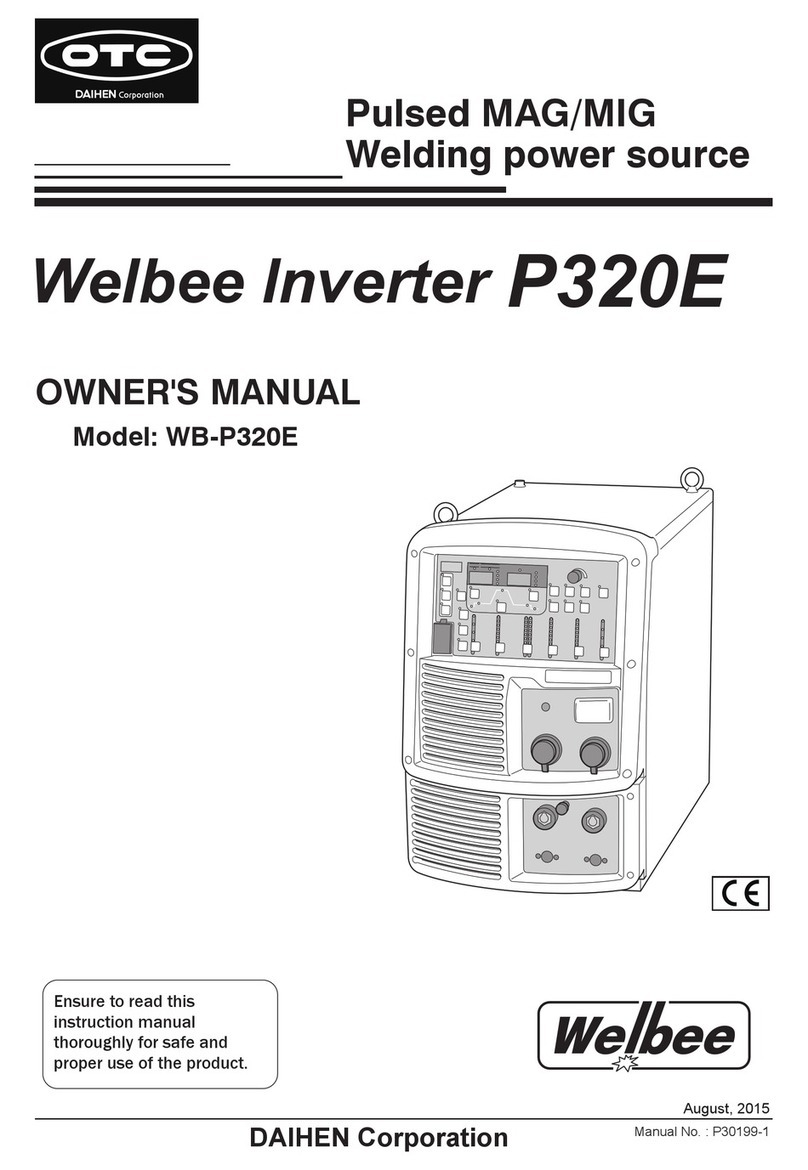
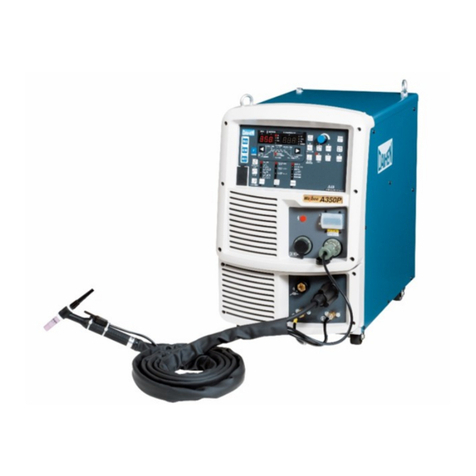
Daihen OTC CPTX-I 400 2W User manual

MANUAL NO:C1035/C1036-02
OWNER'S MANUAL
FOR
DIGITAL INVERTER
CPTX-I 400 2W
CPTX-I 500 2W
MODEL: CPVX-400 C1035
CPVX-500 C1036
INVERTER CONTROLLED WELDING POWER SOURCE
DO NOT DESTROY
IMPORTANT: Read and understand the entire contents of this
manual, with special emphasis on the safety material throughout
the manual, before installing, operating, or maintaining this
equipment. This equipment and this manual are for use only by
persons trained and experienced in the safety operation of
welding equipment. Do not allow untrained persons to install,
operate or maintain this equipment. Contact your distributor if you
do not fully understand this manual.
DAIHEN Corporation WELDING PRODUCTS DIVISION
Upon contact, advise MODEL and MANUAL NO. August, 2020

-1-
TABLE OF CONTENTS
1. SAFETY INFORMATION ............................................................................................................. 2
2. ARC WELDING SAFETY PRECAUTIONS.................................................................................. 2
3. GENERAL NOTICE OF OPERATION ......................................................................................... 7
4. STANDARD CONFIGURATION AND ACCESSORIES ............................................................... 9
5. NAME OF EACH PART...............................................................................................................11
6. NECESSARY POWER SOURCE EQUIPMENT ....................................................................... 12
7. TRANSPORT AND INSTALLATION........................................................................................... 13
8. CONNECTION PROCEDURE AND GROUND FOR SAFETY USE......................................... 15
9. WELDING PREPARATION ........................................................................................................ 21
10. OPERATION............................................................................................................................. 29
11. APPLIED FUNCTION............................................................................................................... 58
12. MAINTENANCE AND TROUBLESHOOTING ......................................................................... 63
13. PARTS LIST ............................................................................................................................. 75
14. SPECIFICATIONS.................................................................................................................... 77
15. SERVICE AND SUPPORT....................................................................................................... 83

-2-
1. SAFETY INFORMATION
The following safety alert symbols and signal words are used throughout this manual to
identify various hazards and special instructions.
WARNING
WARNING gives information regarding possible personal injury or loss
of life.
CAUTION
CAUTION refers to minor personal injury or possible equipment
damage.
Indicates " MANDATORY " matters.
Indicates " PROHIBITED" matters.
2. ARC WELDING SAFETY PRECAUTIONS
WARNING
ARC WELDING can be hazardous.
1. PROTECT YOURSELF AND OTHERS FROM POSSIBLE SERIOUS INJURY OR DEATH.
Be sure to:
・Keep children away.
・Keep pacemaker wearers away until consulting a doctor.
2. Read and understand the summarized safety information given below and the original
principal information that will be found in the PRINCIPAL SAFETY STANDARDS.
3. Have only trained and experienced persons perform installation, operation, and
maintenance of this equipment.
4. Use only well-maintained equipment. Repair or replace damaged parts at once.
ARC WELDING is safe when precautions are taken.
CAUTION
Be sure to observe the followings for preventing physical injuries, a fire and electric shock.
●Use this welding power source in the rain can cause to failure.
This welding power source is designed for IP23S of degree of protection, which is
intended indoor use.
●Use this welding power source for the propose other than the welding can cause
serious physical injuries.
Do not use a welding power source for such as pipe thawing.
●Placed on the inclined plane, the Angle should be less than 10 °, and fixed wheel in
order to prevent the power supply has fallen, sliding.
MANDATORY
PROHIBITED

-3-
2. ARC WELDING SAFETY PRECAUTIONS (continued)
ELECTRIC SHOCK can kill.
Touching live electrical parts can cause fatal shocks or severe burns. The electrode and work
circuits are electrically live whenever the output is on. The power line and internal circuits of
this equipment are also live when the line disconnect switch is on. When arc welding all metal
components in the torch and work circuits are electrically live.
Leaving piled-up dust in the welding machine may cause insulation deterioration and result
in electrical shock and fire.
1. Do not touch live electrical parts.
2. Wear dry insulating gloves and other body protection that are free of holes.
3. Insulate yourself from work and ground using dry insulating mats or covers.
4. Be sure to disconnect the line disconnect switch before installing, changing torch parts
or maintaining this equipment.
5. Properly install and ground this equipment according to its Owner’s Manual and national,
state, and local codes.
6. Keep all panels and covers of this equipment securely in place.
7. Do not use worn, damaged, undersized, or poorly spliced cables.
8. Do not touch electrodes or any metal objects if POWER switch is ON.
9. Do not wrap cables around your body.
10.Turn off POWER switch when not in use.
11.Remove dust by blowing moisture-free compressed air on each part periodically.
ARC RAYS can burn eyes and skin: FLYING SPARKS AND HOT METAL can
cause injury. NOISE can damage hearing.
Arc rays from the welding process produce intense heat and strong ultraviolet rays that can
burn eyes and skin. Noise from some arc welding can damage hearing.
1. Wear face shield with a proper shade of filter (See ANSI Z 49.1 listed in PRINCIPAL SAFETY
STANDARDS) to protect your face and eyes when welding or watching a welder work.
2. Wear approved face shields or safety goggles. Side shields recommended.
3. Use protective screens or barriers to protect others from flash and glare: warn others not
to look at the arc.
4. Wear protective clothing made from durable, flame-resistant material (wool and leather)
and foot protection.
5. Use approved earplugs or earmuffs if noise level is high.
Chipping and grinding can cause flying metal. As welds cool, they can throw off slag.
6. Wear proper body protection to protect skin.

-4-
2. ARC WELDING SAFETY PRECAUTIONS (continued)
WELDING can cause fire and explosion.
Sparks and spatter fly off from the welding arc. The flying sparks, hot metal, spatter, hot base
metal and hot equipment can cause fire and explosion. Accidental contact of electrode or
welding wire to metal object can cause sparks, overheating, or fire.
Leaving piled-up dust in the welding machine may cause insulation deterioration and result
in electrical shock and fire.
1. Protect yourself and others from flying sparks and hot metals.
2. Do not weld where flying sparks can strike flammable material.
3. Remove all flammables within 10m (33ft) of the welding arc. If this is not possible, tightly,
cover them with approved covers.
4. Be alert that welding sparks and hot metals from welding can easily pass through cracks
and openings into adjacent areas.
5. Watch for fire, and keep a fire extinguisher nearby.
6. Be aware that welding on a ceiling, floor, bulkhead, or partition can ignite a hidden fire.
7. Do not weld on closed containers such as tanks or drums.
8. Connect power cable for base metal as close to the welding area as possible to prevent
the welding current from traveling along unknown paths and causing electric shock and
fire hazards.
9. Remove stick electrodes from holder or cut off welding wire at contact tip when not in use.
10.Do not use the welding power source for anything other than arc welding.
11.Wear oil-free protective garments such as leather gloves, a heavy shirt, cuffless trousers,
boots, and a cap.
12.A loose cable connection can cause sparks and excessive heating.
13.Tighten all cable connections.
14.When there is an electrical connection between a work piece and the frame of wire feeder
or the wire reel stand, arc may be generated and cause damage by a fire if the wire contacts
the frame or the work piece.
15.Remove dust by blowing moisture-free compressed air on each part periodically.
FUMES AND GASES can be hazardous to your health.
Arc welding produces fumes and gases. Breathing these fumes and gases can be hazardous
to your health.
1. Keep your head out of the fumes. Do not breathe the fumes.
2. Ventilate the area and/or use exhaust at the arc to remove welding fumes and gases.
3. If ventilation is poor, use an approved air-supplied respirator.
4. Read the Material Safety Data Sheets (MSDS) and the manufacturer’s instructions on
metals, consumables, coatings, and cleaners.
5. Do not weld or cut in locations near degreasing, cleaning, or spraying operations. The heat
and arc rays can react with vapors to form highly toxic and irritating gases.
6. Work in a confined space only if it is well ventilated, or while wearing an air-supplied
respirator. Shielding gases used for welding can displace air causing injury or death.
Be sure the breathing air is safe.

-5-
2. ARC WELDING SAFETY PRECAUTIONS (continued)
CYLINDER can explode if damaged.
A shielding gas cylinder contains high-pressure gas. If damaged, a cylinder can explode.
Since gas cylinders are normally part of the welding process, be sure to handle them carefully.
1. Use only correct shielding gas cylinders, gas regulator, hoses, and fittings designed for
the specific application; maintain them in good condition.
2. Protect compressed gas cylinders from excessive heat, mechanical shock, and arcs.
3. Keep the cylinder upright and securely chained to a stationary support or a rack to prevent
falling or tipping.
4. Keep cylinders away from any welding or other electrical circuit.
5. Never touch cylinder with welding electrode.
6. Read and follow instructions on compressed gas cylinders, associated equipment, and
the CGA publication P-1 listed in PRINCIPAL SAFETY STANDARDS.
7. Turn face away from the valve outlet when opening cylinder valve.
8. Keep protective caps in place over valve except when a gas cylinder is in use or connected
for use.
9. Do not disassemble or repair the gas regulator except if you are authorized by the
manufacturer.
Rotating parts may cause injuries. Be sure to observe the following.
If hands, fingers, hair or clothes are put near the fan’s rotating parts or wire feeder’s feed roll,
injuries may occur.
1. Do not use this equipment if the case and the cover are removed.
2. When the case is removed for maintenance/inspection and repair, certified or experienced
operators must perform the work. Erect a fence, etc. around this equipment to keep others
away from it.
3. Do not put hands, fingers, hair or clothes near the rotating fans or wire feed roll.
ARC WELDING work areas are potentially hazardous.
FALLING or MOVING machines can cause serious injury.
1. When hanging the welding power source by a crane, do not use the carrying handle.
2. Put the welding power source and wire feeder solidly on a flat surface.
3. Do not pull the welding power source across a floor laid with cables and hoses.
4. Do not put wire feeders on the welding power source.
5. Do not put the welding power source or wire feeder where they will pit or fall.
WELDING WIRE can cause puncture wounds.
1. Do not press the gun trigger until instructed to do so.
2. Do not point the gun toward any part of the body, other people, or any metal when threading
welding wire.

-6-
2. ARC WELDING SAFETY PRECAUTIONS (continued)
WARNING
●Do not alter or remodel our products.
●You may get injured or have your equipment damaged because of fire, failure or
malfunction caused by altering or remodeling the products.
●The warranty does not cover any altered or remodeled products
PRINCIPAL SAFETY STANDARDS
Arc welding equipment – Installation and use, Technical Specification
IEC 62081, from International Electro technical Commission
Arc welding equipment Part 1: Welding power sources IEC 60974-1, from International Electro technical
Commission
Safety in Welding and Cutting, ANSI Standard Z49.1, from American Welding Society.
Safety and Health Standards, OSHA 29 CFR 1910, from Superintendent of Documents, U.S.
Government Printing Office.
Recommended Practices for Plasma Arc Cutting, American Welding Society Standard AWS C5.2, from
American Welding Society.
Recommended Safe Practices for the Preparation for Welding and Cutting of Containers That Have
Held Hazardous Substances, American Welding Society Standard AWS F4.1, from American Welding
Society.
National Electrical Code, NFPA Standard 70, from National Fire Protection Association.
Safe Handling of Compressed Gases in Cylinders, CGA Pamphlet P-1, from Compressed Gas
Association.
Code for Safety in Welding and Cutting, CSA Standard W117.2, from Canadian Standards Association,
Standards Sales.
Safe Practices For Occupation And Educational Eye And Face Protection, ANSI Standard Z87.1, from
American National Standards Institute.
Cutting And Welding Processes, NFPA Standard 51B, from National Fire Protection Association.
NOTE: The codes listed above may be improved or eliminated. Always refer to the updated codes.
M100415

-7-
3. GENERAL NOTICE OF OPERATION
3.1 Rated Duty Cycle
CAUTION
⚫Use this welding power source at or under the rated duty cycle. Exceeding the rated duty
cycle limitation may result in damage to the welding machine.
⚫Built-up dust on the transistor or the cold plate on the rectifier may affect the
equipments. Take off the cover of the welding power source once a half year, and then
remove dust by blowing moisture-free compressed air on each part.
The rated duty cycle of the welding power source is the following:
CPTX-I 400 2W: 100% at 400A.
CPTX-I 500 2W: 100% at 500A
⚫The duty cycle of the welding power source is also limited by the duty cycles of combined
accessories such as welding torches. Use the welding machine within the lowest rated duty cycle
of the accessories.
100%
Duty Cycle (%)
0
100
50
400
300
100
200
Welding Current (A)
CPTX-I 400 2W
usable range
100%
Duty Cycle (%)
0
100
50
500
400
300
100
200
Welding Current (A)
CPTX-I 500 2W
usable range

-8-
3. GENERAL NOTICE OF OPERATION (Continued)
3.2 Static External Characteristics
This welding power source is constant -voltage source, the static external characteristics as shown
in the figure below.
3.3 Gas mixture ratio and wire extension
Gas mixture ratio has affections to welding, may causing the difference between output and set
value.
The change of wire extension will affect actual welding current and bring inconformity with set
current.
0
10
20
30
40
50
60
70
80
0 100 200 300 400 500 600
Output Voltage(V)
Output Current (A)
CPTX-I 400 2W
CPTX-I 500 2W

-9-
4. STANDARD CONFIGURATION AND ACCESSORIES
4.1 Standard Configuration
⚫The devices shown in the boxes are standard composition. Other parts must be
prepared by the customers.
⚫Standard cable length is 2/5/10m. You can select extension cable as optional accessary.
Please refer to section 11.4.1.
For MAG/MIG welding use
Welding Power Source
Wire feeder
Water-cooling
unit
Trolley

-10-
4. STANDARD CONFIGURATION AND ACCESSORIES (Continued)
4.3 Items to be Prepared by User
(1) Shielding Gas
Prepare carbon dioxide or mixed gases (in accordance with the welding method).
⚫Carbon Dioxide (CO2 gas) :
The CO2 gas used for welding shall be a conforming product with a purity above
99.5% and a moisture content below 0.05%.
Use CO2 gas with a higher purity for higher welding quality as required.
⚫MAG Gas
Argon (Ar) 80%, carbon dioxide (CO2) 20%.
⚫MIG Gas
Argon (Ar) 97.5%, carbon dioxide (CO2) 2.5%.
(2) Welding Wire
Use a suitable wire for welding method.
(3) Welding electrode holder (for DC STICK)
Prepare welding electrode holder according to the DC STICK mode of the welding power
source.
Picture of connection of wire
feeder
Picture of connection of torch
Connection of base metal cable
Picture of panel

-11-
5. NAME OF EACH PART
5.1 Welding power source
●Name of Each Part of CPTX-I 400/500 2W
Drainage water
Input terminal
Socket for wire feeder
Socket for remote control box
Output terminal (+)
Water feed
Water condensate
Operation panel
Indicator for main power supply
Power switch
Output terminal(-)
Water tank
Parameter adjusting knob

-12-
6. NECESSARY POWER SOURCE EQUIPMENT
6.1 Welding Power Source Equipment (commercial power supply)
WARNING
⚫When the welding machine is used in such a humid environment as construction site, on the
steel plate, or on steel structure, install a leakage breaker.
CAUTION
⚫Be sure to install a switch with fuses or a circuit breaker (for motor) to the input sides of
each welding machine.
⚫Capacity of Necessary Power Source Utility
Specification
CPTX-I 400 2W
CPTX-I 500 2W
Supply voltage
Three-phase 400 V
Three-phase 400 V
Tolerance range of fluctuation
of supply voltage
400 V ±10%
400V ±10%
Installed capacity
23 kVA or more
30 kVA or more
Capacity of switch, electric
leakage breaker
40 A
50 A
6.2 Precautions for Use of the Engine Generator or the auxiliary power of an engine welder
CAUTION
⚫Use the auxiliary power of an engine welder with an improved voltage waveform when it is
used as power source for welding machine. Some engine welders have poor electricity,
which may cause product damage. Contact an engine welder manufacture for improvement
of voltage waveform.
CAUTION
To prevent the engine generator or auxiliary power from being damaged, follow the instructions
below.
⚫Set the output voltage of the engine generator to voltage range between 415 and 456V at no-
load welding operation. Setting to an extremely high output voltage may result in product
damage.
⚫Use the engine generator with a damper winding that has a capacity of more than twice that
of the rated input of the welding machine. Generally, the recovery time of the engine
generator’s voltage for load change is slower than that of the commercial input power
source, and if the engine generator does not have sufficient capacity, sudden current change
such as arc start will occur. This may result in an abnormal decrease in output current or arc
loss. Ask an engine generator manufacturer for a damper winding.
⚫Do not combine more than two welding machines with a single engine generator. The effect
of each welding machine may cause easy loss of arc.
⚫This equipment does not comply with IEC 61000-3-12. If it is connected to a public low
voltage system, it is the responsibility of the installer or user of the equipment to ensure, by
consultation with the distribution network oper, that the equipment may be connected.

-13-
7. TRANSPORT AND INSTALLATION
7.1 Transport
WARNING
Follow the instructions below to avoid accident and product damage when carrying the
welding power source.
⚫Do not touch the live electrical parts inside or outside the welding power
source.
⚫Be sure to disconnect the line disconnect switch before carrying the
welding power source.
⚫Use eye bolts when hanging the welding power source by a crane.
7.2 Installation
WARNING
When installing the welding machine, follow the instructions below to avoid a fire caused by
welding or physical injury from gas fumes.
⚫Do not place the welding machine near combustibles or flammable
gases.
⚫Remove combustible materials to prevent dross coming into contact with
combustible objects. If that is not possible, cover them with
noncombustible covers.
⚫To avoid gas poisoning and risk of suffocation, wear a gas mask or
adequately ventilate when the welding machine is used in a place
regulated by a local law.
⚫To prevent injury or poisoning caused by fume, wear a gas mask or weld
at a partial exhaust facility approved by local regulations.
⚫Adequately ventilate or wear a gas mask when using the welding
machine in a tank, boiler, or the hold of a ship. Heavier gases such as
carbon dioxide or argon gases tend to collect there.
⚫When using the welding machine at a narrow space, comply with a
trained supervisor’s directions. And be sure to wear a gas mask.
CAUTION
To prevent electromagnetic troubles, read the following.
Also, if electromagnetic troubles occur, check the following again.
⚫Change the placement of the welding power source.
⚫Put the input cable in a grounded metal conduit.
⚫Shield the whole welding places from electromagnetic trouble. If
electromagnetic troubles are still not solved after following the above
instructions, consult your dealer.

-14-
7. TRANSPORT AND INSTALLATION (Continued)
CAUTION
Follow the instructions below when selecting an installation place for the
welding power source.
⚫Do not install the welding power source in a place subject to direct sunlight and rain.
⚫Place the welding machine on a strong and stable surface.
⚫Do not block the ventilating hole on the welding machine.
⚫Install the welding machine in a place where the ambient temperature is between –10°C
and 40°C.
⚫Do not install the welding machine in a place where metal material such as spatter enters
the welding power source.
⚫Keep an installation distance of 30cm between the welding power source and the wall or
other welding power.
⚫Install a wind shield to protect arc from wind.
⚫Fix the gas cylinder to a stand specifically made for gas cylinder.
⚫Do not put heavy things on the welding power source.
⚫Install the welding machine, wire feeder, torch, and control cables(including extension
cables) in a place that water may not be splashed.
⚫Place it in a location with an altitude not more than 1,000 meters.
⚫Fix the gas cylinder in place to prevent it from toppling.
⚫Fix the wheels in place to prevent the welding power source from sliding.

-15-
8. CONNECTION PROCEDURE AND GROUND FOR SAFETY USE
WARNING
Follow the instructions below to avoid electric shock.
Do not touch the live electrified parts, as this will result in a fatal shock and sever burn.
⚫Do not touch the live electrical parts of the welding machine.
⚫Have a qualified electrical engineer ground the case of the welding power source and the
base metal or jig electrically connected, following a local law.
⚫Disconnect the welding power source from input power supply by turning off the line
disconnect switch in the power box before grounding the welding power source or base
metal and connecting the cables or hoses.
⚫Do not use a cable with lack of capacity or a seriously damaged cable.
⚫Tighten and insulate the connections of cables.
⚫Securely attach the cover of the welding machine after connection of the cables.
⚫Do not expose the conductor parts of the wiring terminals for welding cables. Use the
auxiliary heat shrinkable tubes (or high temperature insulating tapes) for good insulation.
8.1 Connection at the Output Side of the Welding Power Source
CAUTION
In order to prevent occurrence of electromagnetic harm, refer to the following
items when connecting the welding cables. In case of electromagnetic harm,
refer to the following items again.
⚫Reduce the length of the welding cables as much as possible.
⚫Keep the welding cables close to the ground as much as possible.
⚫Make the cable at the workpiece side parallel to the cable at the wire feeder side.
⚫The grounding of the workpiece and welder shall not be shared by other.

-16-
8. CONNECTION PROCEDURE AND GROUND FOR SAFETY USE (Continued)
8.2.1 For MAG/MIG welding use
Connect in the numerical order.
(1) Ground the base metal. (If required by the local law or codes)
(2) Connect the welding cable between the base metal and output terminal (base metal⊝) of the
power source.
(3) Connect control cable, power cable, gas hose and water feed / condensate hoses to the wire
feeder.
(4)Connect the other end of the cables and hoses to the back side of the welding power source.
(5) Connect the gas tube of the wire feeder to the gas outlet on the gas regulator.
(6) Connect the welding torch to the wire feeder.

-17-
8. CONNECTION PROCEDURE AND GROUND FOR SAFETY USE (Continued)
8.2.2 For DC STICK welding use
Connect in the numerical order.
(1) Ground the base metal. (If required by the local law or codes)
(2) Connect the welding cable between the base metal and output terminal (base metal⊝) of the
power source.
(3) Connect the welding cable to the output terminal (welding torch ⊕).
(4) Connect the welding cable to the welding electrode holder.
Connection of base
metal cable
Connection of welding
cable of holder

-18-
8. CONNECTION PROCEDURE AND GROUND FOR SAFETY USE (Continued)
8.3 Connection of the Gas Hose
WARNING
You may suffer from danger of suffocation caused by lack of oxygen when
shield gas keep drifting in a closed place. Be sure to turn off the shield gas
at the main when the welding power source is not in use.
WARNING
⚫ Be sure to connect the gas hose after fixing to the stand, as physical injuries may result
from the gas cylinder toppling over.
⚫Attach a proper gas regulator to a gas cylinder. Failure to do so may result in physical
injuries. The gas regulator for high pressure gas must be used.
(1) Connect the connecting nut on the gas regulator to the gas cylinder, and tighten it with a wrench
or other tool.
(2) Connect the gas tube to the gas outlet and tighten it with a wrench or other tool.
(3) Connect the cable for the heater of the gas regulator to an appropriate power supply for heating
the gas regulator.
Gas cylinder
Nut for attaching gas
cylinder
(1)
(2)
Gas outlet
Gas regulator
Power Supply
(3)

-19-
8. CONNECTION PROCEDURE AND GROUND FOR SAFETY USE (Continued)
8.4 Grounding and Connecting of Input Power Source
WARNING
Follow the instructions below to avoid electric shock.
Touching the live electrical parts may result in a fatal electric shock and severe
burn.
⚫Do not touch the live electrical parts of the welding machine.
⚫Have qualified electrical engineer ground the welding power source and the base metal or
jig electrically connected in accordance with a local law.
⚫Disconnect the welding power source from input power supply by turning off the line
disconnect switch in the power box before grounding the welding power source or base
metal and connecting the cables or hoses.
⚫After connecting the cables, cover the power source with the cover or the case.
⚫Use a leakage protector when operating the welding power source in construction sites or
other damp locations or on iron plates, steel structures, etc.
CAUTION
Be sure to install a switch with fuse or a circuit breaker (for motor) o the input sides of each
welding machine.
CAUTION
Be sure to ground the case of the welding power source.
If the welding power source operates without grounding, voltage will be generated in the
case through the capacitor between the welding power source input circuit and the case or
floating capacity (electrostatic capacity naturally generated between the input conductor
and the case metal). If you touch the case or the base metal, you may receive an electric
shock.
Mount a switch with fuses or a circuit breaker on each welding power source.
Base metal or jig
Ground cable
(if required by local law)
This manual suits for next models
5
Table of contents
Other Daihen Inverter manuals