Table of contents
Installation manual
2
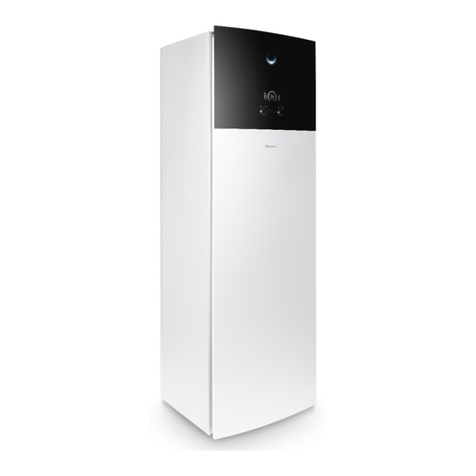
ELSH/X(B)12P30+50E
Daikin Altherma 3 R MT ECH₂O
4P708484-1 – 2023.03
Table of contents
1 About the documentation 2
1.1 About this document.................................................................. 2
2 Specific installer safety instructions 3
3 About the box 4
3.1 Indoor unit ................................................................................. 5
3.1.1 To remove the accessories from the indoor unit......... 5
3.1.2 To handle the indoor unit ............................................ 5
4 Unit installation 5
4.1 Preparing the installation site .................................................... 5
4.1.1 Installation site requirements of the indoor unit .......... 5
4.1.2 Special requirements for R32 units............................. 6
4.1.3 Installation patterns..................................................... 7
4.2 Opening and closing the unit..................................................... 13
4.2.1 To open the indoor unit............................................... 13
4.2.2 To lower the switch box of the indoor unit and
remove the top cover .................................................. 14
4.2.3 To close the indoor unit............................................... 15
4.3 Mounting the indoor unit............................................................ 15
4.3.1 To install the indoor unit.............................................. 15
4.3.2 To connect the drain hose to the drain ....................... 15
5 Piping installation 15
5.1 Preparing refrigerant piping....................................................... 15
5.1.1 Refrigerant piping requirements.................................. 15
5.1.2 Refrigerant piping insulation ....................................... 16
5.2 Connecting refrigerant piping .................................................... 16
5.2.1 To connect the refrigerant piping to the indoor unit .... 16
5.3 Preparing water piping .............................................................. 16
5.3.1 To check the water volume and flow rate ................... 16
5.4 Connecting water piping............................................................ 17
5.4.1 To connect the water piping........................................ 17
5.4.2 To connect a pressure vessel..................................... 18
5.4.3 To fill the heating system ............................................ 19
5.4.4 To fill the heat exchanger inside the storage tank ...... 19
5.4.5 To fill the storage tank................................................. 19
5.4.6 To insulate the water piping........................................ 20
6 Electrical installation 20
6.1 About electrical compliance....................................................... 20
6.2 Guidelines when connecting the electrical wiring...................... 20
6.3 Connections to the indoor unit................................................... 20
6.3.1 To connect the electrical wiring to the indoor unit....... 22
6.3.2 To connect the main power supply ............................. 23
6.3.3 To connect the backup heater power supply .............. 24
6.3.4 To connect the backup heater to the main unit........... 25
6.3.5 To connect the shut-off valve...................................... 26
6.3.6 To connect the electricity meters ................................ 26
6.3.7 To connect the domestic hot water pump................... 27
6.3.8 To connect the alarm output ....................................... 27
6.3.9 To connect the space cooling/heating ON/OFF
output .......................................................................... 28
6.3.10 To connect the changeover to external heat source... 28
6.3.11 To connect the power consumption digital inputs ....... 29
6.3.12 To connect the safety thermostat (normally closed
contact) ....................................................................... 29
6.3.13 To connect a Smart Grid............................................. 30
6.3.14 To connect the WLAN cartridge (delivered as
accessory)................................................................... 32
6.3.15 To connect the solar input........................................... 32
6.3.16 To connect the DHW output........................................ 33
7 Configuration 33
7.1 Overview: Configuration ............................................................ 33
7.1.1 To access the most used commands ......................... 34
7.2 Configuration wizard.................................................................. 35
7.2.1 Configuration wizard: Language .................................. 35
7.2.2 Configuration wizard: Time and date ........................... 35
7.2.3 Configuration wizard: System ...................................... 35
7.2.4 Configuration wizard: Backup heater ........................... 36
7.2.5 Configuration wizard: Main zone.................................. 37
7.2.6 Configuration wizard: Additional zone.......................... 38
7.2.7 Configuration wizard: Tank .......................................... 38
7.3 Weather-dependent curve.......................................................... 38
7.3.1 What is a weather-dependent curve? .......................... 38
7.3.2 2-points curve .............................................................. 39
7.3.3 Slope-offset curve ........................................................ 39
7.3.4 Using weather-dependent curves ................................ 39
7.4 Settings menu ............................................................................ 40
7.4.1 Main zone .................................................................... 40
7.4.2 Additional zone ............................................................ 40
7.4.3 Information ................................................................... 41
7.5 Menu structure: Overview installer settings................................ 42
8 Commissioning 43
8.1 Checklist before commissioning................................................. 43
8.2 Checklist during commissioning ................................................. 43
8.2.1 To check the minimum flow rate .................................. 44
8.2.2 To perform an air purge ............................................... 44
8.2.3 To perform an operation test run ................................. 44
8.2.4 To perform an actuator test run ................................... 44
8.2.5 To perform an underfloor heating screed dryout.......... 45
8.2.6 To set up bivalent heat sources ................................... 45
9 Hand-over to the user 45
10 Technical data 46
10.1 Piping diagram: Indoor unit ........................................................ 46
10.2 Wiring diagram: Indoor unit ........................................................ 47
1 About the documentation
1.1 About this document
Target audience
Authorised installers
Documentation set
This document is part of a documentation set. The complete set
consists of:
▪General safety precautions:
▪ Safety instructions that you must read before installing
▪ Format: Paper (in the box of the indoor unit)
▪Operation manual:
▪ Quick guide for basic usage
▪ Format: Paper (in the box of the indoor unit)
▪User reference guide:
▪ Detailed step-by-step instructions and background information
for basic and advanced usage
▪ Format: Digital files on https://www.daikin.eu. Use the search
function to find your model.
▪Installation manual – Outdoor unit:
▪ Installation instructions
▪ Format: Paper (in the box of the outdoor unit)
▪Installation manual – Indoor unit:
▪ Installation instructions
▪ Format: Paper (in the box of the indoor unit)


