1312
Saturn Evo | MontageanleitungSaturn Evo | Montageanleitung
DEUTSCH
FUNKTIONSBESCHREIBUNG
SATURN EVO besteht aus einem Gehäuse, das an zwei Halbanschen
angebracht wird. Die Türverriegelung liegt im ausschließlichen Er-
messen der Nutzer (s. Bedienungseinleitung).
WICHTIGE HINWEISE
•Prüfen Sie bitte vor der Montage die perfekte Ausrichtung der
Türen ;
•Arbeiten Sie ausschließlich auf glatten Türoberächen;
•Falls erforderlich, verwenden Sie für Unebenheiten die mitge-
lieferten harten Kunststoffeinlagen zur Ausrichtung der Türober-
ächen .
WO KANN MAN SATURN EVO MONTIEREN?
Das Gerät kann sowohl an Doppelügel-Hintertüren als auch an Seiten-
und Schiebetüren angebracht werden.
ACHTUNG
Bei Seiten- und Schiebetüren wird SATURN EVO an der Fahr-
zeugseite und nicht an der Beifahrertürseite angebracht.
Verwenden Sie die Klebeschablone, um die Position der Bohrun-
gen zu markieren.
Prüfen Sie noch einmal vor der Montage die richtige Positionierung
der Klebeschablone.
• Bohren Sie 6 Löcher ø4.5 für eine Befestigung durch Langschrau-
ben ODER bis einer Blechstärke von 2,5mm bohren Sie 6 Löcher
ø6 für die Gewindeeinsätze;
• Auf der Flügel- bzw. Schiebetür bohren Sie nur 1 Loch ø3.5 (die
Bohrschablone ist mit 2 Löchern versehen).
OPTIONAL Bis einer Blechstärke von 2,5mm bohren Sie 6
Löcher ø6 (s. Punkt 5) und setzen Sie die Gewindeeinsätze mit
einer Zange ein (nicht im Lieferumfang);
Sind alle Löcher gebohrt, entfernen Sie die Bohrschablone, reinigen
Sie die Türoberächen und entfernen Sie etwaige Unebenheiten.
Wir empfehlen die gebohrte Oberäche nachträglich mit spezieller
Rostschutzfarbe zu behandeln.
ACHTUNG Prüfen Sie, dass es um die Löcher herum keine Uneben-
heiten gibt.
1
4
5
6
7
2
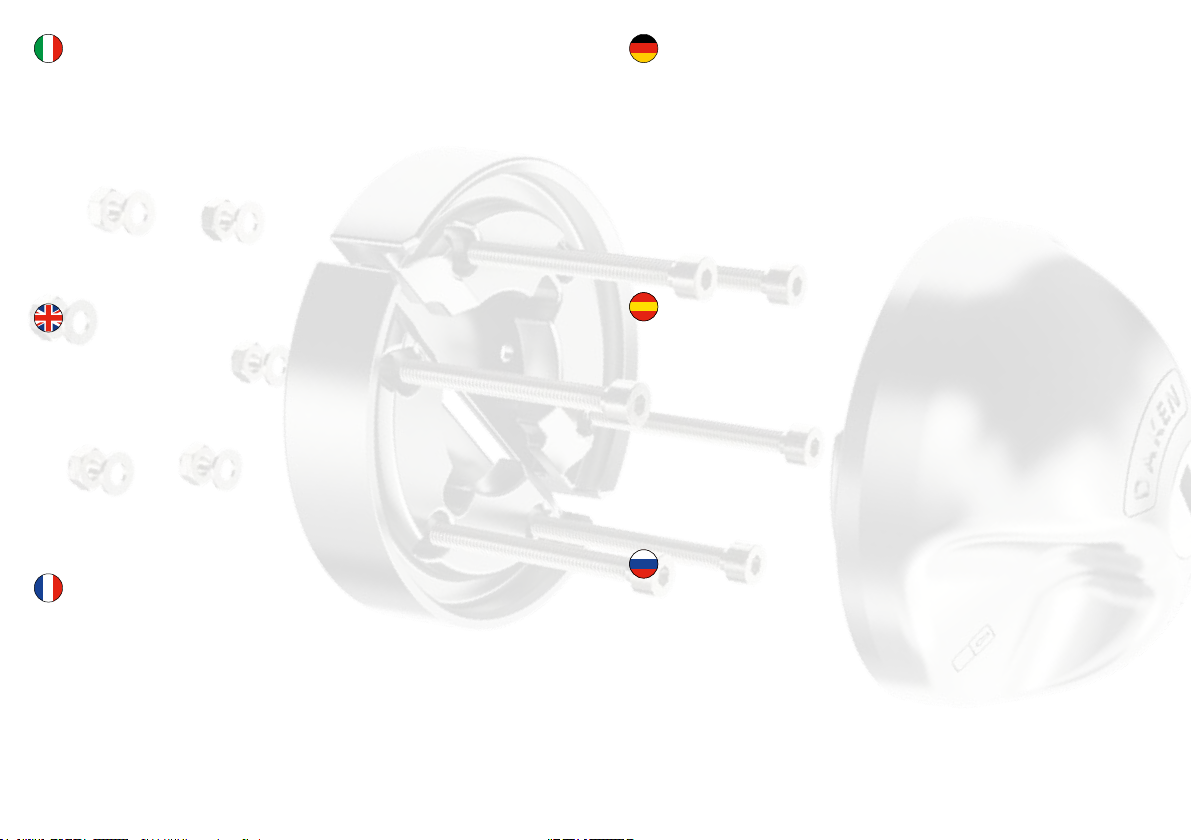
3
Bringen Sie die 2 weichen Gummieinlagen an den Türen und befesti-
gen Sie die 2 Halbansche wie folgt:
HINTERTÜRE
Die 2 Halbansche sind symmetrisch und austauschbar ;
SCHIEBETÜRE
Befestigen Sie den schrägen Halbansch an der Fahrzeugseite und
den anderen Halbansch an der Schiebetür ;
Ziehen Sie 6 lange M4-Schrauben an;
Bis einer Blechstärke von 2,5mm ziehen Sie 6 kurze M4-Schrauben in
den Gewindeeinsätzen an, die Sie bereits eingesetzt haben (s. Punkt 6).
ACHTUNG
Bei unebenen Türoberächen verwenden Sie die mitgelieferten
harten Kunststoffeinlagen (Punkt 2). Ziehen Sie die Schrauben
nicht zu fest an, denn das könnte zu einer Blechverformung führen!
Öffnen Sie die Schiebetür und bringen Sie das Gehäuse (ohne Schlüs-
sel) an der Tür, sodass es mit dem Halbansch perfekt übereinstimmt
(s. Bild ). Drehen Sie das Gehäuse um 180° ;
Zur Befestigung des Gehäuses ziehen Sie die Schraube M3,5x14 mit
Unterlegscheibe in der Bohrung ø3,5 mm an der Türinnenseite an.
Schließen Sie die Schiebetür .
BEDIENUNGSEINLEITUNG
Stecken Sie den Schlüssel ein und drehen Sie ihn um 180°. Drehen
Sie das Gehäuse bis sich das Symbol des Vorhängeschlosses in einer
senkrechten Position bendet. Drehen Sie den Schlüssel und ziehen
Sie ihn aus: das Gerät bendet sich im gesperrten Zustand.
Stecken Sie den Schlüssel ein und drehen Sie ihn; drehen Sie das Ge-
häuse. Drehen Sie den Schlüssel und ziehen Sie ihn aus: das Gerät
bendet sich NICHT im gesperrten Zustand.
Schlossentriegelung und Sperrung werden durch das Heraus-
ziehen des Schlüssels durchgeführt. Die Fahrzeugverriegelung
liegt im ausschließlichen Ermessen der Nutzer.
Nach sorgfältiger Prüfung der Schlossbefestigung kann das System
ent- und verriegelt werden. Schmieren Sie das Schloss mindestens
alle 3 Monate mit einem spezischen Produkt. Wir empfehlen Silikon-
schmierfett nach der Norm VW G052 778 A2. Das Gerät soll beim Fahr-
zeugwaschen keinem direkten Spritzwasser ausgesetzt werden.
8
10 11
12
13
9