6
1.0 INTRODUCTION
Congratulations with your new DALI OPTICON loudspeaker. It is important to us that you’re new
DALI loudspeakers are set up and connected optimally. For this reason, we recommend that you
read this manual and follow its instructions.
The manual contains instructions for setup and connection, as well as tips and advice on how
to get the most out of your new loudspeakers. DALI is acclaimed around the world for unique
loudspeakers built to our uncompromising standards for design and performance. The goal
for every single DALI loudspeaker is always our foremost commitment: To create a listening
experience in your home that will make you forget time and place.
Remember to sign up for the DALI newsletter at www.dali-speakers.com.
Enjoy!
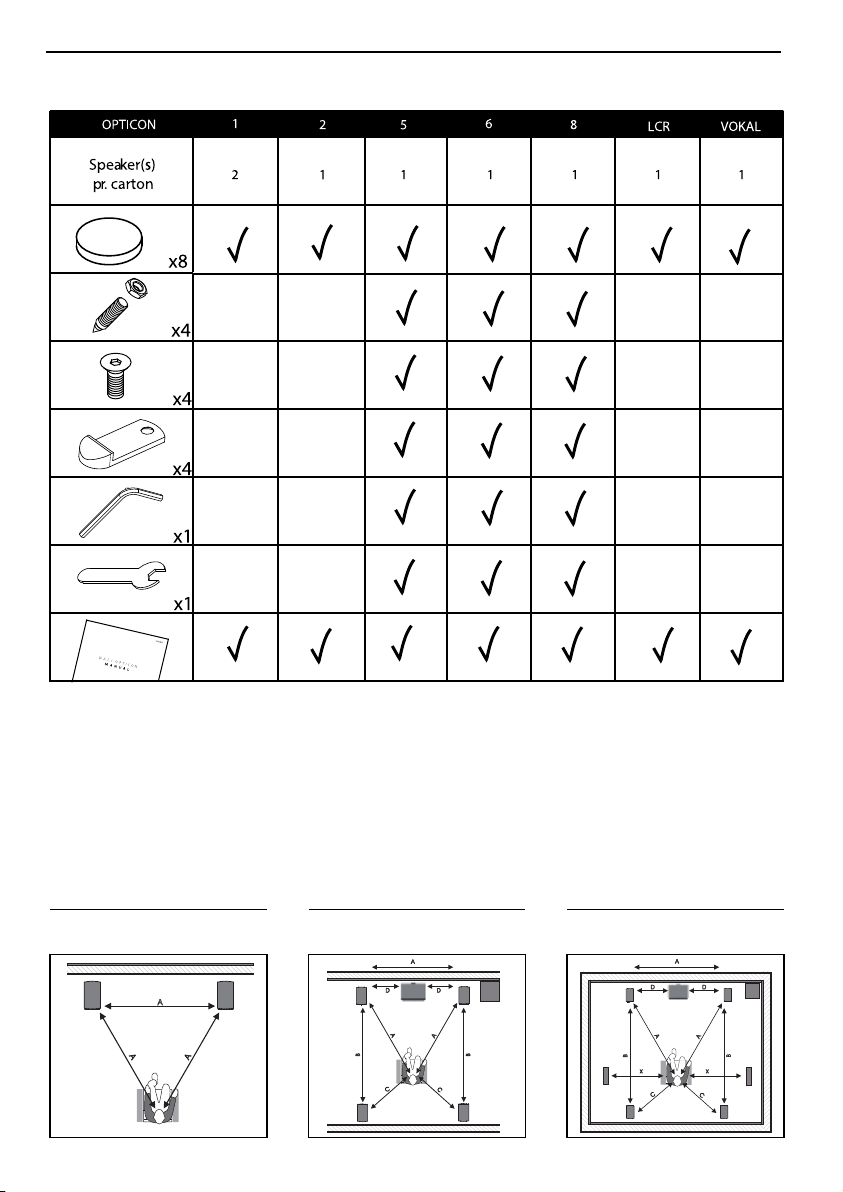
2.0 UNPACKING
Be careful not to damage the contents when you unpack the parts. Depending on which DALI
OPTICON model you have bought, different accessories come with the loudspeaker. Check that
all parts are contained in the cardboard box (see Table 1). Keep the packaging materials should
your speaker need to be relocated or serviced.
2.1 GRILLES
The speakers are delivered with the grille fronts already mounted when you unpack them. If
you wish to remove the grille front, loosen it by gradually tugging at the plungers that hold it in
place. It is important that all plunges are equally loosened before removing the front. Otherwise
the grille may be damaged.
3.0 POSITIONING
To achieve the best results, the loudspeaker setup should be symmetrical round your favourite
listening position, (see Figure 1A – 1C). We recommend that you experiment with the position
of your loudspeakers – the sound quality will change depending on the loudspeaker position.
For DALI OPTICON 1, OPTICON 2 and DALI OPTICON LCR the speakers should ideally be
positioned, so that the tweeter is approximately at ear height when seated in your favourite
listening position. DALI OPTICON 5, 6 and 8 are designed as floor standing speakers. They
should be positioned minimum 20 cm (8”) from the rear wall. DALI OPTICON 2 should likewise
be positioned minimum 20 cm (8”) from the rear wall. DALI OPTICON LCR is optimized for wall-
mounting, but will also work well on a shelf. If wall mounted there should be at least 10 cm (4”)
to any surface underneath the speaker and if placed on a shelf there should be at least 10 cm
(4”) distance to the wall.
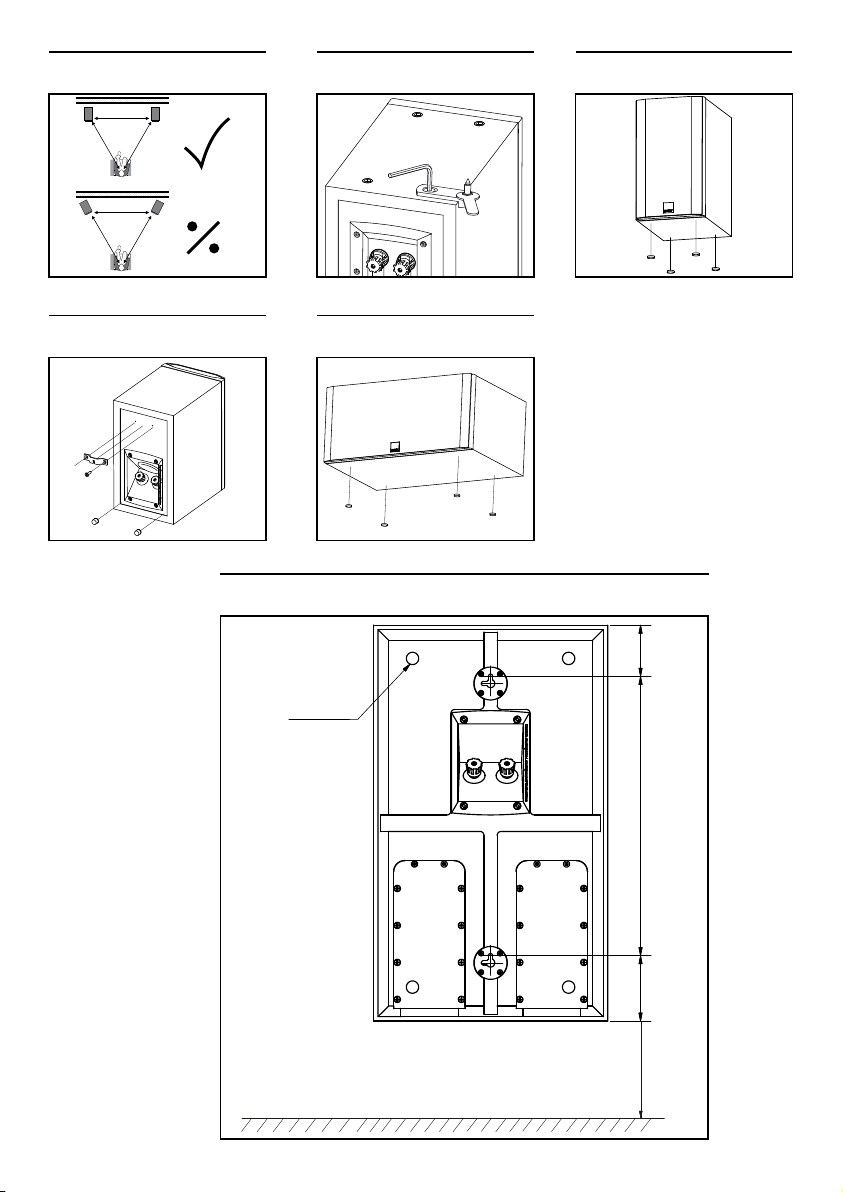
Objects positioned between the speaker and listening position might negatively affect sound
quality. All DALI OPTICON speakers are designed to meet our wide dispersion principle, so they
should not be angled towards the listening position, but be positioned parallel with the rear wall
(see Figure 2). By parallel positioning, the distortion in the main listening area will be lowered
and the room integration will be better. The wide dispersion principle also ensures that sound is
spread evenly within a large area in the listening room.
3.1 DALI OPTICON 5, 6 and 8
The speakers are designed to stand on the floor, using spikes or rubber bumpers under the
speakers, (see Figure 3+4). Be careful not to over tighten the contra nuts. Spikes or rubber
bumpers can improve the sound quality. You can try both to hear what gives the best sound
quality in your setup. Please be aware that spikes may damage the floor if it is not protected.