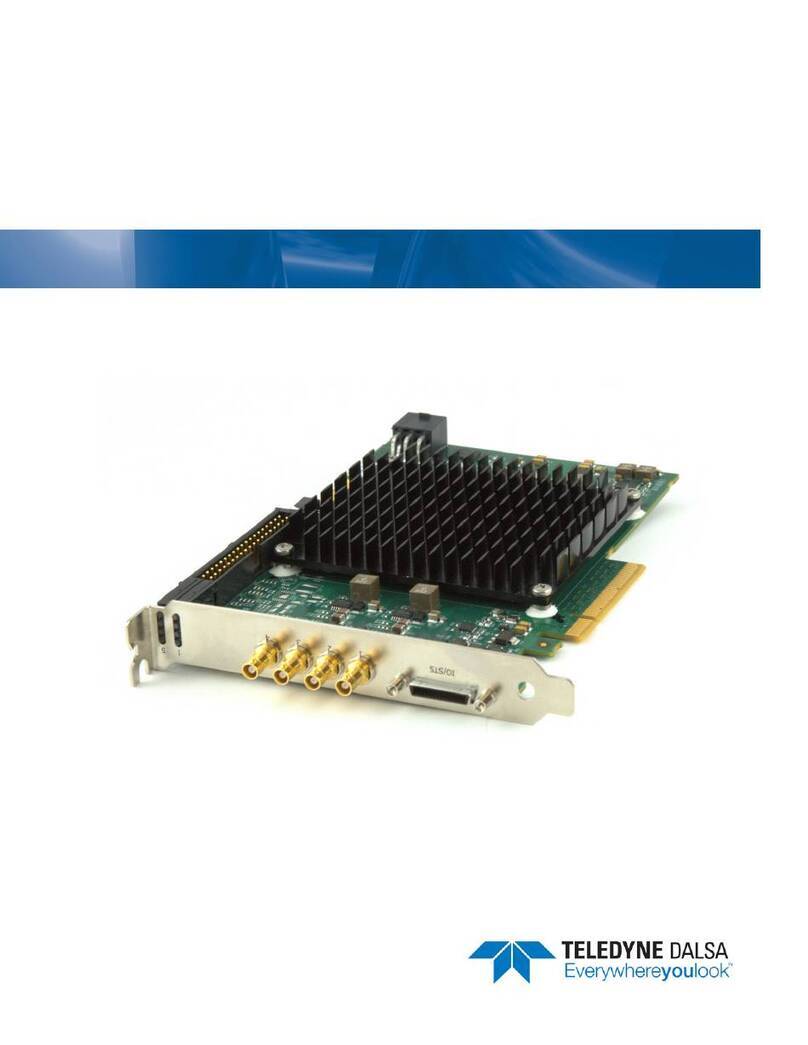
Dalsa Everywhereyoulook Xtium2-CL MX4 User manual

This document does not contain information whose export/transfer/disclosure
is restricted by the Canadian Export Control regulation.
NOTICE
© 2021 Teledyne Digital Imaging, Inc. All rights reserved.
This document may not be reproduced nor transmitted in any form or by any means, either
electronic or mechanical, without the express written permission of TELEDYNE DALSA. Every effort
is made to ensure the information in this manual is accurate and reliable. Use of the products
described herein is understood to be at the user’s risk. TELEDYNE DALSA assumes no liability
whatsoever for the use of the products detailed in this document and reserves the right to make
changes in specifications at any time and without notice.
Microsoft® is a registered trademark; Windows®, Windows® 7, Windows® 8 and Windows® 10
are trademarks of Microsoft Corporation.
All other trademarks or intellectual property mentioned herein belongs to their respective owners.
Edition 1.00 released on June 30, 2021
Document Number: OC-A4CM-MUSR0
About Teledyne DALSA
Teledyne DALSA is an international high performance semiconductor and electronics company that
designs, develops, manufactures, and markets digital imaging products and solutions, in addition
to providing wafer foundry services.
Teledyne DALSA Digital Imaging off ers the widest range of machine vision components in the
world. From industry-leading image sensors through powerful and sophisticated cameras, frame
grabbers, vision processors and software to easy-to-use vision appliances and custom vision
modules.

Xtium2-CL MX4 User's Manual Contents •i
Contents
OVERVIEW 6
PRODUCT PART NUMBERS 6
XTIUM2-CL MX4 FRAME GRABBER FEATURES 7
Series Key Features 7
Supported Camera Link Configurations 7
User Programmable Configurations 8
ACUPlus: Acquisition Control Unit 8
DTE: Intelligent Data Transfer Engine 9
PCI Express x4 Gen3 Interface 9
Advanced Controls Overview 9
Visual Indicators 9
External Event Synchronization 9
Camera Link Communications Ports 9
Quadrature Shaft Encoder 9
DEVELOPMENT SOFTWARE OVERVIEW 10
Sapera++ LT Library 10
Sapera Processing Library 10
QUICK START SETUP & INSTALLATION 11
INSTALLING XTIUM2-CL MX4 16
WARNING!(GROUNDING INSTRUCTIONS) 16
INSTALLATION OVERVIEW 16
Hardware Installation 16
Multi-board Sync & I/O Setup 16
Sapera LT Library & Xtium2-CL MX4 Driver Installation 17
Teledyne DALSA Device Drivers 17
Installation Procedure 17
Xtium2-CL MX4 Firmware Loader 18
Firmware Update: Automatic Mode 18
Firmware Update: Manual Mode 19
Performing a Manual Firmware Update 19
Executing the Firmware Loader from the Start Menu 20
UPGRADING SAPERA OR BOARD DRIVER 21
Board Driver Upgrade Only 21
Upgrading both Sapera and Board Driver 21
Preserving Board Parameters during Driver Upgrade 22
PRESERVING BOARD PARAMETERS DURING BOARD REPLACEMENT OR SYSTEM CLONING 23
DISPLAYING XTIUM2-CL MX4 BOARD INFORMATION 24
Device Manager –Board Viewer 24
Information Field Description 25
Changing Device Settings 27
Device Information Report 28
USING THE CAMERA LINK SERIAL CONTROL PORT 29
COM Port Assignment 29
CONFIGURING SAPERA 30
Increasing Contiguous Memory for Sapera Resources 30
Host Computer Frame Buffer Memory Limitations 31
Contiguous Memory for Sapera Messaging 31
CAMEXPERT QUICK START 32
INTERFACING CAMERAS WITH CAMEXPERT 32

ii •Contents Xtium2-CL MX4 User's Manual
SAPERA CAMERA CONFIGURATION FILES 34
Camera Types & Files 34
Camera Files Distributed with Sapera 34
Overview of Sapera Acquisition Parameter Files (*.ccf or *.cca/*.cvi) 34
Concepts and Differences between the Parameter Files 34
CCF File Details 35
CCA File Details 35
CVI File Details 35
Saving a Camera File 36
Camera Interfacing Check List 36
USING CAMEXPERT WITH XTIUM2-CL MX4 37
BASIC TIMING CATEGORY 38
Parameter Descriptions 38
ADVANCED CONTROL CATEGORY 40
Parameter Descriptions 40
EXTERNAL TRIGGER CATEGORY 42
Parameter Descriptions 42
IMAGE BUFFER AND ROI CATEGORY 44
Parameter Descriptions 44
USING THE FLAT FIELD CORRECTION TOOL 46
Xtium2-CL MX4 Flat Field Support 46
Loading the Required Camera File 46
Set up Dark and Bright Acquisitions with the Histogram Tool 46
Verify a Dark Acquisition 46
Verify a Bright Acquisition 47
Flat Field Correction Calibration Procedure 48
Flat Field Calibration Window 48
Using Flat Field Correction 49
USING THE BAYER FILTER TOOL 50
Bayer Filter White Balance Calibration Procedure 50
Using the Bayer Filter 50
SAPERA DEMO APPLICATIONS 51
Grab Demo Overview 51
Grab Demo Workspace Details 51
Using the Grab Demo 52
Server Selection 52
CCF File Selection 52
Grab Demo Main Window 53
XTIUM2-CL MX4 REFERENCE 54
BLOCK DIAGRAM 54
XTIUM2-CL FLOW DIAGRAM 55
ACQUISITION TIMING 56
LINE TRIGGER SOURCE SELECTION FOR LINE SCAN APPLICATIONS 57
Parameter Values Specific to the Xtium2-CL MX4 57
CVI/CCF File Parameters Used 57
SHAFT ENCODER INTERFACE TIMING 58
Dual Balanced Shaft Encoder RS-422 Inputs: 58
Example using any Encoder Input with Pulse-drop Counter 58
Example using Sequential Encoder Input 59
CVI/CCF File Parameters Used 59
VIRTUAL FRAME TRIGGER FOR LINE SCAN CAMERAS 60
Virtual Frame Trigger Timing Diagrams 60
Synchronization Signals for a 10 Line Virtual Frame 60
Synchronization Signals for Fixed Frame Length Acquisition 61
Synchronization Signals for Variable Frame Length Acquisition 62
SAPERA ACQUISITION METHODS 64

Xtium2-CL MX4 User's Manual Contents •iii
TRIGGER TO IMAGE RELIABILITY 64
Supported Events and Transfer Methods 65
Acquisition Events 65
Transfer Events 66
Trigger Signal Validity 67
Supported Transfer Cycling Methods 67
OUTPUT LUT AVAILABILITY 69
METADATA:THEORY OF OPERATION 70
Metadata Data Structure 70
FLAT FIELD CORRECTION:THEORY OF OPERATION 71
Flat Field Correction Lists 71
Flat Field Correction Sets 72
Xtium2-CL MX4 specific limitations 72
Programming the sets 72
XTIUM2-CL MX4 SUPPORTED PARAMETERS 73
Camera Related Capabilities 73
Camera Related Parameters 74
VIC Related Parameters 79
ACQ Related Parameters 85
Transfer Related Capabilities 87
Transfer Related Parameters 87
General Outputs #1: Related Capabilities (GIO Module #0) 88
General Outputs #1: Related Parameters (GIO Module #0) 88
General Inputs #1: Related Capabilities (GIO Module #1) 88
General Inputs #1: Related Parameters (GIO Module #1) 88
Bidirectional General I/Os: Related Capabilities (GIO Module #2) 89
Bidirectional General I/Os: Related Parameters (GIO Module #2) 89
SAPERA SERVERS & RESOURCES 90
SERVERS AND RESOURCES 90
TECHNICAL SPECIFICATIONS 91
XTIUM2-CL MX4 BOARD SPECIFICATIONS 91
HOST SYSTEM REQUIREMENTS 93
DECLARATIONS OF CONFORMITY 94
FCC Statement of Conformance 94
FCC Class A Product 94
EU and UKCA Declaration of Conformity 94
CONNECTOR AND SWITCH LOCATIONS 95
Xtium2-CL MX4 Board Layout Drawing 95
Connector / LED Description List 95
CONNECTOR AND SWITCH SPECIFICATIONS 96
Xtium2-CL MX4 End Bracket Detail 96
Status LED Functional Description 97
CL-1: Camera Link Connector 1 98
CL-2: Camera Link Connector 2 99
Camera Link Camera Control Signal Overview 100
J5: External Signals Connector (Female DH60-27P) 101
J1: Internal I/O Signals Connector (26-pin SHF-113-01-L-D-RA) 101
J2: Internal I/O Signals Connector (40-pin TST-120-01-G-D) 102
Note 1: General Inputs / External Trigger Inputs Specif ications 103
Block Diagram: Connecting External Drivers to General Inputs 105
External Driver Electrical Requirements 107
Note 2: General Outputs /Strobe Output Specifications 108
Block Diagram: Connecting External Receivers to the General Outputs 109
External Receiver Electrical Requirements 110
Note 3: RS-422/TTL Shaft Encoder Input Specifications 111

iv •Contents Xtium2-CL MX4 User's Manual
Note 3.1: Interfacing to an RS-422 Driver Output 113
Note 3.2: Interfacing to a Line Driver (also called Open Emitter) Output 115
Note 3.3: Interfacing to an Open Collector Output 116
Note 3.4: Interfacing directly to a TTL (also called Push-Pull) Output 116
Note 3.5: Interfacing to a TTL using a Bias Voltage 117
J3: Multi-Board Sync / Bi-directional General I/Os 118
Hardware Preparation 118
Conf iguration via Sapera Application Programming 118
Conf iguration via Sapera CamExpert 119
J4: Power Connector 120
DC Power Details 120
CABLES &ACCESSORIES 121
DH40-27S Cable to Blunt End (OR-YXCC-27BE2M1, Rev B1) 121
DH40-27S Connector Kit for Custom Wiring 122
Cable assemblies for I/O connector J1 123
Teledyne DALSA I/O Cable (part #OR-YXCC-TIOF120) 123
Third Party I/O Cables for J1 123
Cable assemblies for I/O connector J2 124
External Signals Connector Bracket Assembly 124
External Signals Connector Bracket Drawing 124
External Signals Connector Bracket Pinout 124
Board Sync Cable Assembly OR-YXCC-BSYNC40 126
Power Cable Assembly OR-YXCC-PWRY00 127
CAMERA LINK INTERFACE 128
CAMERA LINK OVERVIEW 128
Rights and Trademarks 128
DATA PORT SUMMARY 128
CAMERA SIGNAL SUMMARY 129
Video Data 129
Camera Controls 129
Communication 129
CAMERA LINK CABLE MANUFACTURER CONTACT INFORMATION 130
APPENDIX A: SILENT INSTALLATION 131
Silent Mode Installation 131
Creating a Response File 131
Running a Silent Mode Installation 132
Silent Mode Uninstall 132
Creating a Response File 132
Running a Silent Mode Uninstall 132
Silent Mode Installation Return Code 133
Installation Setup with CorAppLauncher.exe 133
Custom Driver Installation using install.ini 134
Creating the install.ini File 134
Run the Installation using install.ini 134
APPENDIX B: TROUBLESHOOTING INSTALLATION PROBLEMS 135
OVERVIEW 135
PROBLEM TYPE SUMMARY 135
First Step: Check the Status LED 135
Possible Installation Problems 136
Possible Functional Problems 136
TROUBLESHOOTING PROCEDURES 137
Diagnostic Tool Overview 137
Diagnostic Tool Main Window 137
Diagnostic Tool Self Test Window 138
Diagnostic Tool Live Monitoring Window 139

Xtium2-CL MX4 User's Manual Contents •v
Checking for PCI Bus Conflicts 140
Windows Device Manager 142
BSOD (blue screen) Following a Board Reset 142
Sapera and Hardware Windows Drivers 143
Recovering from a Firmware Update Error 143
Driver Information via the Device Manager Program 144
Teledyne DALSA Log Viewer 145
On-board Image Memory Requirements for Acquisitions 145
Dual Camera Input Configuration 145
Symptoms: CamExpert Detects no Boards 146
Symptoms: Xtium2-CL MX4 Does Not Grab 146
Symptoms: Card grabs black 147
Symptoms: Card acquisition bandwidth is less than expected 148
Symptoms: PoCL does not power the camera 148
CONTACT INFORMATION 149
SALES INFORMATION 149
TECHNICAL SUPPORT 149

6•Overview Xtium2-CL MX4 User's Manual
Overview
Product Part Numbers
Xtium2-CL MX4 Board
Table 1: Xtium2-CL MX4 Board Product Numbers
Item
Product Number
Xtium2-CL MX4
OR-A4C0-XMX00
For OEM clients, this manual in printed form, is available on request.
OC-A4CM-MUSR0
Xtium2-CL MX4 Software
Table 2: Xtium2-CL MX4 Software Product Numbers
Item
Product Number
Sapera LT version 8.60 or later for full feature support (available as a free
download from the Teledyne DALSA website.).
1. Sapera LT: Provides everything needed to build imaging
application.
2. Current Sapera-compliant board hardware drivers
3. Sapera documentation (compiled HTML help, Adobe Acrobat®
(PDF)
OC-SL00-0000000
(optional) Sapera Processing Imaging Development Library includes over 600
optimized image-processing routines.
Contact Sales at
Teledyne DALSA
Optional Xtium2-CL MX4 Cables & Accessories
Table 3: Xtium2-CL MX4 Cables & Accessories
Item
Product Number
DH60-27S cable assembly to blunt end:
6 ft cable I/O 27 pin Hirose connector to blunt end.
This cable assembly connects to J5.
(see "J5: External Signals Connector (Female DH60-27P))
OR-YXCC-27BE2M1, Rev B1
Cable set to connect to J1 Internal I/O Signals connector
(J1: 26-pin SHF-113-01-L-D-RA)
See suggested cables
External Signals bracket (OC-X4CC-IOCAB) provides a simple way to bring
out the signals from the External Signals Connector J2 to a bracket mounted
DB37.
Cable assemblies for I/O
connector J2
DH40-27S Connector Kit for Custom Wiring:
Comprised of a DH40-27S connector plus screw lock housing kit
OR-YXCC-H270000
Cable assembly to connect to J3 (Board Sync)
Connecting 2 boards
Connection 3 or 4 boards
OR-YXCC-BSYNC20
OR-YXCC-BSYNC40
Power interface cable required when supplying power to cameras (PoCL)
OR-YXCC-PWRY00
Power Over Camera Link (PoCL) Video Input Cable
2 meter HDR to MDR
2 meter HDR to HDR
OR-COMC-POCLD2
OR-COMC-POCLDH

Xtium2-CL MX4 User's Manual Overview •7
Xtium2-CL MX4 Frame Grabber Features
Series Key Features
•Compliant with Camera Link specification version 2.1
•Uses a PCIe x4 Gen3 slot to maximize transfers to host computer buffers
•Acquire from Monochrome, RGB, Bayer and Bi-Color cameras, both area scan and line scan
•Supports multiple tap formats, in multiple pixels depths
•Pixel clock range f rom 20 to 85 MHz
•Output lookup tables
•White Balance Gain f or RGB pixels
•Vertical and Horizontal Flip supported on board
•Flat Field and Flat Line correction: pixel replacement using either neighborhood pixels or
3x2 cluster replacement.
•External Input Triggers and Shaft Encoder inputs, along with Strobe outputs
•Supports a number of acquisition events in compliance with "Teledyne DALSA’s Trigger to
Image Reliability"
•RoHS compliant
•Supports Power Over Camera Link (PoCL)
Supported Camera Link Configurations
The Camera Link industry standard is maintained by the Automated Imaging Association (AIA).
Camera Link configurations are Base, Medium, Full and Deca (Extended-Full).
Table 4: Camera Link Configuration and Throughput
Configuration
Data
Bits
Maximum Throughput
Cables
Base
24
255 MB/s
1
Medium
48
510 MB/s
2
Full
64
680 MB/s
2
Deca (80-bits)
80
850 MB/s
2

8•Overview Xtium2-CL MX4 User's Manual
User Programmable Configurations
The Xtium2-CL MX4 supports the following Camera Link configurations, using one of 3 available
firmware designs:
Table 5: Xtium2-CL MX4 Firmware Configurations
Firmware
Supported Camera Link Configurations
One Full Camera Link Input
(installation default selection)
•1 Base, 1 Medium or 1 Full Camera Link monochrome or bayer
camera, 1/2/3/4/6/8 tap segmented, 2 taps alternate, or
2/3/4/6/8 taps parallel.
•1 Base or 1 Medium Camera Link RGB camera, 1 tap and 2 taps
segmented/parallel.
•Full Camera Link packed RGB camera.
One 80-bit Camera Link
Input
•One 10 Tap @ 8-bit monochrome or bayer camera
•One 8 Tap @ 10-bit monochrome or bayer camera
•One 80-bit packed RGB camera
•One 80-bit packed Bi-Color camera
Two Base Camera Link Input
(any 2 of the supported
configuration)
•Base Camera Link monochrome or Bayer camera, 1/2/3 tap
segmented, 2 taps alternate, 2/3 taps parallel.
•Base Camera Link RGB camera, 1 tap
Use the Xtium2-CL MX4 f irmware f irmware loader f unction in the Teledyne DALSA Device manager
utility to select firmware f or one of the supported modes. Firmware selection is made either during
driver installation or manually later on (see Firmware Update: Manual Mode).
ACUPlus: Acquisition Control Unit
ACUPlus consists of a grab controller, one pixel packer, and one time base generator per camera
input. ACUPlus delivers a flexible acquisition f ront end and supports pixel clock rates of up to
85MHz.
ACUPlus acquires variable frame sizes up to 64KB per horizontal line and up to 64K lines per f rame.
ACUPlus can also capture an infinite number of lines f rom a line scan camera without losing a
single line of data.

Xtium2-CL MX4 User's Manual Overview •9
DTE: Intelligent Data Transfer Engine
The Xtium2-CL MX4 intelligent Data Transfer Engine ensures fast image data transfers between the
board and the host computer with zero CPU usage. The DTE provides a high degree of data
integrity during continuous image acquisition in a non-real time operating system like Windows.
DTE consists of multiple independent DMA units, Tap Descriptor Tables, and Auto-loading Scatter-
Gather tables.
PCI Express x4 Gen3 Interface
The Xtium2-CL MX4 is a universal PCI Express x4 Gen3 board, compliant with the PCI Express 3.0
specification. The Xtium2-CL MX4 board achieves transfer rates up to 3.2 Gbytes/sec to host
memory, depending on the configuration selected. Note that performance can be lower depending
on PC and/or programmed configuration.
The Xtium2-CL MX4 board occupies one PCI Express x4 Gen3 expansion slot and one chassis
opening.
Important:
•To obtain maximum transfer rate to host memory, make sure the Xtium2-CL MX4 is in a Gen3
slot. Although the board will work in a Gen1/Gen2 slot, only half the perf ormance is achieved.
•The system motherboard BIOS should allow setting the PCIe maximum payload size to 256 MB
or higher. Systems with f ixed settings of 128 MB will limit performance f or transfers to host
memory.
•If the computer only has a PCI Express x16 slot, test directly or review the computer
documentation to verify if the Xtium2-CL MX4 is supported since computer motherboards may
only support x16 graphic video board products in x16 slots.
Advanced Controls Overview
Visual Indicators
Xtium2-CL MX4 f eatures 3 LED indicators to f acilitate system installation and setup. These
indicators provide visual f eedback on the board status and camera status.
External Event Synchronization
Trigger inputs and strobe signals precisely synchronize image captures with external events.
Camera Link Communications Ports
One PC independent communication port per camera input provides Camera Link camera
configuration. This port does not require addition PC resources like free interrupts or I/O address
space. Accessible via the board device driver, the communication port presents a seamless
interface to Windows-based standard communication applications like HyperTerminal, etc. The
communication port is accessible directly f rom the Camera Link connectors.
Quadrature Shaft Encoder
An important feature for web scanning applications, the Quadrature Shaft Encoder inputs allow
synchronized line captures from external web encoders. The Xtium2-CL MX4 provides an RS-422 or
TTL (mutually exclusive) input that supports a tick rate of up to 5 MHz.

10 •Overview Xtium2-CL MX4 User's Manual
Development Software Overview
Sapera++ LT Library
Sapera++ LT is a powerful development library f or image acquisition and control. Sapera++ LT
provides a single API across all current and future Teledyne DALSA hardware. Sapera++ LT
delivers a comprehensive feature set including program portability, versatile camera controls,
flexible display functionality and management, plus easy to use application deve lopment wizards.
Applications are developed using either C++ or .NET frameworks.
Sapera++ LT comes bundled with CamExpert, an easy to use camera configuration utility to create
new, or modif y existing camera configuration files.
Sapera Processing Library
Sapera Processing is a comprehensive set of C++ classes or .NET classes for image processing and
analysis. Sapera Processing offers highly optimized tools f or image processing, blob analysis,
search (pattern recognition), OCR and barcode decoding.

Xtium2-CL MX4 User's Manual Quick Start Setup & Installation •11
Quick Start Setup & Installation
The following procedure outlines the basic steps required to install the Teledyne DALSA Xtium2-CL
MX4. For complete installation details and information, see Installing Xtium2-CL MX4.
Install the Xtium2-CL MX4 in an available PCIex4 (or x8) slot on the hostcomputer.
If using PoCL, connect power to the board J4 connector.
Download and install the Sapera LTSDK softwarefromtheTeledyne DALSA website.
http://teledynedalsa.com/imaging/support/downloads/sdks/
Download and install the Xtium2-CL MX4device driverfromthe TeledyneDALSAwebsite.
https://www.teledynedalsa.com/imaging/support/downloads/drivers/

12 •Quick Start Setup & Installation Xtium2-CL MX4 User's Manual
To complete the installation, update theXtium2-CLMX4 firmwarewhenprompted;select Automatic to
update with the defaultconfiguration(Full CameraLink) or Manualto selectanother option (2 Base Camera
Link or 80-Bits Camera Link).
Reboot when all software and board drivers are installed.
Launch Sapera LT CamExpert to verify the installation; the board should be present in
the list of available devices.
Connect camera(s) to the board Camera Link connectors. Ensure cameras are properly
powered.
If using PoCL, use CamExpert to enable the PoCL feature in the the Basic Timing
category.

Xtium2-CL MX4 User's Manual Quick Start Setup & Installation •13

14 •Quick Start Setup & Installation Xtium2-CL MX4 User's Manual
In CamExpert, click Detect Camera.
If the Detect Camera button is disabled, click Settings to open the the Communication
Settings dialog to conf igure CamExpert to detect attached cameras using a serial port.
When CamExpert detects a camera (if GenCP compliant), camera parameters are
displayed along with the board parameters.
When properly connected, the video status bar displays camera signals in green.

Xtium2-CL MX4 User's Manual Quick Start Setup & Installation •15
Click Grab to acquire a test image to validate the setup.
Modify the board and camera parameters as necessary. When completed, save the
camera configuration f ile.
The Xtium2-CL MX4 can be conf igured using the the parameter settings in this file when
using the Sapera LT API in your application to acquire images

Xtium2-CL MX4 User's Manual Installing Xtium2-CL MX4 •16
Installing Xtium2-CL MX4
Warning! (Grounding Instructions)
Static electricity can damage electronic components. Please discharge any static electrical charge
by touching a grounded surface, such as the metal computer chassis, before performing any
hardware installation. If you do not f eel comfortable performing the installation, please consult a
qualified computer technician.
Important: Never remove or install any hardware component with the computer power on.
Disconnect the power cord from the computer to disable the power standby mode. This
prevents the case where some computers unexpectedly power up when a board is installed.
Installation Overview
The installation sequence is as follows:
•Install the board hardware into an available PCI Express x4 Gen3 slot.
•Turn on the computer.
•Install the Sapera LT Development Library or only its ‘runtime library’.
•Install the Xtium2-CL MX4 Sapera board driver.
•Update the board firmware if required.
•Reboot the computer.
•Connect a Camera Link camera and test.
Hardware Installation
•Turn the computer off, disconnect the power cord (disables power standby mode), and open
the computer chassis to allow access to the expansion slot area.
•Install the Xtium2-CL MX4 into a free PCI Express x4 Gen3 expansion slot. Note that some
computer's x16 slot may support boards such as the Xtium2-CL MX4, not just display
adapters.
•Connect a spare power supply connector to J4 for PoCL cameras (J4: Power Connector) See
Power Cable Assembly OR-YXCC-PWRY00 for information about an adapter for older
computers.
•Close the computer chassis and turn the computer on.
•Log into Windows with an administrator account.
•Connect a Camera Link camera to CL-1 (and optionally to CL-2) camera connectors after
installing Sapera as described below. Test with CamExpert.
Multi-board Sync & I/O Setup
•For multi-board sync applications, see J3: Multi-Board Sync / Bi-directional General I/Os for
information on using two to f our Xtium2-CL boards in one computer.

Xtium2-CL MX4 User's Manual Installing Xtium2-CL MX4 •17
Sapera LT Library & Xtium2-CL MX4 Driver Installation
Sapera LT SDK (full version), the image acquisition and control SDK for Teledyne DALSA
cameras and f rame grabbers is available for download from the Teledyne DALSA website:
http://teledynedalsa.com/imaging/support/downloa ds/sdks/
Run-time versions are also available f or download at this location.
The Sapera LT SDK installation includes compiled demo and example programs,
along with project source code, in both C++ and .NET languages, for most Microsoft
Visual Studio development platforms. The Sapera LT ++ and Sapera LT .NET demo
source code are f ound in the Sapera\Demos directory.
Teledyne DALSA Device Drivers
All Teledyne DALSA device drivers are available for download from the Teledyne DALSA website:
https://www.teledynedalsa.com/imaging/support/downloads/drivers/
Installation Procedure
▪Sapera LT is installed before Teledyne DALSA board drivers.
▪Download the Sapera LT SDK f rom the Teledyne DALSA website and run the executable file; the
installation menu is presented.
▪The installation program may prompt to reboot the computer. It is not necessary to reboot the
computer between the installation of Sapera LT and the board driver.
▪Download the Xtium2-CL MX4 device driver f rom the Teledyne DALSA website and run the
executable file; the installation menu is presented.
▪During the late stages of the installation, the Xtium2-CL MX4 firmware loader application starts.
This is described in detail in the following section.
▪Reboot when all software and board drivers are installed.
If Windows displays any unexpected message concerning the board, power off the
system and verify the Xtium2-CL MX4 is installed in the slot properly. You should
also note the board’s status LED color and compare it to the defined LED states as
described in S: Boot-up/PCIe Status LED.
Ref er to Sapera LT User’s Manual for additional details about Sapera LT.

18 •Installing Xtium2-CL MX4 Xtium2-CL MX4 User's Manual
Xtium2-CL MX4 Firmware Loader
The Device Manager-Firmware Loader program automatically executes at the end of the driver
installation and on every subsequent reboot of the computer. It will determine if the Xtium2-CL
MX4 requires a firmware update. If f irmware is required, a dialog displays. This dialog also allows
the user to load f irmware for alternate operational modes of the Xtium2-CL MX4.
Important: In the rare case of f irmware loader errors please see Recovering from
a Firmware Update Error.
Firmware Update: Automatic Mode
Click Automatic to update the Xtium2-CL MX4 firmware. The Xtium2-CL MX4 supports various
firmware configurations with the default being a Full, Medium, or Base camera.
See User Programmable Configurations for details on all supported modes, selected via a manual
update of alternative f irmware.
With multiple Xtium2-CL MX4 boards in the system, all are updated with new firmware. If any
installed Xtium2-CL MX4 board installed in a system already has the correct firmware version, an
update is not required. In the f ollowing screen shot, a single Xtium2-CL MX4 Full board is installed
and ready for a firmware upgrade.
Figure 1: Automatic Firmware Update
Table of contents
Other Dalsa Computer Hardware manuals
Popular Computer Hardware manuals by other brands

Gigabyte
Gigabyte 3D Cooler installation guide

ekwb
ekwb EK-Annihilator Series installation manual

protech
protech ProX-1630 user manual

Siemens
Siemens SIMATIC CP 341 Getting started

EK-Quantum
EK-Quantum Momentum2 ROG Strix X570-i Gaming D-RGB user guide

AFL Hyperscale
AFL Hyperscale H-Series 7RU Housing installation guide

Diamond Multimedia
Diamond Multimedia ATI Radeon 1550 DIAMOND Specification sheet

Renesas
Renesas RA6 Series user manual

Avalue Technology
Avalue Technology ARC-21W34 Quick reference guide

Rosewill
Rosewill RC603 user manual

ekwb
ekwb EK-FC980 GTX Strix INSTALLATION AND MOUNTING MANUAL

Electrolux
Electrolux OVC3000 Service manual