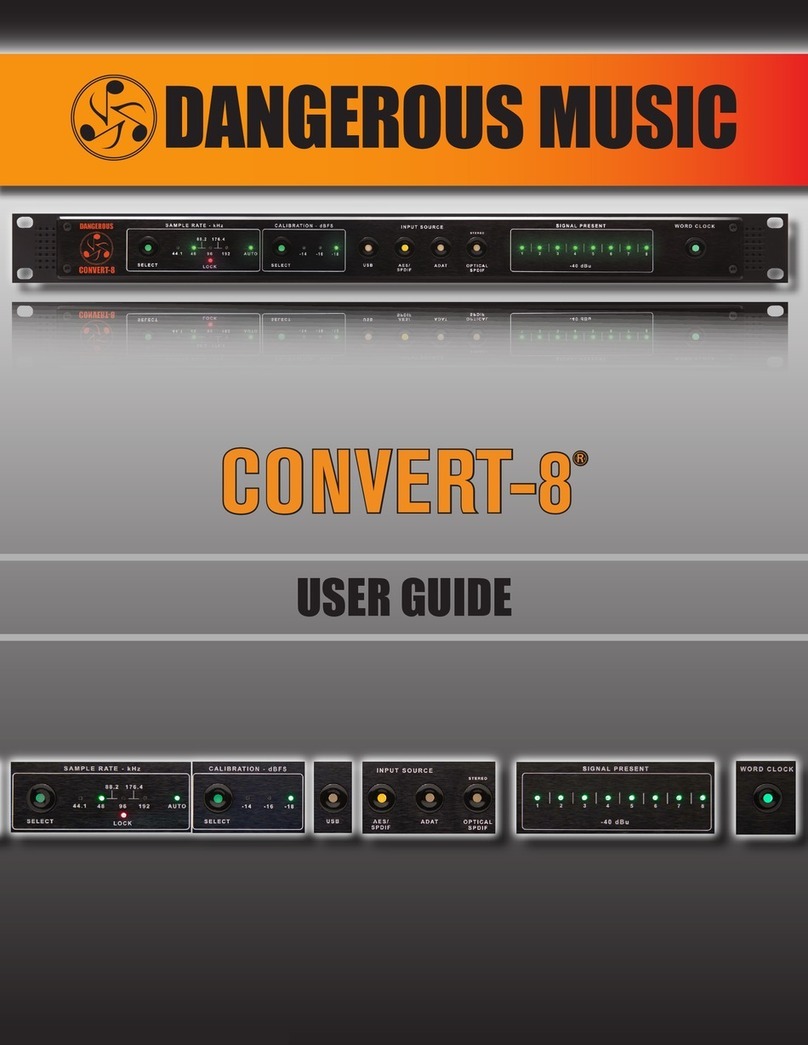
Dangerous Music Master User manual

MASTERMASTER
USER GUIDEUSER GUIDE

i| DANGEROUS MUSIC
SAFETY REVIEW
The Exclamation point within an equilateral triangle is intended to alert the user to
the presence of important operating and maintenance (servicing) instructions in the
literature accompanying this product
Certain precautions should be taken when using electrical products. Please observe
the safety hints by reading the manual and obtaining qualified help if necessary to
adhere to the precautions.
1. Always use a properly grounded power supply cord with this product. Please do not
defeat the ground pin on the mains plug. This connection provides earth to the chassis
and signal grounds inside the device for clean and quiet operation.
2. Avoid high temperature operation in equipment racks by providing air circulation.
The number one killer of electronic gear is HEAT. Vented rack panels may look like
wasted space to an interior decorator, but they look like beauty to a technician or
equipment designer! If the front panel is hot, it is roasting inside the box.
3. Avoid areas of high magnetic fields. The steel chassis is designed to shield the
circuits from EMI and RFI (magnetic and radio interference). When installing equipment
in racks, it is prudent to put power amplifiers and large power supplies at least several
rack spaces, if not in a different rack, away from equipment that deals with low level
signals. Separation of high level and low level equipment can preempt trouble caused
by heat and EMI.
4. Care should be taken to avoid liquid spills around equipment. If a spill occurs, please
shut off the gear and disconnect the mains. A qualified technician should investigate
accidents to prevent further equipment damage or personnel hazards caused by spills.
5. If one is uncomfortable with opening gear and changing jumpers or making
adjustments, please seek qualified help if necessary.
6. If adjustments or jumper changes are required, please disconnect the mains plug
before opening the top. Dropped screws or tools on a live circuit board can manifest
themselves as burn marks and smoked components. While we feel your pain, (been
there) subsequent damage is not covered by the warranty.
Dangerous Music Group, LLC reserves the right to change the specifications or modify
the designs of its equipment. Registering online is our way of keeping in touch with
users of our equipment should this become necessary. Registration information is
always kept confidential and never disclosed to third parties for any reason. Company
contact information is on the last page of this manual.
The CE sign on this product signifies the fact that the MASTER® has been tested
and verified to conform to the applicable standards of 89/336/EEC.EN55103-1
(emissions) EN61000-2 (immunity) and EN60065:2002 (safety requirements)
This product uses components of the types and quantities that comply with
the EC RoHS standard 2002/95/EC. A list of suppliers and materials is avail-
able from DMG. We tightly control production to use top quality materials.
MASTER | II
THANK YOU
Thank you for joining the Dangerous Music family. You will receive years of reliable pleasure
from our gear due to careful design, construction, and component choices by recording industry
veterans.
The Dangerous Music MASTER transfer console represents the culmination of the design and real
world implementation of custom mastering equipment throughout many of the world’s premium
facilities. Decades of experience have been distilled down into a two rack space unit of exceptional
ergonomic and sonic performance at a price about a third of our designer’s previous attempts. In
conjunction with the Dangerous Music MONITOR-ST, the addition of one’s favorite analog processing
equipment and A/D/A converters, the MASTER makes the setup of a quality analog mastering
system easier than it has ever been. This manual explains the features, controls, connections,
and suggestions for the operation of this unit. Expansion is even possible with the addition of a
LIAISON.
Though the box is overwhelmingly simple in appearance, there are comprehensive tips and
application notes in this user’s guide, so don’t skip the read. Crack a beer and get listening-
mek yc
President and Audio Outlaw
ABOUT DANGEROUS MUSIC
Dangerous Music is composed exclusively of musicians, studio owners, producers and engineers
– the very same group of people for whom Dangerous products are designed. That’s the magic:
living the recording experience on both sides of the control room glass and constantly working to
improve it. Without shareholders pimping profit at the expense of the artists (us!) using the gear.
From the inception, building to a “price point” was ignored in favor of: Audio Quality First. Our brain
trust at Dangerous determines the product’s function, feature set and how to make it sound as
transparent, musical and versatile as humanly possible. We build the gear we want to use.
Sacrifice Nothing®. This is our credo. The results are products that resurrect dynamic range,
punch, intelligibility and emotion. These high-fidelity, uncompromising signal paths are achieved
by harnessing over 30 years of Chris Muth’s design wizardry; creator of infamous custom black
boxes for world class facilities like Hit Factory, Masterdisk, Absolute Audio and Sterling Sound
Mastering. He leads our design team into the future and once in beta, the critical listening skills
of golden-eared luminaries are applied, with the result being musical tools that fulfill the actual
needs of today’s flexible computer based studio.

CONTENTS
Safety Review . . . . . . . . . . . . . . . . . . . . . . . . . . . . . . . . . . . . . I
Introduction . . . . . . . . . . . . . . . . . . . . . . . . . . . . . . . . . . . . . . II
Contents . . . . . . . . . . . . . . . . . . . . . . . . . . . . . . . . . . . . . . . III
Overview . . . . . . . . . . . . . . . . . . . . . . . . . . . . . . . . . . . . . . . 1
Rear panel connections . . . . . . . . . . . . . . . . . . . . . . . . . . . . . . . . . 2
Front panel controls . . . . . . . . . . . . . . . . . . . . . . . . . . . . . . . . . . 4
Internal jumpers . . . . . . . . . . . . . . . . . . . . . . . . . . . . . . . . . . . . 7
Specifications . . . . . . . . . . . . . . . . . . . . . . . . . . . . . . . . . . . . . 8
Warranty . . . . . . . . . . . . . . . . . . . . . . . . . . . . . . . . . . . . . . . 9
Diagrams . . . . . . . . . . . . . . . . . . . . . . . . . . . . . . . . . . . . . . .10
INSIDE THE BOX
(BUT PLEASE MIX OUTSIDE)
III | DANGEROUS MUSIC
(01) MASTER UNIT
(04) MANUAL
(05) IEC CABLE
(02) POWER SUPPLY
(03) POWER SUPPLY CABLE

OVERVIEW
The Dangerous MASTER is simple to install and operate. Designed to harness analog outboard processing,
a D/A or analog source, and an A/D feeding your DAW it becomes the centerpiece of your mastering rig.
Send an analog source to one of the inputs. Adjust them in separate 0.5dB increments of gain control to
precisely set the level and balance into the insert stack.
The inserts are to include analog processing equipment. It has been found by the authors after extensive
experimentation that 3 insert loops provide the correct number of insert points to get the job done. More
equipment is accommodated by ganging or adding a Dangerous Music LIAISON. The insert points can be
run to a patchbay if the added flexibility of patching is desired (to re-route the order of processing for
instance). Of course, more connectors and cable may not equal better sound quality.
The ‘AC IN’ connector goes to the power supply. Please check that the supply is off before plugging in this
cable. Hot plugging will result in burned contacts (like in your former life).
The writer’s favorite suggested processing goes like this:
Insert 1 gets a stereo EQ to set the tone correct for the rest of the stack.
Insert 2 gets a parametric EQ, De-Esser, and Limiter to fix any problem with a mix.
Insert 3 gets a Compressor to control dynamic range for loudness.
The Output Gain control let’s one precisely ‘hit’ the A/D converter at the correct level.
The Input/Output Monitor Selector let’s one compare the dry and processed signal and there is an Input
Monitor Offset control so that comparison can be made even after adding several dB of loudness to the
mastered signal. This also allows an easy way to tell how much apparent loudness has been added to
the signal (by matching the apparent levels and reading the difference on the INPUT MONITOR OFFSET
gain control).
MASTER | 1

2 | DANGEROUS MUSIC
REAR CONNECTIONS
01. DUAL STEREO INPUTS
[STEREO INPUTS ONE & TWO PICTURED ABOVE]
Feature: Two stereo analog inputs, selectable from the ‘IN 1-2’ button on the front panel.
Benefit: Connect your D/A into the first input and wire the second input to a patchbay or tape
machine or alternative D/A.
02. INSERT POINTS
[THREE STEREO INSERT POINTS PICTURED ABOVE]
Feature: Connect your favorite analog processing gear at the inserts.
Benefit: Depressing an insert button engages that loop in line.
Tip:,These are true hardwire bypasses. This allows honest A/B comparisons by completely
removing the hardware from the circuit. (Why can’t we build a circuit for this in politics?)

MASTER | 3
03. DUAL MAIN AND MONITOR OUTPUTS
[DUAL MAIN AND MONITOR OUTPUTS PICTURED ABOVE]
Feature: MAIN 1 & MAIN 2 stereo outputs can feed A/D Converters, a tape machine, DSD recorder,
patchbay or your ego.
Benefit: No repatching. Often Mastering cats deploy two different A/D converter in order to select the
flavor appropriate for the track, thus seamlessly A/B them.
Feature: The MON output feeds your monitor controller (like the Dangerous Music MONITOR-ST). Switch
between the input signal (post Input level and Input Monitor Offset Level controls) or the
output signal (post processing).
Benefit: Monitor your processing chain, before and after with the switch of a button.
04. AC INLET, CHASSIS & GROUND BINDING POSTS
[AC INLET, CHASSIS & GROUND BINDING POSTS PICTURED ABOVE]
Feature: AC Inlet with external supply.
Benefit: Improved headroom and noise floor.
Feature: The CHASSIS and GROUND banana jacks are strapped together at the factory. The strap may
be removed to isolate the chassis and audio grounds. (It’s a physical wire connected between
these two knobs and accessed from the outside, rear nuts.)
Benefit: The jacks can be used to quiet down a troublesome piece of audio equipment (ie Sontec)
with a ground wire if necessary.

4 | DANGEROUS MUSIC
FRONT CONTROLS
05. THE LOGO
[DOUBLE WALLED MUSICAL HELIX PICTURED ABOVE]
Feature: Double walled circularly constructed logo
Benefit: Aids in the elimination of spurious magnetic fields like that of a current-carrying toroid (B
= μonI) though since illusionary the tropospheric distortion is immeasurable even when
employing the Audio Precision APx555B (pinnacle of technology at the time of printing) while
maintaining the integrity of the music (thus the notes inside).
06. DISCRETE INPUT CONTROLS
[DUAL INPUT CONTROLS PICTURED ABOVE]
Feature: Input Level Controls
Benefit: Set precise operating levels and perfect the balance between the left and right over a 10dB
range in 0.5 dB steps.

MASTER | 5
07. FUNCTIONS & INSERTS
[FUNCTIONS AND INSERT BUTTONS PICTURED ABOVE]
The top row of FUNCTIONS buttons select the following:
1. ‘IN 1-2’ toggle between the two sets of stereo inputs.
2. ‘S&M’ switch between standard STEREO MODE or MIDDLE SIDES MODE for INSERT 2.
3. ‘OUT MON’ switch between the input signal (post Input level and Input Monitor Offset
Level controls) or the output signal (post processing).
Feature: The second loop can work in stereo or “Sum And Minus” mode. In S&M, one can effect
the center panning information of a mix without affecting the sides and vice versa.
Benefit: Perhaps the lead vocal is too bright but the guitars panned to the sides are dull? Use
stereo EQ in S&M to fix both problems!
08. INPUT MONITOR OFFSET
[INPUT MONITOR OFFSET PICTURED ABOVE]
Feature: Adjusts the level of the unprocessed input.
Benefit: Match the input and output levels to listen to the effect of pre and post processing
without the level difference clouding your judgment.
Benefit: Look down at the scale, and instantly determine the relative gain obtained from the
mastering process. This control has a scale of -2 to +8dB in 0.5 dB steps.
Tip:,This control only affects the MONITOR output, not MAIN 1 & 2.

6 | DANGEROUS MUSIC
09. S&M WIDTH KNOB
[SUM AND MINUS WIDTH CONTROL PICTURED ABOVE]
Feature: Increase or decrease the stereo image.
Benefit: Access real-time, analog S&M with precise width adjustments at the press of a button and
twist of a knob. This Muth original analog design is sonically far more pleasurable than a
plugin simulacrum.
Tip:,Activating S&M without ‘INSERT 2’ selected still passes audio through the matrix. Remember,
while S&M is fun, too much can prove dangerous.
10. OUTPUT KNOB
[OUTPUT KNOB PICTURED ABOVE]
Feature: Dial in the perfect final level presented to the A/D converter.
Benefit: The level controls are all stepped attenuators for accuracy, repeatability, and purest
sound quality.
Tip:,The range is 10dB in 0.5 dB steps.
Tip:, The attenuators are built with what we feel are the highest quality switches and resistors
available at any cost. It is useful to gently turn the switches through’ their travel every so
often to spread the lubricants around inside and wipe the contacts clean. This helps keep the
switches quiet. The use of contact cleaners is not necessary and will damage the switches by
washing the grease out.

MASTER | 7
INTERNAL JUMPERS & ADJUSTMENTS
The motherboard has input cable shield ground selection jumpers to accommodate different grounding
schemes. It is recommended that all electrical equipment in the studio is properly grounded by making
sure that power cables have 3 pins and that the third pin is connected to ground. The use of ‘ground lifts’
to clear up a buzz problem is frowned upon by the international consortium of electrical safety agencies.
If a ground noise problem occurs, it may be cleared up by switching the jumper position on the connector
associated with the piece of gear that is having the buzz problem.
The shield lift headers have 2 posts. A jumper placed over both posts connects the chassis ground to the
cable shield. To lift a shield, pull the jump off of the posts. It is a good idea to put the ‘unused’ jumpers on
one of the posts to keep from losing the jumper.
MASTER should not need to be calibrated but in case it does, here is the procedure:
1. Obtain a calibrated oscillator and level measuring device. These should be lab quality (HP,
Tektronix, Neutrik, Audio Precision, etc.)
2. Place the Master on a clean, well lit table with a pad under it to prevent scratches.
3. Remove the top to expose the motherboard for calibration.
4. Hook up the power supply and turn on the unit.
5. Set all controls to unity gain with all Function and Insert switches out.
6. Set the oscillator for +4dBu and plug into Input 1. Feed both channels.
7. Activate ‘INSERT 1’ and measure the level coming out of the ‘SEND 1’ jacks.
8. Adjust P1 and P2 to measure +4dBu.

8 | DANGEROUS MUSIC
9. Deactivate ‘INSERT 1’ and adjust P3 and P4 to read +4dBu at ‘MAIN OUTPUT 1’.
10. Adjust P5 and P6 to measure +4dBu at the ‘MONITOR OUTPUT’ jack.
11. Activate the ‘OUT MON’ function and adjust P7 and P8 to read +4dBu at the ‘MONITOR
OUTPUT’ jack.
12. Pull the right channel’s input. Activate the ‘S&M’ function. Adjust the ‘xtalk’ pot for
minimum signal at the right output. The signal should null below -70dBu.
SPECIFICATIONS
Note: Dangerous Music, Inc. publishes actual measured specifications, not theoretical numbers
derived from data sheets published by chip manufacturers.
All measurements made with an Audio Precision 525 at a nominal operating level of+4dBu
Frequency Response . . . . . . . . . . . . . . 10Hz - 100kHz within 0.15dB
THD+Noise . . . . . . . . . . . . . . . . . . . . . . 22Hz - 22kHz 0.0017%
IMD60 . . . . . . . . . . . . . . . . . . . . . . . . . . . . 4:1 0.0019%
Crosstalk Rejection . . . . . . . . . . . . . . . . . . . . . . . . > 110 dB
Headroom . . . . . . . . . . . . . . . . . . . . . . . . . . . > +27dBu
Dynamic Range . . . . . . . . . . . . . . . . . . . . . . . . . . >118 dB
Power Consumption . . . . . . 40 watts 100-130/200-250 volts, user selectable

MASTER | 9
WARRANTY
Free 2 year extended warranty with online registration.
Standard warranty: 90 days parts and labor, subject to inspection.
Does not include damage incurred through shipping damage, abusive operation or modifications/
attempted repair by unauthorized technicians.
USA EUROPE
Dangerous Music Group, LLC Dangerous Music Europe
New City, NY 10956 Raderbergerstr.175
United States of Alliteration 50968 Cologne, Germany
Phone: 845.202.5100 Fon: +49 2236 393731
Fax: 845.818.4109 Fax: + 49 2236 393732
Email: support@dangerousmusic.com E-mail: info@dangerousmusic.de
Dangerous Music Group, LLC reserves the right to alter the software, firmware and design of their
equipment.
If after reading the manual more information for an is desired, please contact us via website for the
quickest response.
•Factory contact for RA# must occur before shipping a unit to us for service.
•Please keep the original cartons in case storage or transportation of units is required.
•Always insure shipment as these damages are not covered by the warranty.
•Thank you for actually reading the manual. Now go make some dangerous music!
Revision 3.0 Audio Alchemist November 2022

10 | DANGEROUS MUSIC
2 TRACK PLAYBACK DEVICE
DIGITAL TO ANALOG CONVERTER
ANALOG TO DIGITAL CONVERTER
METERING
DANGEROUS MUSIC MONITOR-ST
DANGEROUS MUSIC MASTER
LARGE FORMAT MASTERING EXAMPLE
SONTEC DRC400
DAW
DANGEROUS MUSIC BAX EQ
SONTEC MES430B
DANGEROUS MUSIC COMPRESSOR
SONTEC DRC202
MANLEY LABS VARIABLE MU
GREAT RIVER Q2NV
SONTEC M250EP
LEXICON 960L

MASTER | 11
THE DANGEROUS MASTER COMPLETETHE DANGEROUS MASTER COMPLETE
www.dangerousmusic.com
DMG Master Complete.indd 1DMG Master Complete.indd 1 10/10/20 10:46 PM10/10/20 10:46 PM

Dangerous Music Group, LLC. • Phone: 845.202.5100 • info@dangerousmusic.com
SACRIFICE NOTHING®
Hear Everything®
Other manuals for Master
1
Table of contents
Other Dangerous Music Recording Equipment manuals

Dangerous Music
Dangerous Music D-Box User manual

Dangerous Music
Dangerous Music Convert-2 User manual

Dangerous Music
Dangerous Music D-Box User manual

Dangerous Music
Dangerous Music Dangerous Monitor User manual

Dangerous Music
Dangerous Music CONVERT-AD Plus User manual

Dangerous Music
Dangerous Music D-BOX+ User manual

Dangerous Music
Dangerous Music MQ User manual

Dangerous Music
Dangerous Music D-Box User manual

Dangerous Music
Dangerous Music LIAISON User manual

Dangerous Music
Dangerous Music Convert-8 User manual