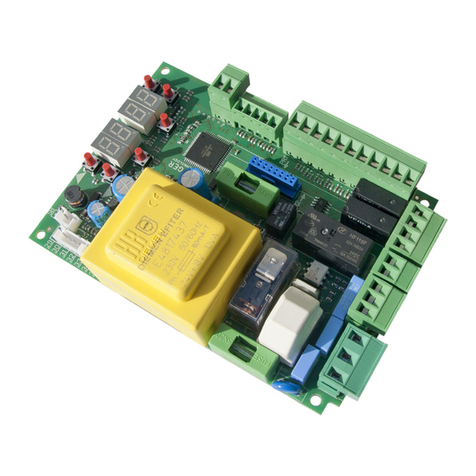
Daspi DS252 A+R User manual

DS252 A+R
1
CUADRO DE MANIOBRA PARA PERSIANAS
de 100 a 250V AC 300-900 MHz
Cuadro de control monofásico de 100 a 250V AC para persianas
enrollables, con receptor multimarca Rx Multi integrado para
frecuencia 300-900 MHz. Entradas de pulsador configurables como
“hombre presente”, orden directa o pulsador secuencial. Con cierre
automático disponible y entrada de fotocélula y lámpara. Con
botonera exterior (opcional)

DS252 A+R
2
CONEXIONES

DS252 A+R
3
NOTA:
-Alimentación de accesorios (bornes 12V DC and COMUN):
conectar para alimentar con corriente continua 12V a fotocélula.
-Pulsador Abrir/Cerrar: conectar 12V y Abrir/Cerrar, según se desee.
-Dispositivos de seguridad: conectar la señal de retorno del
dispositivo a la placa entre el borne de COMÚN y IN.
-Pulsador paso a paso: conectar entre 12V y pulsador.
-Lampara: para conectar una lampara debe conectarse en los
bornes N-LAMP
CONFIGURACIÓN DIP
1 FC / HOMBRE PRESENTE
ON Funcionamiento normal, finales de carrera en el
motor. No están cableados a la placa.
OFF Finales de carrera (en bornes Común, Apertura
y Cierre).
2 HOMBRE PRESENTE EN APERTURA (DIP 1 ON)
ON Para realizar la maniobra de apertura es
necesario mantener pulsado el emisor o pulsador
PROG. Si no se mantiene, la maniobra se detiene.
OFFOrden directa durante laapertura.
3 HOMBRE PRESENTE EN CIERRE (DIP1 ON)
ON Para realizar la maniobra de cierre es necesario
mantener pulsado el emisor o el pulsador PROG. Si
no se mantiene, la maniobra se detiene.

DS252 A+R
4
OFF Orden directa durante el cierre.
4 FOTOCÉLULA
ON Inhabilita la fotocélula (No es necesario
puentear la entrada de Seguridad). Con esta
configuración el cierre automático no está
disponible en la programación.
OFF Habilita la fotocélula para su conexión.
Mediante programación se puede configurar el
modo automático.
ATENCIÓN: EN CASO DE QUE SE CORTE LA CONEXIÓN ELÉCTRICA, AL
RESTAURARLA, LA UNIDAD DE CONTROL DEBE HACER LA MANIOBRA
COMPLETA PARA EL CORRECTO FUNCIONAMIENTO
MENÚ DE PROGRAMACIÓN
BOTÓN WIFI BOTÓN
CCCCC PROGRAMACIÓN

DS252 A+R
5
OPCIÓN 1 - MODO PROGRAMACIÓN TIEMPO MANIOBRAS
Pulse LEARN hasta que escuchar un pitidos largo que
indican que está en modo programación de tiempos de
maniobra.
OPCIÓN 2
OPCIÓN 2
PASO A PASO
Pulse LEARN hasta que
escuche 2 pitidos, al soltar el
botón, se cambiará
automáticamente y la
puerta funcionara en modo
paso a paso.
Un pitido corto indica la
selección paso a paso.
INVERSIÓN EN EL CIERRE
Pulse LEARN hasta que
escuche 2 pitidos, al soltar
cambiara la configuración.
En bajada si pulsa, invierte
la maniobra sin parar.
Un pitido largo indica la
selección inversión en el
cierre
OPCIÓN 3 - BORRADO DE MEMORIA
Pulse LEARN hasta que escuche 3 pitidos que indican que
está en modo borrado de todos los canales y de mandos.
Se borrará al soltar el pulsador.
*Nota: una vez borrada la memoria hay que repetir la
opción 1 OBLIGATORIAMENTE para el correcto
funcionamiento.
MEMORIZACIÓN MANDOS

DS252 A+R
6
SELECCIONAR LA COMBINACION CORRESPONDIENTE PARA LA MARCA
DESEADA. VER TABLA. (esto solo en caso de tener receptor multimarca. Si el
receptor es open code esta deshabilitada la opción tabla)
**EL BOTÓN ROJO ESTÁ UBICADO EN LA TARJETA RECEPTORA (INSTALADA PERPENDICULAR A LA PLACA ARRIBA A LA
DERECHA), EL BOTON HABILITADO ES EL DE ABAJO O IZQUIERDA.
PROGRAMACIÓN DE TIEMPOS DE MANIOBRA
Antes de iniciar la programación, comprobar que los finales de
carrera están bien regulados (en caso de que se instalen). La
puerta debe estar cerrada.
Las ordenes se realizan mediante pulsación de LEARN
1. Seleccionar la opción 1 del MENÚ: Pulsar LEARN hasta que
escuche 1 pitido (se ha activado el modo programación de
tiempos de maniobra).la puerta comenzará la maniobra de
apertura. Si se han seleccionado los finales de carrera, parará
por el final de carrera de apertura y usted dará la orden al final
de la maniobra (pulse LEARN)
2. Una vez finalizada la maniobra de apertura, el cuadro
espera una orden para comenzar la maniobra de cierre. Si se
da la orden dentro de un intervalo de 5 segundos, se activa el
modo manual; si se activa pasados esos 5 segundos, se
configura el modo de cierre automático y el tiempo
transcurrido desde el final de la maniobra de apertura hasta
que se inicia la maniobra de cierre es el tiempo de pausa
establecido.
*En el caso de que la fotocélula esté DESHABILITADA (DIP 4
ON): No funciona la programación por cierre automático,
solo manual (por motivos de seguridad).

DS252 A+R
7
*En el caso de que la fotocélula esté HABILITADA, pero el
usuario no la instale: La placa se bloquea y no permite
realizar ninguna maniobra de cierre, indicando que hay un
error en la configuración.
3. La puerta se detendrá si los finales de carrera están
instalados, por contacto del final de carrera de cierre.
Escuchará un pitido para indicar el fin de la maniobra de cierre
y la salida de la programación de tiempos de maniobra.
Repetir el procedimiento si se desea modificar la
programación.
PROGRAMACION DE UN DISPOSITIVO
(disponible solo si su dispositivo tiene wifi)
1- Descargue la APP “DASPI” desde:
2- Crear nueva cuenta

DS252 A+R
8
3- Añadir dispositivo
4-Seleccionar tipo de dispositivo a añadir, en este caso “SHUTTER MOTOR DASPI”

DS252 A+R
9
5-Primero comprobar que el dispositivo esta conectado a la corriente eléctrica, a
continuación, pulsar “la luz de confirmación en el flash”
6- Conectar el móvil al wifi con el que vaya a trabajar el receptor.
7- Introducir en la APP la red wifi y la contraseña para confirmarle al receptor
dónde queremos que se conecte. Pulsar confirmar.
8- Mantener pulsado en el motor el botón “CTRL” situado abajo a la derecha,
durante unos segundos hasta que el led rojo parpadee.

DS252 A+R
10
9- El receptor se agregó correctamente. Pulse “Finalizado”
10- Una vez agregado podremos controlar las maniobras desde el dispositivo móvil.

DS252 A+R
11

DS252 A+R
12

DS252 A+R
13
ROLLER SHUTTERS CONTROL BOARD100-250V AC
433MHZ
Control board for roller shutters from 100-250V AC, with multiband and
multifrequency receiver RX-Multi integrated (433 MHz frequency).
Up/down input switches (configurable as dead man, direct order or
sequential switch). Automatic closure and photobeam signal input
available and lamp. With external button panel (optional)

DS252 A+R
14
CONNECTIONS

DS252 A+R
15
NOTE:
The lamp work by 1 minute.
-Power supply accessories (terminals 12V DC and COMMON): connect to
feed with direc tcurrent 12Vtophotocell.
- Open / Close button: connect12V and Open / Close, as desired.
-Safety devices: connect the signal of return of the device to the board
betweenthe terminal of COMMON and IN.
-Lamp: to connect a lamp it must be connected to the L-LAMP terminals
DIP SET UP
1 LIMIT SWITCHES /DEAD MAN
ON work normal, the switch limits are in the motor.
OFF Limit switches (at Common, Opening and Closing
terminals).
2 DEAD MAN IN OPENING MANEUVER (DIP 1 ON)
ON To start opening maneuver, is necessary to hold pressed
the transmitter’s button or the PROG switch. If the button is
not held, maneuver will stop.
OFF Opening is set as direct order operation.
3 DEAD MAN IN CLOSING MANEUVER (DIP1 ON)
ON To start the closing maneuver, hold pressed the
transmitter’s button or the PROG button. If the button is not
held, maneuver will stop.
OFF Closing is set as direct order operation.
4 PHOTOBEAM
ON Photocell is disabled (It is not necessary to
bridge the security input). Automatic closure is not available
with this position.

DS252 A+R
16
OFF Photobeam is enabled. This configuration allows the
programming of optional automatic closure.
ATTENTION: IN CASE THE ELECTRICAL CONNECTION IS CUT, WHEN RESTORING IT,
THE CONTROL UNIT MUST DO THE COMPLETE MANEUVER FOR CORRECT
OPERATION
PROGRAMMATION
WIFI BUTTON PROGRAM BUTTON
OPTION 1 –MANEUVERS TIME PROGRAMMING
Press LEARN button until 1 beeps sound that means it is on
maneuvers time programming.
OPTION 2 (DIP 1 ON)
OPTION 2 (DIP 1 OFF)

DS252 A+R
17
STEP BY STEP
Press LEARN until you hear 2
beeps, when you release the
button, it will switch
automatically, and the door will
work in step by step.
A short beep indicates step-by-
step selection.
INVERSION TO CLOSURE
Press LEARN until you hear 2 beeps,
releasing it will change the setting.
In descent, if you press, it reverses
the maneuver without stopping.
A long beep indicates reversal
selection on closing
OPTION 3 –MEMORY ERASING
Press LEARN button until it beeps 4 times. This indicates the erasing
mode is activated. When releasing the button all channels and
remotes will be erased.
*Note: once the memory has been deleted, it is MANDATORY to
repeat option 1 for the correct functioning of the control board.
REMOTE PROGRAMMING
SELECT THE CORRESPONDING COMBINATION FOR THE DESIRED BRAND. SEE
TABLE
** THE RED BUTTON IS LOCATED ON THE RECEIVING BOARD (INSTALLED
PERPENDICULAR TO THE BOARD), LIKE THE LED.
MANEUVERS TIME PROGRAMMING
Before programming, check the correct instalation of the limit switches (in case
they are installed). The door must be closed.
The orders are given by pressing LEARN button or an already programmed
remote.
1. Select option 1 from the MENU: Press LEARN until you hear 1 beep (the
maneuver time programming mode has been activated).

DS252 A+R
18
2. Press LEARN, the door will begin the opening maneuver. If the limit switches
have been selected, it will stop at the opening limit switch and you will give
the command at the end of the maneuver (press LEARN)
3.Once the opening maneuver finishes, control board waits for an order to
start closing maneuver. If activated within 5 seconds, manual mode will be
activated; if activated after 5 seconds, automatic closing mode will be set
up and the time elapsed from the end of opening to the start of the closing
maneuver will be programmed as stand-by time.
*In case photobeam is DISABLED (DIP 4 ON): Automatic closure is not
available at programming maneuver option from the menu (due to
security reasons).
*In case photobeam is ENABLED (DIP 4 ON) but not installed by the user:
The control board will block itself and no closure maneuver will be allowed,
showing to the user there is a mistake and its programming.
4.The door will only stop by pressing the limit switches when these are installed.
Then, 1 beep will indicate the end of the closing maneuver and the exit from
the timing programming.
Repeat the procedure if you need to modify the programming.
Attention: O/S/C button activates function OPEN/STOP/CLOSE.

DS252 A+R
19
PROGRAMING A DEVICE
(Only if you device have Wi-Fi)
1- Download the “DASPI” App on:
2- Create an account
3- Press on “Add Device”

DS252 A+R
20
3-Press on “ADD DEVICE”
4- Choose the kind of device to be added. In this case: “SLIDING GATE DASPI”
5- Check the device is connected to the power and them press on “Confirm indicator
rapidly blink”
Table of contents
Languages:
Other Daspi Control Unit manuals
Popular Control Unit manuals by other brands

aquabrass
aquabrass TOTEM 3105 installation guide

ELCOS
ELCOS CAM-335 User instruction manual

HB-THERM
HB-THERM Thermo-6 manual

Chandler Systems
Chandler Systems DROP Home Protection Valve installation manual

Nortek
Nortek 2GIG-ZWM-500 installation instructions

Secutron
Secutron MODUL-R MR-2100 installation manual

HORNER APG
HORNER APG HE-XPBS Specifications & installation

MTT
MTT MS3765 user manual

Texecom
Texecom Premier Elite iProx installation manual

Danfoss
Danfoss Akva Lux II TDP-F Instructions for installation and use

Pfeiffer Vacuum
Pfeiffer Vacuum DualGauge TPG 262 operating instructions

Stid
Stid SPECTRE INDUSRTY INSTALLATION PROCEDURE