Dataforth PWRM10-01 User manual

PWRM10-01
PWRM20-01
IoT Energy Monitoring Modules
MA1069
Quick Start Guide

MA1069 PWRM10-01 & PWRM20-01 Quick Start Guide
ii
PWRM10-01 & PWRM20-01 Quick Start Guide
MA1069 Rev. A –May 2022
© 2022 Dataforth Corporation. All Rights Reserved.
ISO 9001:2015 Registered QMS
The information in this manual has been checked carefully and is believed to be accurate; however,
Dataforth assumes no responsibility for possible inaccuracies or omissions. Specifications are subject to
change without notice.
The information, tables, diagrams, and photographs contained herein are the property of Dataforth
Corporation. No part of this manual may be reproduced or distributed by any means, electronic,
mechanical, or otherwise, for any purpose other than the purchaser’s personal use, without the express
written consent of Dataforth Corporation.

MA1069 PWRM10-01 & PWRM20-01 Quick Start Guide
iii
Table of Contents
1.0 Features........................................................................................................................................ 1
2.0 Description and Documentation.................................................................................................... 2
3.0 Three Step Setup: Install →Connect →Acquire ......................................................................... 3
4.0 Installing the Module ..................................................................................................................... 4
4.1 Mounting on a DIN Rail .......................................................................................................... 4
4.2 Wiring to Phase Voltages and Phase Currents...................................................................... 5
4.3 Ethernet Connection............................................................................................................... 8
4.3.1 Connecting a Module to a Computer Over a Network..................................................... 8
4.3.2 Connecting a Module to a Computer Directly.................................................................. 8
4.3.3 Connecting a Module to a Tablet or Smartphone............................................................ 8
5.0 Connecting to the Module............................................................................................................. 9
5.1 Downloading the PWRM Discovery Tool ............................................................................... 9
5.2 Running the Discovery Tool ................................................................................................... 9
5.3 Selecting a Module and Connecting .................................................................................... 11
6.0 Acquiring Data from the Module ................................................................................................. 12
6.1 Enter Sensing Device Parameters with Sensor Configuration............................................. 12
6.2 Data Display in Tables ......................................................................................................... 12
6.3 Data Display in Charts.......................................................................................................... 13
6.4 Data Logging ........................................................................................................................ 14

MA1069 PWRM10-01 & PWRM20-01 Quick Start Guide
iv
About Dataforth Corporation
“Our passion at Dataforth Corporation is designing, manufacturing, marketing, and selling the best possible
signal conditioning, data acquisition, and data communication products. Our mission is to set new
standards of product quality, performance, and customer service.” Dataforth Corporation, with more than
thirty years of experience, is the worldwide leader in Instrument Class®Industrial Electronics –rugged, high
performance signal conditioning, data acquisition, and data communication products that play a vital role in
maintaining the integrity of industrial automation, data acquisition, and quality assurance systems. Our
products directly connect to most industrial sensors and protect valuable measurement and control signals
and equipment from the dangerous and degrading effects of noise, transient power surges, internal ground
loops, and other hazards present in industrial environments.
Dataforth spans the globe with more than 50 International Distributors and US Representative Companies.
Our customers benefit from a team of over 130 sales people highly trained in the application of precision
products for industrial markets. In addition, we have a team of application engineers in our Tucson, Arizona
factory ready to solve any in-depth application questions. Upon receipt of an RFQ or order, our Customer
Service Department provides fast one-day delivery information turnaround. We maintain an ample
inventory that allows small quantity orders to be shipped from stock.
Dataforth operates under an ISO9001:2015 quality management system.
Contacting Dataforth Corporation
Contact Method
Contact Information
E-Mail: Technical Support
Website:
www.dataforth.com
Phone:
+1-520-741-1404 and toll free US +1-800-444-7644
Fax:
+1-520-741-0762
Mail:
Dataforth Corporation
3331 E. Hemisphere Loop
Tucson, AZ 85706 USA

MA1069 PWRM10-01 & PWRM20-01 Quick Start Guide
Page 1 of 15
1.0 Features
The PWRM10-01 and PWRM20-01 Energy Monitoring Modules encompass more than 35 years of
design excellence in the process control industry. These DIN rail mounted, industrially rugged, IoT
modules provide a modern solution for a wide range of energy related applications.
Instrument Class Performance
•Wide Operating and Measurement Range of 85 - 265VAC for PWRM10-01
•Wide Operating and Measurement Range of 85 - 525VAC for PWRM20-01
•Connects to 3-Phase Systems, 3-Wire Wye, 4-Wire Wye, and Delta
•Connects to Single Phase Systems
•Self-Powered from any Phase –A, B, or C
•0.1% Phase Voltage Accuracy
•0.1% Phase Current Accuracy
•Industrial Operating Temperature Range -40°C to +85°C
•100ppm/°C Temperature Coefficient
•CE Compliant
Industry Leading Functionality
•Internet of Things (IoT) Connectivity
•Simple Interface through a Web Browser, Smart Phone, or Tablet
•Data Charting
•Data Logging
•Events (Alarm) Configurable on Power Quality Parameters
•Event Trips Post Notifications
•Field Upgradeable for Improvements and Feature Addition
•Security Features
•Compact DIN Rail Housing
Interface Options
•Web UI Hosted on the Module
•HTTP API

MA1069 PWRM10-01 & PWRM20-01 Quick Start Guide
Page 2 of 16
2.0 Description and Documentation
Energy Monitoring Modules PWRM10-01 and PWRM20-01 are IoT, universal, high accuracy,
compact, self-powered, electrical energy measurement devices that interface to three-phase and
single-phase systems. The modules are specifically designed for heavy-duty industrial and
commercial installations and retrofit applications, providing a wide range of highly accurate power
and energy measurements over an operating temperature range of -40°C to +85°C.
The DIN rail mounted enclosures have pluggable terminal blocks for connecting to phase voltages
and phase currents which simplifies setup and maintenance. Both modules have a small form factor
which occupies less space in control cabinets than other measurement solutions. The PWRM10-01
module interfaces to phase voltages of 85 –265VAC, 50/60Hz and is self-powered from any of the
three phases. For higher voltage systems, the PWRM20-01 module interfaces to phase voltages of
85 –525VAC, 50/60Hz and is self-powered from any of the three phases. Both modules can interface
to higher phase voltages with the use of voltage transformers and scaling configured in the module.
Power consumption is low and does not affect measured power and energy.
Phase current inputs have an industry standard range of 0.333VAC full scale. The modules are
configurable to use an external shunt, current transformer, or Rogowski Coil to measure phase
currents directly or non-contact.
The PWRM10-01 and PWRM20-01 modules measure and report a wide range of electrical energy
parameters which include, but are not limited to:
•RMS Voltages and Currents
•Phase Angles
•Line Periods
•Instantaneous Total Active Power
•Instantaneous Total Apparent Power
•Fundamental Active Power
•Power Factors
•Total Active Energy
•Fundamental Active Energy
•Fundamental Reactive Energy
•Reactive Energy
•Harmonics
•Power Quality –Configurable Events Monitor and Post Notifications for:
▪Over-Voltage
▪Over-Current
▪Sag
Real-time data from the module is accessed via an Ethernet port using the HTTP API or a standard
web browser on a host computer, smart phone, or tablet. Data logging is user configurable and once
parameters and ranges are selected, the data is automatically downloaded and stored.
With the ease of use and many features of the PWRM10-01 and PWRM20-01 modules, measuring
power quality, monitoring energy consumption, determining machine health, and other powerful data
analyses become simple operations.
PWRM module literature and software is available for download from the
PWRM Software & User Manual Download Center. This includes, but is not limited to:
MA1069 PWRM10-01 & PWRM20-01 Quick Start Guide
MA1068 PWRM10-01 & PWRM20-01 Hardware User Manual
MA1067 PWRM10-01 & PWRM20-01 HTTP API User Manual

MA1069 PWRM10-01 & PWRM20-01 Quick Start Guide
Page 3 of 15
3.0 Three Step Setup: Install →Connect →Acquire
Three simple steps are all that is required to start monitoring energy with the PWRM10-01 or
PWRM20-01 modules:
STEP 1 Installing the Module
oUnpack the PWRM10-01 or PWRM20-01 module and mount it on a DIN rail
oWire the phase voltages and phase currents to be monitored to the terminal blocks
*The modules are powered by the phase voltages –separate power is not needed
oUse a standard Ethernet cable for direct or network connection to a computer, tablet,
or smartphone
ATTENTION
Read, understand, and follow all instructions in this manual and MA1068 PWRM10 & PWRM20-01
Hardware User Manual including all warnings, cautions, and precautions before installing and using
the product.
CAUTION –RISK OF ELECTRICAL SHOCK
When installing and operating the PWRM10-01 and PWRM20-01 modules, there is a potential shock
hazard from dangerous high voltage. Ensure systems are de-energized before installing the product
or removing the terminal blocks.
STEP 2 Connecting Communications to the Module
oDownload the PWRM Discovery Tool from the Dataforth website
PWRM Software & User Manual Download Center
oRun the tool to identify all PWRMxx-xx modules connected direct or on a local
network
oDouble-click on a module to connect to it using a standard browser and the Web
Interface
STEP 3 Acquiring Data from the Module
oSensor Configuration in the Web Interface sets up the module to properly read
devices used for measuring phase currents and phase voltages
oData Display in the Web Interface displays real time data in tables
oData Charts in the Web Interface graphically display real time data
oLogger in the Web Interface provides data logging
Sections 4.0, 5.0, and 6.0 respectively detail these steps.

MA1069 PWRM10-01 & PWRM20-01 Quick Start Guide
Page 4 of 16
4.0 Installing the Module
Each PWRM10-01 and PWRM20-01 module is shipped in electro-static discharge (ESD) protective
packaging. Use appropriate ESD protection measures while unpacking. If physical damage is noted,
file a claim with the shipping carrier and contact the factory.
4.1 Mounting on a DIN Rail
ATTENTION
Read, understand, and follow all instructions in this manual and MA1068 PWRM10 & PWRM20-01
Hardware User Manual including all warnings, cautions, and precautions before installing and using
the product.
CAUTION –RISK OF ELECTRICAL SHOCK
When installing and operating the PWRM10-01 and PWRM20-01 modules, there is a potential shock
hazard from dangerous high voltage. Ensure systems are de-energized before installing the product
or removing the terminal blocks.
The PWRM10-01 and PWRM20-01 modules mount on 35mm DIN rails that are elevated or flush on
panels. They require no tools or hardware for insertion into a system and only a simple flat blade
screwdriver for removal.
To install a module:
1. Orient the module with the metal latch down and the Ethernet jack away from the DIN rail
2. Align the module DIN rail capture with the top edge of the rail
3. Slide the module down until the module engages the rail
4. Rotate the module and snap in place
Figure 1: PWRM10-01 Installation and Removal from a DIN Rail

MA1069 PWRM10-01 & PWRM20-01 Quick Start Guide
Page 5 of 15
Figure 2: PWRM20-01 Installation and Removal from a DIN Rail
To remove a module:
5. Insert a flat blade screwdriver into the slot in the metal clip
6. Lift the screwdriver to pull back the clip and release the module from the rail
4.2 Wiring to Phase Voltages and Phase Currents
The PWRM10-01 and PWRM20-01 modules have pluggable terminal blocks to connect to phase
voltages and phase currents. This allows modules to be easily added to or removed from a system.
The modules are powered by the phase voltages and an external power supply is not required.
DANGER –HAZARDOUS VOLTAGES
These wiring instructions are for use by qualified personnel only.
Only licensed electricians or qualified personnel should install and maintain the modules and wiring.
REFER TO MA1068 PWRM10-01 & PWRM20-01 Hardware User Manual FOR DETAILS ON
WIRING TO PHASE VOLTAGE AND FOR SENSORS AND WIRING TO PHASE CURRENTS.
PWRM10-01 and PWRM20-01 modules interface to phase currents with burden resistors, current
transformers, or Rogowski Coils with 0.333VAC output at rated current. This low voltage interface is
on the module top terminal blocks.
PWRM10-01 and PWRM20-01 modules interface to phase voltages using the bottom terminal blocks.
WARNING!
Mains voltages of 85VAC to 525VAC can be lethal!

MA1069 PWRM10-01 & PWRM20-01 Quick Start Guide
Page 6 of 16
Figure 3: PWRM10-01 3D View
Figure 4: PWRM10-01 Wiring Diagram & Terminal Block Positions

MA1069 PWRM10-01 & PWRM20-01 Quick Start Guide
Page 7 of 15
Figure 5: PWRM20-01 3D View
Figure 6: PWRM20-01 Wiring Diagram & Terminal Block Positions

MA1069 PWRM10-01 & PWRM20-01 Quick Start Guide
Page 8 of 16
4.3 Ethernet Connection
The PWRM10-01 and PWRM20-01 modules use an Ethernet connection for communication and
configuration.
Communication with the modules is accomplished over Ethernet using a no cost HTTP API. Use a
standard Ethernet cable to connect the module to a local network or for direct connection to a
computer. LEDs integrated in the Ethernet connector and surrounding the connector show
communications and module status. Refer to MA1068 PWRM10-01 & PWRM20-01 Hardware User
Manual for more details.
Figure 7: PWRM10-01 Front Panel Figure 8: PWRM20-01 Front Panel
4.3.1 Connecting a Module to a Computer Over a Network
Hardwire connect the PWRM10-01 or PWRM20-01 module to a network using a router or
switch. Connect a computer to the same network as the module using a hardwire connection
through a router, switch, or wireless connection to a Wi-Fi router or switch.
4.3.2 Connecting a Module to a Computer Directly
Connect a computer directly to a module using a hardwire connection or Wi-Fi bridge.
4.3.3 Connecting a Module to a Tablet or Smartphone
Hardwire connect the PWRM10-01 or PWRM20-01 module to a network that has a Wi-Fi router
or switch. Connect a tablet or smartphone to the same network as the module using the Wi-Fi
router or switch.

MA1069 PWRM10-01 & PWRM20-01 Quick Start Guide
Page 9 of 15
5.0 Connecting to the Module
Dataforth offers a no cost software tool which identifies all PWRM10-01 and PWRM20-01 modules
connected to a computer, tablet, or smartphone either directly or through a local network.
5.1 Downloading the PWRM Discovery Tool
The tool is available for download from the PWRM Software & User Manual Download Center
Two versions are available - one for 64-bit systems and one for 32-bit systems.
PWRM Discovery Tool 32-bit
PWRM Discovery Tool 64-bit
NOTE: The PWRM Discovery Tool currently only runs on a Windows computer with operating system
Win 7 or higher. Future versions will run on tablet and smartphone devices.
5.2 Running the Discovery Tool
It may be necessary to modify corporate or local firewall settings for the tool to run.
Figure 9: Windows Firewall Settings
Once the tool is running, press the Find Devices On Network button. A scan will execute, identify all
connected modules, and continually update connection status.
Figure 10: PWRM Discovery Tool Module Listing

MA1069 PWRM10-01 & PWRM20-01 Quick Start Guide
Page 10 of 16
Modules are factory configured as follows:
Static IP Address 192.168.128.100
Subnet Mask 255.255.255.0
Gateway 127.0.0.1
DNS Server 8.8.8.8
The Discovery Tool will find multiple modules connected to a network with the same static IP address.
For proper operation, assign each module a unique IP address or change the configuration to DHCP.
To change the settings, hover over a module Device Name in the list and right click to open the
configure network menu.
Figure 11: Change IP Parameters
Click Change IP Parameters, then enter the desired static IP address parameters or select DHCP to
allow a network controller to automatically assign an IP address.
Figure 12: Configure IP Parameters
To push network configuration changes to the module, press the OK button.
To apply the new network settings, power cycle the module or right click the module again and select
Reset Device. The module will be removed from the list and reappear when a connection is
established using the new parameters.

MA1069 PWRM10-01 & PWRM20-01 Quick Start Guide
Page 11 of 15
5.3 Selecting a Module and Connecting
The Web Interface to a module can be opened from within the Discovery Tool. Double-click the
Device Name, or hover over the Device Name, right click, then select Open in Browser.
Figure 13: Open Web Interface in a Browser
The Overview page will display after the connection is established.
Figure 14: Web Interface in a Browser

MA1069 PWRM10-01 & PWRM20-01 Quick Start Guide
Page 12 of 16
6.0 Acquiring Data from the Module
Selections on the left side of the panel give full access to module configuration and all features and
functions.
6.1 Enter Sensing Device Parameters with Sensor Configuration
Data will not be accurate until phase voltage and phase current sensors are configured.
First go to the Configuration | Sensor page, select devices used to measure phase currents and
phase voltages, and enter the device parameters.
Figure 15: Configuration | Sensor Page
Custom scaling parameters are available if required by an installation.
6.2 Data Display in Tables
Data is continuously collected from the module at the default poll rate of 1 second and posted to the
appropriate displays and charts.
The Data | Table page has a concise tabulation of the basic parameters measured.
Figure 16: Data | Table Selection

MA1069 PWRM10-01 & PWRM20-01 Quick Start Guide
Page 13 of 15
Figure 17: Data | Table
6.3 Data Display in Charts
The Data | Charts page provides a graphical display of user selected readings from the module.
Charts will autoscale.
Figure 18: Data | Chart Selection
Select the charted data and number of data points to be displayed from the Select Category and
History Capacity drop-down menus.
Figure 19: Charted Data Selection

MA1069 PWRM10-01 & PWRM20-01 Quick Start Guide
Page 14 of 16
Figure 20: Data | Chart Display
6.4Data Logging
The Data | Data Logger page is where logging is configured and operated.
Figure 21: Data | Data Logger Selection

MA1069 PWRM10-01 & PWRM20-01 Quick Start Guide
Page 15 of 15
Figure 22: Data | Data Logger Page
Configure data logging by entering Filename, Read Interval, and Download Interval.
Initiate data logging by clicking the Start Logging button. Data will be collected per the specified
parameters and stored locally in the module. When the download interval is reached the file will be
saved in the \Downloads folder in .CSV format on the host computer, tablet, or smartphone running
the application and a new data file will be opened. This process will repeat until the Stop Logger
button is pressed.
Data files will be downloaded upon completion or immediately by pressing the Download Now button.
The data filename is made up of the name specified and the date and time that the data was collected.
Figure 23: Logged Data File Format
The web browser may post a pop-up asking if downloading multiple files is to be allowed.
Logger status shows when data logging is active or stopped.
Figure 24: Data Logger Start and Stop Status
Status is also shown with green and grey in the left column so logging status is known when a
different page is selected such as Data Display or Data Charts.
Figure 25: Data Logger Status Sidebar Indicator

MA1069 PWRM10-01 & PWRM20-01 Quick Start Guide
Page 16 of 16
Standard Terms and Conditions of Sale Applying to Products Sold by Dataforth
Corporation
Full details on Terms and Conditions of Sale, including Warranty, are found on the Dataforth website at
Dataforth Terms and Conditions of Sale
Application Support
Dataforth provides timely, high-quality product support.
Contact Method
Contact Information
E-Mail: Technical Support
Website:
www.dataforth.com
Phone:
+1-520-741-1404 and toll free US +1-800-444-7644
Fax:
+1-520-741-0762
Mail:
Dataforth Corporation
3331 E. Hemisphere Loop
Tucson, AZ 85706 USA
Returns/Repair Policy
All warranty and repair requests should be directed to the Dataforth Customer Service Department.
Return Material Authorization (RMA) instructions are found on the Dataforth website and can be
accessed using this link: RMA Instructions and Form.
The information provided herein is believed to be reliable; however, DATAFORTH assumes no
responsibility for inaccuracies or omissions. DATAFORTH assumes no responsibility for the use of this
information, and all use of such information shall be entirely at the user's own risk. Application information
is intended as suggestions for possible use of the products and not as explicit performance in a specific
application. Prices and specifications are subject to change without notice. No patent rights or licenses to
any of the circuits described herein are implied or granted to any third party. DATAFORTH does not
authorize or warrant any DATAFORTH product for use in life support devices and/or systems.
PWRM10-01 & PWRM20 Quick Start Guide
MA1069 Rev. A –May 2022
© 2022 Dataforth Corporation. All Rights Reserved.
ISO 9001:2015 Registered QMS
This manual suits for next models
1
Table of contents
Other Dataforth Control Unit manuals
Popular Control Unit manuals by other brands
HL-Tech
HL-Tech BT-3005 user manual
TYROLIT Hydrostress
TYROLIT Hydrostress WSE2226P operating instructions
Fasel Elektronik
Fasel Elektronik FCU2000 Series operating manual
Festo
Festo VZQA-C-M22C-6-GG-V2V4E-2 Instructions & Operating
Thermasol
Thermasol TDS-3000 installation manual
Haldex
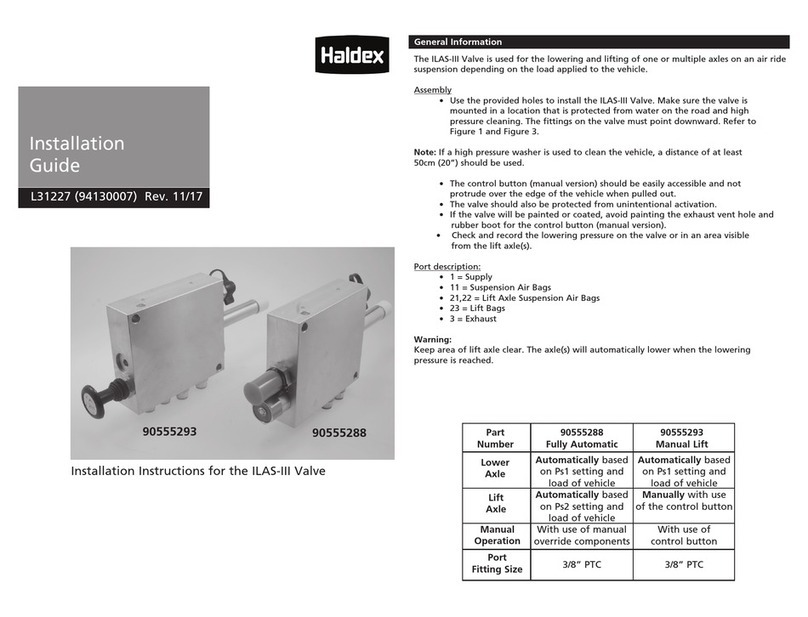
Haldex ILAS-III 90555293 installation guide
