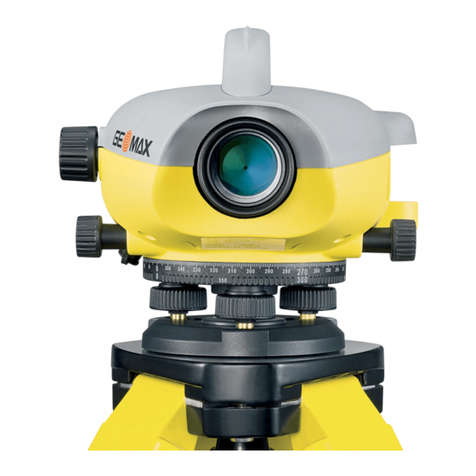
Datum DL32X User manual

32X OPTICAL LEVEL
MODEL NO.: DL32X
OPERATING
INSTRUCTIONS
TO PREVENT SERIOUS INJURY, READ
AND UNDERSTAND ALLWARNINGS
AND INSTRUCTIONS BEFORE USE.

2OPTICAL LEVEL
TABLE OF CONTENT
SPECIFICATIONS ........................................................................................................3
HAZARD SIGNAL WORD DEFINITIONS .................................................................3
GENERAL SAFETY RULES FOR OPERATION .........................................................4
COMPONENT IDENTIFICATION...............................................................................5
OPERATION INSTRUCTION ......................................................................................6
SET UP - MOUNTING ON TRIPOD ...........................................................................6
SET UP - ALIGN THE TOOL........................................................................................6
POINTING AND FOCUSING......................................................................................6
MEASUREMENT - HEIGHT ........................................................................................6
MEASUREMENT - DISTANCE....................................................................................6
MEASUREMENT - ANGLES .......................................................................................6
ACCURACY CHECK.....................................................................................................7
MAINTENANCE AND SERVICE.................................................................................7
WARRANTY INFORMATION .....................................................................................8

3OPERATING MANUAL
ABOUT YOUR OPTICAL LEVEL
Thank you for purchasing this DATUM OPTICAL LEVEL. Your measuring tool features 32x
magnication, a peep sight and a bubble level mirror for ease of use.
Please read and understand the content of this instruction manual before using this product.
Save this manual for future reference.
SPECIFICATIONS
MODEL DL32X
ACCURACY ±1mm at 1km double run levelling
LEVELLING ACCURACY ±3°
SETTING ACCURACY ±0.3”
COMPENSATOR Air-damping compensation system
COMPENSATOR WORKING RANGE ±15’
HORIZONTAL CIRCLE PROTECTOR 360°
MAGNIFICATION 32X
FIELD OF VIEW 1°20’
MINIMUM SIGHTING DISTANCE 40cm
STADIA MULTIPLICATION 100
EFFECTIVE APERTURE LENSE SIZE 36mm
TRIPOD THREAD 5/8”
IP RATING IP54
DATUM is constantly improving its products. All information in this manual is based on the latest product information available at the time of
printing. The specications outlined herein are subject to change without prior notice or obligation.
HAZARD SIGNAL WORD DEFINITIONS
!Indicates an imminently hazardous situation which, if not avoided, will result
in death or serious injury. Obey all safety messages that follow this symbol to
avoid possible injury or death.
DANGER Indicates an imminently hazardous situation which, if not avoided, will result
in death or serious injury.
WARNING Indicates a potentially hazardous situation which, if not avoided, could result
in death or serious injury.
CAUTION Indicates a potentially hazardous situation which, if not avoided, may result
in minor or moderate injury.
CAUTION Used without the safety alert symbol indicates a potentially hazardous
situation which, if not avoided, may result in property damage.
!
!
!

4OPTICAL LEVEL
GENERAL SAFETY RULES FOR OPERATION
CAUTION
Read all safety warnings, instructions, illustrations and specications
provided with this measuring tool. Failure to follow all instructions listed
below may result in property injury.
Save all warnings and instructions for future reference.
•Check the levelling and indication accuracy of the measuring tool each time before using
and after longer transport of the measuring tool.
•Avoid moisture and direct sun light.
•Do not subject the measuring tool to extreme temperatures or variations in temperature.
the accuracy of the measuring tool can be impaired by extreme temperatures or variation
in temperature.
•Store the measuring tool in upright position in the provided tool case when transporting.
Store the tool in secure location when not in use.
•Avoid any impact to or dropping of the measuring tool.
•Do not use or store the instrument in locations where the temperature may reach or
exceed 40°C.
•Do not disassemble the instrument or attempt to perform any internal servicing as this will
void your warranty. Not user serviceable parts included.

5OPERATING MANUAL
COMPONENT IDENTIFICATION
1. Bubble level mirror
2. Optical peep sight
3. Objective lense
4. Horizontal circle
5. Levelling screw
6. Bubble level
7. Adjusting screws for bubble
level
8. 5/8”Tripod thread (bottom
base)
9. Focusing knob
10. Horizontal drive screw
11. Field of view
12. Plumb bob
2
4
1
3
8
6
7
9
10
10
5 5
5
12
Stadia Lines
11

6OPTICAL LEVEL
OPERATION INSTRUCTION
SET UP - MOUNTING ON TRIPOD
•Set up your tripod as levelled and stable as possible.
•Securely place the measuring tool on the tripod via the 5/8”thread.
SET UP - ALIGN THE TOOL
•Align the measuring tool by adjusting the levelling screws
(5) so that the air bubble is positioned in the centre of the
bubble level as illustrated on the right.
•Bubble level mirror (1) is provided for ease of use.
POINTING AND FOCUSING
•Direct the measuring tool towards a white background or a white sheet of paper. Turn the
focusing knob (9) until the cross hairs appear clear and sharp.
•Point the measuring tool towards the sta through the peep sight (2). Continue to adjust
the focusing knob until the the graduation eld of the sta appears clear.
•Adjust the horizontal drive screws (10) until the vertical hair and the centre of the sta is
aligned.
•When the telescope is correctly focused, the cross hairs and the image of the sta must
remain aligned when moving your eye behind the eyepiece.
MEASUREMENT - HEIGHT
•Read o the height of the sta at the centre horizontal line of the
cross hair.
•Height measured in the gure: 0.9 m
MEASUREMENT - DISTANCE
•Centre the measuring tool above the point from which on the
distance is to be measured.
•Read o the height of the sta at the top and bottom stadia lines.
•Multiplied the dierence between top and bottom stadia line by 100,
it’s the distance from the unit to the sta.
•Distance measured in the gure: (0.932-0.87)x100 = 6.2 m
MEASUREMENT - ANGLES
•Point the measuring tool towards the rst point.
•Set the horizontal circle (4) to 0°.
•Direct the measuring tool towards the 2nd point.
•Read o the angle at the reference mark.

7OPERATING MANUAL
ACCURACY CHECK
CHECKING THE CIRCULAR BUBBLE LEVEL
•Adjust the levellings screws (5) so that the air bubble is centred.
•Rotate the measuring tool 180°. If the air bubble is no longer in the centre of the bubble
vial, the bubble level must be re-adjusted.
•Adjust the levelling screws until the air bubble stays at the centre when the tool is turned
to any directions.
CHECKING HORIZONTAL LINE OF SIGHT
•Set up the measuring tool on a
tripod halfway between two staves
approximately 30m apart and ensure the
tool is levelled.
•Read o height from sta A (ie. 1.924m).
Turn the measuring tool and read o
height from sta B (ie. 1.712m).
•Height= A-B= +0.212m showing B is 0.212
higher than A.
•Position the measuring tool 1m away from
sta A.
•Read o height from sta A (ie. 1.696m).
Since B is 0.212 higher than A. If reading
to B is1.484m ±3mm, the line of sight is
horizontal.
•If the readiing is beyond tolerance, cross
hairs must be re-adjusted.
MAINTENANCE AND SERVICE
•Do not attempt to open the device.
•Do not drop, knock or shake the optical level as this will aect precision.
•Keep the instrument clean at all times. Use a soft lint-free cloth for the body and lens tissue
for glass windows. Do not use abrasive cleaners or solvents.
•Don’t expose the laser level to high temperatures or humidity.
•Avoid shock, vibrations and extreme heat.

May 7, 2019 2:25 pm
WARRANTY INFORMATION
This warranty is provided by DATUM of 20 Thackray Road, Port Melbourne VIC 3207.
Phone: 1800 868 258.
Express Warranty
Subject to the exclusions set out below, we warrant that this product will be free from defects
in materials or workmanship for 3 years (90 days for accessories, batteries and chargers) from
the date of purchase.
The benets conferred by this warranty are in addition to all rights and remedies which you
may be entitled to under the Australian Consumer Law, and any other statutory rights you may
have under other applicable laws. This warranty does not exclude, restrict or modify any such
rights or remedies.
Warranty exclusions
This express warranty does not apply where a defect or other issue with the product is caused
by normal wear and tear, misuse or abuse of the product.
Consumer guarantees
Our goods come with guarantees that cannot be excluded under the Australian Consumer Law.
You are entitled to a replacement or refund for a major failure and for compensation for any
other reasonably foreseeable loss or damage.
You are also entitled to have the goods repaired or replaced if the goods fail to be of acceptable
quality and the failure does not amount to a major failure.
Warranty claims
To make a claim under this warranty, you must bring the product along with the proof of
purchase and any other documentary evidence which you think is relevant to the your place of
purchase where the claim will be handled on our behalf during the warranty period specied
above. Any cost incurred by you in bringing the product to the place of purchase will be borne
by you.
Calibration and repair service
Datum recommends to check instrument calibration at least once a year or on as needed basis.
Warranty does not cover calibration service. For calibration or repair, please visit your place of
purchase.
This manual suits for next models
1
Table of contents
Other Datum Laser Level manuals
Popular Laser Level manuals by other brands
LaserLiner
LaserLiner ClassicLiner Green 8P quick guide
LaserLiner
LaserLiner SmartCross-Laser manual
Johnson Level & Tool
Johnson Level & Tool 9105/40-0910 Assembly & operating manual
Metrica
Metrica BRAVO 61355 manual
EXTOL PREMIUM
EXTOL PREMIUM 8823312 Translation of the original user manual
Leica
Leica Lino P5 manual
