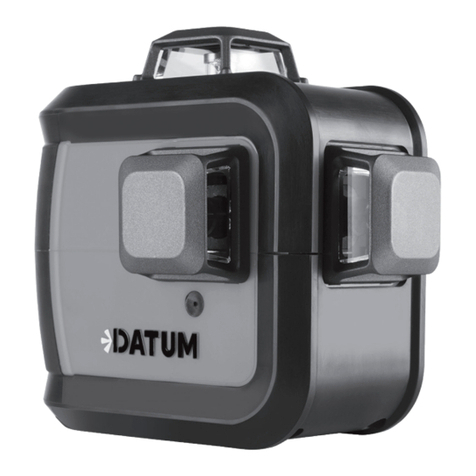
Datum DT1H1V2PR User manual

CROSSLINE LASER LEVEL
WITH PLUMB DOTS
MODEL NO.: DT1H1V2PR DT1H1V2PG
OPERATING
INSTRUCTIONS
TO PREVENT SERIOUS INJURY, READ
AND UNDERSTAND ALLWARNINGS
AND INSTRUCTIONS BEFORE USE.

2CROSSLINE LASER LEVEL
TABLE OF CONTENT
SPECIFICATIONS ........................................................................................................3
HAZARD SIGNAL WORD DEFINITIONS .................................................................3
GENERAL SAFETY RULES FOR OPERATION .........................................................4
COMPONENT IDENTIFICATION...............................................................................5
OPERATION INSTRUCTION ......................................................................................6
CALIBRATION CHECK................................................................................................7
MAINTENANCE AND SERVICE.................................................................................9
TROUBLESHOOTING .................................................................................................9
PRODUCT LABELS .....................................................................................................10
WARRANTY INFORMATION .....................................................................................12

3OPERATING MANUAL
ABOUT YOUR LASER LEVEL
Thank you for purchasing this DATUM CROSSLINE LASER LEVEL. Your laser level features extra
bright laser technology, horizontal/vertical crossline operations and a pendulum lock. It’s ideal
for carpentry, interior layout, tiling, plumbing and electrical layout from oor to ceiling.
Please read and understand the content of this instruction manual before using this product.
Save this manual for future reference.
SPECIFICATIONS
MODEL DT1H1V2PR DT1H1V2PG
BEAM COLOUR RED GREEN
LASER CLASS Class II Class II
LASER WAVELENGTH 635nm 515nm
ACCURACY ±2 mm at 10m ±2 mm at 10m
OPERATING RANGE (INDOOR) 15m 15m
OPERATING RANGE (WITH DETECTOR) 50m 50m
AUTO LEVELLING RANGE ±4° ±4°
BATTERY LIFE (CONTI. OPERATION) 10 Hours 7 Hours
POWER SUPPLY 4 x AA 1.5V batteries 4 x AA 1.5V batteries
LINE PATTERN 1H1V 1H1V
PLUMB DOTS Up and Down Up and Down
IP RATING IP54 IP54
TRIPOD THREADS 1/4" 1/4"
DETECTOR Optional (Part No. DT01REC sold seperately)
DATUM is constantly improving its products. All information in this manual is based on the latest product information available at the time of
printing. The specications outlined herein are subject to change without prior notice or obligation. The purchaser and/or user shall assume
liability for any modication and/or alterations of this equipment from original design and manufacture.
HAZARD SIGNAL WORD DEFINITIONS
!Indicates an imminently hazardous situation which, if not avoided, will result
in death or serious injury. Obey all safety messages that follow this symbol to
avoid possible injury or death.
DANGER Indicates an imminently hazardous situation which, if not avoided, will result
in death or serious injury.
WARNING Indicates a potentially hazardous situation which, if not avoided, could result
in death or serious injury.
CAUTION Indicates a potentially hazardous situation which, if not avoided, may result
in minor or moderate injury.
CAUTION Used without the safety alert symbol indicates a potentially hazardous
situation which, if not avoided, may result in property damage.
!
!
!

4CROSSLINE LASER LEVEL
GENERAL SAFETY RULES FOR OPERATION
WARNING
Read all safety warnings, instructions, illustrations and specications
provided with this laser level. Failure to follow all instructions listed below
may result in personal injury.
Save all warnings and instructions for future reference.
•Do not stare into beam regardless of distance.
•Do not use the laser intensive glasses as safety goggles, sunglasses or when driving.
•Do not point laser in the direction of other people or animals.
•Do not point laser in the direction of mirrors or other reective surfaces.
•Store in a secure location when not in use.
•This is a quality laser measuring device and is 100% factory adjusted within the stated
tolerance.
•Laser should not be used as a toy or by children.
•Do not view beam through optical instruments such as theodolites, binoculars, cameras or
magnifying lenses.
•Avoid using laser in darkened areas. Ensure sucient light levels to avoid damage to eyes.
•Set up cross line laser to ensure laser beam path is above or below eye level.
•Ensure cross line laser is securely set up to avoid accidental movement.
•Always ensure the laser beam is aimed at a sturdy work piece without reective surface.
Bright shiny reective sheet steel or the like is not suitable for laser use as the reective
surface could direct the beam back at the operator.
•Do not break up or throw the battery into re, please recycle the battery after use.
•Turn the laser o when it is not in use. Leaving the laser on increases the risk of staring into
the laser beam.
•Do not use or store the instrument in locations where the temperature may reach or
exceed 40°C.
•Do not disassemble the instrument or attempt to perform any internal servicing as this will
void your warranty. Not user serviceable parts included. Only approved and authorised
service technicians can carry out warranty repairs.
•Avoid direct eye exposure. Consult your laser safety ocer or IEC 60825.14:2011 Part 14 for
best operating practice.
CAUTION Class 2 laser product according to IEC 60825-1:2014.
Do not stare into the laser beam or direct it towards other people.
!
!

5OPERATING MANUAL
COMPONENT IDENTIFICATION
1. Power switch / pendulum lock
2. Control panel
3. Vertical laser output window
4. Up plumb dot output window
5. Horizontal laser output window
6. 1/4”Tripod thread
7. Down plumb dot output window
8. Battery compartment
9. Wall bracket
10. Magnets on b
11. Height adjustment knob
12. 1/4” thread
13. Down plumb dot window
14. 5/8”Tripod thread
15. 1/4”Tripod thread
2
5
1
3
4
6
7
8
9
11
14
10
13
15
12

6CROSSLINE LASER LEVEL
OPERATION INSTRUCTION
BATTERY PLACEMENT
•Your laser level requires 4 AA batteries. Use only new, high-quality battery for best results.
•Locate battery compartment at the bottom of the laser. Insert batteries according to the
symbols and polarity.
•When the battery voltage is low, the indicator light will start ashing in which the batteries
must be replaced.
•Once the voltage is below 3.9V, the unit will shut o automatically due to low battery.
ON/OFF
WARNING Always turn o all lasers and latch the pendulum in place before
transporting.
•Press and hold“LINE” button to switch on the laser.
•Alternatively, turn the laser on by sliding the Power Switch/Pendulum Switch to ON/
UNLOCK position. Pendulum is automatically released for self levelling.
•To turn the laser o, place it on a stable at surface. Slide the Power Switch/Pendulum
Switch to OFF/LOCK position. Pendulum is automatically locked when the switch is turned
to OFF position.
LASER LINES SELECTION
•Turn the switch to ON position. All lines appear when the laser is turned on.
•Press“LINE” button to select laser lines.
AUTOMATIC SELF-LEVELLING
•Pendulum lock (power switch to ON position) must be released for horizontal and vertical
levelling.
•Turn on the laser level. The pendulum automatically aligns a position within the range of
self-levelling range ±4°. Within this range, the laser level automatically correct its position.
•Laser beams start to blink when the device is out of self-alignment range of ±4°. In this
case, place the laser level on a at surface, adjust tripod or wall mount until blinking stops.
PULSE MODE
•Press to activate Pulse Mode so that the device can work with optional laser detector.
•Laser lights will pulse with high frequency, making the laser lines slightly darker.
•Pulse Mode LED Indicator light will be on when this is activated. Press the button again to
exit pulse mode.
WARNING
This is a high precision instrument - To avoid damage always transport
instrument and store with pendulum lock on (or power switch to OFF
position) and in its protective case.
!
!

7OPERATING MANUAL
CALIBRATION CHECK
It’s possible for you to check the calibration of the laser. Calibration by yourself is only
approximate and the accuracy of the calibration will depend on the care with which
you proceed.
TO CHECK THE LEVEL
Checking the horizontal pitch calibration of the laser requires 2 walls, which must be at least
5 metres apart. The best calibration results can be achieved if the laser is mounted on a tripod.
1. Mark point A1 on the wall.
2. Turn the device 180 ° and mark A2 on the opposite side of A1. You now have a horizontal
reference between point A1 and A2.
3. Position the device as near as possible to the wall at the same height of point A1.
4. Turn the device 180° and mark point A3. The dierence between point A2 and A3 is the
tolerance.
1.
1.
If the distance between A2 and A3 is more than 2mm/10m, the device is in need of calibration.
Contact authorised dealer or service agent.

8CROSSLINE LASER LEVEL
CHECKING THE VERTICAL LINE
1. Position the device about 5 m from a wall. Fix a plumb bob with a line of 2.5 m length on
the wall, making sure that the bob can swing freely.
2. Switch on the device and align the vertical laser to the plumb line. The precision is within
the specied tolerance if the deviation between the laser line and the plumb line is not
greater than ± 2mm.
CHECKING THE HORIZONTAL LINE
1. Position the device about 5m from a wall and switch on the cross laser.
Mark point B on the wall.
2. Turn the laser cross approx. 2.5 m to the right and mark point C.
3. Check whether the horizontal line from point C is level with point B to within ± 2 mm.

9OPERATING MANUAL
MAINTENANCE AND SERVICE
•Do not attempt to open the device. To ensure product SAFETY and RELIABILITY, repairs,
maintenance and adjustment should be performed by authorized service centres.
Contact your dealer for more details.
•Do not drop, knock or shake the laser level as this will aect precision.
•Remove batteries when the device is not in use.
•Keep the laser level clean at all times. Use a soft lint-free cloth for the body and lens tissue
for glass windows. Do not use abrasive cleaners or solvents.
•Don’t expose the laser level to high temperatures or humidity.
•Do not store the laser level in hot areas, hot temperatures can short the life of electronic
device, damage battery, and warp or melt certain plastics
•Do not store the laser level in cold areas. When the unit warms up to its normal operating
temperature, moisture can form inside where it may damage circuit board.
•Avoid shock, vibrations and extreme heat.
•Do not immerse the instrument in water.
•Always slide the power switch to the OFF position when storing, transporting or moving
around the job site.
•Calibration service is recommended at least once a year or as needed.
TROUBLESHOOTING
ISSUE POSSIBLE CAUSE AND SOLUTIONS
Laser does not turn on
Check batteries. Make sure batteries are installed according to the
correct polarity.
The batteries may be depleted. Make sure the batteries are in proper
working condition. If in doubt, try installing new batteries.
If the laser has been stored in extremely hot temperatures, allow it to
cool.
Laser does not level Instrument may be outside it’s levelling range. Position the
instrument, tripod or the base surface.
Instrument may have impact damage. Contact service centre for
repair and calibration.
Laser beam keeps ashing Instrument may be outside it’s levelling range. Position the
instrument, tripod or the base surface.

10 CROSSLINE LASER LEVEL
PRODUCT LABELS
DT1H1V2PR
DT1H1V2PG
CAUTION: LASER RADIATION DO NOT STARE INTO BEAM
ACCORDING TO IEC/EN 60825-1:2014 DT1H1V2PR
MAX. POWER OUTPUT: ≤ 1mW @ 635nm BATTERY: 4 x 1.5VAA
D
A
T
U
M
-
2
0
T
H
A
C
K
R
A
Y
R
O
A
D
P
O
R
T
M
E
L
B
O
U
R
N
E
V
I
C
3
2
0
7
CLASS 2
LASER
PRODUCT
Check piece count, headings, photos
& illustrations match on all panels
Compliance
Barcode Scans
Country of Origin
Pronto Code All Panels
Part Number All Panels
Update Details in Pronto
Supplier Contact Correct
Update Product Specication Sheet
Category
Manager
Product Development
Manager
Darren G.
Correction
Approved
Correction
Approved
Correction
Approved
Correction
Approved
GM
Exclusive Brands
Warranty
Statement
Matt B. Richard Mark Jason
Andrew I.
Correction
Approved
Product
Co-ordinator
Ruben
Nadine
Pri
Ya-Chen
Correction
Approved
Designer
GM
Marketing Online Merchandise
Branding
Conrm Product Specs Match Artwork
Country of Origin
Check Codes/Text
Weight Icons Panel Direct
Warranty Spellcheck Check shadowsDie/Overprints Delete extra art
Resolution
Spec/Swatches
Supplier Contact
Add Dimensions
Check corrections
Colours/SepsBleed
Colours:
Filename: 135040 DAT Crossline Laser Level with Plum Dots Red DT1H1V2PR Date: 02/07/2019
Nicole/Jim
Dieline Pantone 166 C
Brand: DATUM Description: CROSS LINE LASER LEVEL WITH PLUMB DOTS– RED BEAM
Pronto: ..135040 Part#: DT1H1V2PR Barcode: 9328225049279 Country of Origin: CHN
CAUTION: LASER RADIATION DO NOT STARE INTO BEAM
ACCORDING TO IEC/EN 60825-1:2014 MADE IN CHINA
MAX. POWER OUTPUT < 1mW @ 515nm BATTERY: 4 x1.5VAA
CLASS 2
LASER
PRODUCT
D
A
T
U
M
-
2
0
T
H
A
C
K
R
A
Y
R
O
A
D
P
O
R
T
M
E
L
B
O
U
R
N
E
V
I
C
3
2
0
7
D
T
1
H
1
V
2
P
G
Check piece count, headings, photos
& illustrations match on all panels
Compliance
Barcode Scans
Country of Origin
Pronto Code All Panels
Part Number All Panels
Update Details in Pronto
Supplier Contact Correct
Update Product Specication Sheet
Category
Manager
Product Development
Manager
Darren G.
Correction
Approved
Correction
Approved
Correction
Approved
Correction
Approved
GM
Exclusive Brands
Warranty
Statement
Matt B. Richard Mark Jason
Andrew I.
Correction
Approved
Product
Co-ordinator
Ruben
Nadine
Pri
Ya-Chen
Correction
Approved
Designer
GM
Marketing Online Merchandise
Branding
Conrm Product Specs Match Artwork
Country of Origin
Check Codes/Text
Weight Icons Panel Direct
Warranty Spellcheck Check shadowsDie/Overprints Delete extra art
Resolution
Spec/Swatches
Supplier Contact
Add Dimensions
Check corrections
Colours/SepsBleed
Colours:
Filename: 135041 DAT Crossline Laser Level with Plum Dots Green DT1H1V2PG Date: 02/07/2019
Nicole/Jim
Dieline Pantone 166 C
Brand: DATUM Description: CROSS LINE LASER LEVEL WITH PLUMB DOTS– GREEN BEAM
Pronto: ..135041 Part#: DT1H1V2PG Barcode: 9328225049286 Country of Origin: CHN
Supplier: 000SUZHFUK Sup#:
EK118DT-2P-GREEN

11OPERATING MANUAL

May 3, 2019 3:22 pm
WARRANTY INFORMATION
This warranty is provided by DATUM of 20 Thackray Road, Port Melbourne VIC 3207.
Phone: 1800 868 258.
Express Warranty
Subject to the exclusions set out below, we warrant that this product will be free from defects
in materials or workmanship for 3 years (90 days for accessories, batteries and chargers) from
the date of purchase.
The benets conferred by this warranty are in addition to all rights and remedies which you
may be entitled to under the Australian Consumer Law, and any other statutory rights you may
have under other applicable laws. This warranty does not exclude, restrict or modify any such
rights or remedies.
Warranty exclusions
This express warranty does not apply where a defect or other issue with the product is caused
by normal wear and tear, misuse or abuse of the product.
Consumer guarantees
Our goods come with guarantees that cannot be excluded under the Australian Consumer Law.
You are entitled to a replacement or refund for a major failure and for compensation for any
other reasonably foreseeable loss or damage.
You are also entitled to have the goods repaired or replaced if the goods fail to be of acceptable
quality and the failure does not amount to a major failure.
Warranty claims
To make a claim under this warranty, you must bring the product along with the proof of
purchase and any other documentary evidence which you think is relevant to the your place of
purchase where the claim will be handled on our behalf during the warranty period specied
above. Any cost incurred by you in bringing the product to the place of purchase will be borne
by you.
Calibration and repair service
Datum recommends to check instrument calibration at least once a year or on as needed
basis. For calibration or repair service (not covered under warranty), please visit your place of
purchase.
This manual suits for next models
1
Table of contents
Other Datum Laser Level manuals
