Daum electronic Fitness 3 User manual

3
3
3
User manual

Table of contents
Choosing the User
Settings
Setting Up
The Dashboard
Dashboard Display
Using the Menu and Language Selection
Heart rate monitoring
Training
Team Award
The Relaxation function
Transport and storage
Accessories (sold separately)
Specifications
Glossary
What to do, if ...?
Warranty conditions
Menu diagram
Sample Diagrams
– Supplement to the Individual Program
Assembly
Maintenance
Please Note
1
2
3
3
4
4
Personal data
Device data
5
5
6
Programs
Programs overview
How to create your own personal programs
Training data
Fitness mark
7
8
8
9
12
13
13
14
15
16
16
17
19
20
22
23
24
25
31

1
Read this user manual thoroughly before using the device.
Please follow the recommendations about your health
You should undergo a general medical examination before you start a training program. You should interrupt
immediately the training session if you fill uncomfortable, dizzy or in any way ill during a training session. Always
start a training with a low load and then increase the load gradually. At the end of the training reduce the load. After
the training you should execute a few stretching and gymnastics exercises to relax your muscles.
Recommendations about the training location
Install your training device on a level ground. The device may damage wooden floors. We therefore recommend the
installation of a protective underlay on wooden floors. We also recommend not to in-stall the device on white or light-
coloured carpets or mats because they could be stained by the black colour of the device's feet. We recommend that
the training location be properly aerated to provide enough fresh air, but nevertheless avoid draught. You can use this
device in a temperature range from +10°C to +35°C.
Safety notes
Children should only use this device under supervision and they must be provided with a proper explanation of its
operating principles. This device is not a toy. Please make sure the device is in working order. You should never train
on a defective device. The device may only be used by one person at a time. You should wear appropriate clothing
and shoes while training. The device may only be used if all the parts are firmly attached and no part is loose. You may
only execute the repair operations described in this user manual. Other repair and service operations may only be
carried out by qualified technicians. Do not press the buttons with the fingernails, always use the fingertips to avoid
scratching the button. Avoid wetting the dashboard. If during a training session your dashboard is wetted by sweat
you should wipe it with a soft cloth after training. The device surface should not come into contact with corrosive or
strong chemicals. The maximum allowable user weight is 120kg. Daum electronic gmbh provides a 24 months
warranty for the device for private use, and a three (3) months warranty for commercial use. The warranty is voided
in the case of improper utilisation.
Please Note
This ergometer is specially designed for health and endurance training. High quality manufacturing, a user
friendly dashboard, ease of use and maintenance all contribute to make this appliance an ideal training
device for sport and fitness purposes. Also note that the complete equipment and the wide performance
range should appeal to sport or fitness conscious persons of every age group.
3
3
3

Dashboard
2
The switch
is located on the rear of the device.
On/Off
Setting Up
When the device is switched On, the LCD
screen displays a big "d" letter and the
system plays a start-up tune.
After this the system displays the program
last used. The manual program is displayed
on the first start-up.
watt
1.
2.
3.
4.
5.
6.
7.
8.
9.
10.
11.
12.
13.
14.
15.
16.
17.
18.
19.
20.
6.
5.
2.
16.
1.
17.
4.
3.
9. 8.
7.
10. 11. 12. 13.
menu fitne ss
info
18.
15.
14.
19.
20.
Heart rate display
Dissipated energy and time display
RPM display
Speed and distance display
Load in watt display
Graphic screen
Control button
Pulse sensor connector
Relax sensor connector
Menu key
Info key
Fitness key
Function key
Reset key (recessed)
PC connector
User window
Memory card reader/writer
Slider switch: 1. Card reader operation
2. ErgoWin u. dashboard update operation
3. Card reader update operation
Connector dashboard cable
Dashboard battery

3
Dashboard Displays
watt
The heart rate window displays the heart rate. When only the upward
pointing arrow is displayed in the middle, then this means that the heart
rate is too low to ensure an effective training. Inversely, when only the
downward pointing arrow is displayed then the heart rate is too high. If
he arrow starts blinking then the load is too high and the user should
moderate the training.
Speed and distance window: this window shows the actual speed and
distance covered. Here too you can switch between these two values by
pressing the control button. See also p. 5
The RPM window indicates the speed in revolution per minute.
(+ = pedal faster, - = pedal slower).
The graphic screen displays the programs. The load (in watt) is shown on
the scale on the left side of the screen. The training time is shown on the
lower axis. In heart rate controlled programs the system displays 100 beats
per minute at the 200 watt position. In elevation profile programs the time
scale the distance in kilometres, while the watt scale is used for the elevation
profile.
Note: the illustrations may be changed without notice!
13
:
08
3
250
0.0
+
0
128
OK
3
The watt window shows the load in watt. The watt value displayed will blink
whenever the device or personal watt limit value is reached. This window also
shows the relax value with relaxation exercises. You can individually set what
data you want to see: time, training time, speed, distance, or dissipated
energy (in kJoule). Press the control button to display a second value or to
switch back. See also p. 5
The user display shows the user number (1 to 4 or guest).

Using the Menu and Language Selection
Turn the control button to move up or down in the menu. Press the control button to open the selected option,
e.g. language selection:
4
1. Press the menu key.
2. Turn the control button to select "User selection".
3. Press the control button.
4. Turn and press the control button to select a user
from 1 to 4 or Guest.
5. The selected user is then indicated on the left side
of window 16.
6. Press the menu key to return to the start.
Mum
User 1 User 2
Dad Daughter
User 3 User 4
Son
The following is an example of a possible user's number attribution scheme in a family:
watt
Menu
Training data
Settings
Information
User selection
Back
Training
watt watt
User selection
User 1
User 2
User 3
User 4
Back
Guest
watt
User selection
Guest
User 1
User 2
User 4
Back
User 3
watt
çais
Language
Deutsch
Fran
Italiano
Portuguese
Back
English
Choosing the User
The device will store the training data
of four users. It is therefore important
that each user selects his own "number"
when training. Guest data are not stored.
wattwatt
watt
Settings
1. Press the menu key.
2. Turn the control button to select "Settings".
3. Press the control button.
4. Turn and press the control button to select "Device Data".
5. Turn and press the control
button to select "Language".
6. Turn and press the control button to select required language.
7. Press the Menu key to
return to your training
program, Press the
function key to return to
“Device Data".
Back
Menu
Training
Training data
Settings
Information
Back
User selection
Menu
Training data
Settings
Information
User selection
Back
Training
Menu
Training
Training data
Information
User selection
Back
Settings
watt
Device Data
Date
Time
Contrast
RPM adaptation
Back
Language
User display
16.
Note: only 2 languages are available per software version.
menu
fitne ss
info
Use the Menu key to call and leave the menu.
Use the function key to move back one step
in the menu. Press the info key to display
information about the menu.
Press the info key during a Training to display actual training and program data.
Personal data
Device data

5
Settings
Personal data
If you want to change the personal data you should always verify
which user is presently selected. This information will always be
shown in the user's window (16). (see Choosing the User p. 4)
You can also enter your own limit values. If one of these values is exceeded
the system will warn you
Watt
Heart rate
Time
Km
kJoule
You can select here the maximal load (between 25 and 400 watts).
If you choose e.g. 180W the load will not exceed this value and the load
display will blink
When the actual heart rate exceeds the entered limit value the system reduces
automatically the applied load. means no heart rate limit,
means the heart rate limit is determined based on the age
"OFF"
"Auto"
A signal melody plays when the time limit is exceeded.
A signal melody plays when the distance limit is exceeded.
A signal melody plays when the kJoule limit is dissipated.
watt
Personal data
Limit values
Coaching
Delete
Other
Back
Physical data
watt
watt
Turn and press the control button to enter and store your physical data
Birth date
Gender
Height
Weight
Fat content (%)
Starting point
Enter your birth date.
Choose M or F to enter your gender.
Enter you height in cm.
Enter your weight in kg.
Enter your body fat content (if known).
Cooldown
Start up
Window 2
Window 4
Load increase
Load decrease
Heart rate
adaptation
Personal data
Physical data
Coaching
Delete
Other
Back
Limit values
Personal data
Physical data
Limit values
Delete
Other
Back
Coaching
Press the
control button
menu
menu
Press the
Menu key
Turn to select
"Personal data"
Press the
control button
Turn to select
"Settings"
watt
Personal data
Physical data
Limit values
Coaching
Other
Back
Delete
Not available on this model.
Use the delete function to reset all the data of the selected user back
to the factory settings.
watt
Personal data
Physical data
Limit values
Coaching
Delete
Back
Other
User's display
16.
Choose "On" if you want to have the possibility to start training from any position within the program.
Not available on this model.
Choose the program you wish to run on start up.
Choose the data you wish to view in window 2.
Choose the data you wish to view in window 4.
Set the load (in watt) increase profile (in seconds) for the heart rate controlled program.
Set the load (in watt) decrease profile (in seconds) for the heart rate controlled program.
Adapt the built-in heart rate program to your own heart rate zone.

6
6
Settings
Device data
Date entry
1. Turn and press the control button to set the day.
2. Turn and press the control button to set the month.
3. Turn and press the control button to set the year.
(DD/MM/YYYY)
watt
Device data
Time
Contrast
Language
RPM Adaptation
Back
Date
watt
Device data
Date
Contrast
Language
RPM Adaptation
Back
Time
watt
Device data
Date
Time
Language
RPM Adaptation
Back
Contrast
watt
Device data
Date
Time
Contrast
RPM Adaptation
Back
Language
watt
Device data
Date
Time
Contrast
Language
Back
RPM Adaptation
watt
RPM adaptation
100.0 %
Back
Setting the time
1. Turn and press the control button to set the hours.
2. Turn and press the control button to set the minutes.
3. Turn and press the control button to set the seconds
(HH:MM:SS).
Kontrast
Sie können den Kontrast des Grafikdisplays von 10-25 verändern.
Normalerweise liegt das Optimum bei etwa 16.
Language
Choose the appropriate language:
German, English, French, Italian, Portuguese,
Finnish, Danish, Dutch.
Note: only 2 languages are available per software version.
RPM adaptation (for the sport performance domain)
Material wear and variations of the mechanical settings can lead to a discrepancy between
the (measured) displayed pedal speed and the real speed. The "RPM adaptation" feature
was added to the software to allow for testing the measured speed value and adjusting it if
needed.
Pedal at constant speed (e.g. 60 RPM) for 1 minute (the clock will count in window 2) and
count the number of pedal revolutions (real value). The required setting is determined with
the following formula:
Real value x 100%= setting value (%)
Displayed value (window 3)
Press the
control button
menu
menu
Press the
menu key
Turn to select
"Device Data"
Press the
control button
Press
control button
Turn to select
"Setting"
Set
value
(turn)

7
Heart rate monitoring
It is important to monitor the heart rate during a training and not to overwork!
70
80
90
100
110
120
130
140
150
160
170
180
190
200
20 25 30 35 40 45 50 55 60 65 70
100%
85%
60%
OK
75%
Example
for a person 50 years old
or heart rate limit of 170
Heart rate 40 to 101
Heart rate 128 to 144
Danger Zone
Heart rate 145 to 169
Alarm Zone
Heart rate above 170
Aerobic Zone
Heart rate 102 to 127
Health
hazard!
Alarm Zone
Danger Zone
Aerobic Zone
Heart rate
Age
Audible signal
A very high heart
rate can be very
dangerous!
Training in the aerobic zone will always be healthy and safe. This zone is located
at 60% to 75% of the maximum heart rate or of the heart rate limit.
For beginner: the widely accepted recommendation is to train at
55% to 65% of the maximum heart rate. This zone is very well suited
for weight loss or for returning users after an extended interruption
due to illness.
Plug the connector on the right side of the dashboard,
attach the clip on the other end of the cable to your ear.
Window 1 will then display your heart rate after a short
delay.
(optional accessory)
Apply some water on the inner side of the band to the left and right side of the serration and then fasten it to your
chest firmly to prevent it from sliding off and insuring the electrodes are in direct contact with the skin. If you have
in the room many devices that may interfere with the signals of a wireless heart rate measuring device, then these
devices must be located at a distance of at least 1.5m from the heart rate measuring device. If more than one
wireless heart rate measuring systems are used in the same room then only one of these systems may be located
close to the training device.
Heart rate measure using the ear clip
Heart rate measure using the chest belt
Warning! If you have a heart pacemaker you should consult your physician
to find out if you can safely use the chest band transmitter!
Window set to
heart rate
display
Training in the aerobic heart rate zone
"OK" indicates that the user
is training within the aerobic
heart rate zone.
You will always achieve your training target optimally if you train in the appropriate
zone, whether your target is the improvement of your fitness level, the reduction of
your body fat content or the development of muscular mass.
Whenever the actual heart rate exceeds that of the alarm zone and the age limit or heart rate limit value is
enabled (see p. 5) the system will give a beep signal and the load will be automatically reduced.
The " " indicates that the training lies below
the aerobic heart rate. Additional blinking
indicates reaching the alarm zone.
The " " indicates that the training lies below
the aerobic heart rate.

Training
8
Watt controlled programs
Heart rate controlled programs:
Elevation profile:
Special programs:
Personal programs:
: the applied load in independent of the speed.
when the heart rate increases the load is decreased and vice versa.
not available on this model.
strength and RPM programs.
here you can create your own programs.
watt
Programs
Heart rate
Elevation profile
Special
Personal prog.
Back
Watt
Standard programs:
Cooldown:
Capacity test:
Manual:
a selection of 19 built-in programs.
not available on this model.
use it to test how long you can go under an increasing load.
you can here increase or decrease the load by turning the control button.
watt
Watt
Cooldown
Capacity test
Manual
Back
Standard
with the built-in programs the heart rate is directly controlled. The required
heart rate varies along the course of the program and thus the corresponding load. If the heart
rate increases the load drops automatically; if the heart rate drops the load increases.
you decide what heart rate you want in beats per minute and the
device will adjust the load so that this value is always maintained.
Built-in programs:
Manual heart rate program:
watt
Heart rate
Manual
Back
Built-in programs
watt
Personal prog
Heart rate
Speed
Back
Watt
Zurück
Elevation profile: not available on this model.
watt
Programs
Watt
Heart rate
Special
Personal prog
Back
Elevation profile
watt
Special
RPM
Back
Strength programs
you can create your own speed independent program.
not available on this model
not available on this model.
Watt:
Heart rate programs:
Speed:
.
Strength programs:
Constant RPM programs:
these programs are based on 15 braking levels (1 to 15) and the effort effected
here is a function of the speed. The load corresponding to the brake level and speed is shown in
window 5. The load in watt corresponding to any braking level is determined from the actual speed
multiplied by a factor specific to the program and rounded to 5 watt units.
this program was specially developed for racing bikers, as they want to
pedal at their own personal speed regardless of the road condition, ascending or descending.
Programs
menu
menu
Press
menu key
Select
"programs"
(turn button)
Press
control
button
Press
control
button
Select
"Training"
(turn button)
Note: Training with the ergo_memo-card1 is described in the user manual on the accompanying CD.
Select
"starting point"
(turn button)
Press
control
button
Press
control
button
You can choose the starting point for built-in programs when
the starting point option is set to "On" (see also p.5).
Select starting point
Please
select
starting point
watt watt
Display example Display example

Training
9
100
200
300
400
0
10 20 30 40 50 min
3
WATT
100
200
300
400
0
10 20 30 40 50 min
4
WATT
100
200
300
400
0
10 20 30 40 50 min
5
WATT
100
200
300
400
0
10 20 30 40 50 min
6
WATT
100
200
300
400
0
10 20 30 40 50 min
7
WATT
100
200
300
400
0
10 20 30 40 50 min
8
WATT
100
200
300
400
010 20 30 40 50 min
9
WATT
WATT
WATT
Standard programs
33 Min. / max 110 Watt
Light load training for women and men with little training experience
Program 3
Interval training "Low"
35 Min. / max 160 Watt
for women and men with little training experience
Program 4
Interval training "Mid
38 Min. / max 210 Watt
for women and men with a good training experience
Program 5
Interval training "High"
19 Min. / max 115 Watt
for untrained women and men age up to 35 years
Program 6
Pyramid "Low"
43 Min. / max 175 Watt
for trained users
Program 7
Pyramid "Mid"
45 Min. / max 225 Watt
for trained users
Program 8
Pyramid "High"
23 Min. / max 180 Watt
for trained users
Program 9
The Alps
100
200
300
400
0
10 20 30 40 50 min
11
WATT
100
200
300
400
0
10 20 30 40 50 min
10
WATT
30 Min. / max 270 Watt
for trained users
Program 10
Matterhorn
40 Min. / max 300 Watt
for trained users
Program 11
Mount Everest
Programs overview
The available programs are described below:
100
200
300
400
0
10 20 30 40 50 min
1
WATT
100
200
300
400
0
10 20 30 40 50 min
2
WATT
Watt load controlled
WATT
WATT
Test programs
32 Min. / max 400 Watt
Program 1
Capacity test 25 Watt / WHO-Standard
24 Min. / max 400 Watt
for trained users
Program 2
BAL-Standard 50 Watts capacity test
manual program (Watt)
Program 0

Training
10
100
200
300
400
010 20 30 40 50 min
12
WATT
100
200
300
400
010 20 30 40 50 min
13
WATT
100
200
300
400
010 20 30 40 50 min
14
WATT
100
200
300
400
010 20 30 40 50 min
15
WATT
100
200
300
400
010 20 30 40 50 min
17
WATT
100
200
300
400
010 20 30 40 50 min
16
WATT
100
200
300
400
010 20 30 40 50 min
18
25 Min. / max 110 Watt
for untrained women up to 40 years of age
Program 12
Active Profi Lady
22 Min. / max 90 Watt
for untrained women up to 60 years of age
Program 13
Active Sport Lady
18 Min. / max 125 Watt
For young users up to 14 years of age
Program 14
Beginners Training 1
23 Min. / max 130 Watt
for untrained men up to 70 years of age
Program 15
Beginners Training 2
34 Min. / max 125 Watt
for trained women up to 30 years of age
Program 16
Body Watching 1
20 Min. / max 100 Watt
suitable for squeezing a training session between two
appointments
Program 18
Short 1
53 Min. / max 100 Watt
for trained women up to 50 years of age The duration of this
training of almost one hour requires strong will and will make
you sweat!
Program 17
Body Watching 2
30 Min. / max 180 Watt
for trained users, who want to check out their performance.
Program 19
Short 2
100
200
300
400
010 20 30 40 50 min
19

11
60 Min. / max. 140 beats / min.
Endurance training for women and men with training
experience
Program 31
long basic endurance prog.
(60 min/low heart rate level)
50
100
150
200
010 20 30 40 50 60 70 min
31
PULS
50 Min. / max. 160 beats. / min.
Demanding endurance training for women and men with
training experience
Program 32
Basic endurance program with peak loads
50
100
150
200
010 20 30 40 50 60 70 min
32
PULS
60 Min. / max. 150 Beats. / min.
Load test for the leisure and sport zone
Programme 36
Step test with 10 min load duration
50
100
150
200
010 20 30 40 50 60 70 min
36
PULS
25 Min. / max. 120 Beats. / min.
This program is suited for pulse rate characteristics of
senior users
Programme 37
Senior I, low heart pulse rate
50
100
150
200
010 20 30 40 50 60 70 min
37
PULS
40 Min. / max. 130 Beats. / min.
Demanding endurance training in the lower heart rate
zone for active senior users
Programme 38
Senior II, low heart rate
50
100
150
200
010 20 30 40 50 60 70 min
38
PULS
Training
50
100
150
200
010 20 30 40 50 60 70 min
29
PULS
20 Min. / max. 130 beats / min.
light load training for women and men with little training
experience
Program 29
preventive, easy short prog.
50
100
150
200
010 20 30 40 50 60 70 min
30
PULS
30 Min. / max. 130 beats / min.
light loading training for women and men with little training
experience
Program 30
Average Optimal Program
Heart rate Programs
Program 47 Cardio program
Program 48 RPM program
Program 50 strength program
Program 77 personal watt controlled program

watt
Personal prog.
Watt
Back
Every user can create one watt controlled program for himself with a duration of up to
30 minutes. Make copies of the blank diagrams provided at the end of this user manual
(page 24) and use them to design your own programs.
Here is the procedure to create a watt controlled program:
Select Watt.
Select Modify and start "drawing".
Turn the control button to the left/right to increase/decrease the height of the bar on the display
until you set the bar to the proper height.
Every drawn bar corresponds to a training duration of one minute.
When your program is finished press the function key and answer the question:
The same procedure applies also for the modification of an existing personal program.
"Erase the bars starting here?" Answer "Yes" or "No" (meaning: program ends either after
the last value/bar entered or, if present, after the last existing value/bar) and select Training.
How to create your own personal programs
watt
Watt
Training
Back
Modify
12
Training
watt
watt
1 min.
watt
A program designed on the blank diagram
to look like the illustration to the left will
appear on the screen as illustrated to the
right.
100
200
300
400
010 20 30 40 50 min
WATT
watt
…
Every drawn bar corresponds
to a training duration of one
minute. Window no. 2 will
show the minute of your
actual position.
When you set up this step
(bar) to the required watt
value press the control
button. Repeat the same
procedure with the following
bars.
Repeat this procedure until
you finish creating your
program.
Display example
for inputting step 1

Training
13
Training data
watt watt
Training data
Total
Weight
Fat content
Coaching
Back
Actual
Actual
Back
Ø-km/h 23.0
Max-km/h 31.0
Time 56.4
Distance 18.0
You review the training data of the selected user:
- Actual: the training values of the last training
- Total: the values of all the training units together
- Weight: the distribution over a period of 60 days and of 1 year
- Fat content: the distribution over a period of 60 days and of 1 year
- Coaching: Not available on this model.
Fitness mark
The device can carry out an evaluation your fitness.
The measurement principle is based on the fact that the pulse rate falls faster within the first minute following a
load period for healthy, well-trained users than for healthy, less trained users. If the user presses the Fitness key
during a training session, the present training is then interrupted and the load will be lowered to 25 Watt within
a few seconds. The graphical screen will display the message "Fitness mark determination". The drop in pulse
rate within 60sec will be measured (see window no. 2) and the mark computed according to the following
scheme and displayed:
The mark of is awarded if no usable result can be measured."F0"
The training program resumes at the actual position after the evaluation process.
The load in Watt is raised within a few seconds to its value just before the evaluation and the training can be continued.
The measuring process takes one minute and its progress is displayed.
1.
A pulse measuring device (ear clip or the cardio sensor chest belt) must be connected and functional
during the whole fitness evaluation process.
displays
and the system plays a short melody.
After one minute window no 2 the F mark
displays an , and a timer counts
the evaluation time from .
Window No. 2 "F"
1 to 60 sec
4.
Press the fitness key.
5.
A fitness evaluation is not possible after the
training session is finished.
2.
3.
Continue pedalling "loosely" at the load of 25 Watt during the
measurement process.
Example of the display
of fitness mark 2.
Graphic window
The fitness mark F1 is awarded for a pulse rate drop of more than 25.0% within 60 sec
The fitness mark F2 is awarded for a pulse rate drop of 20.0% to 24.9% within 60 sec
The fitness mark F3 is awarded for a pulse rate drop of 16.0% to 19.9% within 60 sec
The fitness mark F4 is awarded for a pulse rate drop of 12.0% to 15.9% within 60 sec
The fitness mark F5 is awarded for a pulse rate drop of 8.0% to 11.9% within 60 sec
The fitness mark F6 is awarded when the pulse rate drop is less than 8% within 60 sec
Train at least in the .15 minutes OK-area
fitne ss
Cancel
Warning: If you don't execute (train) a program to its end you should press the menu key
before turning OFF the device to save the training data.
Display example for
the actual training data
more
training data
(turn)
(see also the menu diagram page 23)
Fitness
evaluation
process

Team Award
14
Your perseverance will be rewarded
Take part in the
Team Award
1.000 km 5.000 km 10.000 km
Team Award awarding levels
20.000 km
You can enter the required information directly on our web page at www.daum-electronic.de,
under the heading (the simplest way),
or send us a fax to: +49 / (0) 911 753714
or write to us to:
, Team Award department
"Team Award"
daum electronic GmbH
Flugplatzstr. 100,
D-90768 Fürth, Germany.
Press
control
button
menu
menu
Press
menu key
Select
"Team Award"
(turn)
Press
control
button
Select
"Information"
(turn)
Grafikdisplay
If you send us the team award code number displayed in window no. 6,
together with your name, your address, your email address, the serial
number of your device serial number (on the name plate), and the serial
number of your dashboard (see
); we will send you an award for your performance.
And you will be admitted in the
"Menu", "Information", "Version Data",
"Serial Number"
Give us a chance to surprise you!
"Hall of Fame".
Code number for the
Team Award
Teamaward
Back
Teamaward
Back
Congratulation
for completing
20 000km!
Congratulation
for completing
20 000km!

15
Die Relax - Funktion
watt
Plug the connector of the relaxation sensor into the input socket no. 9
on the dashboard.
"relax"
5.
Wrap the other tape around your middle finger in the same fashion.
4.
Put down the side of the Velcro tape with the sensor button on your finger and
wrap the other side around it and press it firmly in place.
3.
Place the open tape on one of your fingertip. Make sure there is good contact between the silver buttons and your skin.
The wires from the tape should lead away from the back of your hand.
2.
Take the Velcro bands of the fingers' sensor out of the package and open them.
1.
The text in changes from Watt to Relax.
A value is displayed, which
window no. 5
starts at 199.
The Relaxation function
The relaxation function is a that is carried out by measuring the electrical resistance of the skin.
The measured values are indicated by means of optical and audio signals. Biofeedback is thus the translation into
perceptible signals of physiological processes occurring in our body, which our senses can barely, or not at all, perceive.
The relaxation function is the ergo_bike' way of helping you relax and eliminate stress. You should use this option particularly
after a physical en-durance training.
Biofeedback-process
Connecting the relaxation sensor
Relaxing
Relax program / process description
Watt display
The displayed value drops gradually as you relax after training,
and increases with the stress level.
The relax value can drop all the way to almost zero. The user should therefore contribute
to his/her relaxing and avoid any other stress. You can support this process by getting off
the device and sit in a relaxed position, or lay down close to the device and calm down.
The graphic screen displays a representation of the relaxation process. The displayed line
shows the transition from the maximal value (199) to the minimum relax value (0). This
process is also visible in window no. 5. The same process is presented in a graphical form
in window no. 6 (see illustration to the right).
The actual relax level is indicated by a blinking bar in the display window.
The complete relaxing process is divided into 25 levels. A short beep sound
signals when each level is achieved. The successive beeps are each lower
in tonality.
Velcro tape
Sensor button
Relax sensor
connector no. 9
The Relaxation function
Press
control
button
menu
menu
Press
menu key
Select
"Relax"
(turn)
Press
control
button
Select
"Training"
(turn)
5.
199
5.
0

s
w
i
n
g
e
f
f
e
c
t
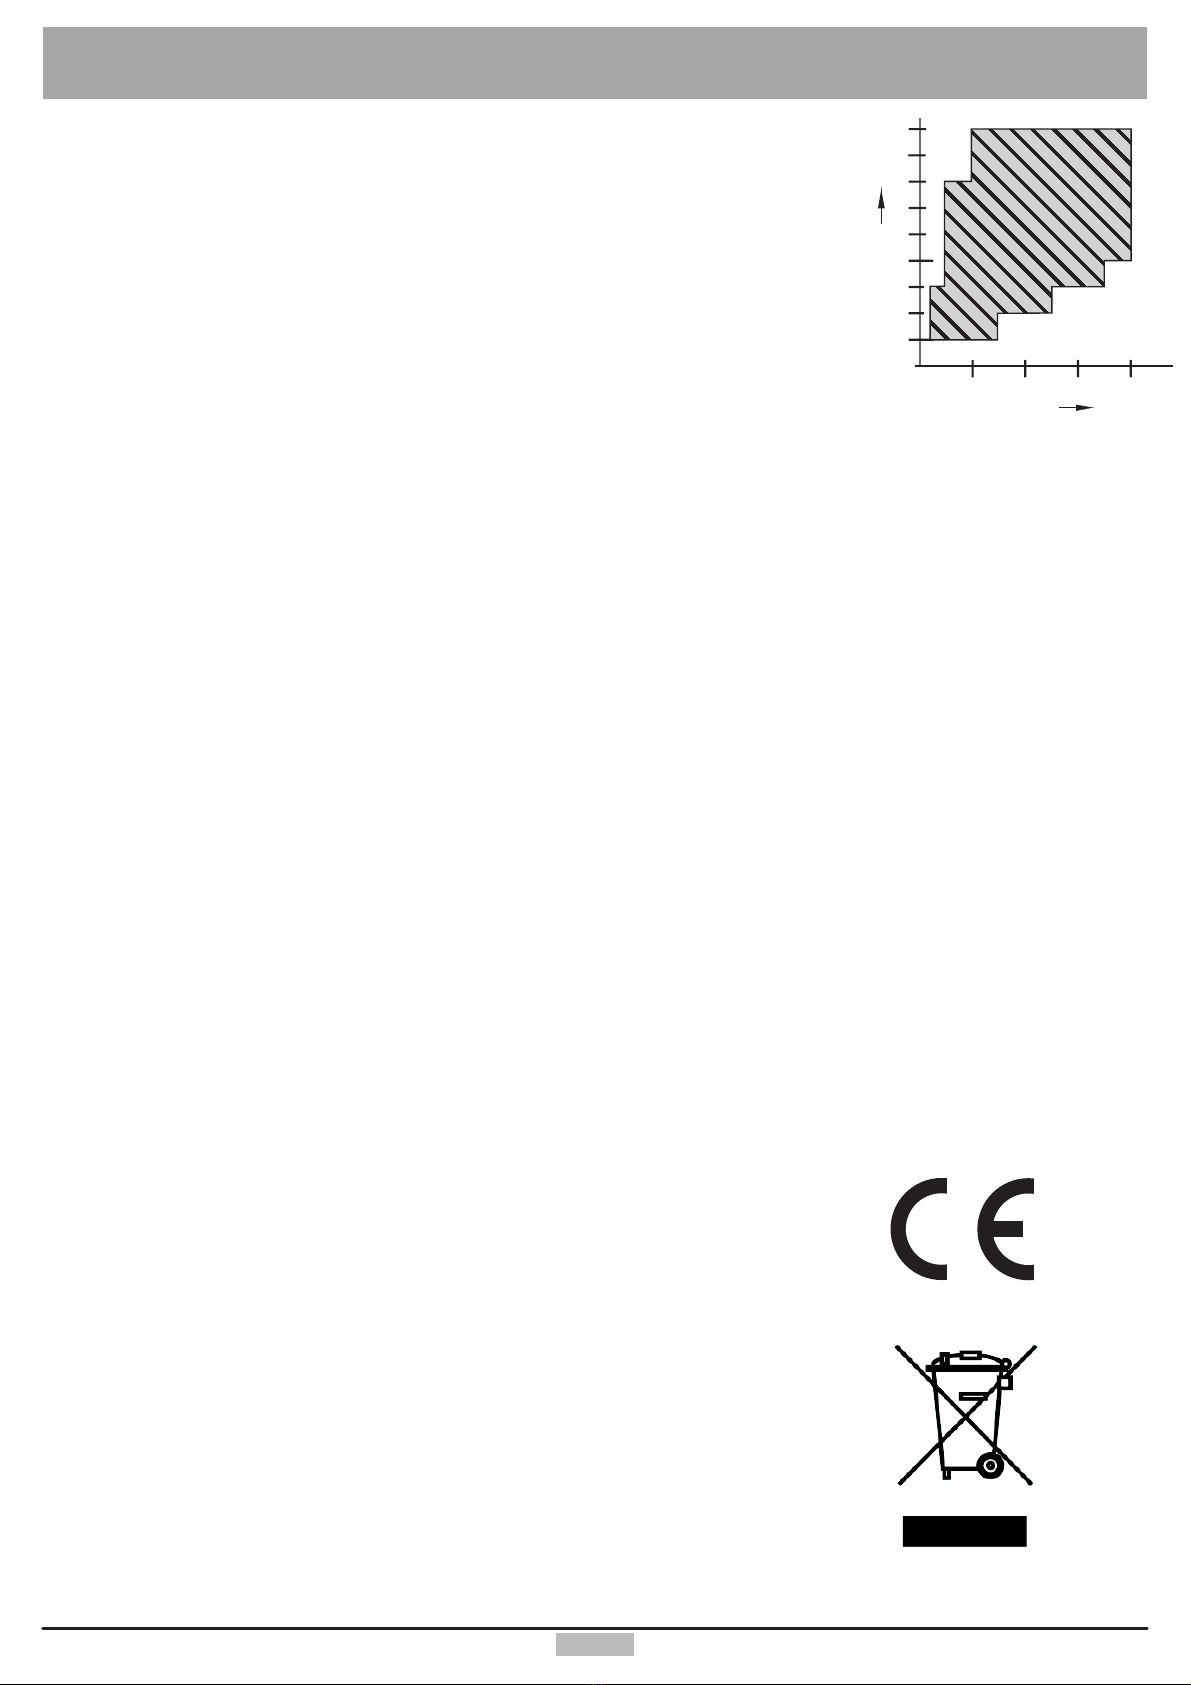
Swing feet The oscillating movements occurring naturally with
real bikes cannot normally be reproduced when
training on an ergometer. These movements include
balancing movements or back and forth oscillations.
The rigid construction, and the fixed feet used to
support the device prevent any dynamic movement.
Moreover, heavy training would eventually lead to
overloading the frame and mounting parts. Squeaking
noises are a typical consequence of such overloads.
16
Transport and storage
Transport
Storage
The rear stand feet are equipped with roller casters to ease moving the device.
Hold the handlebars column with one hand and grab and raise the foot with the
other hand, this way will ensure you have a good grip.
Please take care to keep your back straight and to avoid injuries.
Also move the device as much as possible on flat floors to avoid damaging the bearings.
Store the device in dry and warm rooms, at a temperature range of 0°C to +25°C.
The humidity ratio should not exceed 70%. If you store the device for an extended period
in a cold room you should let it warm up again before using it.
Accessories (sold separately)
15
Multifunction serial USB Bluetooth adapter
The multifunction serial USB Bluetooth adapter is designed to allow for
wireless connection, under the Bluetooth 2.0 standard, of the daum
training ergometer to a computer. It can also be used as a USB to Serial
adapter between the training device and the computer. Range about 10m
(depends on the architectural
environment)
Order No.: 9091024
ergo_memo-card 1
When it is inserted into the card reader in the
dashboard, the training data are saved auto-
matically on the ergo_memo-card1. The card
can be loaded with individual training
instructions and personal data of the
user. These are then automatically
read by the dashboard, making
unnecessary to manually set the
dashboard.
You will find more accessories on our Internet site at: www.daum-electronic.de
The wireless ergo_bike chest belt
We recommend using the wireless chest belt to achieve a better and more precise heart rate measurement.
The corresponding receiver is built into the device.

Specifications
17
Braking system:
Microprocessor controlled, full electronic eddy current
brake operating in the speed ranges shown in the diagram.
Load range: 25 to 400 Watt
Speed range: 0 to 199 RPM
Load precision: +/- 10%
Loading levels: In 5 watts increments, manually adjustable.
Drive: Single-stage, maintenance-free steel-ribbed belt drivein a
spring supported drive unit.
Flywheel: Machined
Bio Feedback Function: Bio feedback based on the electrical resistance of the skin, measurement via finger
electrodes, approx. 100 kOhm to 3 Mohm, self calibrating, display on LCD Panel in
255 levels and audible time controlled relaxing melody.
Fitness level: Six age-related fitness levels grading, displayed on LCD panel and through 6
commendation melodies.
Saddle height adjustment: 21 levels setting for body sizes from 120 to 190 cm
Handlebars adjustment: about 360° continuously
Displays: 2 liquid crystal panels for heart rate, distance, speed, time, load in Watt, kJoule burned,
pedal speed (RPM) and training time.
1 graphic display / 76 x 64 pixels / total of 4864 pixels.
Heart rate measurement:
On the ear, measuring range 50 to 199 pulses/min.;
telemetric using Cardio sensor chest belt (optional accessory).
Limit values setting: Heart rate, distance, training time, kJoule, upper load limit in watt
Alarm signals: Acoustic and optical
Weight: Approx. 40 kg
Dimensions: W / H / L 55 cm x 123 cm x 85 cm
Power supply: 230 V alternating current, 50 Hz, 55 W
Safety class: 2
30
40
50
60
70
80
90
1
1
1
0
2
1
0
0
0
25 200300400
100
Watt
Speed
Power

18
Specifications
EC Declaration of Conformity
We declare under our sole responsibility that the
product: bike ergometer
model: ergo_bike fitness 3
article number: 9096382
complies with all applicable requirements of the following prescriptions:
2004/108/EG EMC Electromagnetic Compatibility
2006/95/EG Low Voltage Directive
Applied standards:
EN 957-1:2005
EN 60601-1-2:2007
EN 60335-1:2007
daum electronic gmbh
Flugplatzst. 100
D-90768 Fürth
Tel.: ++49 (0)911 / 9 75 36-0
Fax: ++49 (0)911 / 9 75 36-96
Fürth, 18/12/2009
Table of contents
Other Daum electronic Exercise Bike manuals

Daum electronic
Daum electronic 8008 TRS3 User manual

Daum electronic
Daum electronic ergo bike Premium 8i Series User manual

Daum electronic
Daum electronic Cardio pro User manual

Daum electronic
Daum electronic 8008 TRS User manual

Daum electronic
Daum electronic ergo_bike medical8 User manual

Daum electronic
Daum electronic Premium 8 User manual

Daum electronic
Daum electronic Vita 2002 PC de luxe User manual

Daum electronic
Daum electronic Cardio 2002 PC User manual