manuals.online logo
Brands
  1. Home
  2. •
  3. Brands
  4. •
  5. DaVinci
  6. •
  7. Indoor Furnishing
  8. •
  9. DaVinci Homestead User manual

DaVinci Homestead User manual

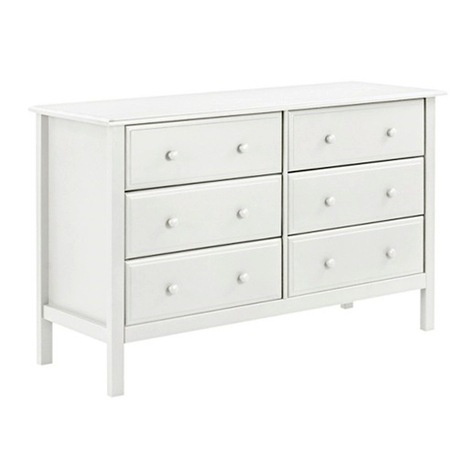
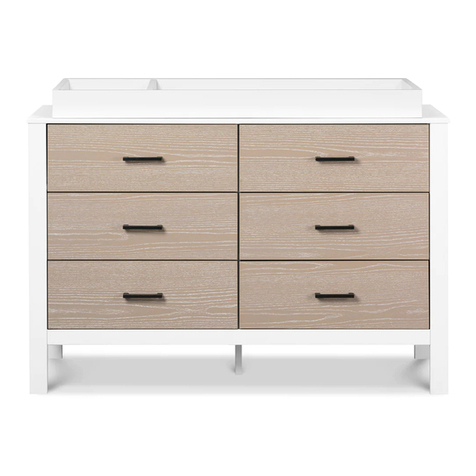
Homestead 6 Drawer Double Dresser Assembly Instructions
Commode double à 6 tiroirs Homestead Manuel d’assemblage
Item# 16126
revised 24JAN2018 1
* Tools Needed (not included)
* Outils requis (non inclus)
Phillips screwdriver
Tournevis cruciforme
* You will need two people to
assemble this 6 drawer double
wide dresser.
* Deux personnes sont nécessaires
pour assembler ce commode
double à 6 tiroirs .
Thank you for purchasing a DaVinci nursery product! To ensure safe use of your product, please
follow these assembly instructions closely. If you are missing parts or have any questions, please
visit our website at www.themdbfamily.com/support.
For assembly, use the Allen wrench if it is included in the hardware box. We also recommend
using a Phillips head screwdriver (not included) to complete assembly. Please do not substitute
parts or use power screwdrivers. Our pieces are made from natural woods. Due to the nature of
wood, some variation in color, grain, or texture is to be expected.
We hope you and your growing family enjoy our product.
With thanks,
DaVinci
Nous vous remercions de votre achat d’un produit pour tout-petits DaVinci! Pour assurer une
utilisation sans risque du produit, veuillez suivre attentivement ces directives d’assemblage. Si des
pièces manquent ou si vous avez des questions, veuillez visiter notre site Web à l’adresse
www.themdbfamily.com/support.
Pour l’assemblage, utilisez la clé Allen si c’est fournie dans la boîte de quincaillerie. Nous vous
recommandons aussi d’utiliser un tournevis à tête cruciforme (non fourni) pour terminer
l’assemblage. Veuillez ne pas remplacer les pièces par des pièces similaires ni utiliser de tournevis
électriques. Nos pièces sont faites de bois naturels. De par sa nature, le bois peut présenter des
variations de couleur, de grain ou de texture.
Nous espérons que vous et votre famille grandissante aimerez notre produit.
Un grand merci,
DaVinci
2
PARTS • PIÈCES
Not to Scale/Pas à l'échelle
C. Middle Panel
C. Panneau centre
D. Top Panel
D. Dessus
A. Left Side Panel
A. Panneau latéral
gauche
B. Right Side Panel
B. Panneau latéral
droit
E. Top Panel Support Rail
E. Bordure dessus
F. Back Top Rail
F. Traverse arrière
supérieure
H. Front Cross Bar (2)
H. Traverse avant (2)
G. Back Bottom Panel
G. Panneau arrière
inférieure
J. Back panel
J. Panneau
arrière
K. Drawer front (6)
K. Façade de tiroir (6)
I. Front Bottom Panel
I. Traverse avant
inférieure
3
HARDWARE • ACCESSOIRES DE MONTAGE
Bolts in Actual Size/Boulons (taille réelle)
O. Drawer bottom (6)
O. Fond de tiroir (6)
M. Right drawer side (6)
M. Côté droit de tiroir (6)
L. Left drawer side (6)
L. Côté gauche de tiroir (6)
N. Drawer back (6)
N. Arrière de tiroir (6)
H9. Allen wrench
H9. Clé hexagonale
H3. 1” Phillips headscrew (48)
H3. Vis à tête cruciforme
de 2,5 cm (1 po) (48)
H6. 2/3” Phillips headscrew (14)
H6. Vis à tête cruciforme
de 1,5 cm (2/3 po) (14)
H1. 1-3/4” Allen Head Bolt (14)
H1. Boulon Allen de 4,4 cm
(1-3/4 po) (14)
H2. 1” Allen Head Bolt (14)
H2. Boulon Allen de 2,5 cm
(1 po) (14)
H5. 0.8 x 3 cm Wood Dowel (23)
H5. 0.8 x 3 cm
Goujon de bois (23)
H7. Curve Washer (10)
H 7. R o n d e l l e
demi-lune (10)
H4. 1/2” Knob Bolt (12)
H4. Vis de poignée de
1,3 cm (1/2 po) (12)
H8. Knob (6)
H8. Poignée (6) 4
1
ASSEMBLY INSTRUCTIONS • INSTRUCTIONS D’ASSEMBLAGE
5
H2
(Front)
(Avant)
(Back)
(Arrière)
F
G
H5
C
2
6
F
C
G
E
H
H
I
H2
(Front)
(Avant)
(Back)
(Arrière)
H5
3
(Front)
(Avant)
(Back)
(Arrière)
H5
H1
H7
H9
C
B
A
7
E
H
H
I
F
G
H5
H5
H9 H1 H7
H2
H9
4
8
H2
(Front)
(Avant)
(Back)
(Arrière)
B
A
D
C
F
E
H9
H1
H5
H9
H2
H9
5
9
(Front)
(Avant)
(Back)
(Arrière)
B
A
D
J
H6
G
6DRAWER ASSEMBLY INSTRUCTIONS
INSTRUCTIONS D'ASSEMBLAGE DES TIROIRS
6a
H3
H3
K
L
M
6b
O
K
L
M
10
6d
H4
6c
L
M
N
K
O
H3
H3
H8
H4
K
11
7
(Front)
(Avant) K
K
K
K
K
K
12
13
Serious or fatal crushing can occur when furniture tips over on children. To help prevent tip-over,
follow the steps below to install this anti-tipping strap.
Le basculement du meuble sur un enfant peut entraîner des blessures graves ou fatales par écrasement. Pour
aider à prévenir le basculement, suivre les étapes ci-dessous afin d'installer cette sangle antibasculement.
FURNITURE ANTI-TIPPING KIT INSTALLATION
INSTALLATION DU DISPOSITIF ANTIBASCULEMENT
8(REQUIRED)
(OBLIGATOIRE)
Phillips
screwdriver
Tournevis
cruciforme
Tools Needed (not included)
Outils requis (non inclus)
Pencil
Crayon
Stubby
Screwdriver
Tournevis
court
X 2X 2
X 1
HARDWARE
ACCESSOIRES DE MONTAGE
WARNING
Serious or fatal crushing injuries
can occur from furniture tip-over.
To help prevent tip-over:
Use of tip-over restraints may
only reduce, but not eliminate,
the risk of tip-over.
This is a permanent label.
Do not remove!
Install tipover restraint provided.
Place heaviest items in the lowest
drawers.
Do not set TVs or other heavy
objects on top of this product,
unless the product is specifically
designed to accommodate them.
Never allow children to climb or
hang on drawers, doors, or
shelves.
Never open more than one
drawer at a time.
(OR)
Do not defeat or remove the
drawer interlock system.
AVERTISSEMENT
Le basculement du meuble peut
entraîner des blessures graves ou
fatales par écrasement. Pour aider
à prévenir le basculement :
Cette étiquette est permanente.
Elle ne doit pas être retirée!
Installer le dispositif
antibasculement fourni.
Placer les objets les plus lourds
dans les tiroirs du bas.
Ne pas placer de téléviseurs ou
d’autres objets lourds sur le
dessus de ce produit, à moins que
le produit ne soit spécifiquement
conçu pour les accommoder.
Ne jamais laisser les enfants
grimper ou s’accrocher aux tiroirs,
aux portes ou aux tablettes.
Ne jamais ouvrir plus d’un tiroir à
la fois.
(OU)
Ne pas défaire ni enlever le
système de blocage des tiroirs.
L’utilisation de ce dispositif de
retenue ne peut que réduire mais
pas éliminer le risque de
basculement.
ASSEMBLY INSTRUCTIONS • INSTRUCTIONS D’ASSEMBLAGE
8a
8b
8c
Locate a 2” x 4” stud
behind the wall, and make
a mark.
Localiser un montant de 2”
x 4” derrière la surface du
mur et faire une marque.
Install the strap on the
wall with the screw and
washer.
Fixer la sangle au mur avec
la vis et une rondelle.
Install the other end of
strap on the back of
dresser with the screw and
washer into the wood
framing of the dresser.
Fixer l'autre extrémité de la
sangle à l'arrière de la
commode avec la vis et une
rondelle dans le cadre de
bois de la commode.
14
2” x 4” wall stud
Montant de mur de 2" x 4"
Finish
Terminé
CHANGER TRAY IS NOT INCLUDED, SOLD
SEPARATELY. CHANGER TRAY M0219 OR M0619
MADE BY THE MDB FAMILY IS RECOMMENDED.
LA TABLE À LANGER N’EST PAS INCLUSE. ELLE
EST VENDUE SÉPARÉMENT. IL EST RECOMMANDÉ
D’UTILISER LA TABLE À LANGER M0219 OU
M0619 FABRIQUÉE PAR MDB FAMILY.
READ ALL INSTRUCTIONS BEFORE USING
THE PRODUCT. KEEP THE INSTRUCTIONS
FOR FUTURE USE. Recheck all screws and
bolts to be sure they are fastened securely.
Do not overtighten.
LISEZ ATTENTIVEMENT TOUTES LES INSTRUC-
TIONS AVANT D’UTILISER CE PRODUIT. CON-
SERVER CES INSTRUCTIONS POUR UN USAGE
ULTÉRIEUR. Procéder à une nouvelle vérification
des vis et des boulons pour vous assurer qu’ils
sont bien fixés. Ne pas trop serrer.
KEEP THIS MANUAL IN A SAFE PLACE FOR
FUTURE REFERENCE.
GARDER CE MANUEL EN LIEU SÛR POUR UN
USAGE ULTÉRIEUR.
15
IMPORTANT :
Comme pour tous les meubles de nourrissons et de bébés, il est important de vérifier périodique-
ment le serrage des attaches, des vis et des boulons. Les parents doivent procurer un environne-
ment sécuritaire à leur enfant en vérifiant régulièrement le meuble avant de placer l’enfant sur
celui-ci.
IMPORTANT:
As with all infant and baby furniture, it is important to check fasteners, screws, and bolts
periodically for tightness. Parents should ensure a safe environment for their children by
checking the furniture regularly before placing a child in the product.
Registering your product is even easier than
before. You can register your product on our
website at :
www.themdbfamily.com/registrations
L’enregistrement de votre produit est plus
facile que jamais. Veuillez l’enregistrer sur
notre site Web à :
www.themdbfamily.com/registrations
Storage:
Pine woods exchange moisture with the air adjust-
ing to major changes in room temperature and
humidity. Therefore, it is best to place your furniture
away from heating or air-conditioning vents.
Sunlight is not friendly to solid wood furniture and
prolonged direct exposure to harsh sunlight can
discolor the finish. Be careful not to place your furni-
ture in direct sunlight for extended periods of time. As
with all your fine furniture, blot up spills immediately.
•
•
Care and Cleaning:
•
Do not scratch or chip the finish. Do not use
abrasive chemicals for cleaning. Clean with mild
soap on a damp, soft rag. Rinse and dry thoroughly.
If you ever refinish this furniture, be sure to use only
a non-toxic finish specified for children’s products. If
you choose to refinish this furniture, the warranty will
be voided.
Entretien et nettoyage :
• Évitez d’égratigner ou d’écailler le fini. N’utilisez pas
des nettoyants abrasifs. Nettoyez le meuble avec du
savon doux sur un chiffon non rugueux. Rincez et
séchez-le complètement. Si vous devez refaire la finition
de ce meuble, assurez-vous d’utiliser un fini non toxique
conçu pour les meubles pour enfants. Si vous entrepren-
ez de refinir ce meuble, sa garantie sera annulée.
• Le bois de pin échange de l’humidité avec l’air en
s’adaptant aux principaux changements de température
et d’humidité ambiante. Il est donc préférable d’éloigner
ce meuble des bouches de chaleur et de climatisation.
• Les rayons du soleil ne font pas bon ménage avec les
meubles en bois massif et une exposition prolongée à la
lumière directe du soleil risque de décolorer le fini.
Prenez garde de ne pas laisser votre meuble directe-
ment au soleil pendant un temps prolongé. Comme pour
tous les meubles précieux, épongez immédiatement
toute éclaboussure.
Rangement :
WWW.THEMDBFAMILY.COM/SUPPORT
THE MDB FAMILY
855 WASHINGTON BLVD.
MONTEBELLO, CA 90640
POUR COMMANDER DES PIÈCES
DE RECHANGE OU MANQUANTES,
VISITEZ-NOUS À :
OU CONTACTEZ-NOUS PAR LA POSTE :
O ORDER
T US BY MAIL:
IF YOU WOULD LIKE T
REPLACEMENT OR MISSING PARTS,
PLEASE VISIT US AT:
WWW.THEMDBFAMILY.COM/SUPPORT
OR YOU CAN CONTAC
THE MDB FAMILY
855 WASHINGTON BLVD.
MONTEBELLO, CA 90640
T US BY MAIL:
A
OR YOU CAN CONTAC
855 WASHINGTON BLVD.
MONTEBELLO, CA 90640
•
•
16

Other DaVinci Indoor Furnishing manuals
DaVinci Margot M24926 User manual

DaVinci

DaVinci Margot M24926 User manual

DaVinci Marley W4923 User manual

DaVinci

DaVinci Marley W4923 User manual

DaVinci Autumn M4355 User manual

DaVinci

DaVinci Autumn M4355 User manual

DaVinci Full Size Bed Conversion Rails User manual

DaVinci

DaVinci Full Size Bed Conversion Rails User manual

DaVinci M7390 Installation and operating instructions
DaVinci

DaVinci M7390 Installation and operating instructions
DaVinci carter's ARLO Maintenance manual

DaVinci

DaVinci carter's ARLO Maintenance manual

DaVinci Chloe Regency M11426 User manual

DaVinci

DaVinci Chloe Regency M11426 User manual

DaVinci 0598 Installation and operating instructions

DaVinci

DaVinci 0598 Installation and operating instructions

DaVinci 9723 Installation and operating instructions

DaVinci

DaVinci 9723 Installation and operating instructions

DaVinci carter's Colby F11902 User manual

DaVinci

DaVinci carter's Colby F11902 User manual

DaVinci Charlie 12801 User manual

DaVinci

DaVinci Charlie 12801 User manual
DaVinci MADDOX RECLINER AND SWIVEL GLIDER User manual

DaVinci

DaVinci MADDOX RECLINER AND SWIVEL GLIDER User manual

DaVinci Kalani M5523 User manual

DaVinci

DaVinci Kalani M5523 User manual

DaVinci Charlie M12826 User manual

DaVinci

DaVinci Charlie M12826 User manual

DaVinci Sawyer Farmhouse M24726 User manual

DaVinci

DaVinci Sawyer Farmhouse M24726 User manual

DaVinci JennyLind Changer Installation and operating instructions
DaVinci

DaVinci JennyLind Changer Installation and operating instructions

DaVinci CARTER'S MORGAN SIX DRAWER DRESSER User manual

DaVinci

DaVinci CARTER'S MORGAN SIX DRAWER DRESSER User manual

DaVinci carter's Radley F23226 User manual
DaVinci

DaVinci carter's Radley F23226 User manual

DaVinci Carter's Morgan F11523 User manual

DaVinci

DaVinci Carter's Morgan F11523 User manual

DaVinci Marley W4926 User manual

DaVinci

DaVinci Marley W4926 User manual

DaVinci 4309 Installation and operating instructions

DaVinci

DaVinci 4309 Installation and operating instructions

DaVinci Morgan 3 User manual

DaVinci

DaVinci Morgan 3 User manual

DaVinci Carter's 11999 User manual

DaVinci

DaVinci Carter's 11999 User manual

DaVinci Sleigh M2990 User manual

DaVinci

DaVinci Sleigh M2990 User manual

Popular Indoor Furnishing manuals by other brands

HOMCOM 311-046 Assembly instruction

HOMCOM

HOMCOM 311-046 Assembly instruction

Tiger S-line 16310 manual

Tiger

Tiger S-line 16310 manual

OK DIGITAL LF10 Series installation guide

OK DIGITAL

OK DIGITAL LF10 Series installation guide

Metro DataVac MetroSHINGLE Installation details

Metro DataVac

Metro DataVac MetroSHINGLE Installation details

Baxton Studio ANN-2012 Assembly instruction

Baxton Studio

Baxton Studio ANN-2012 Assembly instruction

Community Playthings A281 Product guide

Community Playthings

Community Playthings A281 Product guide

NEW AIM PTY BUNKBED-505A Assembly instruction

NEW AIM PTY

NEW AIM PTY BUNKBED-505A Assembly instruction

Coaster 801574 Assembly instructions

Coaster

Coaster 801574 Assembly instructions

Sauder Caraway Etagere 414111 manual

Sauder

Sauder Caraway Etagere 414111 manual

Sienna 3610970003962 manual

Sienna

Sienna 3610970003962 manual

SawStop TSA-SA70 owner's manual

SawStop

SawStop TSA-SA70 owner's manual

Arthur Berndt Prato 70 WA Assembly instructions

Arthur Berndt

Arthur Berndt Prato 70 WA Assembly instructions

Twoey 3820 Assembly instruction

Twoey

Twoey 3820 Assembly instruction

OSP Designs NWP25-BK operating instructions

OSP Designs

OSP Designs NWP25-BK operating instructions

Costway TP10004 user manual

Costway

Costway TP10004 user manual

Hülsta now! no.7 4280 Assembly instruction

Hülsta

Hülsta now! no.7 4280 Assembly instruction

Pitarch 10063 Assembly instructions

Pitarch

Pitarch 10063 Assembly instructions

Honey Can Do CRT-03937 manual

Honey Can Do

Honey Can Do CRT-03937 manual

manuals.online logo
manuals.online logoBrands
  • About & Mission
  • Contact us
  • Privacy Policy
  • Terms and Conditions

Copyright 2025 Manuals.Online. All Rights Reserved.