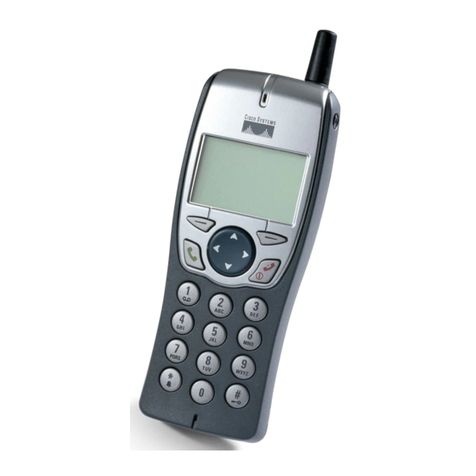
Daviscomms CYBERPHONE User manual


Tableof Contents
1: Get started . . . . . . . . . . . . . . . . . . . . . . 3
1. Standard package contents . . . . . . . . . . .3
2. Phone specification . . . . . . . . . . . . . . . . . 3
3. Phone description . . . . . . . . . . . . . . . . . . 4
4. Installing & removing the battery . . . . . . . 5
5. Charging the battery . . . . . . . . . . . . . . . . 6
6. Powering the Cyber phone on & off . . . . 7
7. Display indicators & icons . . . . . . . . . . . . 8
8. Shortcut menu . . . . . . . . . . . . . . . . . . . . . 9
9. Main Menu icons . . . . . . . . . . . . . . . . . . . 10
2: Configuringyour phone. . . . . . . . 11
1. Important information you should
know first . . . . . . . . . . . . . . . . . . . . . . . . . 11
2. Connecting your phone to an AP . . . . . . .13
3. Connecting your phone to an SIP . . . . . . 14
3: Basic call functions . . . . . . . . . . . . 15
1. Making a IP to IP call (via direct IP) . . . . . 15
2. Making a SIP to SIP call (via SIP server). 16
3. Making a call (via SIP server to landline
or GSM mobile phone) . . . . . . . . . . . . . . 17
4. Speed dial . . . . . . . . . . . . . . . . . . . . . . . . 18
5. Answering a call . . . . . . . . . . . . . . . . . . . 18
6. Mute/Un-mute a call . . . . . . . . . . . . . . . . .18
7. Hold . . . . . . . . . . . . . . . . . . . . . . . . . . . . . 18
4: Menu . . . . . . . . . . . . . . . . . . . . . . . . . . . 20
i Messages . . . . . . . . . . . . . . . . . . . . . . 20
1) Keypad legends. . . . . . . . . . . . . . . . .21
2) Create . . . . . . . . . . . . . . . . . . . . . . . .22
3) Inbox . . . . . . . . . . . . . . . . . . . . . . . . .23
4) Outbox . . . . . . . . . . . . . . . . . . . . . . . 25
5) Chat . . . . . . . . . . . . . . . . . . . . . . . . . 26
ii Contacts . . . . . . . . . . . . . . . . . . . . . . . 27
1) Add . . . . . . . . . . . . . . . . . . . . . . . . . .28
2) Edit . . . . . . . . . . . . . . . . . . . . . . . . . . 28
3) Delete . . . . . . . . . . . . . . . . . . . . . . . .29
4) View Entry . . . . . . . . . . . . . . . . . . . . 29
5) Speed Dial . . . . . . . . . . . . . . . . . . . . 29
iii Call Log . . . . . . . . . . . . . . . . . . . . . . . 30
1) Missed calls . . . . . . . . . . . . . . . . . . . 31
2) Incoming calls. . . . . . . . . . . . . . . . . . 31
3) Outgoing calls . . . . . . . . . . . . . . . . . .31
8. New calls . . . . . . . . . . . . . . . . . . . . . . . . .18
9. Rejecting a call . . . . . . . . . . . . . . . . . . . . 19
10. Silencing the incoming ring tone . . . . . . . 19
11. Call waiting . . . . . . . . . . . . . . . . . . . . . . . 19
12. Conference call . . . . . . . . . . . . . . . . . . . . 19
1

iv Settings . . . . . . . . . . . . . . . . . . . . . . . 32
1) Clock . . . . . . . . . . . . . . . . . . . . 34
2) Wallpaper . . . . . . . . . . . . . . . . . 36
3) Ring tones . . . . . . . . . . . . . . . . 36
4) Message tones . . . . . . . . . . . . . 37
5) Ring Volume . . . . . . . . . . . . . . . 37
6) Receiver volume . . . . . . . . . . . 37
7) Alert mode . . . . . . . . . . . . . . . . 38
8) Message View . . . . . . . . . . . . . 38
9) Brightness . . . . . . . . . . . . . . . . 38
10) Key backlight . . . . . . . . . . . . . 39
11) Auto key lock . . . . . . . . . . . . . .39
12) Key tone . . . . . . . . . . . . . . . . . 39
13) DTMF tone . . . . . . . . . . . . . . . 39
14) Screen Banner . . . . . . . . . . . . 40
15) Factory reset . . . . . . . . . . . . . . 40
16) Software upgrade . . . . . . . . . . 41
v: Configuration . . . . . . . . . . . . . . . . . . . . . . . 45
1) SIP settings . . . . . . . . . . . . . . . .46
2) IP settings. . . . . . . . . . . . . . . . . 49
3) WLAN settings . . . . . . . . . . . . . .52
vi: Information . . . . . . . . . . . . . . . . . . . . . . . . 56
1) SIP information . . . . . . . . . . . . . 56
2) IP information . . . . . . . . . . . . . . 56
3) WLAN information. . . . . . . . . . . 56
4) General information . . . . . . . . . 56
5. Web configurator.. . . . . . . . . . . . . 57
6. Glossary . . . . . . . . . . . . . . . . . . . . 67
7. Health and safety information . . . 68
8. FCC Declaration . .. . . . . . . . . . . . .71
2

1. Get Started
1: Standard Package Contents
Please check carefully if you have the items mentioned
below:
1: WiFi Phone x 01
2: USB Charger x 01
3: USB Cable x 01
4. Battery x 01
5. User’s Manual x 01
6. Lanyard Strap
*Actual contents may vary.
2: PhoneSpecifications
Dimensions: 96(L) x 65(W) x
16(H) Dimension in
mm.
Weight: 65g (without battery)
80g (with battery)
Battery: 650 mAh Li-ion,
3.7v
Charger Input: 100-240v – 50-60Hz
0.2A
Charger Weight: 50g
Charging Time: 3 hours
Standby Time: 48 hours depending
on the network
Talking Time: 2 hours depending
on the network 3
The CYBERPHONE is a 802.11b/g VoIP
WiFi SIP Phone.
Get Started

Get Started
4
3: Phone Description
Earpiece
OLED screen
Right Soft Key
End / Power key
Number keys
Silent mode
key
Left soft
key
Volume up
key
Volume
down
key
Switch input method
key / keypad lock.
Talk/ Call
key
5 Way
joystick
USB Port Battery
cover door
Loop for
Lanyard
Speaker
hole
5-Way Joystick 1
2
34
5 – Push down to select an option
Battery cover
door release
button
Mic
Scroll left for system info In the idle screen, scroll joystick right for shortcut menus
Push up to scroll on the side bar menus
Push down to scroll on the side bar menus

4: Installing and Removing the battery
1. Push and hold the
battery door button down.
2. While the button is
pushed down, push from
the top and slide the
battery door cover outwards.
Battery
Contact point
3. To remove, lift the
battery out
from here
4. To install the battery,
ensure that the contact
points are aligned.
5. Insert the direction shown
in the diagram FIRST.
Re-attach the battery door.
Get Started
*Please refer to page.69 for more information on your battery. 5

Get Started
6
5: Charging the battery
2. Insert the charger into
your wall power outlet.
1. Plug the USB cable into
the charger or to a
computer USB port.
3. Locate the USB port at
the bottom of your phone.
4. Plug the other end of the USB cable in and turn
on the main power to begin charging
With the phone turned
on/off, this Screen will
appear when the phone
is charging.
This screen will appear
when the phone’s battery
charging is completed.
OR
This icon will scroll on the
idle screen if its turned on.
Charging Completed
Note: You need to charge the battery for 8 hours
for its first time use.

Get Started
7
6: Poweringthe Cyber phone on and off
-To Power ON
Press and hold the (end/off key icon) for 5 seconds, release
and the power up window will be shown.
-To Power OFF
Press and hold the (end/off key icon) for 3 seconds, release
and the power down window will be shown.
Fig.1Power up window
Fig.2Power down window
1.0.02

Get Started
8
7: Display indicators and icons Received signal strength from WiFi
access point.
Time display
Call mute (Un-mute, Mute)
Keypad lock
Write Message
The roles of the soft keys vary depending on the
function you are using. The keys just below
selects the functions desired when pressed.
NOTE:If you are disconnected from the signal,
the right soft key will automatically change
to the “SCAN” selection.
2.59P
To lock,press and hold for 1 second.
To unlock,press and hold for 1 second.
(Weak Strong)
(Weak Strong)
Message Inbox (new, read, sent, not sent)
Message Icon
Chat Icon
Soft key function indicators
WiFi connectivity status (refer to pg.12)
Alert type (ring, ring and vibrate, silent,
vibrate only)
Battery level indicator
Recent Calls Icon
Idle Screen

Site Scan
SIP Registration
Reload IP
Restart WLAN
Web Configurator
System info provides a summary of the connection details your phone to the network AP.
WLAN :Displays the name of the AP you are connected to.
IP address : Displays the IP address assigned to the phone.
User Name : Displays the User name used for SIP connection.
Proxy Server : Displays the IP address of the proxy server the phone is connected to.
Outbound proxy : Displays the outbound proxy address of the SIP server the phone
is connected to.
8. Shortcut Menu
Shortcut menu allows a quick access to the configurationsetting menu of your phone.
System Info
9
BACK
: Allows you to scan and join the list of APs available in your network LAN
: Allows you to activate or reconnect your SIP account on the Cyber WiFi phone
: This function allows you to request an IP address from a DHCP server
: This function restarts the phone’s wireless connection to the AP.
: This function allows you to configure your phone settings using a web browser.
Get Started

Get Started
Individual icons will illuminate when selected. Navigate your way around the icons by moving the
joystick. Press the joystick down to select the application.
Message: Use the messages menu to send and receive short messages.
Contacts: Store and find from a list of contacts stored in your contact list.
Call Log: Views the calls you have dialed, received, or missed
Settings: Settings menu provides you with various setting options to customize the phone to your
preferences and needs. You can also reset the setting to their default values.
Config: Use this menu to configure the SIP, IP and WLAN settings.
Info: Use this menu to check the information of your SIP, IP, WLAN and General settings.
10
9: Main Menu Icons

2. Configuring your phone
1: Important information you should know first
-Possible ways of communicating using the CYBERPHONE.
- IP to IP call
- SIP to SIP call
Note: You will need to subscribe with a SIP service provider to make a SIP call.
For reference please refer to www.daviscomms.com.sg
-Requirements in order to establish a communication on the CYBERPHONE.
- The phone must be associated to an AP in order to communicate to other WiFi phones.
Note: - Do take note that there are some network security protocols installed on the LAN which you
wish to connect to.
- Some require registering the MAC address of the CYBERPHONE in order to allow access to
the AP of the network. Under such circumstances, you should seek assistance from your
network administrator to register the MAC address of the phone to the server to gain access to the
network’s AP.
-Encryption
- Connecting the CYBERPHONE to wireless LAN area may require an
encryption password. You will need this password to gain access to the network in order to
associate to the AP you are connecting to.
- Most standard network uses WEP-64 encryption protocol. You would need to consult your network
administrator if the network uses other settings. 11
ConfiguringYour Phone

12
-SIP Server connection
- A SIP connection allows you to communicate to another SIP user via a WiFi phone without having
the hassle to remember the full length of the IP address number.
Note: - Before you can connect to a SIP server, it is necessary that you obtain a SIP account. You can
also obtain a paid SIP account which provides you communication to a mobile phone number (GSM)
or a landline number (PSTN).
For reference please refer to www.daviscomms.com.sg
-Connectivity Status
-The connectivity status of your CYBERPHONE must be green in order for your phone to make calls.
Below is the illustration of the connectivity status of your CYBERPHONE.
ConfiguringYour Phone
Red – Not connected to an AP.
Amber – It is connected to an AP but no IP is being assigned.
Green – Connected to an AP and IP is being assigned.

2: Connectingyour phoneto an AP
13
Auto Connecting to an AP
Before you proceed to making a call, you will first need the CYBERPHONE to connect to an AP.
Your phone will automatically detect and connect to your pre-configured AP on the first power up.
Manually setting up the phone to connect to an AP in your LAN network
Step.1 - From the idle screen, select > MENU > CONFIG > WLAN > SSID >SCAN within your area, a list
of available AP’s will appear >scroll and select the AP you wish to connect to, select > VIEW
> Select the AP you like to join.
Step.2 - In the same WLAN settings menu, select > ENCRYPTION >
scroll and select > WEP-64. ( Please refer to pg.10, on encryption. )
Step.3 - In the WEP-64 screen, select >OPEN SYSTEM> ( Please confirm this
setting with your Network Administrator. ) and select > KEY 1.
Step.4 - Input the password encryption of the AP set by your network administrator >when done, select >
OK > in the WLAN Settings menu, select ACTIVATE by pressing the left soft key .
Note:-
1.) Wait for the connectivitystatus bar to turn green. The main screen will display “Connecting AP….
” followed by “Connecting IP….” to completethe connection the to the network If the connecting AP disappears
and connectivityis still red, retry. If you still have problems,consult your IT administratorfor the network details.
2.) Incase of WEAKSIGNAL, there will be an alert tone & display showing
Step.5 – Once your phone connectivity status turns green
You should be able to make a call via direct IP to IP.
ConfiguringYour Phone
Fig.4Calling Screen
Fig.3PoorSignal Coverage
Screen

3: Connectingyour phoneto an SIP
OPTIONS HANDFREE
14
Note: - Before you proceed to making a call, you will first need to set up the CYBERPHONE to
register to a SIP server connection.
For reference please refer to www.daviscomms.com.sg
Step.1 - From the idle screen, select > MENU > CONFIG > SIP > USER NAME > input your user name
according to your SIP account details and select > OK.
Step.2 - In the same SIP settings menu, select > PASSWORD > input your password according to your
SIP account details and select > OK.
Step.3 - In the same SIP settings menu, select > PROXY SERVER > IP ADDRESS > key in the address
of your SIP server, for example, > SIPprovider.org and select > OK.
Step.4 - In the Proxy Server settings menu, select > STATUS > and select > ENABLE.
Step.5 - Go back to the SIP settings menu, select > OUTBOUND PROXY > IP ADDRESS > key in the
IP address of your SIP server, for example, > SIPprovider.org and select > OK.
Step.6 - In the Outbound Proxy settings menu, select > STATUS > and select > ENABLE.
Step.7 - Go back to the SIP settings menu, select > ACTIVATE by pressing the left soft key .
Note: - After activating, a “Registering SIP…” display will be appear at the Idle screen.
The “Not Registered” sign will disappear on the idle screen to indicate that your
CYBERPHONE is connected to your SIP server account.
Step.8 - You are now ready to make a SIP to SIP call via SIP server.
ConfiguringYour Phone

Basic Call Functions
For eg:- 1234567@191.166.123.203
Note: Please make sure to disable the SIP settings before making an IP to IP
call. To do so, please follow the steps below:
Disabling SIP - Go to MENU > CONFIG > SIP > PROXY SERVER > STATUS >
select DISABLE > select BACK > OUTBOUND PROXY > STATUS >
select DISABLE > select BACK > ACTIVATE by pressing the left soft
key .
Step.1 - In the idle screen, key in the number, for eg:-
1234567@191.166.123.203
Step.2 - Press and “calling 1234567@191.166.123.203” will be displayed.
Step.3 - When the call is connected, call timer will be displayed.
Step.4 - To end the call, press the key.
Note: “@” is keyed by pressing key twice.
Fig.5Calling Screen
Fig.6Call timer screen
These figures are defined
by the recipient’s user name
In the SIP settings.
These figures refers to recipients
FIXED IP number
OPTIONS
15
3. Basic Call Functions
1: Making an IP to IP call (via direct IP)
SPEAKER
SPEAKER

Basic Call Functions
OPTIONS HANDFREE
For eg:- 31080240
Step.1 - Key in the SIP contact number
Step.2 - Press and “calling 31080240 will be displayed.
Step.3 - When the call is connected, call timer will be displayed.
Step.4 - To end the call, press the key.
These figures will be the other parties SIP
phone number you wish to dial.
16
Note: A user can only call to the other party via the same SIP provider. Please refer to your SIP
provider’s agreement if you are contacting another person of another SIP provider account.
Do make sure that your SIP settings are activated. (Refer to Pg.14)
2: Making a SIP to SIP call (via SIP server)

3: Making a call ( via SIP server to Landline/ GSM Mobile Phone)
Basic Call Functions
Note: For eg:- 65 62100123
Step.1 - Key in the number, for eg:- 6562100123
Step.2 - Press and “calling 6562100123” will be displayed.
Step.3 - When the call is connected, call timer will be displayed.
Step.4 - To end the call, press the key.
Country code Land line number
or mobile number
Note: You can only call a Landline / GSM Mobile phone line depending on your SIP Server account
services.
For reference please refer to www.daviscomms.com.sg
Do make sure that your SIP settings are activated. (Refer to Pg.14)
17

4: Speed dial
5: Answering a call
6: Mute/Un-mute a Call
7: Hold
8: New Calls
- Refer to page.29 for the setting up of speed dial.
- During standby mode, press and hold the preset key for 1 second to display
the name and phone number, press left soft key to call.
- Press the key to answer incoming calls. Call timer will be displayed.
Basic Call Functions
SILENT
Fig.7Incoming call screen
18
- During a call is answered, click on options> scroll to mute and click select.
To un-mute the call, click on options> scroll to mute and click select.
During a call you can put the other party to hold by clicking on options> scroll to Hold and click select.
New calls allows you to connect to another user while having one conversations active at the same time.
To create a new call, click on options during a call> scroll to New call > click select> Key in number or
select Contacts> click Call
SPEAKER

- When there is an incoming call, press the key to reject the call.
- Number of missed calls will be displayed. Press the left soft key to
view the missed call.
9: Rejecting a call
10: Silencingthe incomingring tone
11: Call waiting
12: Conference Call
Fig.8Missedcall screen
- When there is a incoming call, press the left soft key >select SILENT.
Fig.9Hold call screen
- When another call comes in during a call, it will give a waiting tone.
- To reject the incoming call, press the left soft key >select REJECT.
- To answer, press the .
Basic Call Functions
VIEW EXIT
19
During a call, click on OPTIONS during a call >scroll to NEW CALL > click SELECT >
key in a phone number or select CONTACTS > click CALL > when third party answers,
click OPTIONS > and select a phone number.
Table of contents
