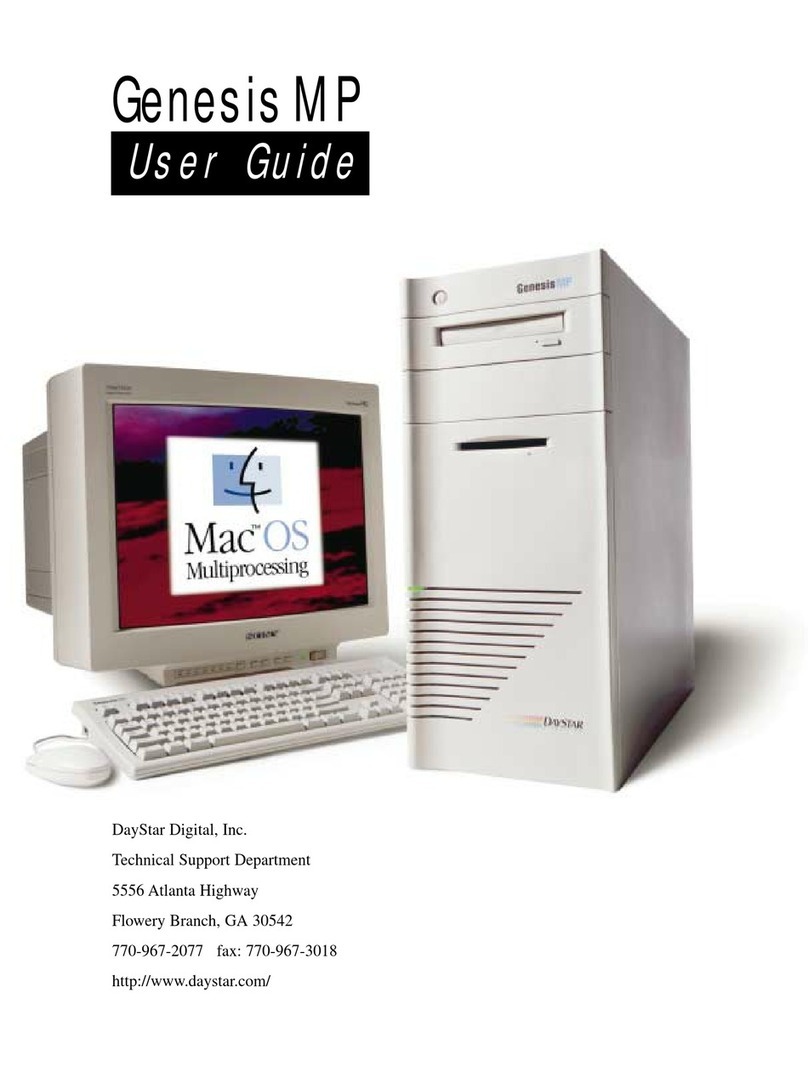
DayStar Digital Genesis MP User manual

DayStar Digital, Inc.
Technical Support Department
5556 Atlanta Highway
Flowery Branch, GA 30542
770-967-2077 fax: 770-967-3018
http://daystar.com/
Service Guide
Genesis MP

Notices
The information contained in this maintenance and service guide is sub-
ject to change without notice.
DayStar Digital, Inc. shall not be held liable for technical or editorial
errors or omissions; nor for incidental or consequential damages
resulting from the performance or usage of this manual.
This manual is protected by copyright. No part of this manual may be
photocopied, reproduced, stored in a retrieval system, or transmitted
in any form (i.e., mechanically, electronically, or otherwise) without
prior written consent from DayStar Digital, Inc.
No licenses, expressed or implied, are granted with regard to any of
the technology documented in this Service and Maintenance Guide.
Copyright © 1996, DayStar Digital, Inc.
All rights reserved, Printed in the USA.
Genesis MP™ is a trademark of DayStar Digital, Inc.
Genesis MP System Utilities is a trademark of DayStar Digital, Inc.
PowerFrax is a freeware product of DayStar Digital, Inc.
nPOWER is a trademark of DayStar Digital, Inc.
Apple, LocalTalk, and Macintosh are all trademarks of Apple Computer, Inc.
AppleCD, Disk First Aid, GeoPort, Mac, are trademarks of Apple Computer, Inc.
Microsoft and MS-DOS are registered trademarks of Microsoft Corporation.
Windows is a registered trademark of Microsoft Corporation.
FCC Statement
This equipment has been tested and found to comply with the limits for a Class
A digital device, pursuant to Part 15 of the FCC Rules. These limits are
designed to provide reasonable protection against harmful interference when
the equipment is operated in a commercial environment. This equipment gener-
ates, uses, and can radiate radio frequency energy and, if not installed and
used in accordance with the instruction manual, may cause harmful interference
to radio communications. Operation of this equipment in a residential area is
likely to cause harmful interference in which case the user will be required to
correct the interference at his own expense.
IMPORTANT:
Changes or modifications to this product not authorized by DayStar Digital, Inc., could
void the FCC Certification and negate your own authority to operate the product.
This product was tested for FCC compliance under conditions that included the
use of DayStar peripheral devices and DayStar shielded cables and connectors
between system components. It is important that you use FCC compliant
peripheral devices and shielded cables and connectors between system compo-
nents to reduce the possibility of causing interference to radios, television sets,
and other electronic devices. You can obtain DayStar peripheral devices and the
proper shielded cables and connectors through a DayStar-authorized dealer.
For non-DayStar peripheral devices, contact the manufacturer or dealer for
assistance.
Notices
Genesis MP2 ◆
∆
!

Preface
Genesis MP
About Genesis MP
About Genesis MP
The Media-Publishing Workstation for the Next Century
The machine you have before you is the new standard in the com-
puter industry—the DayStar Genesis MP. Now Macintosh users
can have the speed they associate with expensive, high-end work-
stations—but at a reasonable price.
Genesis MP is the fastest Mac OS based system available—the
first Mac OS based computer with speed built-in. Using its exper-
tise in multiprocessing, DayStar created Genesis MP with internal
multiprocessing hardware and software. Adopted by Apple,
DayStar’s nPOWER multiprocessing extensions to the Mac OS
are now the official standard for multiprocessing on the Mac.
As computer software becomes more sophisticated, designers,
illustrators, video editors, animators and multimedia producers will
require a machine that’s fast enough to keep pace with their flow
of ideas. Genesis MP is a Media-Publisher’s dream come true.
First— Genesis MP begins with a fast, upgradable PCI-bus moth-
erboard, featuring 2 SCSI busses, Ethernet, 16-bit stereo sound
and room for ample memory expansion.
Then— DayStar adds its nPOWER scalable multiprocessing tech-
nology, a fast tray-loading CD-ROM drive and a solidly-built tower
case with 10 drive bays, 350 watt power supply and three large
cooling fans for improved system reliability.
At the heart of Genesis MP is nPOWER—DayStar’s upgradable
processor card, which features up to four PowerPC 604 processors.
Since the processors are on a card, Genesis may be upgraded as
faster and more advanced processor technology becomes available.
To allow programs to take advantage of nPOWER’s speed,
DayStar has developed an open multiprocessing API (Application
Programming Interface). The API makes it very easy for program-
mers to add multiprocessing support to applications. The API stan-
dard is available to all interested developers.
Apple has acquired the rights to DayStar’s nPOWER architecture.
With Apple’s commitment, nPOWER (now known as the Apple
Multiprocessing Application Programming Interface) is assured of
software support in future versions of the Macintosh operating sys-
tem. Software developers that provide support for nPOWER include
Adobe, Metrowerks, Strata, Elastic Reality and many others.
◆3

Preface – About Genesis MP
Genesis MP4 ◆
Conventions Used in this Guide
The following conventions are used to distinguish elements of the text
in this guide:
Keyboard names will appear in all CAPS and BOLDFACE type. For
example: HOME, TAB.
When keys must be pressed simultaneously, the action is represented
by the keyboard key name and the plus (+) symbol. For example:
<COMMAND> + <OPTION> + <P> + <R>.
The filenames are presented in
UPPERCASE, ITALIC
type. For exam-
ple:
FILENAME
.
When referring to the closed Genesis MP unit, the words top, bottom,
left and right refer to the unit as viewed from the front in standard
operating position.
When referring to the open Genesis MP chassis or the Genesis
MP motherboard, the words top, bottom, left and right refer to the
unit as viewed from the open side panel in standard operating
position.
The word front always refers to the front panel of the Genesis MP
(floppy disk side). The word rear always refers to the rear panel of the
Genesis MP (cable side).
The following words and symbols denote special messages through-
out this guide:
WARNING
TEXT SET OFF IN THIS MANNER INDICATES THAT FAILURE
TO FOLLOW DIRECTIONS PROVIDED IN THE WARNING
COULD RESULT IN BODILY HARM OR IN EXTREME CASES
EVEN LOSS OF LIFE.
CAUTION
Text set off in this manner indicates that failure to follow directions
provided in the Caution could result in damage to equipment or
even loss of information.
IMPORTANT
Text set off in this manner indicates specific instructions or clarify-
ing information is being defined.
Text set off in this manner indicates commentary, sidelights, or interesting information
is being defined.
∆
!
∆
!
∆
!

Genesis MP
Preface – About Genesis MP
◆5
Standard Abbreviations
The following abbreviations (units of measure) and the
corresponding terms used in this guide are defined below:
A amperes mA milliamperes
dB decibels mA microamperes
GB gigabytes MB megabytes
Hz hertz MHz megahertz
in. inches mm millimeters
k 1000 ms milliseconds
K 1024 ms microseconds
KB kilobytes ns nanoseconds
kg kilograms Ωohms
kHz kilohertz sec. seconds
kΩkilohms V volts
lb. pounds W watts

Preface – About Genesis MP
Genesis MP6 ◆
Other Abbreviations
Other abbreviations used in this guide are defined below:
AC alternating current
A/D analog to digital
CD-ROM compact-disc read-only memory
CPU central processing unit
DC direct current
DIMM dual inline memory module
DMA direct memory access
DRAM dynamic RAM
GND ground
IC integrated circuit
I/O input and output
ISDN Integrated Services Digital Network
MMU memory management unit
n.c. no connection
NVRAM non-volatile random-access memory
PCI Peripheral Component Interconnect
(industry-standard expansion bus)
PRAM parameter random-access memory
PROM programmable read-only memory
RAM random access memory
ROM read-only memory
SCC serial communications controller
SCSI small computer system interface
SIMM single inline memory module
SVGA super video graphics adapter
VCC positive supply voltage
VGA video graphics adapter
VRAM video RAM (used for display buffers)

Genesis MP
Preface – About Genesis MP
◆7
Electrostatic Discharge (ESD) Rules
This section covers the proper procedures for grounding and utiliza-
tion of recommended equipment and materials for preventive damage
from Electrostatic Discharge (ESD).
Static electricity can be discharged from one’s self or by a conductor
thereby destroying static-sensitive devices or micro-circuitry. Often,
static discharge may not be detected by sight, touch, or sound,
although damage occurs. Electronic devices exposed to ESD may not
be affected at all and will continue to function properly. Or, this
device(s) may function properly for awhile, then gradually degrade
internally, thus reducing the life of the device(s).
When handling a device consider the following ways static electricity
can be emitted, thereby producing various levels of electrostatic volt-
age levels:
• Working in extreme low humidity
• Walking across carpet with device
• Walking across a vinyl floor
• Body motion within an unprotected ESD work area
• Removing device(s) from plastic packaging
• Removing device(s) from vinyl packaging
• Removing device(s) from Styrofoam packaging
• Removing device(s) from bubble-wrap packaging
• Packing or Unpacking device(s) wrapped in foam
CAUTION
The Genesis MP uses electronic components that are sensitive to
static electricity. Use care when handling and installing these com-
ponents to prevent damage which can be caused by static cur-
rents. Always work in an area of low static electricity on a ground-
ed surface to prevent static discharge.
∆
!

Preface – About Genesis MP
Genesis MP8 ◆
ESD SAFE WORK AREA
IMPORTANT
Many electronic devices are ESD sensitive. Be sure to take the follow-
ing precautions when handling an electronic device:
• When seated, always wear an Anti-static Wrist Strap
• When standing, wear footstraps on a grounded floor mat
• Never attempt installation on a carpeted floor
• Never wear leather shoes (rubber soles are recommended)
• Never attempt installation in an overly dry environment
• Never wear silk or polyester clothing during an installation
• Always remove all jewelry (i.e., rings, bracelets, watches, etc.)
• Always transport electronic devices in static-safe containers:
(i.e., tubes, bags, boxes)
• Always protect parts and assemblies with conductive ESD
approved containers and/or packaging
• Always remove electronic devices in a grounded work area
• Always use field service tools (i.e., screwdrivers, snips, vac-
uums) that are conductive.
Genesis MP is Shipped Complete with an Anti-Static Wrist Strap
The Anti-static Wrist Strap shipped with the Genesis MP is a one-use
disposable safety strap intended for the customer’s use. If you do not
have a re-usable Anti-static Wrist Strap, be sure to purchase one for
each employee that will be handling, installing, servicing, and/or main-
taining equipment.
Grounding Using The Anti-static Wrist Strap
These straps hold a minimum of 1 megaohm resistance. To ensure
proper grounding, this strap must be worn in direct contact with the
skin.
Grounding Using A Grounding Mat
This mat should be used when standing in an electro-static area and
when handling electronic devices. Alligator clips may be substituted
for banana-plug connectors connected to a wrist strap.
Grounding Using Heelstraps/Toestraps/Bootstraps
These straps can be used when standing. These straps may be sub-
stituted for most shoes or boots. The conductive strips must be worn
in direct contact with the skin to be effective.
∆
!

Genesis MP
Preface – About Genesis MP
◆9
PREVENTING DAMAGE TO DISK DRIVES
To prevent ESD and physical shock damage to floppy diskette
drive and/or hard disk drive(s), ensure the following safety precau-
tions:
• Always utilize anti-static techniques when handling drives
• Always re-package drives in their original shipping packaging
• Never drop a drive onto any surface (hard/or soft)
• Shield work surface with a minimum of 1-inch shock-proof foam
• Always place drives “assembly-side-down” on shock-proof foam
CD-ROM Drive
CAUTION
Making adjustments or performing procedures other than those
specified in your equipment’s manual may result in hazardous
exposure.
CAUTION
Do not attempt to disassemble the cabinet containing the laser.
The laser beam used in this product is harmful to the eyes. The
use of optical instruments, such as magnifying lenses, with this
product increases the potential hazard to your eyes. For your safe-
ty, have this equipment serviced only by a DayStar-authorized ser-
vice provider.
If you have an internal DayStar CD-ROM drive in your Genesis
MP, your computer is a Class 1 laser product. The Class 1 label,
located in a user-accessible area, indicates that the drive meets
minimum safety requirements. A service warning label is located in
a service-accessible area.
∆
!
∆
!

Preface – About Genesis MP
Genesis MP10 ◆
Lithium Battery
Genesis MP uses a lithium battery to store users’ preferences and
time and date information while the unit is not turned on.
CAUTION
Danger of explosion if battery is incorrectly replaced. Replace only
with the same or equivalent type recommended by the manufac-
turer. Dispose of used batteries according to the manufacturer’s
instructions.
Lithium batteries cannot be recharged, therefore require disposal
when exhausted. In addition to its explosive potential, lithium is
water-reactive. Genesis MP’s lithium battery must be disposed of
as hazardous waste, therefore, DayStar Digital, Inc. recommends
the following battery disposal procedure:
After removing the exhausted lithium battery from the mother-
board, place the battery into a zip-lock wrapper and packaging
provided with the replacement battery. Mark the zip-lock wrapper
DEAD and return it to DayStar Digital, Inc, where it will be dis-
posed of according to EPA guidelines.
Disposal of a used battery should be handled in accordance with
county, state, province, or local battery disposal regulations.
WARNING
NEVER ATTEMPT TO OPEN OR SERVICE A USED BATTERY.
OPENING A BATTERY CAN DAMAGE THE BATTERY AND
EXPOSES POTENTIALLY HARMFUL AND HAZARDOUS COM-
PONENTS INTO THE ENVIRONMENT.
THERE ARE NO SERVICEABLE PARTS LOCATED INSIDE THE
BATTERY.
More Information about Genesis MP. . .
The following documentation is available to support the Genesis MP:
Genesis MP User Guide
Genesis MP Service Guide
Genesis MP Conversion Guide
Appendix A - External Connections
Appendix B - Internal Connections
Appendix C - Voltage Readings
White Paper: Multiprocessing on the Macintosh
Genesis MP Product Brochure
∆
!
∆
!

Genesis MP
Genesis MP Product Overview
Genesis MP Product Overview
This chapter provides an overview of DayStar Digital’s Genesis
MP and covers the following topics:
Serial Number
Genesis MP Configurations
External Components of Genesis MP
Internal Components of Genesis MP
AC Power
Functional Descriptions
Serial Number
Genesis MP's serial number should be provided to DayStar Digital,
Inc. whenever requesting information or ordering spare parts. The
serial number can be located on the rear I/O panel. Ensure you
have this serial number available.
Serial Number
Chapter 1
◆11

Genesis MP Configurations
The Genesis MP comes in several configurations, allowing flexibili-
ty to meet any production need. Genesis MP configurations are
distinguished by the number of PCI slots (initial models have three
or six slots), and the aggregate clock speed of the processors on
the nPOWER processor card (for example, the Genesis MP 528
has 4-132 MHz processors; 4 x 132 = 528).
DIMM sockets provide for RAM expansion, and with PCI expan-
sion card slots, users can create their own “ultimate workstation”
using the latest technology such as SCSI-3, Fast Ethernet, even
professional quality audio/video capability.
The number of PCI slots, number of DIMM expansion slots/maxi-
mum RAM expansion, processor speed, storage configuration and
other features vary by unit. Consult the Genesis MP User Guide
for information on specific features.
Important Internal Components of the Genesis MP
This photograph lists all the major internal components and fea-
tures of the Genesis MP. Use this graphic to help familiarize your-
self with the machine.
Component
CD-ROM Drive
5.25˝ Internal Bay
1.4 MB Floppy Drive
3.5˝ Internal Drive Bays
Power Supply
DIMM Sockets
Internal Cooling Fans
Secondary Cache
nPOWER Card Connector
PCI Expansion Slots
nPOWER Quad 604 Board
Chapter 1 – Genesis MP Product Overview
Genesis MP12 ◆

Genesis MP
Chapter 1 – Genesis MP Product Overview
◆13
AC Power
Genesis MP provides power through the AC input power receptacle
and a switched power convenience receptacle for monitor connection.
Connecting AC Power to Genesis MP
WARNING
ALWAYS DISCONNECT POWER FROM GENESIS MP PRIOR
TO PERFORMING ANY MAINTENANCE AND/OR SERVICE.
FAILURE TO DISCONNECT POWER TO THIS PRODUCT MAY
CAUSE LOSS OF LIFE.
CAUTION
Maximum current is 3 amps. Refer to the monitor’s service manual
to determine its current requirements.
∆
!
∆
!

Chapter 1 – Genesis MP Product Overview
Genesis MP14 ◆
Functional Descriptions
This section covers functional descriptions of key parts and fea-
tures of the Genesis MP. For Removal and Replacement
Procedures, refer to Chapter 4 of this guide.
SCSI Interface
Genesis MP has two SCSI interfaces: the internal Fast SCSI-2
interface, and the internal/external standard SCSI interface. The
internal Fast SCSI-2 interface drives the internal hard disk and
CD-ROM.
The internal Fast SCSI-2 bus supports transfer rates up to 10
MB/sec. The internal/external SCSI bus supports transfer rates up
to 5 MB/sec.
The motherboard end of the internal SCSI bus is terminated by a
110 W passive terminator. This terminator is located on the main
logic board near the portion of the internal chassis connector that
contains the internal/external SCSI signals.
Termination of the drive end of the internal SCSI bus is accom-
plished by installing the internal drive at the last connector on the
internal SCSI cable, and enabling termination on that drive.
Hard Drives
DayStar currently provides several different drive configurations for
Genesis MP. These include single drive systems operating on the
motherboard SCSI interface, and multiple drive Fast and Wide
arrays using a high-performance PCI SCSI controller.
Additionally, users may install any kind of drive controller available
on the PCI bus (SCSI-3, FiberChannel, SSA). It is also possible to
configure a “software-only” disk array using the Fast SCSI-2 moth-
erboard interface.
For installation instructions refer to Chapter 3 of the Genesis MP
User Guide.
CD-ROM Drive
Genesis MP has a CD-ROM drive that supports worldwide stan-
dards and specifications for CD-ROM and CD-digital audio disks.
This tray-loading CD-ROM drive is located in the top 5.25˝ remov-
able media bay.

Genesis MP
Chapter 1 – Genesis MP Product Overview
◆15
Floppy Drive
Genesis MP has one internal high-density floppy disk drive. The
drive is connected to a 20-pin connector. The floppy drive will read
and write Mac-formatted 800K and 1.44 MB and PC-formatted
720K and 1.44 MB floppies (to read and write PC-formatted disks,
be sure the PC Exchange control panel is enabled.
PCI Slots
The 3 or 6 PCI slots allow for a broad range of expansion cards.
Performance Tips:
In the 6 slot Genesis MP, the six PCI slots are grouped into two
groups of three each. Because the circuitry linking the top three
PCI slots is also used for other motherboard I/O, most expansion
cards perform slightly faster when installed in one of the bottom
three PCI slots.
If you are installing a SCSI array with two PCI cards, you can typi-
cally increase performance by installing one card in one of the top
three PCI slots and the second card in one of the bottom three
PCI slots.

Memory
Genesis MP does not have any main memory soldered to the logic
board. At least one RAM DIMM must be present for the computer
to operate.
Genesis MP uses 168-pin Dual-Inline Memory Modules (DIMMs).
DIMMs provide the widest possible data path to the processor, for
maximum speed. Up to 8 or 12 DIMMs may be installed in
Genesis MP, depending on the model. The table below shows
maximum memory sizes by DIMM size. You can mix and match
different DIMM sizes on one Genesis MP.
For complete instructions on installing DIMMs in Genesis MP, see
Chapter 3 of the Genesis MP User Guide: “Connecting Additional
Peripherals”.
Genesis MP maximum
memory configurations
Interleaving
For maximum performance, DayStar Digital, Inc. recommends
memory interleaving. DIMMs can be installed one or more at a
time. When the startup software detects two DIMMs that are the
same size and installed in corresponding slots, it configures them
as a single 128-bit data bus for increased performance. For 128-
bit bus operation, both DIMMs in the pair also have to have the
same address mode.
To enable interleaving, install DIMMs in identical pairs. DIMM con-
nectors are organized into two banks: Bank A and Bank B. When
installing a pair of DIMMs for interleaving, install one DIMM in
Bank A, and its identical mate in the corresponding slot in Bank B.
For example, if you install a 16 MB DIMM in slot A3, install an
identical 16 MB DIMM in slot B3 to make sure the new memory is
interleaved.
DIMM Maximum Memory with:
Size 8 DIMMs 12 DIMMs
4 MB 32 MB 48 MB
8 MB 64 MB 96 MB
16 MB 128 MB 192 MB
32 MB 256 MB 384 MB
64 MB 512 MB 768 MB
128 MB 1024 MB 1536 MB
Chapter 1 – Genesis MP Product Overview
Genesis MP16 ◆

Genesis MP
Service Policies
Service Policies
Warranty Service Plan Terms and Conditions.
This document outlines the terms and conditions of the DayStar
warranty repair program. Additional details of the service plan are
available by contacting DayStar Digital.
This document addresses the following points:
• The Genesis MP systems warranty
• Warranty repair part numbers and costs
• Reseller reimbursement program
• Diagnosing and Ordering information
• Payment and the Return of defective parts
• Delivery Timetable
• Shipping Methods
The Genesis MP systems warranty
The Genesis MP systems come with a 1 year limited, return to
reseller, warranty. In order to receive your reimbursement, you
must return to DayStar the defective components or subsystems.
As an Elite reseller you have the opportunity to fully service your
clients needs and create greater margin opportunities.
Warranty repair part numbers, costs and ordering
Page 35 contains the list of the subsystems that are available for
performing a warranty repair.
Consult the Service Parts Price List for part numbers and the lat-
est pricing. The Service Parts Price List is available on DayStar’s
FaxBack system at (770) 967-0921, document number 8506.
Once you have confirmed with DayStar Technical Support the sub-
system that you need repaired, you may order the unit. See the
diagnosis and ordering information below.
Chapter 2
◆17

Chapter 2 – Service Policies
Genesis MP18 ◆
Reseller reimbursement program
DayStar’s Genesis MP warranty repair reimbursement program
allows resellers to be credited for performing a warranty repair. A
warranty repair is considered to be the complete start to finish
process to repair a DayStar Genesis system. The DayStar
Genesis MP’s design allows for straightforward replacement of
defective or damaged subsystems.
Consult the Warranty Service Program Overview for specific pric-
ing schedules. The Warranty Service Program Overview is avail-
able on DayStar’s FaxBack system at (770) 967-0921, document
number 8505.
Diagnosing and Ordering information
Call DayStar Technical Support at (770) 967-2077 x #1. Once the
problem is diagnosed, you can order the part directly from the
technical support associate. Certain subsystems can also be
ordered and inventoried on an “as available” basis. Talk to your
technical support representative for further details and ordering
requirements.
Payment and the Return of defective parts
To ship replacement parts prior to the return of defective parts,
DayStar requires that you issue a P.O. or payment as outlined below:
1. With credit approval, Net 30-day invoicing
You are eligible to be invoiced on account by DayStar Digital if
you are currently in good standing with DayStar Digital’s credit
department.
2. Check or money order
The check must be received before the order can be sent.
Please make the check payable to DayStar Digital, Inc.
3. Credit card: American Express, MasterCard, or VISA
While you are on the phone, tech support will issue a return
authorization number (RA) for the mandatory return of the
defective part. You will also be given directions as to how to
ship the defective component back to DayStar.
Upon receipt and conformation of the returned part or subsys-
tem, DayStar will issue a credit to your account.

Genesis MP
Chapter 2 – Service Policies
◆19
Delivery Timetable
Standard Delivery
In-stock merchandise will be shipped out the same day if received
by noon EST. If received after noon EST the merchandise will be
shipped out the next business day.
Shipping Methods
DayStar Digital, Inc. will pay to ship merchandise Federal Express
Economy to the reseller. Returns of defective parts should be
shipped to DayStar via Economy/2nd Day - bill recipient. If
resellers return defective parts via more expensive modes, they
will be billed the amount above the Economy/2nd Day rate.

Other manuals for Genesis MP
1
Table of contents
Other DayStar Digital Desktop manuals
