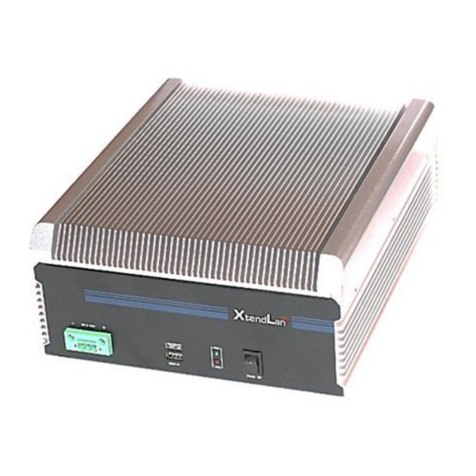
XtendLan PTDX5311 User manual

PTDX5311
PTDX9211
User’s Manual

Copyright
The information in this manual is subject to change without notice for continuous improvement in
the product. All rights are reserved. The manufacturer assumes no responsibility for any
inaccuracies that may be contained in this document. And makes no commitment to update or to
keep current the information contained in this manual.
No part of this manual may be reproduced, copied, translated or transmitted, in whole or in part,
in any form or by any means without the prior written permission of the ICOP Technology Inc.

Safety Information
♦
Read these Safety instructions carefully.
♦
Make sure the voltage of the power source is correct before connecting the equipment to
the power outlet.
♦
Do not expose your Panel PC to rain or moisture, in order to prevent shock and fire
hazard.
♦
Keep PTDX5311/9211 away from humidity.
♦
Do not open the cabinet to avoid electrical shock. Refer to your nearest dealer for
qualified personnel servicing.
♦
Never touch un-insulated terminals or wire unless your power adaptor is disconnected.
♦
Locate your Panel PC as close as possible to the socket outline for easy access and to
avoid force caused by entangling of your arms with surrounding cables from the Panel
PC.
♦
USB connectors are not supplied with Limited Power Sources.
♦
If the equipment is not used for a long time, disconnect it from the power source to avoid
damage by transient overvoltage.
DO NOT ATTEMPT TO OPEN OR TO DISASSEMBLE THE
CHASSIS
(ENCASING) OF THIS PRODUCT. PLEASE CONTACT YOUR DEALER
FOR
SERVICING FROM QUALIFIED
TECHNICIAN
.

T a b l e o f C o n t e n t s
T a b l e o f C o n t e n t s .............................................................iv
C h a p t e r 1 General Information..…………………………………1
1.1 Product
Description
................................................
1
1.2 Product
Specifications
............................................
2
1.3 Product Dimension..........................................4
1.4 Ordering Information
..............................................
5
1.5 Packing
List
............................................................
5
C h a p t e r 2 System
Installation.................................................
6
2.1 CPU Board
Outline
.................................................
6
2.2 Connector Summary
..............................................
8
2.3 Connector Pin Assignments
...................................
9
2.4 External I/O Overview
..........................................
12
2.5 External I/O Pin
Assignment.................................
13
2.6 System
Mapping...................................................
15
2.7 Watchdog Timver
.................................................
18
C h a p t e r 3 Driver Installation…..………………………………..19
3.1 PTDX5311/9211 Development
Note....................
20
3.2 BIOS Defaul
Setting .............................................
21
Warranty............................................................................................
22
This page is
blank
v

C h a p t e r 1
General Information
1.1 Product Description
PTDX5311/9211 is an ultra compact platform for the present demanding embedded and
productive applications. It has new Vortex86DX SoC CPU which consumes only
minimum power requirement when running at 1GHz, and DDR2 memory provides faster data
transfer rate. By using 5.7/8.9” TFT LCD, PTDX5311/9211 becomes the perfect choice for a
limited budget. In additional, the integrated 10/100M Ethernet port supplies the
communication capability which makes PTDX5311/9211 can be more widely used when
running with Linux, Windows CE, and Windows XP
environment to become the perfect solution for system integration.
„
5.7/8.9” WSVGA TFT LCD
„
4-Wire Resistive Touch Panel
„
Vortex86DX SoC 1GHz
„
256/512MB DDR2 system memory
„
AMI BIOS
„
2 watchdog timer
„
Compact Flash Type I/II / Micro SD
„
10/100Mbps Ethernet
„
2 USB 2.0 (host)
„
1 RS-232/485/422 ports
„
Mini-PCI Socket (Wi-Fi Optional)
„
Audio Out
„
Single voltage +5V DC(5A Version)
„
Multi voltage +8~+35V DC(8A Version)
„
Fanless Design
„
Operating temperature range of 0°C to
+60°

1.2 Product
CPU Board Specifications
CPU
Vortex86DX 1GHz
Cache
L1:16KB I-Cache, 16KB D-Cache
L2: 128KB Cache
BIOS
AMI BIOS
Memory
256/512MB DDR2 onboard
Watchdog Timer
Software programmable from 30.5u to 512 seconds x 2 sets
LAN
Integrated 10/100M Ethernet
Audio
CM119 Line-Out
Internal Drives
Compact Flash Type I/II slot
Micro SD slot
I/O
RS-232/422/485 x 1
USB ports (Ver2.0) x 2
RJ-45 Port x 1
Expansion Slot
Mini-PCI socket x 1 (Internal)
Mechanical & Environment
Power Requirement
Single Voltage +5VDC ( 5A )
Multi Voltage +8~+35VDC ( 8A )
Power Consumption
1.3A
Operating Temperature
0 ~ +60 ℃(+32 ~ +140 ℉)
Storage Temperature
-20 ~ +70 ℃(-4 ~ +158 ℉)
Dimensions
236.6 x 146 x 35mm (9.31 x 5.75 x 1.38 inches)
Weight
468g
Certification
CE, FCC, VCCI

LCD Specifications
Display Type
5.7/8.9” TFT LCD
Backlight Unit
LED
Display Resolution
640(W) x 480(H) / 1024(W) x 600(H)
Brightness (cd/m2)
220 nits
Contrast Ratio
500:1
Display Color
262,144
Pixel Pitch (mm)
190.5 (H) x 189 (V) (PTDX9211)
Viewing Angle
Vertical 110o,
Horizontal 140o
Backlight Lifetime
25,000 hrs
Touchscreen
Type
Analog Resistive
Resolution
Continuous
Transmittance
80%
Controller
USB interface (RS-232 interface)
Software Driver
Linux/WinCE/WinXP
DOS(RS-232 interface only)
Durability
1 million

1.3 Product


C h a p t e r 2
System Installation
2.1 CPU Board Outline
Bottom
View

2.2 Connector Summary
Summary
Table
Nbr
Description
Type of Connections
Pin nbrs.
J1
CF Master/Slave Switch
Slide Switch
On/OFF
J3
USB
External USB Connector
6-pin
J4
USB
External USB Connector
6-pin
J5
USB (Touchscreen)
2.0mm 5-pin wafer
5-pin
J6
J-TAG
1.25mm 6-pin wafer
6-pin
J8
PS/2 Keyboard
2.54mm 5-pin box header
5-pin
J9
PS/2 Keyboard/Mouse
External Mini DIN Socket
6-pin
J10
COM1(RS232/422/485)
External D-Sub Male Connector
9-pin
J14
VGA
2.0mm 10-pin box header
10-pin
J27
LVDS connector
1.25mm WAFER20P
20-pin
J18
Micro SD Card Socket
Micro SD socket
9-pin
J24
Audio Mic-In
2.0mm 4-pin wafer
4-pin
J29
Power/IDE LED
2.0mm 4-pin wafer
4-pin
RJ45
Ethernet
External RJ45 Connector
8-pin
PWR
Power Connector (5A)
External Mini DIN Socket
3-pin
PWR
Power Connector (8A)
External Power Plug
2-pin
J23
Audio Line-Out
1.25mm Phone Jack
CF1
CF Card Socket
CF Type I/II Socket
J13
Mini-PCI Socket
Expansion Mini-PCI Socket
J18
Micro SD Card Socket
Micro SD socket

2.3 Connector Pin Assignments
J1: CF Master/Slave Switch
Pin #
Signal Name
On
Master
OFF
Slave
J3: USB
Pin #
Signal Name
Pin #
Signal Name
1
VCC
2
USBD2-
3
USBD2+
4
GND
5
GND
6
GND
J4: USB
Pin #
Signal Name
Pin #
Signal Name
1
VCC
2
USBD3-
3
USBD3+
4
GND
5
GND
6
GND
J5: USB (Touchscreen)
Pin #
Signal Name
1
VCC
2
USBD1-
3
USBD1+
4
GND
5
GND
J6: J-TAG
Pin #
Signal Name
1
VCC
2
GND
3
TCK
4
TDO
5
TDI
6
TMS

J8: PS/2 Keyboard
Pin #
Signal Name
Pin #
Signal Name
1
KBCLK
2
KBDAT
3
NC
4
GND
5
VCC
J9: PS/2 Keyboard/Mouse
Pin #
Signal Name
Pin #
Signal Name
1
KBCLK
2
MSCLK
3
GND
4
KBDATA
5
MSDATA
6
VCC
7
GND
8
GND
9
GND
J10: COM1 RS232/422/485 (Change setting by BIOS)
Pin #
Signal Name
Pin #
Signal Name
1
DCD1/ 422TX- / RS485-
2
RXD1 / 422TX+ / RS485+
3
TXD1 / 422RX+
4
DTR1 / 422RX-
5
GND
6
DSR1
7
RTS1
8
CTS1
9
RI1
J14: VGA
Pin #
Signal
Name
Pin #
Signal
Name
1
R OUT
2
GND
3
G OUT
4
GND
5
B OUT
6
GND
7
HSYNC
8
GND
9
VSYNCD
10
GND

J27: LVDS Connector
Pin #
Signal Name
1
GND
2
3.3V
3
3.3V
4
BRIGHTNESS
5
TXOUT0-
6
TXOUT0+
7
TXOUT1-
8
TXOUT1+
9
GND
10
GND
11
TXOUT2-
12
TXOUT2+
13
TXCLKOUT-
14
TXCLKOUT+
15
GND
16
GND
17
5V
18
5V
19
NC
20
NC
J24: MIC-IN
Pin #
Signal Name
1
MICVREF
2
GND
3
GND
4
MIC-IN
PWR: Power Connector (5A)
Pin #
Signal Name
1
+5V
2
GND
3
NC
4
GND

PWR: Power Connector (8A)
Pin #
Signal Name
1
+ 8 ~ 35V
2
GND
J29: Power/IDE LED
Pin #
Signal Name
1
PWRLEDP
2
PWRLEDN
3
IDELEDP
4
IDELEDN

2.4 External I/O Overview
PTDX5311/9211WA PTDX5311/9211A
(Note1: Wireless is optional)
(Note2: COM1 RS232/422/485 is selected by BIOS setting)

2.5 External I/O Pin Assignment
Power Switch
Pin #
Status
|
ON
O
OFF
Power Connector (5A)
Pin #
Signal Name
1
+5V
2
GND
3
NC
Power Connector (8A)
Pin #
Signal Name
1
+8 ~ 35V
2
GND
J10: COM1 RS232/422/485 (Change setting by BIOS)
Pin #
Signal Name
Pin #
Signal Name
1
DCD1/422TX-/RS485-
2
RXD1/422TX+/RS485+
3
TXD1 / 422RX+
4
DTR1 / 422RX-
5
GND
6
DSR1
7
RTS1
8
CTS1
9
RI1

Audio Line-Out
Pin #
Signal
Name
1
GND
2
LOUTL
3
Open Touch
4
Open Touch
5
VREFOUT
USB
Pin #
Signal Name
1
VCC
2
USB0-
3
USB0+
4
GND
5
GGND
6
GGND
RJ45
Pin #
Signal Name
Pin #
Signal Name
1
FTXD+
2
FTXD-
3
FRXIN+
4
NC
5
NC
6
FRXIN-
7
NC
8
NC
PS/2 Keyboard/Mouse
Pin #
Signal Name
1
KBCLK
2
PMCLK
3
GND
4
KBDAT
5
PMDAT
6
SB5V

2.6 System Mapping
This manual suits for next models
1
Table of contents
Other XtendLan Desktop manuals

XtendLan
XtendLan EBF-211-Z3735F-2-32 Owner's manual

XtendLan
XtendLan TCD-N2600-C2G2-2 User manual

XtendLan
XtendLan TC-800 User manual

XtendLan
XtendLan EBF-231-5I24 User manual

XtendLan
XtendLan EBF-211-Z3735F-2-32 Owner's manual

XtendLan
XtendLan TC-965 User manual

XtendLan
XtendLan TC-261 User manual

XtendLan
XtendLan TV-850B User manual