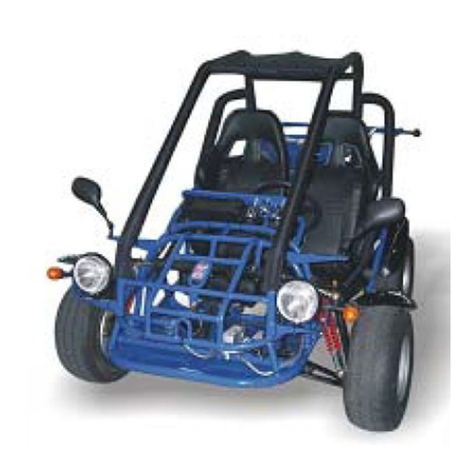
Dazon Raider Max 175D User manual

File No.:SF-E175-WX-B01-D

RaiderMax175(single-seat,double-seat):ServiceManual EECVersion:2.0 April 2005
2
FOREWORD
This service manual has been specially prepared to provide all the necessary information for the
proper maintenance and repair of the RAIDER Max 175 (EEC-approved for on-road use).
The Buggy fits the needs of a wide variety of buggy users above 16 years old. Those who will service
this Buggy should carefully review this manual before performing any repair or service.
All information, illustrations, photographs and specifications contained in this manual are based on
the latest product information available at the time of publication. Due to the improvements or other
changes, there may be some discrepancies in this manual. Therefore, if the newest information is
requested in future, please contact the local distributor.
Distributors reverse the right to make production changes at any time, without prior notice or
incurring any obligation to make the same or similar changes for the vehicles previously built or sold.

RaiderMax175(single-seat,double-seat):ServiceManual EECVersion:2.0 April 2005
3
CONTENTS
1.
General Information ------------------------------------------------------------------------4
2. Periodic Maintenance and Tune-Up Procedures --------------------------------------7
3. Engine ----------------------------------------------------------------------------------------14
3.1 Lubrication System--------------------------------------------------------------------14
3.2 Cylinder Head & Valve---------------------------------------------------------------16
3.3 Drive Pulley, Clutch & Driven Pulley---------------------------------------------21
3.4 Final Transmission Box--------------------------------------------------------------22
3.5 Ac Generator & Starting Clutch---------------------------------------------------24
3.6 Crankcase & Crankshaft------------------------------------------------------------26
3.7 Cooling System-------------------------------------------------------------------------28
3.8 Carburetor------------------------------------------------------------------------------31
4Reverse Gearbox--------------------------------------------------------------------------- 41
5Wiring Diagram ---------------------------------------------------------------------------- 43

RaiderMax175(single-seat,double-seat):ServiceManual EECVersion:2.0 April 2005
4
1. General Information
1.1 Model Identification
1.1.1 Frame Number
The frame number or VIN is stamped under the seat on the frame and stuck behind the seat.
1.1.2 Engine Number
The engine number is located on the upper rear right engine case.
1.2 Fuel and Oil Recommendations
Be sure to use the specified fuel and oil
1.2.1 Fuel
Please use the gasoline of SAE 90# or above.
Also we recommend you to use the unleaded gasoline.
1.2.2 Engine Oil
Please use the high-quality engine oil of SAE 10w/30SF.
1.3 Break-in Procedure
For your first 2 hours of riding, don’t exceed 2/3 throttles.
Vary the engine speed for the first 5 hours.
Never hold the engine at full throttle for long periods of time.

RaiderMax175(single-seat,double-seat):ServiceManual EECVersion:2.0 April 2005
5
1.4 Specifications
DIMENSIONS SINGLE-SEAT/DOUBLE-SEAT
Overall Length 2330mm / 2300mm
Overall Width 1310mm / 1460mm
Overall Height 1425mm / 1425mm
Wheelbase 1475mm / 1520mm
GroundClearance 200mm / 250mm
VIN AccordwithGMVRA01-01
Statutory Plate& Safety Labels Accord with GB 7258-1997
ENGINE
Model PMI162MK
Type Forced water-cooled, single cylinder, 4-stroke
Engine Capacity 175cc
Displacement 174.5ml
Bore×Stroke 62mm×57.8mm
Max. Power 7.4kw or 7500r/m
Max. Torque 12.5N.m or 6500 r/m
Idle Speed 1500±100 r/m
CO Emission 7.0g/km
HC Emission 1.0 g/km
Fuel Type SAE 90# or above (unleaded)
Min. Fuel Consumption 354g/KW.h
Lubricate Oil Type SAE 15W / 40SF
Lubrication Pressure & splash
Cooling Fluid SHELL (Antifreeze)
Antifreeze Temperature of Cooling Fluid - 450C
Mixing Ratio (Cooling Fluid : Water ) 1:1
Cooling Water-cooled
Ignition C.D.I.
Starting Electric
SparkPlug D7
Spark Plug Gap 0.6~0.7mm
Transmission Chaintransmission
Transmission Ratio F 1:1, B 1:1.758
Primary Transmission Ratio 2.2-0.9
Compression Ratio 10±0.1:1
Reduction Ratio 2.8
Clutch Automatic, centrifugal, dry, shoe type
Generator Outer rotor, flywheel
Carburetor Vacuumfilmtype
Absorber Normal(in10
5 times of experiments)
Air Cleaner Paper element, filtration type

RaiderMax175(single-seat,double-seat):ServiceManual EECVersion:2.0 April 2005
6
Gear-Shifting Automatic, centrifugal
CAPACITIES
Front/RearTireLoadCoefficient 36
Front/RearTireSpeedLevel L
Fuel Tank 7.0L, 130kpa (no leakage in experiments)
Starting Time ≤15s
Climbing ≥20%
Top speed 63km/h
Tachometer 33-40km/h(meterscale:40km/h)
Turning Radius 3m / 3.5m
AccelerationNoiseLevel ≤80dB (A)
Horn DL80-90 12V 3A 105dB, 93<dB (A) <112
Headlight 12V35W/35W
Headlight High Beam Intensity Accord with laws ®ulations
Taillight 12V 5W /21W
TurningLight 12V10W
LicenseLight 12V5W
Battery 12V8Ah
Anti-theftLock ≥200N.m
RearviewMirror Accordwithlaws®ulations
CHASSIS
Front/RearBrake Hydraulicdisc,footcontrol
Front Wheel Brake Force 760N / 1140N
Rear Wheel Brake Force 832N / 1038N
BrakingDistance ≤7 m@30km/h
ParkingBrake Hydraulicdisc,handcontrol
Front Tire 20.5 × 8.0–10
Rear Tire 20.5 × 8.0–10
TIRE PRESSURE
Front 175kpa
Rear 200kpa
WEIGHT
NetWeight 235kg / 255kg
zThe specifications are subject to change without notice.

RaiderMax175(single-seat,double-seat):ServiceManual EECVersion:2.0 April 2005
7
2. Periodic Maintenance and Tune –up Procedures
2.1 Location of Parts
Double-seat
Headlight
Rearview Mirror
Roll Bar
Seat Belt
Seat
Steering
Wheel
Front
Wheel
Turning
Light
Front
Mudguard
Front Shock
Absorber
Awning
Control Panel
Brake
Handle
Reverse
Handle
Fan
Rear
Reflector
Rear
Wheel
Taillight
Rear Rack
Turning
light

RaiderMax175(single-seat,double-seat):ServiceManual EECVersion:2.0 April 2005
8
Single-seat
zPlease demand for a copy of the Parts Book from your dealer and locate each component location.
Roll Bar
Headlight
Turning Light
Front Wheel
Seat
Rear Rack
Seat Belt
Rear Wheel
Front
Shock
Absorber
Throttle Pedal
Rear Shock Absorber
Control Panel
Rearview Mirror
Steering Wheel

RaiderMax175(single-seat,double-seat):ServiceManual EECVersion:2.0 April 2005
9
2.2 Periodical Checks and Services
The maintenance intervals in the following table are based upon average riding conditions.
Riding in unusually dusty areas requires more frequent services.
Items 1st Service of 1st week Daily Monthly Quarterly Yearly
Tire Press /Wear X X X X R
Handle Brake Cable A A A A
Brake Performance X X X X X
Brake Pad X X R R
Brake Fluid X X X X R
Nuts /Bolts X X X X X
Air Filter X X C R R
Carburetor A A A C
Spark Plug X CA CA R
Drive Chain CAL CAL CAL CAL CAL
Gear Box Oil X X X R
Engine Oil X X R R R
Chassis X X X X
Valve Clearance A A A A
Reverse Cable A A A A
Reverse Assy. X
Battery X X X R
Cooling Water X X X X X
Throttle Cable X X R
Drive Belt X R R
Driven Plate Sub Assy. X X R
Fuel Filter X C C R
Note: X: inspect, clean or replace if necessary; C: clean; A: adjust; L: lubricate; R: replace.
Attention: In order to keep the 6-month warranty valid, please
a) find an approved DAZON dealer to carry out the 1st service and quarterly service;
b) keep the proof of any service carried out. As in the unlikely event of a warranty claim being necessary, the
service history needs to be available.

RaiderMax175(single-seat,double-seat):ServiceManual EECVersion:2.0 April 2005
10
2.3 Maintenance and Tune-up Procedures
This section describes the servicing procedures of every item in the Periodic Maintenance
Intervals Table above.
2.3.1 Spark Plug
Clear up the carbon around the spark plug to prevent it from dripping into the cylinder when
removing the spark plug.
Remove the spark plug:
a) In general, it should be carried on after the engine has cooled down;
b) If the spark plug is too tight to remove, spray some rust inhibiter on
the spark plug washer and the thread part; after the inhibiter has
soaked the washer and thread part, rotate the spark plug;
c) Clear up the filth and carbon accumulation on the spark plug with
a steel brush or a blade;
d) Inspect the spark plug gap (in general, it should be about 0.6 - 0.7 mm.);
e) When the carbon accumulation and wear of the spark plug are too serious, replace the spark
plug with a new one of the same specification.
2.3.2 Tire Pressure / Wear
Check the tire pressure before each of your driving.
The tire pressure is very important for the riding stability.
Specifications: Front Tire: 175kpa
Rear Tire: 200kpa
2.3.3 Brake Performance
a) Always check if there is plenty of brake fluid in the brake fluid
reservoir;
b) Check if the front/rear brake pad is in good condition;
c) Check the brake rotor for abnormal wear.
2.3.4 Air Cleaner
Clean the air cleaner quarterly, or more often when driving in dusty
conditions.
If the air cleaner is clogged with dust, its performance will be severely
decreased, even the engine damages will probably be caused.

RaiderMax175(single-seat,double-seat):ServiceManual EECVersion:2.0 April 2005
11
Inspection and Cleaning of Filters
zPaperFilter
a) Remove the filter from its housing;
b) Lightly tap the filter on an object to knock out the dust;
c) Replace the filter element if it is wrinkled or torn.
zFoam Filter
a) Remove the filter out of its steel cage;
b) Wash the filter in non-flammable cleaning solvent;
c) Submerge the filter in oil and squeeze it to remove excess oil;
d) Install the filter element back into the air box.
2.3.5 Nuts and Bolts in Chassis
Inspect the nuts and bolts in the chassis during the first week and every month thereafter.
The nuts and bolts become loose normally after use, please check for the looseness regularly.
2.3.6 Tightening Torque Table
Conventional Marked Bolt 8.8 Marked BoltBolt Diameter
(mm) N•m Kg•m lb-ft N•m Kg•m lb-ft
4 1-2 0.1-0.2 0.7-1.5 1.5-3 0.15-0.3 1.0-2.0
5 1-4 0.2-0.4 1.5-3.0 3-6 0.3-0.6 2.0-4.5
6 4-7 0.4-0.7 3.0-5.0 8-12 0.8-1.2 6.0-8.5
8 10-16 1.0-1.6 7.0-11.5 18-28 1.8-2.8 13.0-20.0
10 22-35 2.2-3.5 16.0-25.5 40-60 4.0-6.0 29.0-43.5
12 35-55 3.5-5.5 25.5-40.0 70-100 7.0-10.0 50.5-72.5
14 50-80 5.0-8.0 36.5-58.0 110-160 11.0-16.0 79.5-115.5
16 80-130 8.0-13.0 58.0-94.0 170-250 17.0-25.0 123.0-181.0
18 130-190 13.0-19.0 94.0-137.5 200-280 20.0-28.0 144.5-202.5
2.3.7 Fuel Switch Inspection
a) Stop the engine, remove the gasoline tube from the carburetor, and check if the gasoline is
flowing;
zBefore and during the cleaning, inspect the element for tears; replace it if it’s torn.
zMake sure that the element is seated properly and no foreign material can pass by it

RaiderMax175(single-seat,double-seat):ServiceManual EECVersion:2.0 April 2005
12
b) After expelling the gasoline remnant (about 5-10 ml) from the negative pressure switch and
negative pressure tube, if the gasoline doesn’t flow, the switch is in good condition; otherwise,
the negative pressure tube needs cleaning;
c) Remove the negative pressure tube from the gasoline supply tube, and suck it with mouth or
apply pressure on it with a vacuum pump, and then release the pressure;
If the gasoline flows out of the gasoline tube when under pressure, and stops flowing when
released from pressure, the switch is in good condition.
Note: a) Smoking and lighting fires are strictly forbidden.
b) Before the operation, blow enough air from the supply side of the negative pressure switch,
so as to eliminate the stuff sticking on the diaphragm.
2.3.8 Final Gear Oil
Inspect the final gear oil monthly and replace it quarterly.
a. Check the oil level: remove the oil level screw on the left rear
engine case;
b. Drain out the oil: remove the drain plug at the rear bottom of
the engine case;
Recommendation: before draining the final gear oil, please
warm the engine for at least 10 minutes.
Notes: We recommend the Mobile 85w/90 gear oil for the final drive case. However, in extreme
cold weather conditions, the vehicle may become hard to start, so we advise some lighter viscous
oil, such as 75 wt or the equivalent motorcycle transmission fluid.
2.3.9 Engine Oil
Inspect the engine oil before every riding and replace it monthly.
a) Remove the drain plug from the left side bottom of the engine,
and drain out the left oil into an oil pan for disposal;
b) Remove the large cap on the left bottom of the engine ,and
remove the screen;
c) Wash the screen with some cleaning solvent and reassemble it;
make sure that the O-ring is still in good conditions;
d) Refill the engine with the SAE10W/30SF engine oil and run the
engine for 5 minutes;
e) Check the oil level on the filler cap stick to assure that it’s proper;
Gear Oil Capacity 0.2L 85w/90

RaiderMax175(single-seat,double-seat):ServiceManual EECVersion:2.0 April 2005
13
f) Screw in the large cap.
2.3.10 Chassis
Inspect, clean or replace it monthly if necessary and lubricate it quarterly.
a) Grease the chassis bushings and bearings with some grease quarterly to make sure that they can
operate smoothly and enjoy an extended life;
b) If it’s used in extremely wet, muddy or dusty conditions, we recommend you to service it more
often.
2.3.11 ReverserAdjustment
a) Press down the reverse lever to the "FW" position so that the
units can move forward;
Pull back the lever to "BW" so that the units can move backward.
b) Adjusting Nut #1 on the top of the reverse cable can adjust the
mesh status inside the reverse gear box. In the forward position
there should be about 1/4 inch play in the cable for the correct
adjustment.

RaiderMax175(single-seat,double-seat):ServiceManual EECVersion:2.0 April 2005
14
3. Engine
3.1 Lubrication System
3.1.1 Lubrication diagram
3.1.2 Trouble shooting
zThe engine oil level is too low.
a) The engine oil is consumed naturally;
b) The engine oil leaks;
c) The piston rings are worn.
zThe engine oil is dirty.
a) The engine oil isn’t replaced in time;
b) The cylinder head gasket is damaged.
zThe lubrication isn’t good.
a) The engine oil level is too low;
b) The oil filter is clogged, or the oil pipes are clogged;
c) The oil pump is damaged
3.1.3 Specifications
Engine Oil Capacity 1.0L (Disassembling) 0.8L (Replacing)
Engine Oil 10W/30SF

RaiderMax175(single-seat,double-seat):ServiceManual EECVersion:2.0 April 2005
15
3.1.4 Engine Oil
zInspection
a) Stop the engine;
b) Stay the vehicle on the flat ground for 2-3 minutes;
c) Inspect the oil level.
Note: The oil level gauge shouldn’t be screwed in.
zReplacement
a) Remove the oil filler cover, and drain out the oil remnant
when the engine is warm;
b) Reassemble the cover;
Torque: 18-20 N.m.
c) Check if the O-rings are damaged; replace if necessary;
d) Fill in the same type of engine oil;
Engine oil capacity: 1.0 L (Disassembling)
0.8L (Replacing)
Engine oil type: 10W/30SF
e) Start the engine to check if there is any oil leakage;
f) Stop the engine and check the oil level again.
zEngine Oil Screen
a) Drain out the oil;
b) Take out the spring filter;
c) Assemble the screen, spring and filter cap;
d) Add enough oil into the engine.

RaiderMax175(single-seat,double-seat):ServiceManual EECVersion:2.0 April 2005
16
3.2 Cylinder Head & Valve
3.2.1 Disassembly Diagram
1. TimingSprocket 2.TimingChain
3.TensionBar 4.AirCleanerBracket
5.RockerArm,AirExhaust 6.RockerArm,AirIntake
7.RockerArm,Valve 8.CamShaftComp.
9. Spark Plug 10. Exhaust Valve
11.Tensioner 12. Gasket, Tensioner
13. Cylinder 14. Gasket, Cylinder
15.Rubber Pipe, Water Inlet 16.Intake Valve
17.Intake Pipe Comp. 18.Thermostat Comp.
19. Temperature Sensor 20.Rubber Pipe, Water Return
21.Guide Bar 22.Valve Comp.
123
4
5
6
7
8
9
10
11
12
13
14
15
16
17
18
19
20
21
22
13
14

RaiderMax175(single-seat,double-seat):ServiceManual EECVersion:2.0 April 2005
17
3.2.2 Trouble Shooting
zThe compression is too low or not stable.
a) Valve
The lifter isn’t adjusted well;
The valve is burnt or deformed;
The valve spring is damaged;
The valve timing is faulty;
The valve seat seal is faulty.
b) Cylinder Head
The cylinder head gasket leaks air;
The cylinder head is deformed or cracked.
c) Cylinder piston is faulty.
zThe compression is too high.
There is carbon accumulation on the piston or in the combustion chamber.
zNoise
The lifter isn’t adjusted well.
The valve is burnt, or the valve spring is damaged or worn.
The rocker or the rocker shaft is damaged or worn.
3.2.3 Assemble Valve Rocker Arms & Shafts
a) Check if the seals on the valve rocker arm shafts are in good
condition; if damaged, replace them;
Put some engine oil on the surface of the rocker arm shafts and
the seals.
b) Assemble the two valve rocker arms (exchangeable) in the
place as shown in the picture;
Valve Rocker Arm
Seal

RaiderMax175(single-seat,double-seat):ServiceManual EECVersion:2.0 April 2005
18
c) Insert the rocker arm shaft with the mark “IN” into the hole on
the left side of the cylinder head cover and the hole of the rocker
arm;
At the same time, insert the rocker arm shaft with the mark “EX”
into the holes on the right side of the cylinder in the same way;
d) Turn the dials of the two rocker arms to the position as shown
in the picture;
Fasten the two dials.
3.2.4. Adjust Valve Clearance
a) Open the engine peephole cap;
Adjust the flywheel “ T ” to the maximum reading, while
the engine piston reaches the top dead point;
b) Loosen the lock bolts at the intake / exhaust valve dials;
;
Hole on Left Side
of Cylinder
Hole on Right Side
of Cylinder
RockerArm of
Ex. Valve
RockerArm of
In. Valve
En
g
ine
Fl
y
wheel
In. Valve Dial
Ex. Valve Dial Lock Bolt
Lock Bolt

RaiderMax175(single-seat,double-seat):ServiceManual EECVersion:2.0 April 2005
19
c) Turn fully outward the intake / exhaust valve dials until the
dials can’t be turned any more;
d) Turn inward the intake / exhaust valve dials for
1.5~ 2.0 scales (at this moment, the valve clearance
should be 0.08mm~0.1mm);
e) Fasten the lock bolts at the intake / exhaust valve dials.
Inward
Ex.
Valve
Dial
Outwar
d
In.
Valve
Dial
Outward

RaiderMax175(single-seat,double-seat):ServiceManual EECVersion:2.0 April 2005
20
3.3 Drive Pulley, Clutch & Driven Pulley
3.3.1 Disassembly Diagram
1.Crankecase,Right 2.DrivenPulleyComp.
3.Belt 4.DrivePulleyComp.
5.Gasket,LeftCrankcase 6.Crankcase,Left
7.SpecialScrewSet 8.Shroud(LeftCrankcaseCover)
5
1
2
34
Table of contents
Other Dazon Utility Vehicle manuals
Popular Utility Vehicle manuals by other brands
Taylor-Dunn
Taylor-Dunn BG-015-00 Operation, t roubleshooting and replacement parts manual
ShoreLand'r
ShoreLand'r SLB14TS Series Service manual
Equipter
Equipter RB4000 Operator's manual
Polaris
Polaris Ranger 6x6 700 EFI 2009 owner's manual
Crown
Crown CU-48 OFF-ROAD SERIES owner's manual
Landoll
Landoll LT10A Series Operator's manual
Taylor-Dunn
Taylor-Dunn RE-380-36 Service and Replacement Parts Manual
Pongratz
Pongratz L-AT G-K Additional Operating Manual
Toro
Toro Groundsmaster 7210 Operator's manual

Baja motorsports
Baja motorsports SD65 Sand Dog Setup instructions
Kellfri
Kellfri 23-TV06PRO manual

Linhai
Linhai LH50DU Owner's/operator's manual
