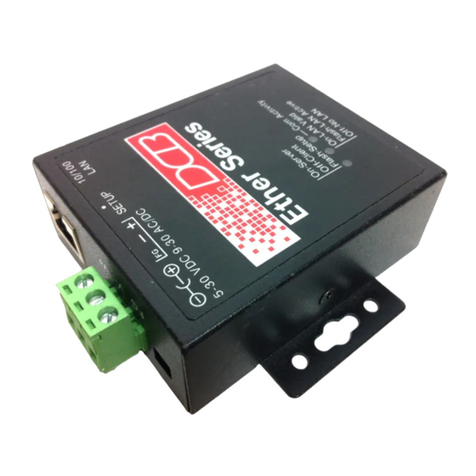
DCB etherpath X4 User manual

E ther Path - X 4
S erial S e rver
User’s Guide
Revised April 5, 2012
Firmware Version 1.09

FCC Statement
This device complies with the limits for a Class digital device, pursuant to Part 15 of the FCC rules.
Operation is subject to the following two conditions:
(1) This device may not cause harmful interference.
(2) This device must accept any interference received, including interference that may cause undesired
operation.
Copyright 2006. All rights reserved.
Version 1.0
All trademarks and trade names are the properties of their respective owners.

TABLE OF CONTENTS
FCC Statement...............................................................................i
Chapter 1
Introduction..............................................................1
EtherPath Functions.............................................................1
Client/Server Mode.......................................................................1
Server Mode..................................................................................2
Point-to-Multiple-Point (EtherModem) Mode...............................2
Reverse Telnet (Telnet Client) Mode............................................2
Other Features......................................................................2
Multiple Ports................................................................................2
Automatic Connection...................................................................2
AT Commands..............................................................................2
Connection Recovery....................................................................2
Protocol Conversion......................................................................3
Configuration Security..................................................................3
Upgradeable Firmware..................................................................3
On-board Tools.............................................................................3
Physical Details....................................................................4
Front Panel....................................................................................4
Rear Panel.....................................................................................5
ottomRed LED............................................................................5
Configuration Switches .......................................................6
Switch 1........................................................................................6
Switch 2........................................................................................6
Switch 3........................................................................................6
Switch 4........................................................................................6
LED Indicators.....................................................................6
Rear Panel LED Indicators............................................................6
Front Panel LED Indicators..........................................................8
Front Panel Port LED Indicators...................................................8
Package Contents.................................................................9
Software Requirements ........................................................9
Chapter 2
Installation..............................................................10
Overview............................................................................10
Quick Start..........................................................................10
Installation..........................................................................10
1. Configure the EtherPath’s IP address......................................10
2.Connect the Ethernet Cable......................................................11
3.Verify the IP Address Configuration........................................12
4. Enter Your Configuration .......................................................13
5. Minimum Configuration..........................................................13
i

Help Screens and Field Edits............................................13
Chapter 3
The Con iguration Process....................................15
Overview............................................................................15
Using the Configuration Flexibility....................................15
Configuration Process Examples .......................................16
Make configuration changes, test them with Activate, then save them with Save. ..............................16
Make configuration changes, save them, reset to activate the changes....................................................16
Transfer a saved configuration to the EtherPath, save it, reset the EtherPath to activate the changes.....16
Note regarding saved configurations...........................................16
.................................................................................16
Chapter 4
Terminal/Telnet
Con iguration..........................................................17
Overview............................................................................17
Terminal configuration requires the following:...........................17
Procedure....................................................................................17
Telnet Configuration..........................................................18
Terminal/Telnet Interface...................................................19
Entering Data..............................................................................19
Menu Options.....................................................................19
Main Menu Option 1.
Setting LAN properties................................................................19
1. IP Address...............................................................................20
2. Subnet Mask............................................................................20
3. Gateway IP Address................................................................20
4. TCP Tx Timeout......................................................................20
5. SNMP Enable..........................................................................20
6. Web Setup Enable...................................................................20
This option controls whether the Etherpath's web server (which allows web configuration) to work or not.
If you select disable, and activate changes, you will no longer be able to configure via the web interface.
You can always configure via the serial port Serial3, but you need physical access to the unit for serial
configuration as you need to change a switch and reboot............20
7. Web Server Port......................................................................20
8. Telnet Setup Enable.................................................................20
This option controls whether the Etherpath's telnet setup server waits for a user to setup the Etherpath X4
via telnet or not. If you select disable, and activate changes, you will no longer be able to configure via
the telnet interface. You can always congigure via the serial port Serial3.................................................20
7. Telnet Setup Port.....................................................................20
Main Menu Option 2.
Set Admin Username and Password............................................21
Main Menu Option 3.
Set Serial Port Data.....................................................................21
Flow Control...............................................................................21
aud Rate....................................................................................22
ii

Introduction
Parity...........................................................................................22
Data its......................................................................................22
Stop its......................................................................................22
DCD Input Control......................................................................22
Client Dial Mode.........................................................................22
Set port dialing mode [AT Dial Hardware, (DCD) Dial, or Nailed Up] In AT dial mode, modem-like AT
commands are used to connect to a remote server. In DCD dial, the client automatically connects to the
remote server when the DCD signal goes high. In nailed-up mode, the DCD signal is ignored, and as
soon as the client is activated, it connects to the remote server.. .22
Mode...........................................................................................22
Client's Remote IP Address.........................................................22
Server Ethernet Port....................................................................22
Main Menu Option 4.
Advanced Configuration Screen..................................................23
1. Transmit Timer........................................................................23
M. Timer Mode...........................................................................23
2. lock Size...............................................................................24
3. Flow Control OFF uffer Level..............................................24
4. Flow Control ON uffer Level................................................24
5. Line_Terminator_Character.....................................................24
6. Transmit_on_LT_Char............................................................24
7. Server End-of-Line Filter........................................................24
8. Client Local Character Echo....................................................24
9. Keep-Alive Frequency............................................................24
Setting this parameter to a non zero value will enable a Keep-Alive feature in the Unit. When the Unit is
in Client mode, it will send Keep-Alive messages to the server at the specified frequency when the link
between the client and server is idle. When the Unit is in Server mode, it will close the connection if the
link is idle for more than 3.5 times the Keep-Alive Frequency. The Telnet modes work differently: the
Server end sends Telnet NOPs, and the Client end times out. [0=OFF, 1-32767 seconds].....................25
Main Menu Option 5.
Display Settings...........................................................................26
Main Menu Option 6.
Reset Configuration to Default....................................................27
Main Menu Option 7.
Save and Exit...............................................................................27
Main Menu Option 8.
SNMP Configuration...................................................................27
Contact Person............................................................................27
Device Name...............................................................................27
Physical Location........................................................................27
SNMP Community......................................................................27
Main Menu Option 9.
Exit without Saving.....................................................................28
Chapter 5
Web-Based Con iguration.....................................29
Overview............................................................................29
Administrative Maintenance...............................................30
Maintenance.......................................................................30
Actions................................................................................30
iii

Notes...........................................................................................31
Tools...................................................................................31
Activate Changes................................................................32
Notes...........................................................................................32
Store Configuration............................................................33
Notes...........................................................................................33
Chapter 6
Operation................................................................34
Overview............................................................................34
Client/Server Point-to-Point (Nailed-Up) Mode...............34
Server Mode.......................................................................35
Client/Server Point-to-Multiple-Point (EtherModem) Mode35
Client (Reverse Telnet) Mode............................................36
Method 1 (ATD dial mode).........................................................36
Method 2 (Hardware Dial mode).................................................36
Chapter 7
Con iguration Security...........................................37
Overview............................................................................37
Level 0: ............................................................................37
Level 1:...............................................................................37
Level 2:...............................................................................37
Level 3:...............................................................................38
Chapter 8
Troubleshooting......................................................39
Hardware Problems............................................................39
Can't Connect via the LAN................................................40
Other Problems...................................................................41
Checking Device Operation...............................................42
Appendix A
Speci ications..........................................................43
EtherPath - X4 Specifications............................................43
Appendix B
Port Pinout and Cables..........................................44
RS-232 PIN Assignments...................................................44
Control Signal Operation....................................................44
DTR.............................................................................................44
Receive Data...............................................................................44
Transmit Data..............................................................................44
DCD............................................................................................44
Signal Ground.............................................................................44
DSR.............................................................................................45
RTS.............................................................................................45
iv

Introduction
CTS.............................................................................................45
RS-422 PIN Assignments RJ-45 Connector......................45
RS-422 Port Operation.......................................................45
Transmit Data (TXD-A), PIN 1...................................................45
Transmit Data (TXD- ), PIN 2...................................................45
Receive Data (RXD-A), PIN 3....................................................45
Receive Data (RXD- ), DCD Input............................................46
CA LES.............................................................................46
To PC 9-pin COM: port..............................................................46
EtherPath-X4 to PC crossover ethernet cable..............................46
.................................................................................46
Appendix C
Programming..........................................................47
Introduction........................................................................47
Description and ehavior...................................................47
Ports used by the EtherPath................................................47
Server Mode.......................................................................48
Transmit Conditions....................................................................48
Locking Avoidance Mechanism.........................................48
When in Raw Server mode:.........................................................48
Application Notes...............................................................49
Appendix D
AT Command Summary........................................50
AT Commands....................................................................50
AT Command Responses...................................................50
AT Command Operation ...................................................50
Appendix E
Open Source So tware In ormation......................51
Introduction........................................................................51
Obtaining the Source Code.................................................51
v

Chapter 1
Introduction
This chapter provides an overview of the EtherPath's features and capabilities.
ongratulations on the purchase of your new EtherPath X4 serial server. The EtherPath is a versatile
product that enables serial communications devices to operate via Ethernet. It is designed to easily
connect up to four serial port devices to your network. A remote PC or other serial device can then be used
to monitor, configure, manage and send or receive data to the serial port devices through the LAN/WAN.
C
The EtherPath can receive data from any asynchronous serial device, convert the data to a valid IP packet,
and transmit that data over the LAN/WAN. Serial devices can then be accessed from anywhere on your
LAN/WAN by any workstation computer running telnet, dedicated software, or COM: port redirection
software. Two EtherPaths may be used in “nailed-up” mode to build a “RS-232 path” through the
WAN/LAN. Multiple EtherPaths may be connected via Ethernet by using them in Point-to-Multiple point
"AT Dial " mode.
The EtherPath-X4 provides four independent serial ports, each accessible using the same IP address and
different, configurable port numbers.
Some serial port devices in common use are ar Code Readers, UPSs, SCADA RTUs, security alarms,
access control devices, timeclocks, POS terminals, and multiplexers.
For easy connection to your LAN, the EtherPath supports both 10 aseT and 100 aseT connections.
EtherPath Functions
The EtherPath can be used in several modes – simple Client/Server or Server, as illustrated below, point-to-
multiple-point (EtherModem) Client/Server, and reverse telnet Client. These modes are described below.
Figure 1: Modes o Operation
Client/Server Mode
In this mode, two EtherPaths are used. oth are connected to serial RS-232 devices. This is termed a
“Nailed-Up” connection.
The "Client" EtherPath will automatically establish a connection to the "Server" EtherPath upon power-
up.
1

EtherPath-X4 User’s Guide
The device on one EtherPath communicates with the other serial port device as if it was directly
connected via a serial port cable.
The EtherPaths and the LAN are completely transparent to PC application and serial port device.
Server Mode
This mode requires only a single EtherPath. The EtherPath is connected to the serial port device, and to the
LAN.
Users on the LAN can then connect to the serial port device and communicate with it via Telnet, using any
assigned IP and port address. Most LAN connected workstations provide support for communication via
Telnet.
A special-purpose utility program or port redirector program may be used instead of Telnet, or the user may
create custom software using Visual asic, C++, or other network programming tools. y using port
redirection, the EtherPath may function as a remote serial port on a PC.
Point-to-Multiple-Point (EtherModem) Mode
Point-to-multiple-point (EtherModem) operation allows a single EtherPath running in client mode to
connect to multiple servermode EtherPaths, one at a time, under the control of the attached RS-232 device.
The client operates similar to a modem with “AT” dialing enabled. The attached device treats the EtherPath
as if it was a modem, using remote IP addresses instead of telephone numbers.
Reverse elnet ( elnet Client) Mode
This mode requires only a single EtherPath. The EtherPath is connected to the serial port device, and to the
LAN. The EtherPath will connect to most remote telnet servers under user control by using “reverse telnet”
or telnet client operation. The EtherPath will connect to any port number under user control with either
hardware (pin6) dialing or AT dialing.
y using the "AT Dial" commands, the connected device can direct the EtherPath to connect to multiple
remote devices, one at a time.
Other Features
Multiple Ports
The EtherPath-X4 provides four independent serial ports. They are accessible via different IP ports using
the IP address of the box. The ports may have different protocols and speeds, as they are independent of
each other.
Automatic Connection
When used in Client/Server mode, the “Client” EtherPath will automatically establish a connection to the
“Server” EtherPath on power-up, or under the control of an RS-232 control signal.
A Commands
The EtherPath responds to most common AT commands when in the Client mode. Commands are listed in
the Appendix.
Connection Recovery
The EtherPath uses a proprietary protocol to ensure the client/server session always exists on TCP/IP.
When data hasn't been transferred through the connection for some time, the EtherPath will communicate
with the other device (either EtherPath or PC) to ensure that the connection is still open.
2

Introduction
If there is no response, the device will reset to the initial state, and attempt to reconnect.
Also, if the RS-232 link is broken, it will be reconnected automatically if possible (when in Hardware-
connect mode).
This operation is described in the Appendix.
Protocol Conversion
The RS-232 device at the client end and the device at the server end of a link do not have to use the same
communications protocols on the RS232 link (speed, parity, flow control). The EtherPaths will convert the
data to the correct protocol.
Configuration Security
Etherpath configuration may be “Locked-down” or restricted in several ways. The web rowser interface,
telnet configuration interface, and SNMP configuration interfaces may be disabled. Specific IP addresses
may be configured into the unit to disallow configuration from any other than the desired management
workstations.
Upgradeable Firmware
Firmware upgrades are downloadable to the EtherPath. The utility program required for this, and the actual
firmware upgrades, are available from your dealer.
On-board ools
The Etherpath-X4 contains diagnostic tools such as traceroute, ping, and a simple packet sniffer to aid in
network troubleshooting.
3

EtherPath-X4 User’s Guide
Physical Details
Front Panel
The EtherPath-X4 front panel is shown below.
Figure 1: EtherPath-X4 Front Panel
Status Red LED Status Indicator
Power Red LED Power Indicator
RJ-45 Serial Port 1
1Red LED Port 1 Activity
2Red LED Port 2 Activity
RJ-45 Serial Port 2
RJ-45 Serial Port 3 (Also Setup port)
3Red LED Port 3 Activity
4Red LED Port 4 Activity
RJ-45 Serial Port 4
4

Introduction
Rear Panel
The EtherPath-X4 rear panel is shown below.
Some units use different power connectors.
Figure 1: EtherPath-X4 Rear Panel
1 Power port Connect the power
adapter here.
2 Switch Bank Configuration Switches
op Red LED LAN Activity Indicator
Bottom Red LED LAN Link Indicator.
8 Ethernet Port A 10/100 aseT Ethernet
Port
5

EtherPath-X4 User’s Guide
Configuration Switches
The rear panel contains four small switches, numbered 1 through four (left to right). These are used for
configuration.
The normal position or all switches is DOWN.
Switch 1
This switch immediately resets the unit . When placed in the UP position, it resets the router just as if it had
been power cycled. It should then be returned to the down position.
Switch 2
This switch places the unit in basic configuration mode. It is used to provide a terminal interface for initial
configuration. Powering up the unit with this switch UP, provides a terminal attached to the Serial-3 port
with a login prompt and the ability to manage the unit with a command line. This method is used to install
an initial IP address in the router.
Switch 3
Factory use only.
Switch 4
Factory use only.
LED Indicators
There are two red LED indicators on the rear panel adjacent to each LAN connector and four red LED
indicators on the front panel near each 9-pin serial connector.
6

Introduction
Rear Panel LED Indicators
•The lower red LED is the Ethernet Status indicator. It is lit when there is a valid 10/100 aseT Ethernet
connection. This LED flashes with activity on the Ethernet (even if the activity isn't directly to this
unit).
•The upper red LED is multi-function indicator. The different states indicated by these LED are
described below.
Red LED
Indication
Status
Description
OFF Client Mode
ON Server Mode
Rapid Flashing Setup Mode
Irregular
Flashing
Power On
Self Test
or Firmware
Download
7

EtherPath-X4 User’s Guide
Front Panel LED Indicators
•Lower Left LED is a power indicator.
•Upper Left LED is a status indicator. It should always be on.
Front Panel Port LED Indicators
•OFF - no DCD
•ON - DCD present or nailed up
•FLASH 1/second - no socket session
•FLASH 5/second - socket session active
8

Introduction
Package Contents
You should find the following items packaged with your EtherSeries Router:
•The EtherPath Unit
•Power Adapter (if applicable)
•This User’s Guide CDROM
•Short cable with RJ-45 connectors
•9-pin Remote-PC adapter
If any of the above are missing, contact your dealer immediately.
Software Requirements
The EtherPath supports the following protocols.
•TCP/IP
•UDP
•ARP
•ICMP
•TELNET
•SNMP
The EtherPath has been tested to work with:
•All versions of Windows
•Unix - SCO, Sun, AIX, Linux, etc.
•Macintosh
•Most serial devices such as scanners, RTUs, SCADA hosts, alarm controllers, POS devices,
PCs, terminals, P X craft ports, etc.
•VOIP multiplexers, digital video cameras, video conferencing systems, etc.
•Many different serial industrial devices.
9

Chapter 2
Installation
This Chapter details the LAN installation process for the EtherPath- 4.
Overview
For Telnet Mode or Web Browser Mode configuration, LAN installation is performed before configuration.
There must also be a valid IP address in the unit prior to configuration with these methods. The de ault IP
address may not work with your network.
If you use Terminal Mode configuration, then the configuration may be performed prior to LAN
installation. See Chapter 3 for details.
Quick Start
Quick start instructions are on the next page. Installation is an easy process, but you are must have a
thorough understanding of IP networking, subnetting, and routing. You should have a network diagram
illustrating IP addresses, subnetting, and all IP routing that you intend to use prior to installing the router.
Installation
1. Configure the EtherPath’s IP address
This requires several steps. I the unit’s de ault address (192.168.1.1) is appropriate or your network,
skip this step.
1. Place configuration switch 2 in the UP position with all other switches DOWN.
2. Attach a terminal device to serial port 3. The terminal should be configured for 9600 bps, 8 data bits,
1 stop bit, and no parity. Parts required for this connection are provided with the unit. Use the
“REMOTE PC” adapter on one end of the provided RJ-45cable. Connect the cable between serial
port 3 and your PC’s COM: port. The terminal device may be a PC running the Hyperterm or
ProComm communications program (or equivalent).
3. Power up the unit. After about 5 seconds, a login screen will appear on the terminal screen.
Login Screen
4. The unit will boot up pausing at a login screen. For initial setup, enter the login name “setup” in lower
case letters. No password is required.
10
Welcome to the EtherPathX4 v1_0
To start the Serial Setup Program, login with
the name: setup

Troubleshooting
5. The main command-line menu will then be displayed. See the Telnet/Command-line configuration
section for configuration information. For a quick-start, you may only need to set the IP address using
option 1, Set LAN properties.
6. After making your changes, select option 7. The unit will now compress these values and save the
configuration to flash memory. Do not cycle power during this time or the unit may be rendered inoperable.
9. Return switch 2 to the down position. The Final Screen shows the URL to use when configuring the
router. The screen below will be displayed.
10. The unit will now reboot.
2. Connect the Ethernet Cable
Connect a 10 aseT or 100 ase T LAN cable to the Ethernet Port and Reboot the unit with a power cycle or
the reset switch. The EtherPath will now be available for configuration with any web browser on the same
LAN segment. If your web browser does not see the EtherPath, verify that you do not have a proxy server
configured in the browser. If so, properly configure the browser to bypass the proxy server for this URL.
11
---- Welcome to the EtherPathX4 version v1_0 Setup
Program ----
1 Set LAN properties
2 Set name/password
3 Set Serial port parameters
4 Set Advanced port parameters
5 Display Configuration
6 Reset Configuration to Defaults
7 Save and Exit
8 SNMP configuration
9 Exit without saving
Select a function by number ->:
Select a function by number ->: 7
Erasing flash sector 0x10fc0000
Storing file [config.tar.gz], size 741 bytes
Store complete
Setup complete.
Return Switch 2 to the off (down) position

EtherPath-X4 User’s Guide
3. Verify the IP Address Configuration
Enter the URL from step 1.8 (or http://192.168.1.1 if appropriate ) into your web browser. The login screen
below should be displayed.
Login Screen
Log in using the user name “admin” and no password (blank field). If this screen doesn’t display, check
the Troubleshooting Section in Chapter 6.
12

Troubleshooting
4. Enter Your Configuration
Initial Main Menu
From this index screen, you can select a section on the left and will be taken to configuration screens for
each router subsystem.
5. Minimum Configuration
The minimum configuration items required for basic operation are:
1. IP address appropriate for your LAN.
2. Serial port configuration appropriate to communicate with your serial device.
Configure these items and the EtherPath is ready for use.
Help Screens and Field Edits
In addition to the "HELP" button on the main screen, the field names on all configuration screens are
hyperlinks to context sensitive help screens. Simply click on the field name to bring up a second window
with the help information. Close that window to return to your entry screen.
13
Table of contents
Other DCB Server manuals
Popular Server manuals by other brands
Lenovo
Lenovo ThinkSystem SN550 Maintenance manual
Quantum
Quantum StorNext M440 User Essentials

Alcatel
Alcatel 5620 troubleshooting guide
Silicon Graphics
Silicon Graphics POWER CHALLENGE user guide

Nortel
Nortel 1000 Con?guration guide Description, Installation and Operation Manual
HP
HP P5389A - Intel Pentium III-S 1.4 GHz Processor... Reference

Lenovo
Lenovo ThinkServer TS200v Informace o záruce a podpoře
Lenovo
Lenovo x3650 M5 Installation and service guide
Supermicro
Supermicro SUPERSERVER 5018A-LTN4 user manual

HP
HP ProLiant BL420c user guide

Solwise
Solwise interNAS/USB user guide

Lenovo
Lenovo ThinkServer TS150 User guide and hardware maintenance manual
