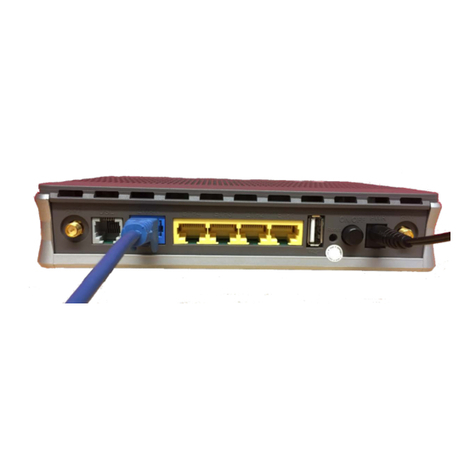
DEC DECswitch 900ET Operating and maintenance instructions

DECswitch 900ET
Installation and Configuration
Part Number: EK-DETER-IN. A01
March 1996
This book describes how to install and configure the DECswitch 900ET module.
Revision/Update Information: This is a new document.

Digital Equipment Corporation makes no representations that the use of its products in the manner
described in this publication will not infringe on existing or future patent rights, nor do the descriptions
contained in this publication imply the granting of licenses to make, use, or sell equipment or software in
accordance with the description.
Possession, use, or copying of the software described in this publication is authorized only pursuant to a
valid written license from Digital or an authorized sublicensor.
© Digital Equipment Corporation 1996. All rights reserved.
The following are trademarks of Digital Equipment Corporation:
DEC, DECswitch, DECconnect, DEChub, DECnet, Digital, clearVISN, MultiSwitch, ThinWire, and the DIGITAL logo.
AppleTalk is a registered trademark of Apple Computer, Inc.
Novell and IPX are registered trademarks of Novell, Inc.
FCC NOTICE - Class A Computing Device:
This equipment generates, uses, and may emit radio frequency energy. The equipment has been type tested and found to comply
with the limits for a Class A computing device pursuant to Subpart J of Part 15 of FCC Rules, which are designed to provide rea-
sonable protection against such radio frequency interference when operated in a commercial environment. Operation of this equip-
ment in a residential area may cause interference; in which case, measures taken to correct the interference are at the user's expense.
VCCI NOTICE - Class 1 Computing Device:
This equipment is in the 1st Class category (information equipment to be used in commercial and/or industrial areas) and conforms
to the standards set by the Voluntary Control Council for Interference by Data Processing Equipment and Electronic Office Ma-
chines aimed at preventing radio interference in commercial and/or industrial areas. Consequently, when used in a residential area
or in an adjacent area thereto, radio interference may be caused to radios and TV receivers. Read the instructions for correct han-
dling.
CE NOTICE - Class A Computing Device:
Warning!
This is a Class A product. In a domestic environment this product may cause radio interference, in which case the user may be
required to take adequate measures.
Achtung!
Dieses ist ein Gerät der Funkstörgrenzwertklasse A. In Wohnbereichen können bei Betrieb dieses Gerätes Rundfunkstörungen
auftreten, in welchen Fällen der Benutzer für entsprechende Gegenma(nahmen verantwortlich ist.
Attention!
Ceci est un produit de Classe A. Dans un environment domestique, ce produit risque de créer des interférences radioélectriques, il
appartiendra alors à l'utilisateur de prendre les mesures spécifiques appropriées.

iii
CONTENTS
Preface
Overview . . . . . . . . . . . . . . . . . . . . . . . . . . . . . . . . . . . . . . . . . . . . . . . . . . . . . . . . . . . . . . . . . . . . .vii
Organization. . . . . . . . . . . . . . . . . . . . . . . . . . . . . . . . . . . . . . . . . . . . . . . . . . . . . . . . . . . . . . . . . . viii
Associated Documents. . . . . . . . . . . . . . . . . . . . . . . . . . . . . . . . . . . . . . . . . . . . . . . . . . . . . . . . . . . ix
Conventions and Terms . . . . . . . . . . . . . . . . . . . . . . . . . . . . . . . . . . . . . . . . . . . . . . . . . . . . . . . . . . xi
Correspondence . . . . . . . . . . . . . . . . . . . . . . . . . . . . . . . . . . . . . . . . . . . . . . . . . . . . . . . . . . . . . . . .xii
How to Order Additional Documentation . . . . . . . . . . . . . . . . . . . . . . . . . . . . . . . . . . . . . . . . . . . xiii
Safety
Overview . . . . . . . . . . . . . . . . . . . . . . . . . . . . . . . . . . . . . . . . . . . . . . . . . . . . . . . . . . . . . . . . . . . . .xv
1 Product Introduction
Overview . . . . . . . . . . . . . . . . . . . . . . . . . . . . . . . . . . . . . . . . . . . . . . . . . . . . . . . . . . . . . . . . . . . . 1-1
What is the DECswitch 900ET? . . . . . . . . . . . . . . . . . . . . . . . . . . . . . . . . . . . . . . . . . . . . . . . . . . 1-2
Features . . . . . . . . . . . . . . . . . . . . . . . . . . . . . . . . . . . . . . . . . . . . . . . . . . . . . . . . . . . . . . . . . . . . . 1-3
Front Panel Features. . . . . . . . . . . . . . . . . . . . . . . . . . . . . . . . . . . . . . . . . . . . . . . . . . . . . . . . . . . . 1-6
Back Panel Features. . . . . . . . . . . . . . . . . . . . . . . . . . . . . . . . . . . . . . . . . . . . . . . . . . . . . . . . . . . . 1-9
2 Installing the Module
Overview . . . . . . . . . . . . . . . . . . . . . . . . . . . . . . . . . . . . . . . . . . . . . . . . . . . . . . . . . . . . . . . . . . . . 2-1
Installing the Module in a DEChub 900 . . . . . . . . . . . . . . . . . . . . . . . . . . . . . . . . . . . . . . . . . . . . 2-2
Task 1: Compare the Power Ratings . . . . . . . . . . . . . . . . . . . . . . . . . . . . . . . . . . . . . . . . . . . . . . . 2-3
Task 2: Seat the Module into the DEChub 900 . . . . . . . . . . . . . . . . . . . . . . . . . . . . . . . . . . . . . . . 2-4
Task 3: Verify Initial LED Operation . . . . . . . . . . . . . . . . . . . . . . . . . . . . . . . . . . . . . . . . . . . . . . 2-5
Task 4: Connect the Cables . . . . . . . . . . . . . . . . . . . . . . . . . . . . . . . . . . . . . . . . . . . . . . . . . . . . . . 2-6

iv
3 Installing the Setup Port Cable
Overview. . . . . . . . . . . . . . . . . . . . . . . . . . . . . . . . . . . . . . . . . . . . . . . . . . . . . . . . . . . . . . . . . . . . 3-1
Signaling Standards. . . . . . . . . . . . . . . . . . . . . . . . . . . . . . . . . . . . . . . . . . . . . . . . . . . . . . . . . . . . 3-2
Setup Port Device Cabling . . . . . . . . . . . . . . . . . . . . . . . . . . . . . . . . . . . . . . . . . . . . . . . . . . . . . . 3-2
Connecting the Setup Port. . . . . . . . . . . . . . . . . . . . . . . . . . . . . . . . . . . . . . . . . . . . . . . . . . . . . . . 3-3
4 Setting Up and Configuring the Module in a DEChub ONE
Overview. . . . . . . . . . . . . . . . . . . . . . . . . . . . . . . . . . . . . . . . . . . . . . . . . . . . . . . . . . . . . . . . . . . . 4-1
Accessing the Setup Port. . . . . . . . . . . . . . . . . . . . . . . . . . . . . . . . . . . . . . . . . . . . . . . . . . . . . . . . 4-2
Using Menus to Setup the Module . . . . . . . . . . . . . . . . . . . . . . . . . . . . . . . . . . . . . . . . . . . . . . . . 4-3
Go to Local Console . . . . . . . . . . . . . . . . . . . . . . . . . . . . . . . . . . . . . . . . . . . . . . . . . . . . . . . . . . 4-18
CONFIG Commands. . . . . . . . . . . . . . . . . . . . . . . . . . . . . . . . . . . . . . . . . . . . . . . . . . . . . . . . . . 4-21
Configuring Token-Ring Port Connection (0 or 1). . . . . . . . . . . . . . . . . . . . . . . . . . . . . . . . . . . 4-22
Configuring Ethernet Port 2 Connection. . . . . . . . . . . . . . . . . . . . . . . . . . . . . . . . . . . . . . . . . . . 4-23
Configuring OBM. . . . . . . . . . . . . . . . . . . . . . . . . . . . . . . . . . . . . . . . . . . . . . . . . . . . . . . . . . . . 4-24
5 Configuring the Module in a DEChub 900
Overview. . . . . . . . . . . . . . . . . . . . . . . . . . . . . . . . . . . . . . . . . . . . . . . . . . . . . . . . . . . . . . . . . . . . 5-1
Accessing the Setup Port. . . . . . . . . . . . . . . . . . . . . . . . . . . . . . . . . . . . . . . . . . . . . . . . . . . . . . . . 5-2
DEChub 900 MultiSwitch Installation Menu . . . . . . . . . . . . . . . . . . . . . . . . . . . . . . . . . . . . . . . . 5-3
Using Menus to Setup the Module . . . . . . . . . . . . . . . . . . . . . . . . . . . . . . . . . . . . . . . . . . . . . . . . 5-5
Using Telnet to Configure Interfaces . . . . . . . . . . . . . . . . . . . . . . . . . . . . . . . . . . . . . . . . . . . . . 5-17
Configuring Token-Ring Port Connection (0 or 1). . . . . . . . . . . . . . . . . . . . . . . . . . . . . . . . . . . 5-19
Configuring Ethernet Port 2 Connection. . . . . . . . . . . . . . . . . . . . . . . . . . . . . . . . . . . . . . . . . . . 5-20
Configuring OBM. . . . . . . . . . . . . . . . . . . . . . . . . . . . . . . . . . . . . . . . . . . . . . . . . . . . . . . . . . . . 5-21
6 Removing the Module
Overview. . . . . . . . . . . . . . . . . . . . . . . . . . . . . . . . . . . . . . . . . . . . . . . . . . . . . . . . . . . . . . . . . . . . 6-1
Removing the Cables . . . . . . . . . . . . . . . . . . . . . . . . . . . . . . . . . . . . . . . . . . . . . . . . . . . . . . . . . . 6-2
Unseating the Module . . . . . . . . . . . . . . . . . . . . . . . . . . . . . . . . . . . . . . . . . . . . . . . . . . . . . . . . . . 6-3
A Problem Solving
Overview. . . . . . . . . . . . . . . . . . . . . . . . . . . . . . . . . . . . . . . . . . . . . . . . . . . . . . . . . . . . . . . . . . . . A-1
LED Descriptions . . . . . . . . . . . . . . . . . . . . . . . . . . . . . . . . . . . . . . . . . . . . . . . . . . . . . . . . . . . . . A-2

v
Problem Solving Using LEDs . . . . . . . . . . . . . . . . . . . . . . . . . . . . . . . . . . . . . . . . . . . . . . . . . . . .A-3
B Connector and Pin Assignments
Overview . . . . . . . . . . . . . . . . . . . . . . . . . . . . . . . . . . . . . . . . . . . . . . . . . . . . . . . . . . . . . . . . . . . .B-1
Connector Assignments . . . . . . . . . . . . . . . . . . . . . . . . . . . . . . . . . . . . . . . . . . . . . . . . . . . . . . . . .B-2
Internal and External Crossover Configurations . . . . . . . . . . . . . . . . . . . . . . . . . . . . . . . . . . . . . .B-6
C Product Specifications
Overview . . . . . . . . . . . . . . . . . . . . . . . . . . . . . . . . . . . . . . . . . . . . . . . . . . . . . . . . . . . . . . . . . . . .C-1
Operating Specifications . . . . . . . . . . . . . . . . . . . . . . . . . . . . . . . . . . . . . . . . . . . . . . . . . . . . . . . .C-2
Acoustical Specifications. . . . . . . . . . . . . . . . . . . . . . . . . . . . . . . . . . . . . . . . . . . . . . . . . . . . . . . .C-5


vii
Preface
Overview
About this Manual
This manual describes how to install the DECswitch 900ET in a DEChub 900
MultiSwitch. (How to install the DECswitch 900ET in the DEChub ONE docking
station is described in the DEChub ONE Installation manual.) This manual also
describes how to configure the DECswitch 900ET software to operate in either a
DEChub 900 MultiSwitch or as a standalone module in a DEChub ONE docking
station.
Intended Audience
This manual is intended for use by personnel who will install and configure the
DECswitch 900ET module.

viii
Organization
This manual is organized as follows:
Section Description
1 Provides an overview of the DECswitch 900ET, describes its
features, and lists front and back panel features.
2 Provides instructionsfor installing the module ina DEChub 900
MultiSwitch.
3 Provides instructions for installing the setup port cable.
4 Provides instructions for configuring the module in a DEChub
ONE.
5 Provides instructions for configuring the module in a DEChub
900 MultiSwitch.
6 Provides instructions for removing the module from a DEChub
900 MultiSwitch.
A Provides installation-specific troubleshooting information
using the LEDs.
B Provides connector and pin assignment information.
C Provides product specifications.

ix
Associated Documents
The following documentsprovide information relating to the module. To orderany of
these documents, refer to the section titled How to Order Additional Documentation.
Title and Order Number Description
clearVISN Overview and
Concepts Provides an overview and concepts for
clearVISN.
clearVISN Configuration and
Use Describes how to configure and use
clearVISN applications.
clearVISN Installation Describes how to install
clearVISNapplications.
DEChub ONE Installation
EK-DEHU2-IN Provides installation and operation
guidelines for single-slot hub configuration,
including rack-mount options and cabling.
Bridging
Configuration Guide
AA-QL29B-TE
Describes bridging methods, operational
features of bridging, configuration methods
and basic configurations, and monitoring of
bridging software.
DEChub 900 MultiSwitch
Owner’s Manual
EK-DH2MS-OM
Provides installation, use, security, and
troubleshooting information for the DEChub
900 MultiSwitch.
Event Logging System
Messages Guide
AA-QL2AB-TE
Describes messages logged by the Event
Logging System.
(continued)
Network Interface
Operations Guide
AA-QL2BB-TE
Describes the configuring and monitoring of
the network interfaces in the Bridge Router
Software bridging router.

x
Distributed Routing
Software Router Protocols
Reference Guide
AA-QL2CB-TE
Provides detailed reference information
about the micro-operating system structure
and the protocols and interfaces that the
bridging routers support.
Systems Network Architecture
Guide
AA-QU5SA-TE
Supports IBM’s Systems Network
Architecture (SNA) and Data Link Switching
(DLSw).
Distributed Routing
Software Routing Protocols
Users Guide
AA-QL2DB-TE
Explains how to configure and monitor the
routing protocol software.
System
Software Guide
AA-QL2EB-TE
Describes the installation, configuration, and
operation of the Bridge Router Software.
Title and Order Number Description

xi
Conventions and Terms
Overview
This book uses the following conventions and terms:
Convention Description
Bold Type Indicates user input
Monospaced Type Indicates system output
16.20.54.156 The format of an IP address is the standard 4-
octet dotted decimal notation, where each
octet of the address is represented as a
decimal value, separated by a decimal point
(.).
Italics In examples, indicates user input.
[ ] Contain default responses to the installation
menu prompts.
<Return> Indicates that you press the Return Key.
08-00-2B-A3-00-00 This format represents a Media Access
Control (MAC) address in examples and
figures.
SNMP The Simple Network Management Protocol
(SNMP) is an industry standard protocol for
network management.
ThinWire Cable This cable is an IEEE 10base2 Coaxial cable
that carries Ethernet signals.
Ethernet The Digital’s term for its product’s
compatibility with the ISO 8802-3/ANSI/
IEEE 802.3 standards and the Ethernet
standards for Carrier Sense Multiple Access
with Collision Detection (CSMA/CD) local
area networks (LANs).

xii
Correspondence
Documentation Comments
Ifyou have comments or suggestions about this document, sendthem to the Network
Products Business Organization.
Attn.: Documentation Project Manager
FAX: (508) 486-6093
E-MAIL: doc_quality@lkg.mts.dec.com
Online Services
To locate product specific information, refer to the following online services:
BBS To read the Bulletin Board System, set your modem to 8 bits, no parity, 1 stop bit and
dial 508-486-5766 (U.S.)
WWW The Digital Equipment Corporation Network Products Business Home Page on the
World Wide Web is at the following addresses:
North America: http://www.networks.digital.com
Europe: http://www.networks.europe.digital.com
Australia: http://www.digital.com.au/networks

xiii
How to Order Additional Documentation
To order additional documentation, use the following information:
To Order: Contact:
By Telephone Continental USA: 1-800-DIGITAL (1-800-344-4825)
Canada: 1-800-267-6215
Alaska, New Hampshire, and Hawaii: 1-603-884-6660
Electronically
(USA. only) Dial 1-800-DEC-DEMO
(For assistance, call 1-800-DIGITAL)
By Mail
(USA and
Puerto Rico)
DIGITAL EQUIPMENT CORPORATION
P.O. Box CS2008
Nashua, New Hampshire 030601-1260
(Place prepaid orders from Puerto Rico with the local Digital
subsidiary: 809-754-7575)
By Mail
(Canada) DIGITAL EQUIPMENT CORPORATION LTD.
940 Belfast Road
Ottawa, Ontario, Canada K1G 4C2
Attn: A&SG Business Manager
Internationally DIGITAL EQUIPMENT CORPORATION
A&SG Business Manager
c/o local Digital subsidiary or approved distributor
Internally U.S. Software Supply Business (SSB)
DIGITAL EQUIPMENT CORPORATION
10 Cotton Road
Nashua, New Hampshire 030601-1260


xv
Safety
Overview
Any warning or caution that appears in this manual is defined as follows:
WARNING Contains information to prevent personal injury.
CAUTION Contains information to prevent damage to equipment.
VORSICHT Enthält Informationen, die beachtet werden müssen, um
den Benutzer vor Schaden zu bewahren.
ACHTUNG Enthält Informationen, die beachtet werden müssen, um
die Geräte vor Schaden zu bewahren.
DANGER Signale les informations destinées à prévenir les accidents
corporels.
ATTENTION Signale les informations destinées à prévenir la détério-
ration du matériel.
AVISO Contiene información para evitar daños personales.
PRECAUCIóN Contiene información para evitar daños al equipo.

xvi
The warnings and cautions that must be observed for the hardware described in this
manual are listed below in English, German, French, and Spanish.
WARNING Do not attempt to open the module under any circum-
stances - physical injury may occur. Only qualified ser-
vice personnel are authorized to open the module.
VORSICHT! Versuchen Sie auf gar keinen Fall, das Modul zu öffnen
- es besteht Verletzungsgefahr. Module dürfen nur von
entsprechend ausgebildetem Kundendienstpersonal
geöffnet werden.
DANGER! N'ouvrir cet appareil en aucun cas, sous peine de
blessures corporelles. L'ouverture ne doit être effectuée
que par un personnel d'entretien qualifié.
¡AVISO! No se debe abrir el módulo bajo ninguna circunstancia;
pueden ocurrir lesiones físicas. Sólo se autoriza al per-
sonal cualificado abrir el módulo.
CAUTION This action deletes all configured settings and replaces
them with factory default values. All configuration set-
tings will be lost.
ACHTUNG Bei diesem Vorgang werden alle
Konfigurationseinstellungen gelöscht und die
Werkseinstellungen wieder eingesetzt. Alle
Konfigurationsdaten gehen verloren.
ATTENTION Cetteactionsupprime touslesparamètresdeconfiguration
et les remplace par des valeurs prédéfinies. Tous les
paramètres de configuration seront perdus.
PRECAUCIóN Esta intervención borrará todos los parámetros de
configuración y los sustituirá por valores por defecto
definidos de fábrica. Se perderán todos los parámetros de
configuración.

Product Introduction 1-1
Chapter 1
Product Introduction
Overview
IntroductionThis chapter describes the DECswitch 900ET product and its features.
In this chapter
Topic Page
What is the DECswitch 900ET? 1-2
Features 1-3
Front Panel Features 1-6
Back Panel Features 1-9

What is the DECswitch 900ET?
1-2 Product Introduction
What is the DECswitch 900ET?
The DECswitch 900ET (also referred to in this manual as the module) is a bridging
router. It connects two Token-Ring LANs and one Ethernet LAN. Each LAN interface
can be connected either to an external LAN or to a DEChub 900 backplane channel.
Only one of the Token Ring interface can be connected to the backplane channel.
The DECswitch 900ET is available in two packages: Multiprotocol (MP) and Internet
Protocol (IP). These packages are defined later in this chapter. This module
interconnects networks that have both routable and nonroutable protocols. It routes
some protocols while bridging others.
You can configure the module in a DEChub 900 MultiSwitch (also referred to in this
manual as the DEChub 900) or as a standalone unit in a DEChub ONE docking station.
The Token Ring port is an IEEE 802.5 compliant network interface that supports 4
Megabytes per second and 16 Megabytes per second ring speeds.
Ethernet is Digital's term for its product compatibility with the ISO 8802-3/ANSI/
IEEE 802.3 standards and the Ethernet standards for Carrier Sense Multiple Access
with Collision Detection (CSMA/CD) local area networks (LANs).
The DECswitch 900ET standards-compliant technology (IEEE 802.1d, 802.2, 802.3)
ensures interoperability in multivendor networks.

Product Introduction 1-3
Features
Features
Your DECswitch 900ET module includes the following features.
Hot Swap The module’s hot swap capability allows you to install or remove the module from a
DEChub 900 without turning off the power.
Configuration and Management
The following configuration and management options are available:
•Support for configuration and management through a command line interface in
two ways: locally via the setup port in a DEChub ONEdocking station or remotely
via Telnet in both the DEChub 900 and the DEChub ONE docking station.
•The Auto Select feature senses which external Ethernet interface has the cable
connected and activates that interface.
•Upgradeable device firmware (in nonvolatile Flash memory) using Trivial File
Transfer Protocol (TFTP).
•Out-of-Band Management (OBM) over Serial Line Internet Protocol (SLIP)
through the OBM connector as an alternative to in-band management.
•Support using LAN hopping and launching of Telnet windows via Digital’s
clearVISN product.
•Configuration and Management via TCP/IP Telnet.
•SNMP Gets and Traps for network monitoring.

Features
1-4 Product Introduction
Routing Protocols
The following routing protocols are supported:
•IP. The IP routing protocols are as follows:
–– OSPF (Open Shortest Path First)
–– RIP (Routing Information Protocol)
–– EGP (Exterior Gateway Protocol)
–– IS-IS (Integrated Intermediate System to Intermediate System)
–– MOSPF (Multicast Open Shortest Path First)
–– DVMRP (Distance Vector Multicast Routing Protocol)
•IPX
•AppleTalk Phase II
•DECnet Phase IV
•DECnet Phase V/OSI
Bridging The following bridging options are supported via Adaptive Source Routing
Transparent (ASRT) bridging:
•Spanning tree loop detection protocol IEEE 802.1d.
•Source Routing (SR) Bridging.
•Source Routing Translational Bridging (SR -TB).
•High-speed local traffic filtering and forwarding.
•Flexible filtering (source address, destination address, and protocol) for greater
network control, increased security and bandwidth utilization, and reduced
propagation of network problems.
Table of contents
Other DEC Network Router manuals
