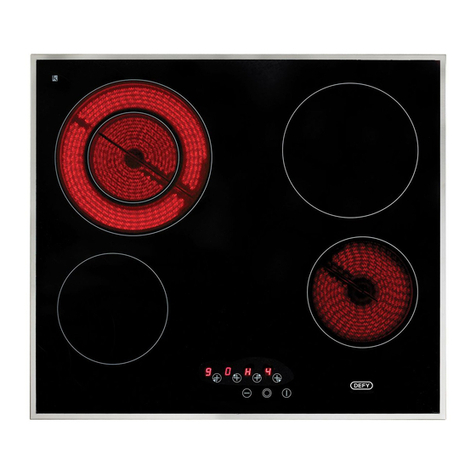
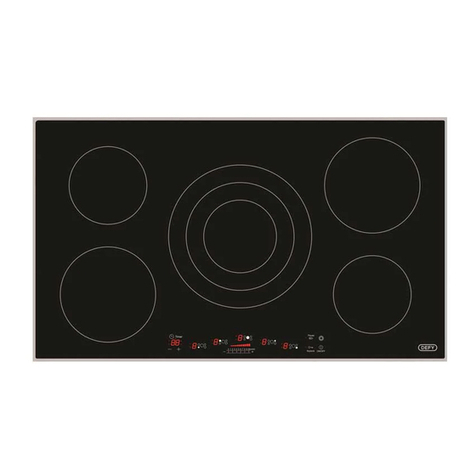
Defy DHD406A User manual

Page 1 of 24
DHD406A
600 TC VITROCERAMIC HOB
Cooking
Instruction manual
Part number: 073516

Page 2 of 24
Record in the space below the listed information for future reference. The serial number
may be found on the label attached to the hob base.
SERIAL NUMBER…………………………………………………………………………………..
DATE OF PURCHASE……………………………………………………………………………...
PURCHASED FROM………………………………………………………………………………..
………………………………………………………………………………………………………….
3 Introduction
4 Important safety instruction
5 Electrical safety
6 Product safety
7 Prevention against possible fire risk
8 General information
9 Installation
13 Preparation
13 How to use the hob
15 Controls
21 Maintenance and care
22 Troubleshooting
23 Branches
24 Warranty

Page 3 of 24
Congratulations on the purchase of this quality appliance. We trust that you will enjoy many years of
trouble free use.
Please read these instructions carefully before using the appliance.
This book will provide you with information on how to operate and care for your appliance in order
that you gain the maximum benefit from it.
Disposing of the old appliance
• Dispose of the old appliance in an environmentally friendly manner.
• Refer to your local dealer or solid waste collection centre in your area to learn how to dispose
of your appliance. Before disposing of the appliance, cut off the power cable plug and make
the door lock (if any) unusable to avoid dangerous conditions to children.
Introduction

Page 4 of 24
This section contains safety
instructions that will help you avoid
risk of injury and damage. All
warranties will become void if you
do not follow these instructions.
General safety
• This appliance is not intended for
use by persons (including
children) with reduced physical,
sensory or mental capabilities, or
lack of experience and
knowledge, unless they have
been given supervision or
instruction concerning the use of
the appliance by a person
responsible for their safety.
• Children should be supervised to
ensure that they do not play with
the appliance.
• Always keep children and infirm
persons away from the appliance
when it is in use.
• Do not carry out any repairs or
modifications on the appliance.
• The appliance must be
disconnected from the mains
during installation, maintenance,
cleaning and repair procedures.
Important safety instructions
Product safety instructions
• Be careful when using alcoholic
drinks in your dishes. Alcohol
evaporates at high temperatures
and may cause a fire since it can
ignite when it comes into contact
with hot surfaces.
• Do not use the appliance for
heating closed tins and glass
jars. The pressure that would
build up in the tin/jar may cause
it to burst.
• Do not place any flammable
materials close to the appliance
as the sides may become hot
during use.
• Keep all ventilation slots clear
of obstructions.
• The appliance may be hot
when it is in use. Never touch
the hot cooking zones.
• Make sure that the hob controls
are switched off after every
use.
• Use a deep pan, large enough
to cover the appropriate
cooking zone.
• Always dry food thoroughly
before placing it in hot oil or fat.
Frozen food in particular will
spit and splatter if added too
quickly.
• Never fill the pan more than
one third full of fat or oil.
• Never heat fat or fry with a lid
on the pan.
• Do not fry too much food at
once. This lowers the
temperature of the oil or fat and
results in fatty foods.
• Do not leave hot fat or oil
unattended. If overheating
occurs, these could catch fire.
Danger of fire: Do not store items on the cooking surface. CAUTION: The
cooking process has to be supervised. A short term cooking process has to
be supervised continuously. WARNING: Unattended cooking on a hob with
fat or oil can be dangerous and may result in a fire.

Page 5 of 24
• Do not leave hot fat or oil
unattended. If overheating
occurs, these could catch fire.
• Do not use or store
inflammable products (alcohol,
petrol, benzene etc.) near the
appliance as these pose a fire
risk.
• Do not cover the hob or
burners with aluminium foil.
• Switch off the power at the
mains in the event of a fault or
when cleaning the appliance.
• Only use clean pots with an
even flat base to prevent
cracking on glass due to hot
spots.
If the product is handed over to
someone else for personal use
or second-hand use purposes,
the user manual, product labels
and other relevant documents
and parts should be also given.
• Installation and repair
procedures must always be
performed by Authorized
Service Agents. The
manufacturer shall not be held
responsible for damages arising
from procedures carried out by
unauthorised persons which
may also void the warranty.
Before installation, read the
instructions carefully.
• Do not operate the product if it
is defective or has any visible
damage.
• Ensure that the product function
knobs are switched off after
every use.
Electrical safety
If the product has a failure, it
should not be operated unless it
is repaired by an Authorised
Service Agent. There is the risk of
electric shock!
Only connect the product to a
grounded outlet/line with the
voltage and protection as
specified in the “Technical
specifications”. Have the
grounding installation made by a
qualified electrician while using
the product with or without a
transformer. Our company shall
not be liable for any problems
arising due to the product not
being earthed in accordance
with the local regulations.
Never wash the product by
spreading or pouring water onto
it! There is the risk of electric
shock!
• The product must be
disconnected during installation,
maintenance, cleaning and
repairing procedures.
If the power connection cable for
the product is damaged, it must
be replaced by the manufacturer,
its service agent or similarly
qualified persons in order to
avoid a hazard.
Only use the connection cable
specified in the “Technical
specifications”.

Page 6 of 24
WARNING: Unattended
cooking on a hob with fat or oil
can be dangerous and may
result in fire. NEVER try to
extinguish a fire with water, but
switch off the appliance and
then cover flame e.g. with a lid
or a fire blanket.
• CAUTION: The cooking
process has to be supervised.
A short term cooking process
has to be supervised
continuously.
• WARNING: Danger of fire:
Do not store items on the
cooking surfaces.
• WARNING: If the surface is
cracked, switch off the
appliance to avoid the
possibility of electric shock.
• In case of hotplate glass
breakage: Immediately shut off
all burners and any electrical
heating element and isolate
the appliance from the power
supply. Do not touch the
appliance surface. Do not use
the appliance.
• The appliance is not intended
to be operated by means of an
external timer or separate
remote-control system.
• Vapour pressure that build up
due to the moisture on the hob
surface or at the bottom of the
pot can cause the pot to move.
Therefore, make sure that the
oven surface and bottom of the
pots are always dry.
The appliance must be installed
so that it can be completely
disconnected from the mains
supply. The separation must be
provided by a switch built into the
fixed electrical installation,
according to construction
regulations.
•Any work on electrical
equipment and systems should
only be carried out by
authorized and qualified
persons.
• In case of any damage, switch
off the product and disconnect it
from the mains. To do this, turn
off the fuse at home.
• Make sure that fuse rating is
compatible with the product.
Product safety
• WARNING: The appliance and
its accessible parts become hot
during use. Care should be
taken to avoid touching heating
elements. Children shall be kept
away unless continuously
supervised.
• Never use the product when
your judgment or coordination is
impaired by the use of alcohol
and/or drugs.
Do not place any flammable
materials close to the product as
the sides may become hot
during use.
• Keep all ventilation slots clear of
obstructions.
• Do not use steam cleaners to
clean the appliance as this may
cause an electric shock.

Page 7 of 24
Check the general
appearance of your
appliance for any
damages that might
have occurred during
transportation.
• WARNING: Use only hob
guards designed by the
manufacturer of the cooking
appliance or indicated by the
manufacturer of the appliance in
the instructions for use as
suitable or hob guards
incorporated in the appliance.
The use of inappropriate guards
can cause accidents.
Prevention against possible
fire risk!
• Ensure all electrical connections
are secure and tight to prevent
risk of arcing.
• Do not use damaged cables or
extension cables.
• Ensure liquid or moisture is not
accessible to the electrical
connection point.
Intended use
• This product is designed for
domestic use. Commercial use
will void the guarantee.
• CAUTION: This appliance is
for cooking purposes only. It
must not be used for other
purposes, for example room
heating.
• The manufacturer shall not be
liable for any damage caused by
improper use or handling errors.
Safety for children
• WARNING: Accessible parts
may become hot during use.
Young children should be kept
away.
• The packaging materials will be
dangerous for children. Keep the
packaging materials away from
children. Please dispose of all
parts of the packaging according
to environmental standards.
• Electrical products are dangerous
to children. Keep children away
from the product when it is
operating and do not allow them
to play with the product.
• Do not place any items above the
appliance that children may reach
for.

Page 8 of 24
General information
1 Single-circuit cooking plate
2 Assembly clamp
3 Vitroceramic surface
4 Base cover
Voltage / frequency 220-240 V ~ 50/60 Hz
Total power consumption 6000 W
Cable type / section min.H05V2V2
5 x 1,5 mm2/ 3 x 2,5 mm2
Technical specifications
External dimensions (height / width / depth) 55 mm/650 mm/510 mm
Installation dimensions (width / depth) 560 mm/490 mm
Burners
Front left Single-zone cooking plate
Dimension 180 mm
Power 1800 W
Rear left Single-zone cooking plate
Dimension 140 mm
Power 1200 W
Rear right Single-zone cooking plate
Dimension 180 mm
Power 1800 W
Front right Single-zone cooking plate
Dimension 140 mm
Power 1200 W
Technical specifications may be changed
without prior notice to improve the quality
of the product.
Figures in this manual are schematic and
may not exactly match your product.
Values stated on the product labels or in
the documentation accompanying it are
obtained in laboratory conditions in
accordance with relevant standards.
Depending on operational and
environmental conditions of the product,
these values may vary.

Page 9 of 24
Installation Surfaces, synthetic laminates and adhesives
used must be heat resistant (100 °C
minimum).
The worktop must be aligned and fixed
horizontally.
Cut aperture for the hob in worktop as per
installation dimensions.
Product must be installed by a qualified
person in accordance with the regulations in
force. The manufacturer shall not be held
responsible for damages arising from
procedures carried out by unauthorized
persons which may also void the warranty.
Preparation of location and
electrical installation for the
product is under customer’s
responsibility.
The product must be installed in
accordance with all local
electrical regulations.
Prior to installation, visually check
if the product has any defects on
it. If so, do not have it installed.
Damaged products cause risks
for your safety.
Unpacking
• Please ensure that packaging material is
disposed of in a responsible manner.
• Plastic bags should be cut up to prevent
children playing with them and
accidentally suffocating.
• Some models feature a protective film
over stainless steel trim. This film must be
carefully removed before using the hob.
• If the appliance is damaged in any way,
do not use it. Report the damage to your
dealer.
*Minimum height to extractor as recommend
in hood instruction manual. If not
recommended in the hood instruction
manual, this height should be at least 650
mm.
**Minimum distance between cabinetry must
be equal to width of hob
Before installation
The hob is designed for installation into
commercially available work tops. A safety
distance must be left between the appliance
and the kitchen walls and furniture. See
figure (values in mm).
It can also be used in a free standing
position. Allow a minimum distance of 750
mm above the hob surface.
(*) If a cooker hood is to be installed above
the cooker, refer to cooker hood
manufacturer' instructions regarding
installation height. If not defined any size in
the hood manual, this height should be at
least 650 mm.
Remove packaging materials and transport
locks.

Page 10 of 24
Earth leakage
This hob should not be connected through
an earth leakage system. Refer to S.A.N.S.
10142
Installation and connection
• The product must be installed in
accordance with all local gas and electrical
regulations.
Do not install the hob on places with
sharp edges or corners.
There is the risk of breakage to the
glass ceramic surface!
Electrical connection
Connect the product to a grounded outlet/
line protected by a miniature circuit breaker
of suitable capacity as stated in the
"Technical specifications" table. Have the
grounding installation made by a qualified
electrician while using the product with or
without a transformer.
Our company shall not be liable for any
damages that will arise due to using the
product without a grounding installation in
accordance with the local regulations.

Page 11 of 24
The product must be connected
to the mains supply only by an
authorised and qualified person.
The product's warranty period
starts only after correct
installation.
Manufacturer shall not be held
responsible for damages arising
from procedures carried out by
unauthorised persons.
The power cable must not be
clamped, bent or trapped or come
into contact with hot parts of the
product.
A damaged power cable must be
replaced by a qualified electrician.
Otherwise, there is risk of electric
shock, short circuit or fire!
• Connection must comply with national
regulations.
• The mains supply data must correspond to
the data specified on the type label of the
product. Type label is at the rear housing of
the product.
• Power cable of your product must comply
with the values in "Technical specifications"
table.
Before starting any work on the
electrical installation, disconnect
the product from the mains supply.
There is the risk of electric shock!
Connecting the power cable
While performing the wiring, you must apply
with the national/local electrical regulations
and must use the appropriate socket outlet/
line and plug for oven.
In case of the product's power limits are out
of current carrying capability of plug and
socket outlet/line, the product must be
connected through fixed electrical installation
directly without using plug and socket outlet/
line.
1. If a power cable is not supplied
together with your product, a power
cable with a minimum requirement as
stated in the Technical specifications table
(Technical specifications, page ) in
accordance with the electrical installation at
your home must be connected to your
product by following the instructions in the
cable diagram.
If it is not possible to disconnect all poles in
the supply power, a disconnection unit with
at least 3 mm contact clearance (fuses, line
safety switches, contactors) must be
connected and all the poles of this
disconnection unit must be adjacent to (not
above) the product in accordance with IEE
directives. Failure to obey this instruction
may cause operational problems and
invalidate the product warranty.
Additional protection by a residual
current circuit breaker is
recommended.
2. Open the terminal block cover with a
screwdriver.
3. Insert the power cable through the cable
clamp below the terminal and secure it to
the main body with the integrated screw on
cable clamping component.
4. Connect the cables according to the
supplied diagram.
5. After completing the wire connections,
close the terminal block cover.
6. Route the power cable so that it will not
come into contact with the product and get
squeezed between the product and the
wall.

Page 12 of 24
Power cable must not be longer than
2 m because of safety reasons.
Installing the product
1. Turning the hob upside down, place it on
a flat surface.
2. When installing the hob, apply the sealing
gasket, which was provided in the
packaging, around the hob as shown in the
following picture, ensuring that it remains 1
to 2 mm inside from the outer edge of the
glass.
3. Place the hob on the counter and align it.
4. Using the installation clamps secure the
hob by fitting through the holes on the
lower casing.
1 Hob
2 Screw
3 Installation clamp
4 Counter
When installing the hob onto a
cabinet, a shelf must be installed in
order to separate the cabinet from
the hob as illustrated in the above
figure. This is not required when
installing onto a built-under oven.
For example, if it is possible to touch the
bottom of the product since it is installed
onto a drawer, this section must be covered
with a wooden plate.
* min. 15 mm
Rear view (connection holes)
Final check
1. Operate the product.
2. Check the functions.
Future Transportation
• Keep the product's original carton and
transport the product in it. Follow the
instructions on the carton. If you do not
have the original carton, pack the product
in bubble wrap or thick cardboard and tape
it securely.
Location of the connection holes
shown in the below figure are
schematic,may vary depending on
the product model. Fix them
according to connection holes on
your product.
Making connections to different
holes is not a good practice in
terms of safety since it can
damage the gas and electrical
system.
There are gas and electrical
components contained within this
hob, therefore when fitting the
mounting springs/clamps only
attach the supplied fixings to the
connection holes shown in this
manual. Failure to observe this
advise may lead to life and
property safety
Check the general appearance of
your product for any damages that
might have occurred during
transportation.

Page 13 of 24
Preparation
Tips for saving energy
The following information will help you to use
your appliance in an ecological way, and to
save energy:
• Defrost frozen dishes before cooking them.
• Use pots/pans with cover for cooking. If
there is no cover, energy consumption may
increase 4 times.
• Select the burner which is suitable for the
bottom size of the pot to be used. Always
select the correct pot size for your dishes.
Larger pots require more energy.
• Pay attention to use flat bottom pots when
cooking with electric hobs.
Pots with thick bottom will provide a better
heat conduction. You can obtain energy
savings up to 1/3.
• Vessels and pots must be compatible with
the cooking zones. Bottom of the vessels
or pots must not be smaller than the
hotplate.
• Keep the cooking zones and bottom of the
pots clean. Dirt will decrease the heat
conduction between the cooking zone and
bottom of the pot.
• For long cookings, turn off the cooking
zone 5 or 10 minutes before the end of
cooking time. You can obtain energy
savings up to 20% by using the residual
heat.
Initial use
First cleaning of the appliance
1. Remove all packaging materials.
2. Wipe the surfaces of the appliance with a
damp cloth or sponge and dry with a cloth.
The surface might get damaged
by some detergents or cleaning
materials.
Do not use aggressive detergents,
cleaning powders/creams or any
sharp objects during cleaning. Do
not use harsh abrasive cleaners
or sharp metal scrapers to clean
the oven door glass since they
can scratch the surface, which
may result in shattering of the
glass.
How to use the hob
General information about cooking
• Before frying foods, always dry them well
and gently place into the hot oil. Ensure
complete thawing of frozen foods before
frying.
• Do not cover the vessel you use when
heating oil.
• Place the pans and saucepans in a manner
so that their handles are not over the hob
to prevent heating of the handles. Do not
place unbalanced and easily tilting vessels
on the hob.
• Do not place empty vessels and
saucepans on cooking zones that are
switched on. They might get damaged.
• Operating a cooking zone without a vessel
or saucepan on it will cause damage to the
product. Turn off the cooking zones after
the cooking is complete.
• As the surface of the product can be hot,
do not put plastic and aluminum vessels on
it.
Clean any melted such materials on the
surface immediately.
Such vessels should not be used to keep
foods either.
• Use flat bottomed saucepans or vessels
only.
• Put appropriate amount of food in
saucepans and pans. Thus, you will not
have to make any unnecessary cleaning by
preventing the dishes from overflowing.
Do not put covers of saucepans or pans on
cooking zones.
Place the saucepans in a manner so that
they are centered on the cooking zone.
When you want to move the saucepan onto
another cooking zone, lift and place it onto
the cooking zone you want instead of
sliding it.
Never fill the pan with oil more than
one third of it. Do not leave the hob
unattended when heating oil.
Overheated oils bring risk of fire.
Never attempt to extinguish a
possible fire with water! When
oil catches fire, cover it with a fire
blanket or damp cloth. Turn off the
hob if it is safe to do so and call the
fire department.

Page 14 of 24
Using the hobs
Spills may damage the
glass ceramic surface and
cause fire.
Do not use vessels with
concave or convex
bottoms.
Use only the saucepans
and pans with flat bottoms.
They ensure easier heat
transfer.
If the diameter of the
saucepan is too small,
energy will be wasted.
Do not allow any object to drop
on the hob. Even small objects
such as a saltshaker may
damage the hob.
Do not use cracked hobs. Water
may leak through these cracks
and cause short circuit.
In case of any kind of damage on
the surface (eg., visible cracks),
switch off the product
immediately to minimize the risk
of electric shock.
Quick heating glass-ceramic
hobs emit a bright light when
they are switched on. Do not
stare at the bright light.
Tips about glass ceramic hobs
• Glass ceramic surface is heatproof and is
not affected by big temperature
differences.
• Do not use the glass ceramic surface as a
place of storage or as a cutting board.
• Use only the saucepans and pans with
machined bottoms. Sharp edges create
scratches on the surface.
• Do not use aluminum vessels and
saucepans. Aluminum damages the glass
ceramic surface.
1 Single-Zone cooking plate 18-20 cm
2 Single-Zone cooking plate 14-16 cm
3 Single-Zone cooking plate 18-20 cm
4 Single-Zone cooking plate 14-16 cm is
list of advised diameter of pots to be used
on related burners.

Page 15 of 24
Controls
SpeciÞcaƟons
Turning on the hob
Touch the " " key on control panel for 1
second. Cooking zone displays illuminate.
The hob is ready for use now. You can
select different cooking zones within the
following 10 seconds. Other controls are not
allowed to function when main key " " is
being operated.
" " and all the relevant decimal points will
flash in all cooking zone displays.
Main key - ON/OFF key
Keylock
Temperature setting/Increasing timer
Temperature setting/Decreasing
timer
** Dual/Triple cooking zone selection
key
* Enable/disable timer
** Enable/disable cooking zone
Cooking zone display (temperature
setting 0 ... 9)
Dual/triple cooking zone operation
LED (Cooking zone display)
* Timer display (there are 4 LEDs for
4 different cooking zones)
Cooking zone selection controls
This unit is controlled over the
touch control unit. Each operation
you make on your touch control
will be confirmed by an audible
signal if your touch control unit is
equipped with a timer.
(*) If your hob is equipped with a
timer.
**
If your hob is equipped with these
functions
In models with a clock
If no operation is performed within 10
seconds, the hob will automatically return to
Standby mode.
Control panel
Always keep the control panels
clean and dry. Humidity and dirt
can cause problems in functions.
Graphics and figures are for
informational purposes only.
Actual appearance or functions
may vary.
If you press main key " " for longer than 2
seconds, the hob will turn off and return to
Standby mode.

Page 16 of 24
1. Turn on the hob.
2. Touch one of the cooking zone selection
controls to turn on the desired cooking
zone. After selecting the cooking zone of
the hob, " " decimal point will flash on
the relevant cooking zone display.
If no operation is performed within 10
seconds, the hob will automatically return
to Standby mode.
3. Touch " " or " " keys to set the
temperature level to a value between "1"
and "9" or between "9" and "1".
" " and " " keys are equipped with repeat
function. If you touch any of these keys for a
long time, temperature level will continuously
increase or decrease at every 0,4 seconds.
If you start with " " key, "1" appears on
display. If you start with " " key, set value
appears on display (e.g., half second ''A"
and half second "9") . This indicates that
Booster is activated.
When your hob gets overheated;
• If the active cooking zones are set to a
higher than the 7th level, hob reduces
the level of active cooking zones to
level 7 and the cooking zones can not
be selected higher than this level.
• If overheating persists; if the active
cooking zones are set to a higher than
the 5th level, hob reduces the level of
active cooking zones to level 5 and the
cooking zones can not be selected
higher than this level.
If hob temperature rises excessively, it can
turn itself off for protection and the cooking
zones can not be operated.
Booster
This function facilitates cooking. When
Booster is activated, the cooking will operate
at maximum power for a certain period of
time (see, Table-1). Booster time depends
on the selected temperature level. This is
indicated with an "A" and the set
temperature value which flash alternately on
cooking zone display (e.g., half second "A",
half second "9") Once the Booster time is
over, power of cooking zone will be reduced
and the temperature value will be displayed
continuously.
All cooking zones are equipped with Booster
function.
Enabling the Booster function:
1. Turn on the hob.
2. Select the desired cooking zone by
touching the cooking zone selection keys.
3. Use " " key to set the cooking zone
temperature value to "9". Once the
temperature setting is made, "9" and "A"
will appear on the display alternately. This
indicates that temperature value is set to
"9" and Booster function is activated.
If your hob gets overheated,
booster function cannot be set for
protection.
4. Then, use " " key within 10 seconds to
select the temperature setting you want to
be activated for the remainder of cooking
process after the Booster time is over.
Use " " or" " keys to set the cooking
zone to a value between "1" or "9" (it is
supposed that level 6 is selected for the
example).
5. "A" and "6" appears alternately on the
display during Booster function (at the end
of Booster period, "6" will be displayed
continuously).
Selecting the cooking zones

Page 17 of 24
Turning oī the Booster funcƟon:
Touch " " key until temperature level
decreases "0" to disable the Booster
function earlier.
If "9" will be selected as temperature level
that will be activated after Booster period
and no other lower level is selected, then
flashing of the screen will cease in 10
seconds. Booster is now deactivated.
Turn oī the hob.
If you press main key " " for longer than 2
seconds, the hob will turn off and return to
Standby mode.
If there is residual temperature that can be
used after the hob is turned off, this will be
indicated with " " symbol that appears on
the relevant cooking zone display
continuously.
Turning oī cooking zones individually:
A cooking zone can be turned off in 3
different ways:
1. By touching " " and " " keys
simultaneously.
2. By decreasing the temperature level to "0"
with " " key.
3. By using the Ɵmer funcƟon (if any) for the
relevant cooking zone
1.Touching " " and " " keys simultaneously
Select the desired cooking zone with
cooking zone selection key" ". Decimal
point appears on " " cooking zone display.
Touch " " and " " keys simultaneously to
turn off the cooking zone.
2. Decreasing the temperature level of the
desired cooking zone to "0" with " " key
Furthermore, cooking zone can also be
turned off by decreasing the temperature
level to "0".
3. Using the Ɵmer oī funcƟon (if any) for the
relevant cooking zone
When the Ɵme is over, the Ɵmer will turn oīthe
cooking zone assigned to it. "0" and "00" will
appear
on all displays. Dual/triplet cooking zone and
the LEDs connected to the timer will be
deactivated. Furthermore, when the time is
over, an audible alarm will sound. Touch any
key on the touch control panel to silence the
audible alarm.
Turning on Dual/Triplet cooking zones**
Turning on the dual cooking zone:
Select the desired cooking zone equipped
with dual zone. Decimal point of the relevant
cooking zone must start to flash.
Set the temperature level to a value between
1 and 9 and touch " " key to activate the
dual zone of the cooking zone.
" " LED of the relevant dual zone will also
flash continuously. " " Status of the dual
cooking zone will change when you touch
the key for a second time: dual cooking zone
will switch between on and off status.
Expansion zone will only be activated if the
main zone of the cooking zone is set to a
temperature level between "1" and "9".
Turning on the triplet cooking zone:
Select the desired cooking zone equipped
with triplet zone. Decimal point of the
relevant cooking zone must start to flash.
Set the temperature level to a value between
1 and 9 and touch " " key to activate the
dual zone of the cooking zone.
" " LED of the relevant dual zone will also
light up continuously. If you touch " " key
again, " " LED of the triplet zone flashes
and triplet cooking zone is activated.
When you touch " " key once again
triplet zone of the cooking zone turns off
again. Above operation will always
change the status of the double/triplet
cooking zones.
Enabling the double and triplet zones by
touching the " " key of the selected
cooking zone.
Keylock * (in models with clock)
Touch the " " key for longer than 2 seconds to
lock the touch control. OperaƟon will be
conÞrmed with an audible signal.

Page 18 of 24
Then, " " LED will flash and all cooking
zones will be locked.
Cooking zones, can only be locked in the
operation mode. If the cooking zones are
locked: only the main key " " can be
operated. " " LED will flash and indicate a
key lock module. If you turn the hob off when
the keys are locked, the keylock will be
activated next time you turn the hob on
again. Key lock must be deactivated in
order to be able to operate the hob.
Disabling the Child Lock:
You can disable the child lock as you have
activated it.
1. Touch main key " " to turn on the hob.
2. Touch " " and " " keys simultaneously for
at least 2 seconds.
3. Then, touch " " key once again.
» " " appears on all cooking zone displays
as long as the Child lock is activated. " "
will disappear when the lock is deactivated
successfully.
" " key will allow you to lock or unlock
the touch control in operation mode.
Touch " " key for 2 seconds to unlock the
cooking zones. Operation will be confirmed
with an audible signal.
Then, " " LED turns off. Now the touch
control is unlocked and can be operated
normally.
Child Lock
You can protect the hob against being
operated unintentionally in order to prevent
children from turning on the cooking zone.
Child Lock function contains a few complex
steps to lock the touch control unit. Child
Lock can only be activated and deactivated
in Standby mode.
Locking the module:
1. Touch main key " " to turn on the hob.
2. Touch " " and " " keys simultaneously for
at least 2 seconds.
3. Then, touch " " key once again.
» Child Lock function is activated and " "
appears on all cooking zone displays.
Timer funcƟon * (in models with clock)
This feature facilitates cooking for you. You
will not have to attend the hob continuously
during the cooking process and the cooking
zone will turn off automatically at the end of
the time you have selected.
Timer provides following features: Touch
control can command to maximum 4 cooking
zone timers and one alarm cooking timer
assigned at the same time. All timers can
only be used in operation mode.
Timer as an alarm
Alarm timer operates independently from
other cooking zones. Therefore, it is not
important whether a cooking zone is
selected or not.
1. Touch " " key to enable the alarm Ɵmer.
"00" and " " will appear on the Ɵmer
display and a dot will appear on the lower
right side. Thus, alarm Ɵmer is acƟvated.
2. Then, set the desired Ɵme value by touching "
" and " " keys.
3. Timer will start to countdown aŌer you have
made the Ɵme seƫng..

Page 19 of 24
» When the time is over, an audible alarm
will sound. Touch any key on the touch
control panel to silence the audible alarm.
Cooking zone Ɵmer:
The cooking zone timers can only be set
for the cooking zones that are activated.
1. First turn on the hob and then enable the
desired cooking zone. (cooking zone must be
set to a value between 1and 9)
2. As in the alarm timer, enable the
cooking zone timer by touching " "
key. "00" and " " will appear on the
timer display and a dot will appear on
the lower right side. Thus, cooking
zone timer is activated.
3. You must touch " " key for a second Ɵme in
order to enable cooking zone Ɵmer. Now you
can assign the Ɵmer.
4. Set the desired Ɵme value by touching " "
and " " keys.
To set the hob timers:
1. AŌer enabling the Þrst cooking zone Ɵmer,
touch the " " key again. The control will
turn clockwise towards the next acƟve
cooking zone assigned to the Ɵmer.
Assignment proposal will be shown with a
ßashing " " LED.
2. Set the desired Ɵme value by touching " "
and " " keys.
3. Timer acƟvated for the cooking zone which
was set Þrst is indicated with a conƟnuously
ßashing " " LED.
• More timers can be assigned for other
active cooking zones by touching the "
" key once again.
" " LEDs that illuminate continuously on
the timer display indicate the timer that is
currently counting down.
You can display the values set for cooking
zone timers and egg timer by changing
the position of " " key. A flashing front
right " " LED always shows an
assignment.
If no LED is flashing, value of the egg
timer will be displayed on the timer
screen.
Disabling the Ɵmers:
First you must display the timer by changing
the position of the " " key until the timer
appears. This value can later be cancelled in
2 different ways:
By decreasing the value step by step to "00"
by touching " " key.
By touching " " and " " keys
simultaneously for half second until "00"
appears on timer display.
When the time is over, an audible alarm will
sound. Touch any key on the touch control
panel to silence the audible alarm.
Display the remaining time value of the
cooking zone timer 3 (indicator LED flashes)
to the timer display (the indicator LEDs of
the active timers of the cooking zones 1 and
4 in fact will not be visible on the timer
display).
Keep warm funcƟon (if any)
Keep Warm function of the cooking zone
helps to keep the food warm by selecting an
additional temperature level between 0 and
1. Touch" " key to activate the Keep Warm
function.
Then, " " LED flashes. Touch " " key
again to disable the cooking zone.

Page 20 of 24
Operation time constraints
The hob control is equipped with an
operation time limit. When one or more
cooking zones are left on unintentionally, the
cooking zone will automatically be
deactivated after a certain period of time.
(see, Table-1).
Operation time limit depends on the selected
temperature setting. If there is a timer
assigned for the cooking zone, "00" appears
on the timer display for 10 seconds (10
seconds later, residual heat indicator turns
on). Then, timer display is turned off. After
disabling the cooking zone automatically as
described above, it becomes operational
again and maximum operation time is
applied for this temperature setting.
Table-1: Temperature setting parameters;
Cycle time 47.0 seconds.
Temp
setting
OFF
time -
seconds
ON time -
seconds
Operation
time limit
- hour
Booster
time -
seconds
0 0 0 0 -
1 45,6 1,4 6 60
2 43,6 3,4 6 180
3 41,3 5,7 5 288
4 38,4 8,6 5 390
5 35,9 11,1 4 510
6 33,1 13,9 1,5 150
7 26,2 20,8 1,5 210
8 19,2 27,8 1,5 270
9 0 47,0 1,5 -
Residual Heat Functions
For a deactivated cooking zone whose
surface temperature is sensed to be above
60°C or whose display indicates a value
above 60°C, a " " (residual heat) symbol
appears on the display. When residual heat
falls below 60°C, "0" appears on the display.
Sample application:
Following lightning conditions will allow
a smooth calibration:
Illumination with a bulb without a reflector
(100W, dull) 70 cm above the glass ceramic
hob. After a successful calibration, it is
warranted that the hob will operate as
intended even under a strong illumination
such as halogen spot lamp with reflector (50
W).
If an error occurs, calibration is repeated
until the ambient conditions allow for a
successful calibration. Hob control system
can only be operated when the calibration of
all sensors are successful.
You must remove all substances on the hob
during calibration. Also the ambient
illumination should not be too strong during
calibration. If one of the F1, F2 or F4
messages is obtained, user must turn off all
light sources or close the window during the
calibration process at first connection to the
supply power. When the calibration is
completed successfully, control system can
tolerate high amount of ambient light.
Hob control system adopts and recalibrates
itself according to the changes in ambient
conditions while it is in use.
Touch control has a sensor that
protects against overheating. The
cooking zone will be deactivated
when reacting to the sensor. For
more information about error
messages refer to table. If a key is
activated repeatedly (more than10
s), control system is deactivated
and audio signal is given.
When power restores after a
power failure or your Hob is
switched off if the residual heat of
the relevant cooking zone was
above 60°C before the failure,
residual heat display flashes.
Display continues to flash until
the maximum residual heat time is
over or the cooking zone is
selected and enabled
Table of contents
Other Defy Hob manuals
Defy
Defy DHD414 GEMINI 820 TC BEVEL User manual
Defy
Defy VITROCERAMIC Series User manual
Defy
Defy SLIMLINE NCP DHD409 User manual
Defy
Defy DHG118 User manual
Defy
Defy DHG905 User manual
Defy
Defy GEMINI 770 TC BV User manual

Defy
Defy DHG931 User manual
Defy
Defy DHD412 User manual
Defy
Defy GEMINI SOLID PLATE User manual
Defy
Defy DHG901 User manual

Defy
Defy Automaid 600 electronic User manual
Defy
Defy DHG128 User manual
Defy
Defy DHG131 User manual
Defy
Defy DHD398 User manual

Defy
Defy DHD 394 User manual

Defy
Defy TOUCH CONTROL INDUCTION HOB User manual
Defy
Defy DOMINO 2 User manual
Defy
Defy DHD411 User manual
Defy
Defy DHG604 User manual
Defy
Defy DHG 116 User manual

