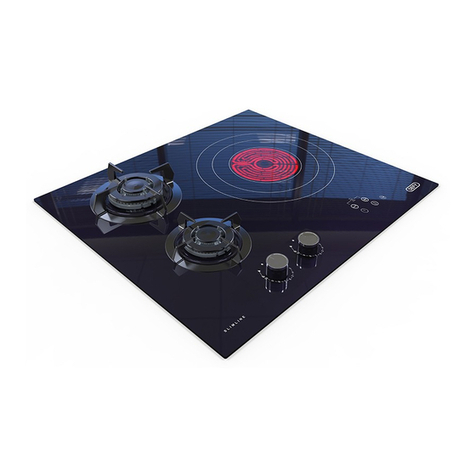
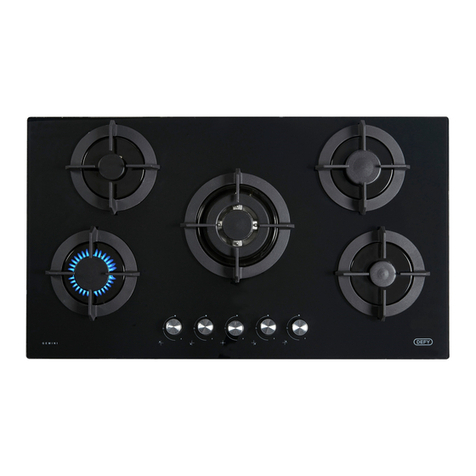
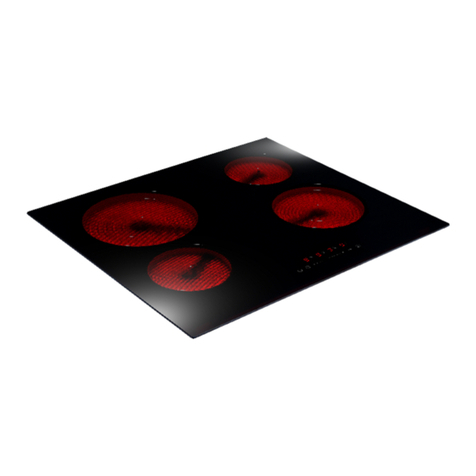
Defy GEMINI 770 TC BV User manual

Page 1
DHD417
HOB GEMINI 770 TC BV
Cooking
Instruction manual
Part number: 071866D

Page 2
Dear Customer,
Your new Defy hob was manufactured in a state of the art facility and has passed strict
quality control procedures. Please read this manual carefully before using your hob for the
first time and then store it within easy reach for future reference.
This manual will provide you with information on how to operate and care for your hob to gain
the maximum benefit from it.
We trust you will enjoy years of trouble free use.
EXPLANATION OF SYMBOLS
Important information
Warning—Hazardous situations
Warning—Electric shock
Caution; Warning for fire hazard
Caution; Warning for hot surfaces

Page 3
Contents
1. Technical specifications 4
2. Important Safety Instructions 5
General safety 5
Electrical safety 5
Product safety 6
Intended use 7
Safety for children 7
Package information 8
Future Transportation 8
3. Installation 9
Before installation 9
Installation and connection 9
Electrical connection 10
4. Preparation 11
Tips for energy saving 11
Initial use 11
First cleaning of the appliance 11
5. Controls 12
Control panel 12
Specifications 12
Turning on the hob 12
Booster 13
Child lock 15
Timer function 15
Error messages 17
6. Maintenance and care 18
Caring for the hob 18
Recommendations 18
7. Customer care 19
8. Warranty 20

Page 4
The manufacturer strives for continuous improvement. For this reason, the text and
illustrations in this manual are subject to change without notice.
Figures in this manual are schematic and may not exactly match your product.
Values stated on the product labels or in the documentation accompanying it are
obtained in laboratory conditions in accordance with relevant standards. Depending
on operational and environmental conditions of the product, these values may vary.
Technical Specifications
1
Model DHD 417 “770 TC”
Volts 220V –240V 50/60Hz~
Amperes 33
Plate power rating (ø, mm/ W)
Front cooking zone left 210/120, 2200/750
Front cooking zone right 180, 1800
Rear cooking zone right 170 x265, 2400/1500
Rear cooking zone left 140, 1200
Total power ( W) 7600
Type of switch Electronic sensors
Width
Depth
770 mm
510 mm

Page 5
2 Important safety instructions
This section contains safety
instructions that will help you
avoid risk of injury and damage.
All warranties will become void if
you do not follow these
instructions.
General safety
• This appliance is not intended
for use by persons (including
children) with reduced
physical, sensory or mental
capabilities, or lack of
experience and knowledge,
unless they have been given
supervision or instruction
concerning the use of the
appliance by a person
responsible for their safety.
• Young children should be
supervised to ensure that they
do not play with the appliance.
• Installation and repair
procedures must always be
performed by Authorized
Service Agents. The
manufacturer shall not be held
responsible for damages
arising from procedures
carried out by unauthorized
persons which may also void
the warranty. Before
installation, read the
instructions carefully.
• Do not operate the product if it
is defective or has any visible
damage.
• Ensure that the product
function knobs are switched off
after every use.
Electrical safety
• If the product has a failure, it
should not be operated unless
it is repaired by the Authorized
Service Agent. There is the risk
of electric shock!
• Only connect the product to a
grounded outlet/line with the
voltage and protection as
specified in the “Technical
specifications”. Have the
grounding installation made by
a qualified electrician while
using the product with or
without a transformer. Defy
shall not be liable for any
problems arising due to the
product not being earthed in
accordance with local
regulations.
• Never wash the product by
spreading or pouring water
onto it! There is the risk of
electric shock!
• The product must be
disconnected from the mains
supply during installation,
maintenance, cleaning and
repairing procedures.
• If the electrical supply is
restricted, means of all-pole
disconnection must be
accessible and incorporated in
the fixed wiring in accordance
with the regulations.

Page 6
• Never use the product when
your judgment or coordination
is impaired by the use of
alcohol and/or drugs.
• Be careful when using
alcoholic drinks in your dishes.
Alcohol evaporates at high
temperatures and may cause
fire since it can ignite when it
comes into contact with hot
surfaces.
• Do not place any flammable
materials close to the product
as the sides may become hot
during use.
• Keep all ventilation slots clear
of obstructions.
• Do not use steam cleaners to
clean the appliance as this
may cause an electric shock.
• Do not use or store flammable
products (alcohol, petrol,
benzene etc.) near the
appliance as these pose a fire
risk.
• Danger of fire: Do not store
items on the cooking surfaces.
• Unattended cooking on a hob
with fat or oil can be
dangerous and may result in
fire. NEVER try to extinguish a
fire with water, but switch off
the appliance and then cover
flame e.g. with a lid or a fire
blanket.
• WARNING: If the surface is
cracked, switch off the
appliance to avoid the
possibility of an electric shock.
• If the power connection cable
for the product is damaged, it
must be replaced by the
manufacturer, its service agent
or similarly qualified persons in
order to avoid a hazard.
• The appliance must be
installed so that it can be
completely disconnected from
the network. The separation
must be provided either by a
mains plug, or a switch built
into the fixed electrical
installation, according to
construction regulations.
• Any work on electrical
equipment and systems should
only be carried out by
authorized and qualified
persons.
• In case of any damage, switch
off the product and disconnect
it from the mains. To do this,
turn off the fuse at home.
• Make sure that fuse rating is
compatible with the product.
Product safety
• The appliance and its
accessible parts become hot
during use. Care should be
taken to avoid touching
heating elements. Children
less than 8 years of age shall
be kept away unless
continuously supervised.

Page 7
Intended use
• This product is designed for
domestic use. Commercial
use will void the guarantee.
• This appliance is for cooking
purposes only. It must not be
used for other purposes, for
example room heating.
• The manufacturer shall not be
liable for any damage caused
by improper use or handling
errors.
Safety for children
• Accessible parts may become
hot during use. Young children
should be kept away.
• The packaging materials will
be dangerous for children.
Keep the packaging materials
away from children. Please
dispose of all parts of the
packaging according to
environmental standards.
• Electrical and/or gas products
are dangerous to children.
Keep children away from the
product when it is operating
and do not allow them to play
with the product.
• Do not place any items above
the appliance that children
may reach for.
• Do not spray aerosols in the
vicinity of this appliance while
it is in operation.
• Do not modify this appliance
• Where this appliance is
installed in a marine craft or in
caravans, it shall not be used
as a space heater.
• Do not use the appliance for
heating closed tins and glass
jars. The pressure that would
build up in the tin/jar may
cause it to burst.
• Always keep children and
infirm persons away from the
appliance when it is in use.
• Use a deep pan, large enough
to cover the appropriate
cooking zones.
• Always dry food thoroughly
before placing it in hot oil or
fat. Frozen food in particular
will spit and splatter if added
too quickly.
• Never fill the pan more than
one third full of fat or oil.
• Never heat fat or fry with a lid
on the pan.
• Do not fry too much food at
once. This lowers the
temperature of the oil or fat
and results in fatty foods.
• Do not leave hot fat or oil
unattended. If overheating
occurs, these could catch fire.
• Do not modify this appliance
• This appliance is not intended
to be operated by means of
external timer or separate
remote control system

Page 8
DANGER Broken
glass!
Do not let any objects
fall onto the hob. Even
small objects may
damage the hob. Do not
use glass ceramic hobs
with cracks. Water may
enter into the cracks and
cause a short circuit. If
the surface is damaged
in any way (e. g. visible
cracks), switch off the
device immediately to
reduce the risk of an
electric shock.
Only use clean pots with
an even flat base to
prevent cracking on
glass due to hot spots.
Danger of fire: Do not
store items on the
cooking surface.
CAUTION: The cooking
process has to be
supervised. A short term
cooking process has to
be supervised
continuously.
WARNING: Unattended
cooking on a hob with fat
or oil can be dangerous
and may result in a fire.
Package information
• Packaging materials of the
hob are manufactured from
recyclable materials in
accordance with
Environmental Regulations.
• Do not dispose of the
packaging materials together
with domestic or other wastes.
Take them to collection points
designated by the local
authorities.
Future Transportation
• Keep the product's original
carton and transport the
product in it. Follow the
instructions on the carton. If
you do not have the original
carton, pack the product in
bubble wrap or thick
cardboard and tape it
securely.

Page 9
Installation
3
The hob must be installed by a qualified
electrician in accordance with national
regulations. Installation is the buyer’s
responsibility. The manufacturer accepts no
liability for this service. Any action that the
manufacturer has to take as a result of an
erroneous installation will not be covered by
the warranty.
DANGER Prior to installation,
visually check if the product has
any defects on it. If so, do not
have it installed. Damaged
products cause risks for your
safety.
DANGER The product must be
installed in accordance with all
local electrical regulations.
Preparation of location and
electrical and gas installation for
the appliance is the customer’s
responsibility. Risk of broken glass!
Do not put the ceramic hob down
on a corner or edge.
Before installation
The hob is designed for installation in a
commercial worktop. A safety distance must
be left between the appliance and the
kitchen walls and furniture. See figure
overleaf (values in mm).
• It can also be used in a free standing
position. Allow a minimum distance of 750
mm above the hob surface.
• (*) If a cooker hood is to be installed
above the cooker, refer to cooker hood
manufacturer' instructions regarding
installation height (min 650 mm)
• Remove packaging materials and
transport locks.
• Surfaces, synthetic laminates and
adhesives used must be heat resistant
(100 °C minimum).
• The worktop must be aligned and fixed
horizontally.
• Cut aperture for the hob in worktop as per
installation dimensions.
Cupboard design
Cooking appliances generate considerable
heat. The layout and materials of the
mounting cabinet should take account of
these characteristics.
Surfaces and surrounding edges
immediately adjacent to the hob should be
able to withstand temperatures of up to 100°
C without delaminating or discolouring.
Connection to the power supply must be
carried out by a qualified electrician, who will
ensure that the hob is correctly connected
and safely earthed. The rated current is
printed on the serial number label attached
to the base cover.
The hob must be connected to the mains
through a double pole isolating switch which
has a minimum clearance between the
contacts of 3 mm. in both poles. A means for
disconnection must be provided in the fixed
wiring.
This appliance must be earthed
and the manufacturer and the
seller do not accept
responsibility for any damage due
to incorrect installation or electrical
connection.
DANGER Risk of electric shock,
short circuit or fire by damage
of the mains lead!
The mains lead must not be
clamped, bent or trapped or come
into contact with hot parts of the
hob. If the mains lead is damaged,
it must be replaced by a qualified
electrician.
Installation and connection
The appliance must be installed in
accordance with local electrical regulations.

Page 10
The connection must comply with national
regulations. The mains supply data must
correspond to the data specified on the type
label of the appliance.
Risk of broken glass!
Do not put the ceramic hob down
on a corner or edge.
DANGER Risk of electric shock!
Before working on the electrical
installation, disconnect the
appliance from the mains supply.
DANGER Risk of electric shock,
short circuit or fire by
unprofessional installation!
The appliance may be connected
to the mains supply only by a
qualified electrician and the hob is
only guaranteed after correct
installation.
Electrical connection
Connect the appliance to a grounded outlet/
line protected by a fuse of suitable capacity
as stated in the "Technical specifications"
table. Have the grounding installation made
by a qualified electrician. The manufacturer
and the seller do not accept responsibility
for any damage due to incorrect installation
or electrical connection.
Safety installation
• A removable horizontal board must be
fitted below the hob and 75mm away from
the worktop bottom face.
• Space between this board and the
appliance must be empty and no objects
may be stored or kept there.
• This board will effectively shield the user
from the base of the hob which gets hot
during use. The board needs to be
removable for service purposes as the
hob, once installed, can only be loosened
from below.
• If the appliance is installed with a side
adjacent to a vertical kitchen cabinet, the
distance between the edge of the
appliance and that of the cabinet side
must be a least 150mm. The distance
between the back wall and the rear edge
of the hob must be at least 55mm.
• The hob is supplied with securing clips.
• These fit into dedicated slots around the
hob base . (see picture A)
• Insert the clips (as shown in picture B)
• Lift the clips up until they click into place.
(as shown in picture C)
• To avoid liquid spills penetrating between
the hob and the worktop, apply the
supplied self- adhesive seal to the
perimeter of the aperture. Do not use a
silicone sealer.
• Invert the hob on the worktop adjacent to
the aperture before making the electrical
connection. This will ensure sufficient
cable length for subsequent servicing.
Earth leakage
This hob should not be connected through
an earth leakage system.
Refer to S.A.N.S. 10142
Connection to the power supply must be
carried out by a qualified electrician, who will
ensure that the hob is correctly connected
and safely earthed. The rated current is
printed on the serial number label attached
to the base cover.
The hob must be connected to the mains
through a double pole isolating switch which
has a minimum clearance between the
contacts of 3 mm in both poles.
A means for disconnection must be provided
in the fixed wiring.

Page 11
Preparation
Tips for energy saving
The following information will help you to
save energy:
• Defrost frozen dishes before cooking.
• Select the burner which is suitable for the
bottom size of the pot to be used. Always
select the correct pot size for your dishes.
Larger pots require more energy.
• Pots with a thick base will provide a better
heat conduction. You can obtain energy
savings up to 1/3.
• Pots must be compatible with the cooking
zones. Bottom of the pots must not be
smaller than the hotplate.
• Always cover the pot with a lid. This will
conserve energy and minimize spillage.
Initial use
First cleaning of the appliance
1. Remove all packaging materials.
2. Wipe the surfaces of the appliance with a
damp cloth or sponge and dry with a
cloth.
The surface may get damaged
by some detergents or cleaning
materials. Do not use
aggressive detergents, cleaning
powder/cream or any sharp
objects.
4
A
SIDE VIEW
WORKTOP
SELF ADHESIVE SEAL
HOB
CLIP
B
C
• Position the hob into the aperture so that
the securing clips are compressed
between the hob base and the worktop.
(see Sketch below).
Since the following are not factory faults,
they are the owner’s responsibility.
• Damage to exterior finish.
• Breakage of glass and other components.
• Damage through improper use or
installation of the appliance.
• Damage caused by moving the appliance.
• Use pots with a base diameter slightly
larger than that of the thermal area. This
will ensure even heat distribution and
prevent spillage from dripping onto and
staining the hot zone.
• Keep the cooking zones and bottom of the
pots clean. Dirt will decrease the heat
conduction between the cooking zone and
bottom of the pot.
• Use only pots with a solid level base. An
uneven base will prolong cooking time and
waste energy.
• Save energy by switching the plate off 5 to
10 minutes before the end of a lengthy
cooking period. The hob will retain
sufficient residual heat to complete the
cooking process.
• A pot with rough edges could scratch the
appliance surface if it were dragged
across the surface of the appliance.
• Any spillage of sugar solution such as jam,
must be removed immediately. If allowed
to cool on the surface it could pit and
damage the surface.
• Do not cover the appliance surface with
aluminium foil and do not use poor quality
aluminium pots. These will leave unsightly
deposits which in time, could adhere to the
surface of the hob.
• Only use clean pots with an even flat base
to prevent cracking on glass due to hot
spots.

Page 12
Controls
5
Specifications
Turning on the hob
Touch the " " key on control panel for 1
second. Cooking zone displays illuminate.
The hob is ready for use now. You can se-
lect different cooking zones within the follow-
ing 10 seconds. Other controls are not al-
lowed to function when main key " " is be-
ing operated.
" " and all the relevant decimal points will
flash in all cooking zone displays.
Main key - ON/OFF key
Keylock
Temperature setting/Increasing tim-
er
Temperature setting/Decreasing
timer
** Dual/Triple cooking zone selec-
tion key
* Enable/disable timer
** Enable/disable cooking zone
Cooking zone display (temperature
setting 0 ... 9)
Dual/triple cooking zone operation
LED (Cooking zone display)
* Timer display (there are 4 LEDs
for 4 different cooking zones)
Cooking zone selection controls
This unit is controlled over the
touch control unit. Each operation
you make on your touch control
will be confirmed by an audible
signal if your touch control unit is
equipped with a timer.
(*) If your hob is equipped with a
timer.
**
If your hob is equipped with these
functions
In models with a clock
If no operation is performed within 10 sec-
onds, the hob will automatically return to
Standby mode.
Control panel
Always keep the control panels
clean and dry. Humidity and dirt
can cause problems in functions.
Graphics and figures are for
informational purposes only.
Actual appearance or functions
may vary.
If you press main key " " for longer than 2
seconds, the hob will turn off and return to
Standby mode.

Page 13
1. Turn on the hob.
2. Touch one of the cooking zone selection
controls to turn on the desired cooking
zone. After selecting the cooking zone of
the hob, " " decimal point will flash on
the relevant cooking zone display.
If no operation is performed within 10
seconds, the hob will automatically return
to Standby mode.
3. Touch " " or " " keys to set the
temperature level to a value between "1"
and "9" or between "9" and "1".
" " and " " keys are equipped with repeat
function. If you touch any of these keys for a
long time, temperature level will continuously
increase or decrease at every 0,4 seconds.
If you start with " " key, "1" appears on
display. If you start with " " key, set value
appears on display (e.g., half second ''A"
and half second "9") . This indicates that
Booster is activated.
When your hob gets overheated;
• If the active cooking zones are set to a
higher than the 7th level, hob reduces
the level of active cooking zones to
level 7 and the cooking zones can not
be selected higher than this level.
• If overheating persists; if the active
cooking zones are set to a higher than
the 5th level, hob reduces the level of
active cooking zones to level 5 and the
cooking zones can not be selected
higher than this level.
If hob temperature rises excessively, it can
turn itself off for protection and the cooking
zones can not be operated.
Booster
This function facilitates cooking. When
Booster is activated, the cooking will operate
at maximum power for a certain period of
time (see, Table-1). Booster time depends
on the selected temperature level. This is
indicated with an "A" and the set
temperature value which flash alternately on
cooking zone display (e.g., half second "A",
half second "9") Once the Booster time is
over, power of cooking zone will be reduced
and the temperature value will be displayed
continuously.
All cooking zones are equipped with Booster
function.
Enabling the Booster function:
1. Turn on the hob.
2. Select the desired cooking zone by
touching the cooking zone selection keys.
3. Use " " key to set the cooking zone
temperature value to "9". Once the
temperature setting is made, "9" and "A"
will appear on the display alternately. This
indicates that temperature value is set to
"9" and Booster function is activated.
If your hob gets overheated,
booster function cannot be set for
protection.
4. Then, use " " key within 10 seconds to
select the temperature setting you want to
be activated for the remainder of cooking
process after the Booster time is over.
Use " " or" " keys to set the cooking
zone to a value between "1" or "9" (it is
supposed that level 6 is selected for the
example).
5. "A" and "6" appears alternately on the
display during Booster function (at the end
of Booster period, "6" will be displayed
continuously).
Selecting the cooking zones

Page 14
Turning off the Booster function:
Touch " " key until temperature level
decreases "0" to disable the Booster
function earlier.
If "9" will be selected as temperature level
that will be activated after Booster period
and no other lower level is selected, then
flashing of the screen will cease in 10
seconds. Booster is now deactivated.
Turn off the hob.
If you press main key " " for longer than 2
seconds, the hob will turn off and return to
Standby mode.
If there is residual temperature that can be
used after the hob is turned off, this will be
indicated with " " symbol that appears on
the relevant cooking zone display
continuously.
Turning off cooking zones individually:
A cooking zone can be turned off in 3
different ways:
1. By touching " " and " " keys
simultaneously.
2. By decreasing the temperature level to
"0" with " " key.
3. By using the timer function (if any) for the
relevant cooking zone
1.Touching " " and " " keys
simultaneously
Select the desired cooking zone with
cooking zone selection key" ". Decimal
point appears on " " cooking zone display.
Touch " " and " " keys simultaneously to
turn off the cooking zone.
2. Decreasing the temperature level of the
desired cooking zone to "0" with " " key
Furthermore, cooking zone can also be
turned off by decreasing the temperature
level to "0".
3. Using the timer off function (if any) for
the relevant cooking zone
When the time is over, the timer will turn off
the cooking zone assigned to it. "0" and "00"
will appear
on all displays. Dual/triplet cooking zone and
the LEDs connected to the timer will be
deactivated. Furthermore, when the time is
over, an audible alarm will sound. Touch any
key on the touch control panel to silence the
audible alarm.
Turning on Dual/Triplet cooking zones**
Turning on the dual cooking zone:
Select the desired cooking zone equipped
with dual zone. Decimal point of the relevant
cooking zone must start to flash.
Set the temperature level to a value between
1 and 9 and touch " " key to activate the
dual zone of the cooking zone.
" " LED of the relevant dual zone will also
flash continuously. " " Status of the dual
cooking zone will change when you touch
the key for a second time: dual cooking zone
will switch between on and off status.
Expansion zone will only be activated if the
main zone of the cooking zone is set to a
temperature level between "1" and "9".
Turning on the triplet cooking zone:
Select the desired cooking zone equipped
with triplet zone. Decimal point of the
relevant cooking zone must start to flash.
Set the temperature level to a value between
1 and 9 and touch " " key to activate the
dual zone of the cooking zone.
" " LED of the relevant dual zone will also
light up continuously. If you touch " " key
again, " " LED of the triplet zone flashes
and triplet cooking zone is activated.
When you touch " " key once again
triplet zone of the cooking zone turns off
again. Above operation will always
change the status of the double/triplet
cooking zones.
Enabling the double and triplet zones by
touching the " " key of the selected
cooking zone.
Keylock * (in models with clock)
Touch the " " key for longer than 2
seconds to lock the touch control. Operation
will be confirmed with an audible signal.

Page 15
Then, " " LED will flash and all cooking
zones will be locked.
Cooking zones, can only be locked in the
operation mode. If the cooking zones are
locked: only the main key " " can be
operated. " " LED will flash and indicate a
key lock module. If you turn the hob off when
the keys are locked, the keylock will be
activated next time you turn the hob on
again. Key lock must be deactivated in
order to be able to operate the hob.
Disabling the Child Lock:
You can disable the child lock as you have
activated it.
1. Touch main key " " to turn on the hob.
2. Touch " " and " " keys simultaneously
for at least 2 seconds.
3. Then, touch " " key once again.
» " " appears on all cooking zone displays
as long as the Child lock is activated. " "
will disappear when the lock is deactivated
successfully.
" " key will allow you to lock or unlock
the touch control in operation mode.
Touch " " key for 2 seconds to unlock the
cooking zones. Operation will be confirmed
with an audible signal.
Then, " " LED turns off. Now the touch
control is unlocked and can be operated
normally.
Child Lock
You can protect the hob against being
operated unintentionally in order to prevent
children from turning on the cooking zone.
Child Lock function contains a few complex
steps to lock the touch control unit. Child
Lock can only be activated and deactivated
in Standby mode.
Locking the module:
1. Touch main key " " to turn on the hob.
2. Touch " " and " " keys simultaneously
for at least 2 seconds.
3. Then, touch " " key once again.
» Child Lock function is activated and " "
appears on all cooking zone displays.
Timer function * (in models with clock)
This feature facilitates cooking for you. You
will not have to attend the hob continuously
during the cooking process and the cooking
zone will turn off automatically at the end of
the time you have selected.
Timer provides following features: Touch
control can command to maximum 4 cooking
zone timers and one alarm cooking timer
assigned at the same time. All timers can
only be used in operation mode.
Timer as an alarm
Alarm timer operates independently from
other cooking zones. Therefore, it is not
important whether a cooking zone is
selected or not.
1. Touch " " key to enable the alarm timer.
"00" and " " will appear on the timer
display and a dot will appear on the lower
right side. Thus, alarm timer is activated.
2. Then, set the desired time value by
touching " " and " " keys.
3. Timer will start to countdown after you
have made the time setting.

Page 16
» When the time is over, an audible alarm
will sound. Touch any key on the touch
control panel to silence the audible alarm.
Cooking zone timer:
The cooking zone timers can only be set
for the cooking zones that are activated.
1. First turn on the hob and then enable the
desired cooking zone. (cooking zone must
be set to a value between 1and 9)
2. As in the alarm timer, enable the
cooking zone timer by touching " "
key. "00" and " " will appear on the
timer display and a dot will appear on
the lower right side. Thus, cooking
zone timer is activated.
3. You must touch " " key for a second
time in order to enable cooking zone
timer. Now you can assign the timer.
4. Set the desired time value by touching "
" and " " keys.
To set the hob timers:
1. After enabling the first cooking zone timer,
touch the " " key again. The control will
turn clockwise towards the next active
cooking zone assigned to the timer.
Assignment proposal will be shown with a
flashing " " LED.
2. Set the desired time value by touching "
" and " " keys.
3. Timer activated for the cooking zone
which was set first is indicated with a
continuously flashing " " LED.
• More timers can be assigned for other
active cooking zones by touching the "
" key once again.
• After 10 seconds, timer display reverts
back to the timer that will end first.
" " LEDs that illuminate continuously on
the timer display indicate the timer that is
currently counting down.
You can display the values set for cooking
zone timers and egg timer by changing
the position of " " key. A flashing front
right " " LED always shows an
assignment.
If no LED is flashing, value of the egg
timer will be displayed on the timer
screen.
Disabling the timers:
First you must display the timer by changing
the position of the " " key until the timer
appears. This value can later be cancelled in
2 different ways:
By decreasing the value step by step to "00"
by touching " " key.
By touching " " and " " keys
simultaneously for half second until "00"
appears on timer display.
When the time is over, an audible alarm will
sound. Touch any key on the touch control
panel to silence the audible alarm.
Display the remaining time value of the
cooking zone timer 3 (indicator LED flashes)
to the timer display (the indicator LEDs of
the active timers of the cooking zones 1 and
4 in fact will not be visible on the timer
display).
Keep warm function (if any)
Keep Warm function of the cooking zone
helps to keep the food warm by selecting an
additional temperature level between 0 and
1. Touch" " key to activate the Keep Warm
function.
Then, " " LED flashes. Touch " " key
again to disable the cooking zone.
Operation time constraints
The hob control is equipped with an
operation time limit. When one or more
cooking zones are left on unintentionally, the
cooking zone will automatically be
deactivated after a certain period of time.
(see, Table-1).

Page 17
Operation time limit depends on the selected
temperature setting. If there is a timer
assigned for the cooking zone, "00" appears
on the timer display for 10 seconds (10
seconds later, residual heat indicator turns
on). Then, timer display is turned off. After
disabling the cooking zone automatically as
described above, it becomes operational
again and maximum operation time is
applied for this temperature setting.
Hob control system should also not be
exposed to strong light sources such as sun
light, strong halogen lamps and etc.
Table-1: Temperature setting parameters;
Cycle time 47.0 seconds
Temp
setting
OFF
Time -
second
s
ON
Time -
second
s
Operati
on time
limit -
hour
Booste
r time -
second
s
0 0 0 0 -
1 45,6 1,4 6 60
2 43,6 3,4 6 180
3 41,3 5,7 5 288
4 38,4 8,6 5 390
5 35,9 11,1 4 510
6 33,1 13,9 1,5 150
7 26,2 20,8 1,5 210
8 19,2 27,8 1,5 270
9 0 47,0 1,5 -
Residual Heat Functions
For a deactivated cooking zone whose
surface temperature is sensed to be above
60°C or whose display indicates a value
above 60°C, a " " (residual heat) symbol
appears on the display. When residual heat
falls below 60°C, "0" appears on the display.
Sample application:
Following lightning conditions will allow
a smooth calibration:
Illumination with a bulb without a reflector
(100W, dull) 70 cm above the hob. After
successful calibration, it is warranted that the
hob will operate as intended even under
strong illumination such as halogen spot
lamp with reflector (50 W).
If an error occurs, calibration is repeated
until the ambient conditions allow for a
successful calibration. Hob control system
can only be operated when the calibration of
all sensors are successful.
Remove all substances on the hob during
calibration. The ambient illumination should
not be too strong during calibration. If an
error messages is obtained, turn off all light
sources or close the window during the
calibration process. When the calibration is
completed successfully, the control system
can tolerate high amount of ambient light.
The control system adopts and recalibrates
itself according to the changes in ambient
conditions while in use.
Touch control has a sensor that
protects from overheating. The
cooking zone will be deactivated
when reacting to the sensor. Refer
to table 2 about error messages. If
a key is activated repeatedly,
control system is deactivated and
audio signal is given.
When power restores after a
power failure or your Hob is
switched off if the residual heat of
the relevant cooking zone was
above 60°C before the failure,
residual heat display flashes.
Display continues to flash until the
maximum residual heat time is
over or the cooking zone is
selected and enabled
Error
Code
Description Recommended
Action
AF10 Communication
error with Touch
Processor.
Call a service
center.
AF20 Error on touch
keys.
Call a service
center.
AF30 Faulty relays. Call a service
center.
F-F-F-F Pressing the
same sensor for
more than 12
seconds.
Wait for 10 seconds
then press the
button again. If error
continues call a
service center.
t-t-t-t Touch control
overheated
Wait for the unit to
cool down and
restart hob. If error
continues call a
service center.
Table 2: Error codes and error sources
Sensor Calibration and Error Messages
When the supply power is applied, hob
control system performs calibration
depending on the sensor, glass and ambient
conditions. Do not cover the glass part of the
sensor with anything during calibration.

Page 18
Maintenance and care
6
PROBLEM
The plates do not work / Check there is
power to the wall switch.
The timer on Gemini hobs make a clicking
noise / This is normal. Timers do make a
clicking noise.
Remember that you may be charged for a
service call even during the warranty period
if the fault is due to or caused by any of the
above.
Problem check
Before calling a service technician to assist
with a problem
Caring for the hob
• Vitroceramic is a tough, durable material,
which provides a beautiful and long
lasting cooking surface. To keep it looking
good, it needs to be cleaned regularly.
• Clean the product thoroughly after each
use. In this way it will be possible to
remove cooking residues more easily,
thus avoiding these from burning the next
time the appliance is used.
• Wipe the glass ceramic surface using a
piece of cloth dampened with cold water
in a manner as not to leave any cleaning
agent on it. Dry with a soft and dry cloth.
Remaining residues may cause damage
on the glass ceramic surface when using
the hob for the next time.
• If the surface is heavily soiled, apply a
suitable smooth top cleaning solution
(available from Defy Service Centres) on
a sponge and wait until it is absorbed well.
Then, clean the surface of the hob with a
damp cloth.
• Wipe the hob surround with a damp hot
soapy cloth and dry.
• Remove calcium stains (yellow stains) by
applying a small amount of lime remover
such as vinegar or lemon juice. Other
suitable commercially available products
can also be used.
• Dried residues on the glass ceramic
surface should under no circumstances
be scraped with hook blades, steel wool
or similar tools.
• If necessary stubborn spills may be
removed using an approved blade
scraper.
• Always ensure any excess liquid is
thoroughly wiped off after cleaning and
any spillage is immediately wiped dry.
• Do not use cleaning agents that contain
acid or chloride to clean stainless or inox
surfaces. Use a soft cloth with a liquid
detergent (not abrasive) to wipe those
parts clean, paying attention to sweep in
one direction.
• Only use clean pots with an even flat base
to prevent cracking on glass due to hot
spots.
WARNING: In the unlikely
event of the Vitroceramic
sustaining accidental damage or
cracks, switch off the appliance
at the mains to avoid an electric
shock and have the panel
replaced before further use.
Recommendations
• Use only pots with a solid level base. An
uneven base will prolong cooking time
and waste energy.
• Use pots with a base diameter slightly
larger than that of the thermal area. This
will ensure even heat distribution and
prevent spillage from dripping onto and
staining the hot zone.
• Always cover the pot with a lid. This will
conserve energy and minimize spillage.
• Save energy by switching the plate off 5
to 10 minutes before the end of a lengthy
cooking period. The Vitroceramic hob will
retain sufficient residual heat to complete
the cooking process.
• A pot with rough edges could scratch the
Vitroceramic surface if it were dragged
across the surface of the hob.
• Any spillage of sugar solution such as
jam, must be removed immediately. If
allowed to cool on the Vitroceramic
surface it could pit and damage the
surface.
• Do not cover the Vitroceramic surface with
aluminium foil and do not use poor quality
aluminium pots. These will leave unsightly
deposits which in time, could adhere to
the Vitroceramic surface.

Page 19
7 Defy customer care call centre
If you have followed the instructions and still have a problem or have any service or spares
by calling 0861 00 3339. They will be able to advise you on any aspect of the appliance.
ZAMBIA: SOUTHGATE INVESTMENTS LTD
Plot 1606, Sheki Sheki Road
P.O. Box 33681
Lusaka, 10101, Zambia
Tel: +260 0211 242332/3
Fax: +260 0211 242933
NAMIBIA: ATLANTIC DISTRIBUTORS (PTY)
LTD
10 Tienie Louw Street, Northern Industrial Area
P.O. Box 21158, Windhoek, Namibia
Tel: (061) 216162
Fax: (061) 216134
ZIMBABWE: TRADE COM AFRICA
Trade Com Africa, 183 Loreley Crescent
Msasa, Harare, Zimbabwe
Tel: +00263 773 438001
BOTSWANA: RAY MORGAN AGENCIES
RMA Service Centre, Plot 48, East Gate
Gaborone International Commerce Park
Kgale View, Gaborone
Botswana
Tel: +267 390 3996 / 390 3912
Fax: +267 318 7376
Cell: +267 7134 6539
SWAZILAND: LYNDS DISTRIBUTORS
P.O Box 716, Mbabane, Swaziland, H100
Tel: (00268) 2515 4310/8
Fax: (00268) 2518 4318
MOZAMBIQUE: COOL WORLD. LDA
Rua da Resistencia No. 97B R/C
Cell: +258 84 44 61 234
Nosso Show Room
Av: da Industrias, Parcela No.735 * 735A
Machava, Maputo
Defy Sub-Saharan Africa Branch contact
details

Page 20
Warranty
8
This certificate is issued by DEFY APPLIANCES (PTY) LTD manufacturers of Defy and Ocean
products, hereinafter the Company, to the original purchaser only, of the appliance described on
the certificate and shall constitute the only warranty given in respect of this appliance.
The Company warrants to the original purchaser that for a period of TWO YEARS from date of
purchase the appliance is free from defect under normal domestic use, both in workmanship and
material, subject to the following conditions.
1. Repair or replacement of any part of this appliance, found by the Company to be defective,
shall be at the election of the Company. The Company reserves the right to effect such service
through any of its Service Divisions or Authorised Service Dealers. The cost of such service
shall be borne by the Company in full, provided that the appliance is located no further than 50
km from a Company Service Centre or an Authorised Service Dealer. Where the appliance is
located beyond the 50 km radius, the purchaser shall be liable for the standard travelling
charges, as determined by the Company.
CARRY IN SERVICE Microwave ovens, Compact cookers and small appliances are repaired in
our service centres and are not collected from the customers home. Faulty units should be
delivered to the purchasing dealer or to the nearest Company Service Centre for warranty
repairs.
2. Cracked, rusted or corroded solid plates, vitreous enamelware, rust, cosmetic wear or
cosmetic/external damage to products/components/fuses and lamps are specifically excluded
from these warranties. It is an express condition of these warranties that the purchaser takes
due care and attention in the use and maintenance of the appliance. Abuse, misuse in conflict
with operating instructions, connection to incorrect voltages and subjection to commercial use
shall release the Company from its obligations.
3. This warranty shall become void and cease to operate if the appliance is dismantled by, or any
repairs to the appliance are effected by any persons not duly authorised by the Company, or if
substitute parts not approved by the Company are used in the appliance, or if the serial number
of the appliance is removed.
4. The Company shall not be responsible for damages resulting from fire, flood, civil disturbances
or any Act of God. The Company shall not, in terms of these warranties be responsible nor held
liable for any consequential loss or damage of any kind caused by or due to the failure or
malfunction of the appliance. The Company shall not be responsible for damages caused by
insect and/or animal infestation.
5. The Company shall not be responsible for transportation or other costs other than those
incurred within the provisions of Point 1 of this Certificate.
6. For warranties in the Republic of South Africa and Sub-Saharan Africa, please contact
the customer care line. Please refer to the previous page for South African and Sub-
Saharan African contact details.
7. Where service is requested under warranty and no fault or defect can be found by the
Company, all costs incurred will be for the purchaser's account.
8. This Certificate as well as your invoice will serve as proof of purchase. For the purpose of
warranty, it will be essential to produce this Certificate and invoice. Failure to do so, will render
the purchaser liable for service costs.
KEEP THIS CERTIFICATE AND SALES INVOICE AS PROOF OF PURCHASE FOR
WARRANTY PURPOSES.
This manual suits for next models
1
Table of contents
Other Defy Hob manuals
Defy
Defy Gemini CP Series User manual
Defy
Defy GEMINI SOLID PLATE HOB User manual
Defy
Defy SLIMLINE NCP DHD409 User manual
Defy
Defy HG 3210 CS User manual
Defy
Defy DHD414 GEMINI 820 TC BEVEL User manual
Defy
Defy DHD406A User manual

Defy
Defy DHG132 User manual
Defy
Defy DHD601 SLIMLINE HOB TC User manual

Defy
Defy DOMINO DHD316 User manual
Defy
Defy DHG118 User manual


