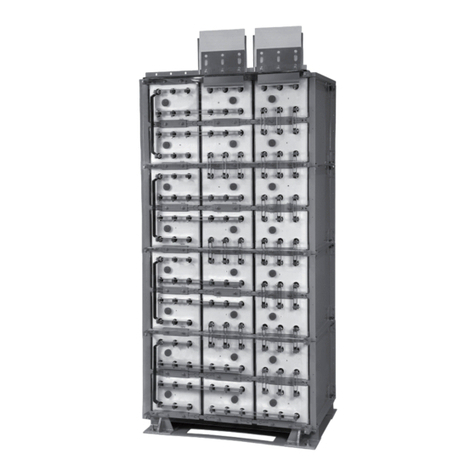
Deka Unigy II User manual

NB Module
Installation and Operation Manual
California
Proposition 65
Warning:
Batteries, battery posts, terminals and related accessories
contain lead and lead compounds, and other chemicals known
to the state of California to cause cancer and birth defects or
other reproductive harm. Wash hands after handling.
®

Safety Precaution
Protective Equipment..........................................3
Procedures ........................................................3
Receiving & Storage
Receiving Inspection ..........................................3
Unpacking ..........................................................3
System Shipment................................................3
Storage ..............................................................4
In tallation
General ..............................................................5
Grounding ..........................................................5
Electric Code for Maintenance Access ..............5
Floor Anchoring & Module Arrangement ............5
Hardware Torque Values ....................................5
Sy tem In tallation
Module Installation..............................................5
Cell Installation ..................................................8
Electrical Connection
Top Termination ................................................10
Side Termination ..............................................11
TABLE OF CONTENTS
Connector Assem ly ........................................13
Final Assem ly..................................................13
Safety Shield Assem ly ....................................14
Sy tem Operation
Charge Voltage ................................................15
Temperature Compensation ............................15
Cell Voltage ......................................................15
Rectifier Ripple Voltage ....................................15
Record Keeping ................................................15
Maintenance
Annual Inspection ............................................16
Battery Cleaning ..............................................16
Capacity Testing ..............................................16
Cell Removal Procedure ..................................16
Cell Weight & Volume ......................................17
Battery Maintenance Report ............................18
Appendix A ....................................................19
Appendix B ....................................................20
2

SAFETY PRECAUTIONS
Although all valve-regulated batteries have the electrolyte
immobilized within the cell, the electrical hazard associated
with batteries still exists. Work performed on these batteries
should be done with the tools and the protective equipment
listed below. Valve-regulated battery installations should be
supervised by personnel familiar with batteries and battery
safety precautions.
WARNING: Risk of fire, explosion or burns. o not
disassemble, heat above 40°C, or incinerate.
Protective Equipment
Although VRLA batteries can vent or leak small amounts of
electrolyte, electrical safety is the principle but not the only
concern for safe handling. Per IEEE 1188 recommendations,
the following minimum set of equipment for safe handling of
the battery and protection of personnel shall be available:
1. Safety glasses with side shields, or goggles, or face
shields as appropriate. (Consult application specific
requirements)
2. Electrically insulated gloves, appropriate for the installation.
3. Protective aprons and safety shoes.
4. Portable or stationary water facilities in the battery
vicinity for rinsing eyes and skin in case of contact
with acid electrolyte.
5. Class C fire extinguisher.
6. Acid neutralizing agent.
7. Adequately insulated tools.
8. Lifting devices of adequate capacity, when required.
Procedures
The following safety procedures should be followed during
installation: (Always wear safety glasses or face shield
when working on or near batteries.)
1. These batteries are sealed and contain no free electrolyte.
Under normal operating conditions, they do not present
any acid danger. However, if the battery jar or cover is
damaged, acid could be present. Sulfuric acid is harmful
to the skin and eyes. Flush affected area with water
immediately and consult a physician if splashed in the
eyes. Consult MS S for additional precautions and first
aid measures.
2. Prohibit smoking and open flames, and avoid arcing in
the immediate vicinity of the battery.
3. o not wear metallic objects, such as jewelry, while work-
ing on batteries. o not store un-insulated tools in pockets
or tool belt while working in vicinity of battery.
4. Keep the top of the battery dry and clear of tools and other
foreign objects.
5. Provide adequate ventilation (per IEEE standard 1187 and/or
local codes) and follow recommended charging voltages.
6. Extinguishing media: Class ABC extinguisher.
Note: CO2may be used but not directly on the cells due
to thermal shock and potential cracking of cases.
7. Never remove or tamper with the pressure relief valves
unless for cell replacement. Warranty void if vent valve is
removed.
8. Inspect all flooring and lifting equipment
for functional adequacy.
9. Adequately secure battery modules, racks, or cabinets to
the floor.
10. Connect support structures to ground system
in accordance with applicable codes.
11. The below IEEE Standards contain additional information.
Other standards may be relevant to your specific application.
IEEE 1187 – Recommended Practice for Installation
esign of VRLA Batteries
IEEE 1188 – Recommended Practice for Maintenance,
Testing, of VRLA Batteries
IEEE 1189 – Selection of VRLA Batteries for
Stationary Applications
RECEIVING & STORAGE
Receivin Inspection
Upon receipt, and at the time of actual unloading, each
package should be visually inspected for any possible damage
or electrolyte leakage. If either is evident, a more detailed
inspection of the entire shipment should be conducted and
noted on the bill of lading. Record receipt date, inspection date
and notify carrier of any damage.
Unpackin
1. Always wear eye protection.
2. Check all batteries for visible defects such as cracked
containers, loose terminal posts, or other unrepairable
problems. Batteries with these defects must be replaced.
3. Check the contents of the packages against the packaging
list. Report any missing parts or shipping damage to your
East Penn agent or East Penn Mfg. Co. immediately.
4. Never lift batteries by the terminal posts.
5. When lifting batteries, the proper equipment is needed
such as a forklift or a portable crane. Always check the
lifting capacities of the equipment being used and never
lift more than one module and/or cell at a time.
System Shipment
Battery System will be received with cells and modules on
separate pallets. Amount of pallets dependent on number of
cells and module type.
3

RECEIVING & STORAGE CONT.
Module Shipment
All battery accessories (connectors, terminal plates, hardware)
will be included with a module pallet. The pallet will be indicat-
ed with an “Accessory” sticker. The “Accessory” module pallet
will include a base and a top plate. 3 x 2 modules will be
shipped two high with base plate and top plate on top of the
module assembly. 2 x 2 modules will be shipped 3 high with
base plate & top plate on either side of the module assembly.
Cell Shipment
Each cell will be in an individual sleeve. There will be a
maximum of 6 cells per pallet.
Stora e
1. Cells should be stored indoors in a clean, level, dry, cool
location. Recommended storage temperature is 0°F to 90°F
(–18°C to 32°C).
2. Stored lead-acid cells self discharge and must be
given a boost charge to prevent permanent performance
degradation.
0°F to 77°F (-18°C to 25°C) storage:
Batteries should be recharged six months from date
of manufacture.
>77°F (25°C) storage:
Use the chart below for recharge intervals. Voltage read-
ings should be taken on a monthly basis. Cells that reach
2.10V per cell or less should be recharged regardless of
scheduled interval. Record dates and conditions for all
charges during storage.
3. If a boost charge is required; the recommended charge is
24 hours at a constant voltage equal to 2.40V per cell.
4. o not store beyond 12 months.
5. Store in horizontal position only.
3 x 2 Module Assembly
2 x 2 Module Assembly
4

INSTALLATION
General
Caution should be taken when installing batteries to insure no
damage occurs. The battery cabinet, tray, rack, etc. shall be
inspected for sharp edges that could cause damage to the
battery casing. Batteries shall not be dropped, slid, or placed on
rough or uneven surfaces such as tray lips or grated flooring.
Mishandling of batteries could result in equipment damage or
human injury. East Penn will not be liable for damage or injury
as a result of mishandling or misuse of the product.
Groundin
When grounding the battery system, proper techniques should
be applied per electrical standards, such as NEC and/or local
codes. All module structural bolting connections are provided
with grounding washers. Two sets of 0.201 diameter x .750"
center holes are provided on the back side of the top plate to
accept a # 6 x .750 center compression grounding lug. The
holes must be tapped for a 1/4-20UNC thread and paint must
be removed for a proper grounding pad location. *
*Note: Battery y tem and/or individual module grounding, if
required, i the in taller’ re pon ibility.
E ectric Code for Maintenance Access Refer to ANSI/NFPA-
70 National Electric Code for access and working space
requirements around the battery. A minimum of 36" aisle
space is recommended in front of the battery for service and
inspection. Additional spacing may be required to meet
earthquake seismic requirements.
Modu e Arrangement See East Penn Mfg. Co.’s system layout
diagram. One is supplied with each shipment. If it cannot be
located, contact East Penn Mfg. Co. for a copy. Refer to your
delivery number, located on the packing slip. This will aid in
obtaining the proper diagram.
Hardware Torque Requirements
SYSTEM INSTALLATIONS
All part hould be verified again t packaging li t.
Report any mi ing part .
Module Installation
Assemble system per the following details.
1. Remove floor-mounting base support from module pallet.
2. Position base(s), consult included system layout diagram
for required configuration. Bases are required to be
level prior to installing modules.
3. Multiple stack systems should have a minimum of 4.00"
between bases. The additional spacing is for proper
installation of modules.
4. Anchor holes can be marked and drilled with bases in
place. All anchor holes in base (16 per base) are required
to be used to meet NEBS Zone 4 seismic requirements.
Anchors required to be installed prior to modules being
installed onto base. Reference Appendix A for base plate
anchor hole layout.
Consult local building codes for anchor bolt
requirements. Anchor bolts not included.
5
Bolt Size Torque/Retorque
1/2-13 100ft-lb 135.5 Nm
3/8-16 45ft-lb 61.0 Nm
1/4-20 125 in-lb 14.1 Nm

7. Base and module layout should be compared to system
layout diagram. All ½-13 x 1.75" hardware (2 per corner)
are to be installed on the inside of the module for module
to base connection. All hardware should be checked for
proper torque before proceeding. Star washers are to be
installed with teeth towards module to ensure proper
grounding. Consult “Hardware Torque Requirements”
(pg 5) for proper torque values.
SYSTEM INSTALLATIONS CONT.
5. Remove hardware holding modules together (4 bolt
assemblies) and holding modules to pallet (4 bolt
assemblies). Hardware removed from module to
module will be reused to attach modules to modules.
Hardware holding modules to pallet can be discarded.
6. Install modules onto bases using supplied lifting straps.
Consult below diagram for proper sling attachment and
lifting. Consult included system layout diagram for module
position.
CAUTION: Never lift more than one module at a time
with the supplied lifting slings.
Module to Pallet Disassemble
Module to Module Separation
6

10. The system layout diagram should be consulted to
determine module configuration. System design limits
modules to be stacked no higher than 4 modules (8 cells
high). Bolt assemblies (two per corner) are required on the
outside of the module to complete the module to module
connection. All ½-13 x 1.75" hardware should be checked
for proper torque before proceeding. Star washers are to
be installed with teeth towards module to ensure proper
grounding. Consult “Hardware Torque Requirements”
(pg 2) for proper torque values.
8. Bolt assemblies (two per corner) are required on the
outside of the module to complete the base to module
connection. All ½-13 x 1.75" hardware should be checked
for proper torque before proceeding. Star washers are to
be installed with teeth towards module to ensure proper
grounding. Consult “Hardware Torque Requirements”
(pg 5) for proper torque values.
9. Multiple battery systems — all stacks should have the
same tier completed before moving to the next tier.
7

Star washers are to be installed with teeth towards module to
ensure proper grounding.
Note: Top Plate hardware contain two different type of tar
wa her . Con ult below hardware diagram for proper
in tallation.
Retainer Bar Installation
1. Tier to Tier Retainer Bar Installation — Retainer bars
are to be installed per the below detail. All 3/8-16 x 1.25"
hardware should be checked for proper torque before
proceeding. Consult “Hardware Torque Requirements”
(pg 5) for proper torque values.
2. Top & Bottom Retainer Bar Installation — Retainer
bars are to be installed per the below detail. Top plate is to
be installed on the top module prior to installing top retain-
er bar. All 3/8-16 x 1.25" hardware should be checked for
proper torque before proceeding. Consult “Hardware
Torque Requirements” (pg 5) for proper torque values.
SYSTEM INSTALLATIONS CONT.
11. Cell / Sleeve Installation — Install cells into modules.
Cells are shipped separate from modules. Cell polarity
orientation responsibility of installer. Consult system
layout diagram for cell location and polarity.
Care should be taken when installing cells that lifting
device does not contact previously installed cells
possibly causing a short.
12. Top Plate Installation — The top plate is to be installed on
the top module after all cell / sleeve assemblies have been
installed. Bolt assemblies (two per corner) are required on
the outside of the module to complete the top plate to mod-
ule connection. All ½-13 x 1.75" hardware should be checked
for proper torque before proceeding. Consult “Hardware
Torque Requirements” (pg 5) for proper torque values.
8
Tier to Tier Retainer Bar
Top Retainer Bar

Safety Shield Bracket Installation
1. Safety Shield Brackets are to be installed at the outside
corners of each module (4 per module). Consult below
detail for locations. Use 3/8-16 x 1.25" hardware to install
brackets. Consult “Hardware Torque Requirements”
(pg 5) for proper torque values.
2. Module layout should be compared to system layout
diagram and all hardware should be checked for proper
torque before proceeding. Consult “Hardware Torque
Requirements” (pg 5) for proper torque values.
ELECTRICAL CONNECTION
Fo ow a safety requirements as detai ed in “Safety
Precautions” section prior to working on any e ectrica
connections.
Some installations may require the terminal plates to be in
close proximity of each other. It is recommended that the
terminal plate assembly installations be completed prior
to installing the inter-cell connections. This practice will
reduce the risk of a possible electrical short from damag-
ing the entire battery system.
TERMINAL ASSEMBLY
Top Termination
Consult system layout diagram for termination locations.
1. Install terminal plate bracket to the top of the module.
Slide clip onto back of channel at hole locations.
Use 3/8-16 x 1.25" hardware. Install loosely for
future alignment.
Top Shield Bracket Installation
Center Shield Bracket Installation
9
Bottom Retainer Bar Bottom Shield Bracket Installation

5. Install terminal plate to battery posts using 1/4-20 x 1.00"
hardware.
6. Attach terminal plate to terminal plate bracket. Note posi-
tion of terminal plate. Terminal Plate Bracket may have to
be moved in order to be flush with the terminal plate.
7. All hardware should be checked for proper torque before
proceeding. Consult “Hardware Torque Requirements”
(pg 5) for proper torque values.
TERMINAL ASSEMBLY CONT.
2. Remove module bolts directly behind location of
terminal plate.
3. Replace flat washer with cap washer. Re-install 3/8-16 x
1.25" into module with safety shield bracket (if required).
Torque hardware before proceeding. Consult “Hardware
Torque Requirements” (pg 5) for proper torque values.
4. Install rubber caps over bolts.
Terminal Plate to be installed on battery posts as shown
10

8. Lug Hole Layout — Top terminal plate designed to use up
to 0.50" dia. bolt and a maximum 1.75" centers and 1.188"
min., 2 hole lug.
9. Lug Attachment — Maximum of six cable lugs can be
installed per terminal plate. Lug Hardware not included.
10. Safety Shield Installation — Top terminal safety shield
consists of three pieces. Assemble per the below illustra-
tion. Clear plastic shields are of different lengths. Longer
shield to be installed on the front side of the terminal plate.
The shields should be even at the bottom, making the front
shield longer at the top.
Side Termination
Consult system layout diagram for side termination location.
1. Remove safety shield bracket if required.
2. Install plastic Side Terminal Bracket and re-install safety
shield bracket using bolts from previous step. Use 3/8-16
x 1.50" bolt for the remaining bracket assembly. Bolts
should be installed loosely for future adjustments.
3. Install side terminal connector to battery posts using 1/4-
20 hardware plate to terminal plate bracket using 1/4-20
x 1.00" hardware. Bolts should be installed loosely for
future adjustments.
11
0.88
1.39
3.75
3.75
.56 DIA. HOLES FOR
1/2" BOLTS
Complete Assembly

12
TERMINAL ASSEMBLY CONT.
4. Connect side terminal plate to side terminal plate connec-
tors. Side terminal bracket and side terminal connectors
may have to be adjusted to insure plate and connectors are
flush. Use 1/4-20 x 1.25" hardware.
5. Connect side terminal plate to terminal plate bracket using
1/4-20 x 1.00" hardware. Bolts should be installed loosely
for future adjustments.
6. After all parts are installed and alignment is confirmed,
torque all bolts. Consult “Hardware Torque
Requirements” (pg 5) for proper torque values.
7. Install Side Terminal Shield to Side Terminal Plate using
¼-20 screws.
Tighten but do not torque hardware.
8. Side Terminal Plate is designed to use up to 0.50" dia. bolt
and a maximum 1.75" centers and 1.188" min., 2 hole lug.
Plate is capable of handling 4 runs of cable.
Lu Positionin Options:
Maximum of four cable lugs can be installed per terminal
plate. Lug Hardware not included.
Complete Assembly

13
CONNECTOR ASSEMBLY
1. The contact surfaces of each individual post on every cell
have been cleaned and coated with a thin film of No-Ox-I
“A” grease at the factory. Assure the contact surfaces are
free of dust or dirt prior to assembly. A clean non-abrasive
cloth should be used to remove ny dirt. Re-apply a light
coat of No-Ox-I “A” grease to all cleaned surfaces.
2. The battery system is supplied with a connector package
appropriate to the required load the batteries are connected
to. Review the below chart “Connector Packages” to ensure
the correct connector package has been supplied.
3. Installation and direction of the battery post hardware is
important to ensure proper electrical clearance between
battery posts of adjacent cells and within a cell. Consult the
below diagram for clarification.
4. Battery post bolt hardware to be installed as shown.
5. NB battery systems are supplied with multiple connectors
to be used per battery post. A 2CU connector package will
require 2 connectors per connection (1 per side), see
example below. A 4CU package will require 4 connectors
per connection (2 per side) and an 6CU package will
require 6 connectors per connection (3 per side). Tighten
& torque all bolts after all connectors are installed.
Consult “Hardware Torque Requirements” (pg 5) for
proper torque values.
Final Assembly Check Procedure
1. For future identification of all cells, number individual
cells in electrical connection sequence, beginning with
number one (1) at the positive end of the battery. The
last cell of the battery is located at the negative output
terminal.
2. Read and record the voltages of the individual cells to
assure that they are connected properly. The total battery
voltage should be approximately equal to the number of
cells connected in series, multiplied by the measured
voltage of one cell If the measured is less, recheck the
connections for proper polarity. Verify that all cells and
battery connections have been properly torqued.
3. Measure and record the intercell connection resistance
using a micro-ohms meter. This helps determine the ade-
quacy of initial connection installation and can be used as
a reference for future maintenance requirements. Refer to
the recording forms in Appendix B of this manual.
Review the records of each connection and detail resist-
ance measurements. Clean, remake, and remeasure any
connection that has a resistance measurement greater
than 10% of the average of all the same type connections
(i.e. intercell, intermodule, etc.).
Connector Packages
Type Plates AMPS WPC
2CU 5-33 ≤1000 ≤1600
4CU 5-33 ≤2000 ≤3200
6CU 5-33 ≤3000 ≤4800
Bolt Package
2CU 1/4-20 x 1.50" JMP1407
4CU 1/4-20 x 1.75" JMP1435
6CU 1/4-20 x 2.00" JMP1409
2CU Package Detail
Tier to Tier
Cell to Cell

CONNECTOR ASSEMBLY CONT.
4. Battery performance is based on the output at the battery
terminals. Therefore, the shortest electrical connection
between the battery system and the operating equipment
results in maximum total system performance.
Select cable size based on current carrying capability and
voltage drop.
Cable size should not provide a greater voltage drop between
the battery system and operating equipment than specified.
Excessive voltage drop in cables will reduce the desired
reserve time and power from the battery system.
SAFETY SHIELD ASSEMBLY
1. All Safety Shield Brackets should already be installed at
this time. Refer to Cell Installation Section for bracket
installation.
2. Safety Shields are designed with a “keyhole” type
attachment.
3. One shield will cover one module or two tiers. Starting with
the bottom module, hang the first shield on the top brackets
through the large part of the keyhole. At the same time
aligning the cutout at the bottom of the shield with the
second set of brackets. After all shields are in place tighten,
but do not torque hardware.
Top Protection Shield Installation
For side terminal assembly, attach top protective cover to
highest front shield.
14
Bottom
Overlap
Top

15
For top terminal assembly, align protective cover in front of
top terminal plates. Mark area of protective shield that is
required to be removed in order to fit between the terminals.
Cut protective cover along marks.
Attach to front shield and verify fit. Additional trimming may be
required to ensure proper fit.
SYSTEM OPERATIONS
Char er Volta e
These batteries are designed for continuous float applications.
Float / Standby
2.25 vpc ± 0.01 @ 77°F (25°C)
When setting the float voltage on the charger, the system
should be set to float at the nominal cell float voltage times the
number of cells per string. The charger must be able to main-
tain the system voltage within ± 0.5% of the desired level at all
times. The desired float voltage varies with temperature
according to the table in the next column.
Temperature Compensation
Battery voltage should be adjusted for ambient temperature
variations.
2mV per °C (1.8°F) per cell
For temperatures above 77°F (25°C) subtract and for tempera-
tures below 77°F (25°C) add.
Consult Voltage Compensation Chart in Appendix B
for temperature compensation voltage maximum and
minimum limits.
The average battery operating temperature should not exceed
95°F (35°C) and should never exceed 105°F (40.5°C) for more
than an eight-hour period. Operating at temperatures greater
than 77°F (25°C) will reduce the operating life of the battery.
If operating temperatures are expected to be in excess of 95°F
(35°C), contact East Penn for recommendations.
ischarging at temperatures less than 77°F (25°C) will reduce
the capacity of the battery.
Battery Volta e
Although the charger must maintain the system voltage within
± 0.5%, individual cell voltages may vary by ± 0.05 volts of the
average battery float voltage.
Equalizin
Upon installation of the battery, an optional boost charge of
2.40 vpc ± 0.01 vpc for of 24 hours (not to exceed 24 hours)
can be applied. (Note: Verify that the higher battery voltage
will not adversely affect the other connected equipment.) If
this is done, be sure to reset the charging equipment to the
proper float voltage.
Cell Volta e
Although the charger must maintain the system voltage with-
in ± 0.5%, individual cell voltages may vary by ± 0.05 volts
of the average cell float voltage.
Rectifier Ripple Volta e
FRE UENCY
Ripple that has a frequency greater than 667Hz (duration
less than 1.5ms) is acceptable, unless it is causing addi-
tional battery heating. Ripple that has a frequency less
than 667Hz (duration greater than1.5ms), must meet the
following voltage specification to be acceptable.
VOLTAGE
Ripple voltage shall be less than 0.5% peak to peak of the
manufacturer’s recommended string voltage. Failure to
comply can void the warranty.
RECORD KEEPING
Volta es, Temperatures & Ohmic
Readin s
Record keeping is an important part of stationary battery
maintenance and warranty coverage. This information will
help in establishing a life history of the battery and inform
the user if and when corrective action needs to be taken.
(Refer to Appendix A, Battery Maintenance Report)
While it is acceptable to operate at temperatures less than
77°F (25°C), it will require longer charging time to become
fully recharged. Also, the capacity will be less at operating
temperatures below 77°F (25°C).
After installation and when the batteries have been on float
charge for one week, the following data should be recorded:
1. Battery terminal voltage.
2. Charger voltage.
3. Individual cell float voltages.
4. Ambient temperatures.
5. Terminal connections should be checked to verify that the
installer did torque all connections properly, consult
“Hardware Torque Requirements” (pg 2) for proper
torque values. Micro-ohm readings should be taken
across every connection. Refer to meter manufacturer’s
instructions for proper placement of probes. If any read-
ing differs by more than 20% from its initial installation
value, re-torque the connection, consult “Hardware
Torque Requirements” (pg 5) for proper torque values.
If reading remains high, clean contact surfaces
according to Step 1 under Connector Assembly.
6. Individual cell Ohmic readings. For 6-post cells, measure
from center positive to center negative posts. o not
measure diagonally from positive to negative posts. See
next page for specific location.

RECORD KEEPING CONT.
MAINTENANCE
Always wear eye protection when working on or near batteries.
Keep sparks and open flames away from batteries at all times.
Review Safety Precautions on pg. 1.
Annual Inspection (1)
1. Conduct a visual inspection of each cell.
2. Record the battery string voltage.
3. Record the charger voltage.
4. Record the individual cell voltages. The accuracy of the
MM ( igital Multimeter) must be .05% (on dc scale) or
better. The MM must be calibrated to NIST traceable
standards. Because float readings are affected by dis-
charge and recharges, these readings must be taken when
batteries have been on continuous, uninterrupted float for
at least one month. Cells should be within ± 0.05 volts of
the average cell float voltage.
5. Record the ambient temperatures.
6. Record individual cell Ohmic readings.
7. Record all intercell, interunit and terminal connection
resistances. Micro-ohm readings should be taken during
this inspection. If any reading differs by more than 20%
from initial readings taken, retorque the connection.
Recheck the micro-ohm reading. If the reading remains
high, clean the contact surface according to installation
portion of this manual.
(1) Other Maintenance Inspection interva s fo ow
IEEE 1188
Battery Cleanin
Batteries, cabinets, racks, and modules should be cleaned with
clear water or a mixture of baking soda and water.
Never use solvents to clean the battery.
Capacity Testin
Per IEEE 1188 “Capacity testing is used to trend battery aging.
The result of a capacity test is a calculation of the capacity of
the battery. The calculated capacity is also used to determine if
the battery requires replacement.”
o not discharge the batteries beyond the specified final volt-
age. When discharging at higher rates, extra connectors may
need to be added to prevent excessive voltage drop and / or
excessive temperature rise. Consult “Connector Packages”
chart (pg. 15) for current limits. When performing capacity
testing and recording data use IEEE 1188 instructions. Should
it be determined that any individual battery(ies) or cell(s) need
to be replaced, contact your nearest East Penn agent or East
Penn Service Center.
CELL REMOVAL PROCEDURE
1. Before removing cell, review Safety Precautions on pg. 2
of this manual. Contact East Penn Mfg. Company, Inc. with
specific questions or concerns.
2. Remove one cell at a time.
3. Confirm the lifting device is rated to handle the weight of
one cell.
4. All tools used to remove the cell shall be insulated to
avoid metal contact with battery posts.
5. Remove bolts from the retainer bar from the cell to be
replaced.
6. Cells develop internal pressure. Relieving this pressure
from the cell will make it easier to remove the cell from the
sleeve assembly.
a. Pry off the vent shroud
b. Remove the flame arrestor
c. Loosen valve using a 17mm hex key approximately
½ turn to release the internal pressure. A cloth
should be used to cover the valve when releasing
pressure to avoid any chance of acid spray being
released”
d. Immediately tighten the valve and torque to
12-14 in-lb (1.4-1.6 Nm).
7 Thread Polypropylene rope through the battery posts as
illustrated below and knot.
8. Remove the two retaining bars holding in the
cell to be removed.
16

9. Pull cell from module onto lifting device. Care should
be taken so lifting device does not come in contact with
cell posts.
10. Replacement cell may have built up pressure while on
open circuit. Refer to step 5 for relieving the internal
cell pressure.
11. After cell has been installed into sleeve refer to “Retainer
Bar Installation” section (pg 8).
AVR125-33
Acid Volumes & Weights
Data subject to cha ge.
MSDS sheets can be obtained at
www.eastpennuni y.com.
17
Cell Electrolyte Pure
Size cc gal gm lb acid lb
AVR125-33 25,793 6.61 33,531 73.92 29.55

Cell Serial Cell Volts Cell Connector Ohmic Value Cell Serial Cell Volts Cell Connector Ohmic Value
No. Number Temp. (Float) Ohmic Value* 1 2 3 No. Number Temp. (Float) Ohmic Value* 1 2 3
1 31
2 32
3 33
4 34
5 35
6 36
7 37
8 38
9 39
10 40
11 41
12 42
13 43
14 44
15 45
16 46
17 47
18 48
19 49
20 50
21 51
22 52
23 53
24 54
25 55
26 56
27 57
28 58
29 59
30 60
*Consult Cell type/Battery Type Label – Found on Retaining Bar or Left Side of Each Module.
*CONSULT I&O MANUAL, “RECOR KEEPING”, FOR A ITIONAL INFORMATION INCLU ING PROPER LOCATION OF PROBES FOR MULTI-TERMINAL JARS.
Remarks and Recommendations: ____________________________________________________________________________________________________________________________________________________________________________________
_______________________________________________________________________________________________________________________________________________________________________________________________________________
_______________________________________________________________________________________________________________________________________________________________________________________________________________
Readings Taken By: ______________________________________________________________________________________________________________________ Notation: This form must be comp eted and submitted with any product warranty c aim.
(EPM Form : XXXX 08/08 Form available as a Excel Spreadsheet. Co sult your EPM Represe tative.) Readi gs should be take at I stallatio a d at least a ually thereafter.
Battery Maintenance Report
Company _______________________________________________________________ Service ate
Address_________________________________________________________________ Battery wg #
Battery Location & I. . Number ______________________________________________ Connector Pkg Ambient Air Temp.__________ºF
Total No. of Cells ____________________________ Charger Output Voltage _________ Float Currnet _________ Battery I. . # ______________________________________
Battery Type* _____________________________________ Total Battery Voltage _____________________(read at battery ter inals) Installer ______________________________
ate of Mfg.* _____________________________________ Panel Meter Voltage ______________________(display voltage) ate Installed ______________________________
Site Load Current ______________________________A ps Conductance/Impendance Meter _________________________________________________________( fg. & odel)
Rectifier Mfg. & Model__________________________________________________ AC Ripple Voltage _______________________(Note if voltage is expressed in RMS, Peak. or Peak To Peak)
Environment (i.e. Hut. Central Office. etc...) __________________________________________________________________________________________________________
(See Manual)

19
APPENDIX A
BASE ANCHOR HOLE PATTERN
Module AB
Type
2 x 2 17.55 29.55
3 x 2 30.33 42.83

APPENDIX B
ºC Float ºF
>35 2.230 >95
34 2.232 93.2
33 2.234 91.4
32 2.236 89.6
31 2.238 87.8
30 2.240 86.0
29 2.242 84.2
28 2.244 82.4
27 2.246 80.6
26 2.248 78.8
25 2.250 77.0
24 2.252 75.2
23 2.254 73.4
22 2.256 71.6
21 2.258 69.8
20 2.260 68.0
19 2.262 66.2
18 2.264 64.4
17 2.266 62.6
16 2.268 60.8
15 2.270 59.0
14 2.272 57.2
13 2.274 55.4
12 2.276 53.6
11 2.278 51.8
<10 2.280 <50
VOLTAGE COMPENSATION CHART
East Penn Manufacturing Co.
Lyon Station, PA 19536-0147 Phone: 610-682-4231 Fax: 610-682-4781 e-mail: sales@eastpennunigy.com
E.P.M. Form No. 2038 4/19 © 2019 by EPM Printed in U.S.A.
All data subject to change without notice. No part of this document may be copied or
reproduced, electronically or mechanically, without written permission from the company.
www.eastpennunigy.com
Other manuals for Unigy II
2
Table of contents
Other Deka Control Unit manuals
Popular Control Unit manuals by other brands

Microhard Systems
Microhard Systems HP900 operating manual

Baxi
Baxi Luna Sat RPZ-SP+2C Installation and operating manual
Essel Technology
Essel Technology RFID A1 user manual

Aetina
Aetina AIE-KO21 user manual

KE2 Therm Solutions
KE2 Therm Solutions KE2 Low Temp Plus Defrost quick start guide
Radicom Research
Radicom Research RB8762C Series Designer's guide
