Deli 4083 User manual

Reserved for future use
Simple to Operate
Easy to Use
Welcome to use our series products of safes (cabinets) and safe deposit
boxes. Please read the instruction manual carefully before use, and operate
correctly according to the instructions.
Safe and Reliable
Electronic password series products
USER'S MANUAL

Contents
1. Product Unpacking…………………………………………………..01
2. Product Schematic…………………………………………………..02
3. First Use…………………………………………………………..…..03
4. Battery Installation…………………………………………………...03
5. Password Setting …………………………………………………….03
6. Door Closing Operation……………………………………………..04
7. Hidden Code Function……………………………………………....04
8. Deleting Incorrect Password………………………………………..04
9. Alarm Function………………………………………………………..05
10. Battery Replacement……………………………………………….05
11. Emergency Opening………………………………………………..06
12. Querying Door Opening Record…………………………………..06
13. System Date Modification………………………………………….07
14. Precautions for Use …………………………………………………08
15. Common Faults and Troubleshooting………………………….….09
DELI GROUP
1. Product Unpacking
Check that product appearance is intact after unpacking the box and checking all
accessories. Please contact the dealer if anything is broken or missing.
Instruction
manual*1
Door lock
keys*2
Emergency
keys*2
Expansion
bolt*2
External battery
compartment*1
Internal door
keys*2
5# battery*4
Remark: For products without internal door products inside the box, There is no internal
door keys attached.

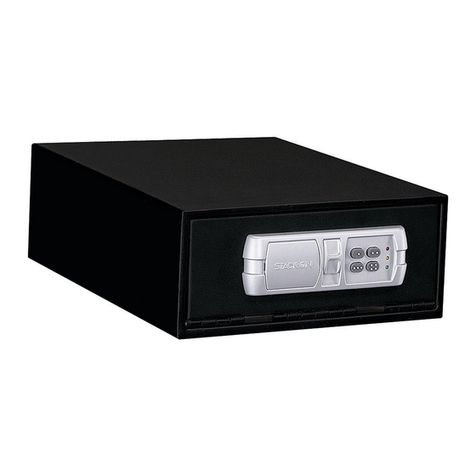
2. Product Schematic
Front view
Side view (with door open)
Panel layout
Panel layout
Serial
number
1
2
3
4
5
6
Name
Box
Electronic
Panel
Door lock slide
cover
Reset key
Backside cover
Internal battery
compartment
Serial
number
7
8
9
10
11
12
Name
Display
screen
Keys
Door lock
Emergency
lock
Emergency
lock flip cover
External power
supply socket
DELI GROUP

3. First Use
1) Push the door lock slide cover down to the limited position and press the emergency lock
flip cover;
2) Insert one of the door lock keys and one of the emergency keys into the corresponding key
hole, respectively, turn the emergency key clockwise, then turn the door lock key clockwise to
open the door.
4. Battery Installation
1) Put the four 5# batteries into the internal battery compartment located on the backside
cover of the door according to the correct polarity. The display shows it scans "口" back and
forth from left to right after the power is supplied, then it shows "good" after the scan is
completed, and it will enter the standby state;
2) Insert the door lock key, press the key "#" to wake up, and enter the factory password
"12345678" when the display shows "-------";
3) Press the key "#" to confirm, the display shows "OPEN", please turn the door lock key
clockwise within 6 seconds to open the door.
5. Password Setting
The factory password of this product is "12345678". Please reset your personal password
before use to ensure safety.
1) Press the key "#" to wake up, enter the factory password "12345678", and the display shows
"OPEN". The door can be opened;
2) Within 25 seconds after the display is turned off, press the Reset key on the backside cover
of the door and the display shows "set";
DELI GROUP
DELI GROUP
3) Enter a new password of 1-8 digits, press the key "#" to confirm, the display shows "into", and
the new password is set;
4) The display shows the new password again for 1 second and then returns to the standby state.
Tip: Verify the new password after the password is set, and then lock the door after
confirmation.
6. Door Closing Operation
1) Close the door;
2) Turn the door lock key counterclockwise and pull it out.
7. Hidden Code Function
8. Deleting Incorrect Password
1) After pressing the key "#" and before entering the password, the hidden code function can
be switched by pressing the key "*". When the hidden code function is valid, the digits which
are entered afterwards will not be displayed, but they will be replaced by "口";
2) The digit display is automatically restored after this function is turned on.
If an incorrect password is entered during the operation, it can be deleted by using the key “*”
before pressing the key "#" to confirm. The last digit entered can be cleared each time the key
"*" is pressed.

When the voltage of the batteries drops to a certain level, the display will show "Lo bat" after
the password is entered each time, indicating that the battery voltage is insufficient, please
replace with new batteries as soon as possible. (It is recommended that you use 5# alkaline
batteries)
1) Wrong password alarm
The display shows "Error" each time an incorrect password is entered, then "---------" will be
displayed again, and the password can be entered again at this time. The display shows the
alarm horn symbol and will alarm for one minute if a wrong password is entered consecutively
for three times. Entering the correct password during the alarm can stop the alarm.
2) Vibration alarm
The vibration alarm function is turned on when the display shows "ALERT ON" if the key "0" is
pressed in the standby state; The display shows the alarm horn symbol and "---------" and will
alarm for one minute when the product is vibrated by external force. Entering the correct
password during the alarm can stop the alarm.
DELI GROUP
DELI GROUP
10. Battery Replacement
11. Emergency Opening
12. Querying Door Opening Record
9. Alarm Function
1) Please provide power by using the external battery compartment when the batteries are
depleted and the operation cannot be made. Insert the plug of the external battery
compartment into the external power supply socket located below the electronic panel, and
enter the correct password to open the door;
2) Please use the emergency key to open the door when the electronic system fails or the
password is forgotten. The way to open the door is the same as the first use.
1. First open the door by entering the password. You can query the previous door open
records by pressing key "0" or "8" when the display shows "OPEN". Each record is displayed
on two screens;
2. The first screen is displayed at first: password type (for example: "PASS-1" / "PASS-2") and
record number (for example: "N0 01" - "N0 58");
3. Then the second screen is displayed: the door opening date and time of this record;
4. Record page turning: in the state of record query, if the key "0" has been pressed, record
number +1 to turn the page; if the key "8" has been pressed, record number -1;
5. If the key is not pressed within 3 seconds, it will exit the query state and return to the
standby state;
6. The system can save the latest 58 records at most. When there are more than 58 records,
each time a new record is added, the oldest record will be overwritten. Each record
contains the following information: year, month, day, hour, minute, record number (1=last
record, 2=last second record, ... 58=last 58th record), password type (1=personal
password, 2=administrative password).

13. System Date Modification
DELI GROUP
1. In the standby state, press the key "*" to enter the state of modifying the system date and
time;
2. Enter "year", "month", "day", "hour", "minute" (10 digits in total) by pressing the digit keys
directly. It will be automatically confirmed after the corresponding space digit flashes. Then
it will save the new time and exit the setting state, and return to the standby state;
3. Press the key "*" to go back one space during the setting and re-enter one;
4. The system will identify the validity of the entered digits, and it will not confirm the invalid
values that exceed the range. The valid ranges of each parameter are as follows:
Year: 00~99, Month: 01~12, Day: 01~31, Hour: 00~23, Minute: 00~59;
5. Note: The system cannot automatically distinguish a month of 31 or 30 days and a leap
month's maximum days when modifying the date. The user must ensure that the date they
enter is meaningful and avoid artificial errors such as "February 30th";
6. If the modification is not finished and no key is pressed within 8 seconds, it will exit the
modification state (the modified value is invalid) and return to the standby state;
7. The system is embedded with a perpetual calendar from 2000 to 2099, which will
automatically switch to a month of 31 or 30 days and convert to a leap year when timing.

15. Common Faults and Troubleshooting
DELI GROUP
Symptoms
Causes
Troubleshooting
No any response when pressing
the digit keys to enter the
password
The batteries are depleted
Use the external battery compartment or
the emergency key to open the
electronic code lock and replace the
batteries
Battery polarity reversed
Insert the batteries properly
Circuit board failure
Please contact the maintenance
department
The door lock key cannot be
inserted in or removed
The key is inserted in the
wrong direction
Please contact the maintenance
department
There are foreign objects in
the key hole
Remove foreign objects in the key hole
The key is not turned to the
limit
Please reinsert in the correct direction
The door cannot be opened when
the electronic code lock has been
opened
Turn the handle for more than
7 seconds, and the electronic
lock has been reset
Enter the password again and turn the
handle to the limit within 7 seconds
The alarm does not sound
The batteries are depleted
Please replace the batteries
Battery polarity reversed
Insert the batteries in the correct way
14. Precautions for Use
1) Do not put the user's manual, door lock keys, emergency keys and external battery
compartment in the box, they should be stored in other safe place;
2) The battery should be taken out to prevent the leakage of liquid from damaging the
electronic system if the product is left unused for a long time;
3) Always fix the cabinet to a solid concrete wall for safe keeping;
4) Do not store too much cash and valuables when unattended or without a remote alarm
device.
Installation layout
DELI GROUP

No.
Version: 1.0
Date: March of 2016
Product Warranty Card
DELI GROUP
Commodity
Information
Commodity Name
Factory Date
Commodity Model
Production
Date
Customer
Information
Company Name
Contact
Address
Phone
Sales
Information
Seller Name
Contact
Address
Phone
Sales Date
Invoice No.
Maintenanc
e Record
Fault Description
Maintenance Result
Customer
Signature
Maintenance Person
Signature
Date
This page is cut off along the dotted line
and kept by the dealer
Product Code
DELI GROUP CO., LTD.
Add: Deli Industrial Park, Ninghai,
Zhejiang
Service Hotline: 400-185-0555
Http://www.nbdeli.com
MADE IN CHINA

DELI GROUP
Product Warranty Card
Dear users:
Thank you for purchasing our products. In order to ensure the interests of users, all users who
purchase our products can contact the local dealer or special maintenance station by the proof
of invoice and warranty card if the product fails due to quality problems.
Warranty notice:
1. If the product fails under normal use within one year from the date of purchase by the user,
our company will provide free repair, parts replacement and other services according to the
failure situation;
2. This warranty card and purchase invoice are the proofs that our company provide
after-sales service to customers. Please fill out the following form on this card, and it will be
valid only after the dealer affixes the official seal;
3. In one of the following cases, free repair service is not provided, and it will be charged for
maintenance:
(1) The the validity period of the warranty has expired;
(2) Damage caused by improper use, maintenance or storage not in accordance with the
requirements of the product instruction manual;
(3) Product failure or damage caused by force majeure;
(4) Wear parts or accessories.
This card comes together with the product, and one card for one machine. In order to
ensure that you have full right to the free repair service provided by our company, please
keep this card properly, and you can not get another copy if you lose it.
Purchase Date: _____(mm/dd/yyyy)
This manual suits for next models
1
Table of contents
Other Deli Safe manuals

