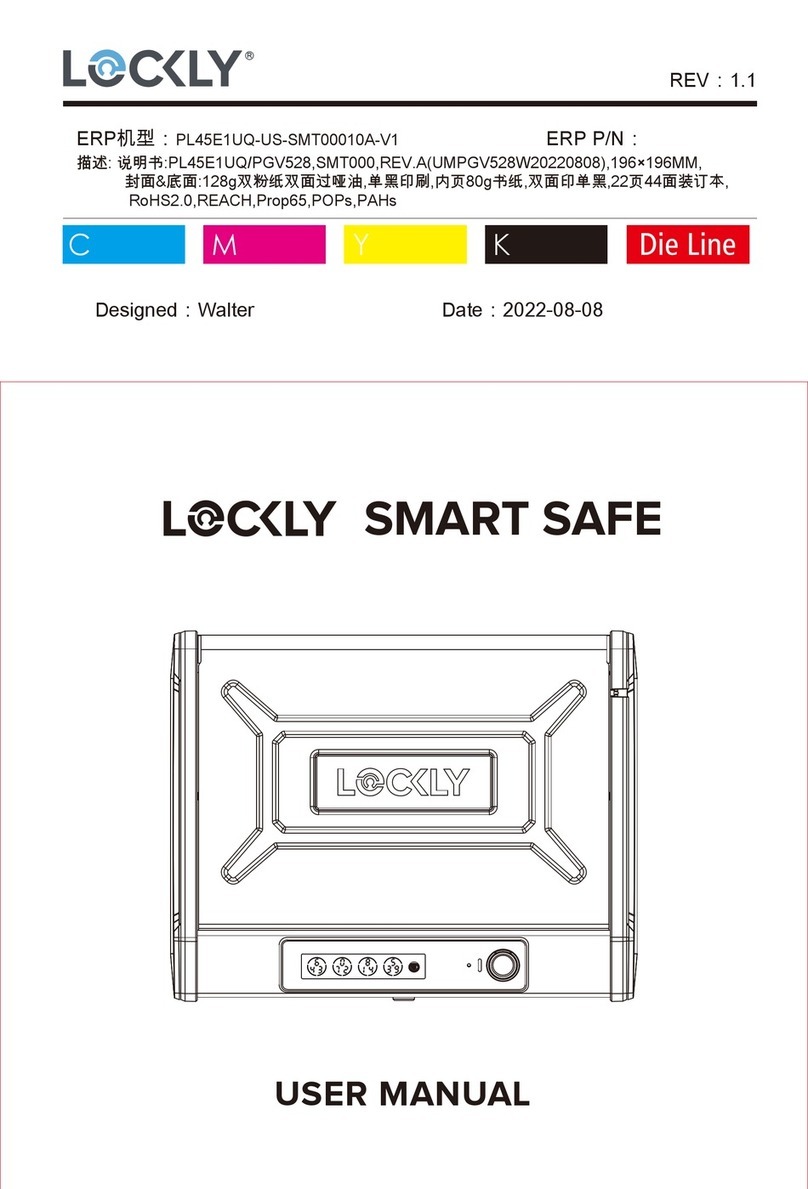
Lockly PGV528W User manual

USER MANUAL
LOCKLY SMART SAFE
6
4 3
0
7 2
8
1 4
5
3 9

TABLE OF CONTENTS
Section 1 - Product Highlights
Section 2 - Product Overview
Section 3 - Installation & Setup
3.1 Optional Installation
3.2 Setting Up the Secure Link Wi-Fi Hub
3.3 Connecting Your Lockly Smart Safe
1.1 Product Features
Section 6 - Advanced Features
Section 7 - Key Duplication
Section 9 - Maintenance and Cleaning
9.1 Cleaning
1
2
3
4
6
7
5
8
10
12
25
28
29
26
27
27
31
32
32
32
32
32
33
34
Section 10 - Safety Precautions
10.1 Safety Precautions 35
Section 8 - Important Notes
8.1 Important Notes 34
2.1 Product Overview - Exterior
2.2 Product Overview - Interior
2.3 Understanding Your Smart Safe
2.4 Rebooting Your Smart Safe
2.5 Low Battery
2.6 Changing The Battery
5.1 Unlocking with Access Codes
5.2 Unlocking with Fingerprint
5.3 Unlocking with App
5.4 Unlocking with QR Code
15
16
16
17
19
21
23
24
4.6 Pairing to a New Mobile Device
4.7 Adding a Fingerprint
4.8 Fingerprint Scanning Directions
4.9
Fingerprint Scanning Tips & Troubleshoot
4.10 Shine Mode
Section 4 - Using Your Smart Safe
Section 5- Unlocking
14
15
4.1 Configuring Access
4.2 Adding Access Codes
4.3 Checking/Deleting Access Code
4.4 Entering Programming Mode
4.5 Restore Factory Settings
5.5 Unlocking with Physical Key
5.6 Safe Mode - Overview
6.1 Offline Access Code™ (OAC)
6.2 eBadge
6.3 Smart-Sync
6.4 Sub-Admin Access
6.5 Duress Finger Alert
6.6 Twin-Credential Opening Capability
30
5.7 Disabling Safe Mode
7.1 Key Duplication
Table of Contents
For additional support, visit http://Lockly.com/help

1.1 Product Features
1SECTION 1.1
Patented Hack-Proof PIN Genie Keypad
Digits are randomly displayed on the key pad ensuring access codes to be undetectable to intruders
after repeated use. Numbers are randomly distributed across 4 buttons, with 3 numbers in each button.
Users can press any button showing their number. Location of the numbers are always different every
time someone uses the keypad, making it hard for prying eyes to guess the correct code.
Advanced 3D Fingerprint Recognition
Biometric Fingerprint Recognition protocol allows up to 99 registered fingerprints to be used and accepts
only actual fingerprints - preventing lifted prints from being used.
Tamper-proof / Premium Build
Made of drop tested fortified steel alloy with corrosion resistant coating, magnet resistant and laser-cut
3D keyway. With included anti-theft cable and screws to prevent the Smart Safe from being moved or
stolen.
Air Transfer compatible
Quickly transfer fingerprint and trusted user profiles from your Lockly smart locks to your Smart Safe.
Pneumatics Easy-Lift Mechanism
Unlock Safe quietly and in-sync with LED lights that allows users to unlock, grab valuables with a single
hand. Pneumatics mechanism can be easily replaced (DIY) when unlocking performance slows down
overtime.
Backup Keys and Type-C USB Socket
Lockly Smart Safe can be opened with physical backup keys. There is type-C connection socket that can
be the source of continuous power supply or can be used as power backup in case the Safe runs out of
battery.
Offline Access Code™(OAC)
The offline access code can allow owners to issue access codes, set the allowed access duration, all
without Lockly ever connecting to the internet, so in case of power outage, you can still magically and
remotely issue Access Codes without any connection to the web.
Live Monitoring
Through your smartphone, monitor Smart Safe access from anywhere in the world and Secure control
access all permissions.
Multiple Access Codes & Monitoring
Store up to 37 Access Codes for family, friends and guests, as well as monitor entry and exit records. You
can also upgrade up to 100 user access codes with Lockly\OS.
2.1 Product Overview - Exterior
2SECTION 2.1
Fingerprint
Reboot Button
LED Indicator
OK Button
Keypad Buttons
Touchscreen
Key Hole

Battery
Compartment
LED Light
Type-C USB port
SECTION 2.2 3
2.2 Product Overview - Interior
Program Button
When the Safe opens, the light automatically
turns ON and OFF after 2 minutes. Touch the
keypad to turn ON the lights again.

2.3 Understanding Your Smart Safe
Understanding some key functions of operating your Smart Safe is important. The following guides
will walk you through setting the Safe, adding Access Codes, deleting Access Codes, adding finger-
prints, deleting fingerprints, how to configure your OAC (Offline Access Code™) and more...
For any questions you can always visit https://Lockly.com/help for assistance.
Don’t forget that Lockly works best with our iOS and Android™app. Please download the app by
visiting the link below.
Scan or visit Lockly.com/app
4 SECTION 2.3

SECTION 2.4 5
2.4 Rebooting Your Smart Safe
Reboot Button
NOTICE
Reboot Lockly in case of dead battery or malfunction. No settings
will be changed and all Access Codes will still be stored within
Lockly.
Press and release the reboot button when you want to reboot the Safe. Your Lockly will beep once
after reboot. Only reboot when necessary.
You will need something small such as a paperclip, to press the reboot button located on the exterior
of the safe, left of the fingerprint reader. Insert the paperclip and press down firmly and let go. Your
screen should restart and the safe should reboot automatically.

6 SECTION 2.5
Type-C
2.5 Low Battery
When the battery is in seriously low condition, Lockly will make continuous beeping sounds in addition
to the flashing low battery icon on the touch screen. You should replace batteries immediately
to avoid your Smart Safe from shutting down.
When your Safe low-battery warning alert finally dies, you will have 3 chances to unlock your
Safe
either by a password, APP or fingerprint. If the unlock was successful, the low-battery
warning
alert will be on for 1 minute. After which, the Safe will go to dead-battery mode
and the screen will
display a low-battery icon .
Dead Battery
Condition Indicator Solution
Low Battery
Battery Icon on the display
keypad will light up to indicate
low battery .
Replace batteries immediately to
avoid battery failure. Lockly can still
operate up to 300 cycles
in low
battery condition.
When there is no display
and sounds; and screen is
non-functional.
Your Lockly has a Type-C USB port located at the right
exterior of the Smart Safe. You may use a power bank
to temporarily power up your safe. Once the screen
lights up, enter your Access Code or scan a registered
fingerprint to unlock Safe. Once unlocked, batteries
should be replaced immediately.
This Type-C USB port can be plugged in a DC 5V to
provide continuous power supply for the safe. The
installed battery will serve as backup power supply in
case of power interruptions.
Replace batteries immediately.
Supplied physical backup keys
can be used to unlock the safe.
Alternatively, use Type-C USB port
as shown
below to
activate the
safe.

7SECTION 2.6
2.6 Changing The Battery
Under normal use, the Lockly battery will last up to a year. Please check battery levels regularly and
change your batteries when the low battery notification is issued. For best practice, always use new
batteries by a major brand.
Open the battery compartment cover and insert four (4) new AA alkaline batteries as shown.
- Make sure the batteries are oriented correctly by matching the orientation displayed.
- Replacing the batteries do not reset stored Access Codes.
- To see a list of recommended brands, please visit http://Lockly.com/battery
NOTICE
Press the snap to remove the battery cover.
Carefully take out the battery holder and disconnect from the terminal.
Make sure you DO NOT PULL the connection cable.
Remove and/or install new 4 x AA batteries according to +/- direction.
Connect the battery holder to the terminal cable and return inside the battery box.
Return the battery cover.
1
2
3
4
- AA +
3
124
Whenever batteries are replaced, reconnecting Smart Safe to your smartphone
app is required.
If you have not yet downloaded the app, visit: Lockly.com/app

8SECTION 3.1
3.1 Optional Installation
Installation is optional for your Lockly Smart Safe. It is suggested to choose a location within your
home or office is that it discreet yet can be easily accessed when it is needed. Ideally, this safe could
fit in a bedroom side table, closet or an office cabinet drawer.
If you wish to position the safe in open areas like top of the table, wall divider, a car or any place that
you think there is a chance that it can be stolen, we have provided mounting screws and security
cable that can be used to secure your safe.
"Click"
Length: 1100mm 2
1
Head
Head
Tail
1. Wrap the cable head and tail around a fixed
object.
2. Insert the cable head to the upper right
groove buckle of the safe. When you hear a
"click" sound, the rope installation is completed.

9
SECTION 3.1
3.1 Optional Installation (Continued)
Lockly Smart Safe supports horizontal or vertical fixed installation on the wall or bottom plate,
which is optional. Please select the appropriate fixing method according to your use scenario.
During installation, put Lockly Smart Safe in the installation position and mark the hole opening
position with a pen. You need to use drilling tools when opening holes. Please take necessary
safety precautions. After drilling, use the set screw in the accessory package to fix Lockly Smart
Safe according to the following diagram.
A B

10 SECTION 3.2
3.2 Setting Up the Secure Link Wi-Fi Hub
30 Feet (9 meters)
Distance Between
Lockly Smart Safe Secure Link Wi-Fi Hub
You
Using an iOS or Android™
Device with Bluetooth & Wi-Fi enabled
The Secure Link requires a strong wireless signal for optimal performance. Make
sure the Secure Link will be installed in a location with a strong 2.4 Ghz wireless
signal. Sometimes distances between Wi-Fi hub and Safe can vary due to
circumstances. If you are having difficulty setting up optimal range of 30/ft or
less, we’re here to help. Call our customer care team: (669) 500 8835, or visit
Lockly.com/help for suggestions and troubleshooting tips.
To set up your Lockly Smart Safe, choose an appropriate location for the Secure Link Wi-fi Hub for
optimum performance (see below). For optimum connectivity, it is recommended that the hub be
no further than 30 feet (9 meters) away from the Safe.
During the setup process position yourself between the Safe and the Secure Link Wi-Fi Hub—ideally
no more than 30 feet (9 meters) apart. Ensure your iOS or Android device has both Bluetooth and
Wi-Fi enabled.
NOTICE
6
4 3
0
7 2
8
1 4
5
3 9

11
SECTION 3.2
3.2 Setting Up the Secure Link Wi-Fi Hub (Continued)
Plug the Secure Link Wi-Fi Hub into the 5V 1A USB AC adapter and plug the AC adapter to your
wall socket.
Once you have confirmed that your Secure Link Wi-Fi Hub is ready to connect to your safe, open
the Lockly App from your smartphone. Make sure you are standing between the Wi-Fi hub and
Lockly Smart Safe, then Add New Device and follow the on screen instructions.
USA Outlet Shown
If your Secure Link is connected to your
wireless network, the LED indicator is SOLID
GREEN.

12 SECTION 3.3
3.3 Connecting Your Lockly Smart Safe
The App will take you through the following steps. You will need your activation card that is included
in the box to proceed.
ADD NEW DEVICE Select A Device Select Lockly Smart Safe GET STARTED
Scanning LOCK SERIAL Input Activation Code
If you can't scan LOCK SERIAL,
Then enter manually
●●●●● AT&T 9:41 AM 100% ●●●●● AT&T 9:41 AM 100% ●●●●● AT&T 9:42 AM 100%
●●●●● AT&T 9:42 AM 100%
●●●●● AT&T 9:43 AM 100% ●●●●● AT&T 9:44 AM 100% ●●●●● AT&T 9:44 AM 100%
Turn to the
next page
ACC20221223
Activation Card
SAV E
ACC20221223
Activation Card
SAV E

13
SECTION 3.3
3.3 Connecting Your Lockly Smart Safe (Continued)
The display of the APP interface you see may be different from the printed interface. Lockly will continue
to optimize the APP user experience. Please operate according to the actual interface of the APP.
Set the Admin Code Confirm lock password Password setting OK
Plug in your Secure Link
and Click "YES"
Set Wi-Fi Click “Yes” when the
green light is on Successfully Added
AT&T 9:49 AM 100%
AT&T 9:47 AM 100%
AT&T 9:46 AM 100%
AT&T 9:45 AM 100%
Congratulations!
Your Lockly Smart
Safe is now set up.
AT&T 9:45 AM 100%
AT&T 9:48 AM 100%
AT&T 9:49 AM 100%
AT&T 9:47 AM 100%
AT&T 9:46 AM 100%

14 SECTION 4.1
4.1 Configuring Access
The Default Access Code is
NOTICE 1 2 3 4 5 6
How to Use the Keypad
There are a total of five (5) buttons on the keypad as shown in the example image above. The numbers
in each button may differ from what is shown on your device than what is displayed here.
To enter your required digit, just simply press the circle where your number is shown. You do not need
to press the actual number as anywhere within the circle will suffice.
The last button on the right is the OK button. You will be pressing this button when you are done
entering your Access Code.
You must complete connecting your Lockly Smart Safe (Section
3.2-3.3) to manage your access codes. Follow the on screen
instructions to complete the setup.
There are different types of Access Codes that can be generated using the Lockly App. Each type
of access code have different levels of permission you can select for your guests, tenants, deliveries,
helpers, etc., Get the latest updates on access codes, visit: www.support.lockly.com/faq/access codes/
OK Button
NOTICE

15SECTION 4.2~4.3
4.2 Adding an Access Code
Enter the App Access Management settings then tap "Add New User". Select the type of user you
wish to add access, “Trusted User”, “Guests”, “Admin”. For example, select Trusted User, enter the
user’s name and set the Access Code. Re-enter the access PIN code, then tap “Confirm” to
successfully add the new access code.
The default access code 123456 can not be deleted until a new access code has been
setup. Immediately setup a new access code and delete the default access code
for your security.
**Lockly\OS is premium paid subscription recommended for property management
or for homes and businesses with multiple Lockly devices.
4.3 Checking/Deleting an Access Code
Access codes can only be deleted through the App. Enter the App Access Management and you
can view all the issued access code users. Tap the access code user you wish to be deleted. Check
access code and user name is correct, then tap "Delete User" to complete deleting the user access
code.
An access code is a combination of 6 to 8 digits. Using the Lockly app, the Administrator can set up
and assign up to 37 free access PIN codes or up to 100 access codes through Lockly/OS**
Default access code 1 2 3 4 5 6 becomes invalid once an administrator access code is setup.

SECTION 4.4~4.516
4.4 Entering Programming Mode
4.5 Restore Factory Settings
ModeNumber
Bluetooth Pairing
Restore Factory Settings
Program Button
To enter Programming Mode, open the Smart
Safe. The programming button is located on
the rear left interior.
Quickly press the Program Button twice to
enter programming mode.
To end Programming Mode, press the Program
button anytime. Programming Mode will auto-
matically exit if the keypad is inactive for more
than thirty (30) seconds.
If you need to restore to factor settings, you must
have your Activation Code available. The Activa-
tion Code can be found on the Activation Code
Card that came with your Lockly Smart Safe.
See below which Reset procedure applies for you:
Never Connected to App
Enter Programming Mode, press RE (Restore Factory Settings) and select Yto perform factory reset.
Once the Lockly Smart Safe has been reset, all the data previously stored will be deleted.
Connected to App
In the App, go to Settings > Reset and Pairing > Perform Factory Reset. The smart safe will restart
and reset. After reset, you’ll need the Activation Code to reconnect the App.

17SECTION 4.6
4.6 Pairing to a New Mobile Device
Pair with Bluetooth
If you are pairing a new device or have performed a factory reset in the APP, you can directly
refer to Section 3.3. Your Lockly Smart Safe can be Bluetooth paired without entering Programming
Mode. Otherwise please follow the steps below to pair with Bluetooth.
While in Programming Mode, select “BL” to pair a new smart phone. If you are not in Programming
Mode, please see Section 4.4 to enter Programming Mode.
After pressing “BL”, the BL icon will flash and you will here two short beeps. Lockly Smart Safe will wait
for the new device to pair, please refer to Section 3.3 to reconnect Your Lockly Smart Safe.
You will hear long beep and the green light will be on if the pairing is successful. You will here 3 short
beeps and the red light will be on if pairing is unsuccessful. You will need to re-enter the programming
mode, then Bluetooth pairing mode "BL" to pair the device.

SECTION 4.618
ACC20221223
Activation Card
SAV E
Need help? Email: help@Lockly.com | Support: +1(669) 500-8835
4.6 Pairing to a New Mobile Device (Continued)
PAIR LOCKLY TO APP
To pair your Smart Safe to a new mobile phone, download the Lockly app on your new mobile phone
then use the same account to login to your Lockly App on the new mobile device. If you're pairing
your Lockly to a new Lockly app account, follow the steps below:
1. On the old Lockly app account, go to Settings > Reset and pairing >Perform Factory Reset.
2. Download, register and log in to the new Lockly app account.
3. You will need to scan the ACTIVATION CODE* that comes with the lock to setup to a new account.
If you cannot remove your Lockly from the old account, please
IMPORTANT
1
2
Old Lockly
app account
Scan to new Lockly
app account
3
Welcome Card
ACC20221223
Activation Card
SAV E
ICCPGD82920221223
Need Help? Visit support at www.lockly.com/help
This card has an activation code that
is unique to your smart lock. Do not
lose it. You will need it to set up your
lock, identify ownership and to reset
your lock if necessary.
ACTIVATION CARD
Card missing? Contact us.
Keep in a secure and safe place
This manual suits for next models
1
Table of contents
Other Lockly Safe manuals
Popular Safe manuals by other brands

DIEBOLD
DIEBOLD JJB-23ES user manual

Phoenix
Phoenix Fire Fox SS1621E operating instructions

ExecutiveSafe
ExecutiveSafe ES035 Operation manual

Stealth
Stealth BIOMETRIC HANDGUN HANGER SAFE instructions

ISLANDSAFE
ISLANDSAFE MODERNO XN Series user manual

SPORTS AFIELD
SPORTS AFIELD ELEVATION SA1639E-THD instruction manual