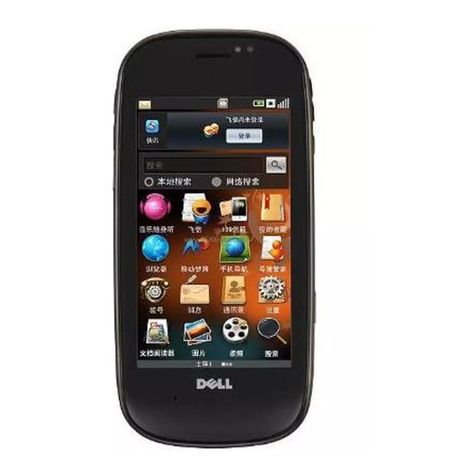
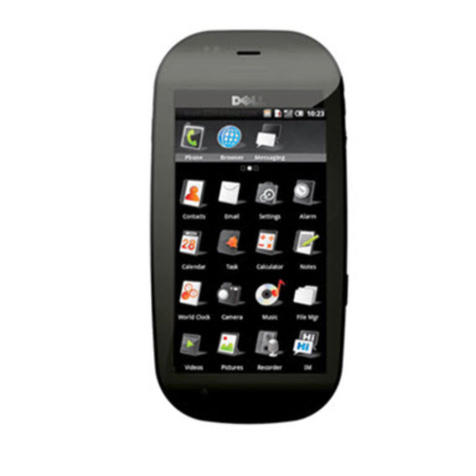
Dell Aero Assembly instructions

Tips and Tricks
This document provides instructions for the frequently-used features available on your
Dell Aero smartphone.
December 2010


3
Connection Manager
The Connection Manager allows you to
quickly access Wi-Fi, Bluetooth, Ringtones &
sounds, Missed calls, Messages, Emails,
Calendar, upcoming ev ents, and current
applications.
To open the connection manager:
Tap the status bar and drag it down to the
bottom of the screen.
To turn on/off Wi-Fi:
Open the Connection Manager.1.
Tap2. Communication.
If Wi-Fi is turned off, tap3. OFF to turn it on.
To adjust the Wi-Fi settings, tap the arrow
icon .
To turn on/off Bluetooth:
Open the Connection Manager.1.
Tap2. Communication.
If Bluetooth is turned off, tap3. OFF to turn
it on.
To adjust the Bluetooth settings, tap the arrow
icon .
To switch the ringtones and sounds profile:
Open the Connection Manager.1.
Tap2. Ringtones & Sounds.
Tap the profile you want to switch to.3.
Tap the arrow icon4. to adjust the
volume or change the alerts.

4
To adjust the ringtones and sounds volume
or change the alerts:
Open the Connection Manager.1.
Tap2. Ringtones & Sounds.
Tap the arrow icon3. next to the
Ringtone or Sound you want to adjust.
Tap the volume or particular alert that you4.
want to change.
Notifications
The Notifications section in the Connection
Manager displays the missed calls, messages,
emails, upcoming events, or current
applications.
To view missed calls, emails, calendar events,
and current applications:
Open the Connection Manager.1.
Tap2. Notifications.
Tap a notification to open it in the appropriate
application.
Tap clear notification, if you do not want to
see a particular notification.

5
Navigation
Home/back icon
The Home/back icon appears at the top
when an application is open.
To go to the home screen, tap and hold the
Home/back icon and drag the slider across
the screen.
To return to the previous screen, menu
structure, web page, or to exit an application,
tap the Home/back icon .
Current screen indicator
Located immediately below the favorites
bar are four small squares that indicate your
current screen. Tap a small square
to quickly switch to a different screen (for
example Home, 2, 3, 4, and so on).
To view additional screens:
Swipe your finger across the display to the
right or left.
Leaving and returning to an application:
If you have navigated several levels in an
application, you can return to the home
screen at any time using the slide to go home
button.
To return to the application you left recently,
tap the application icon. The application
opens at the level you were in when you left
it. If you want to go to a previous level in the
application, tap the Home/Back icon .
6
General Tips
Options icon
The Options icon appears at the top
when an application is open.
Tap the Options icon to view the options
associated with the application. Swipe your
finger from the bottom of the screen to the
top to determine if more options are available.
Options button (side button)
When an application is open, press the
options button at the side of the phone for a
short duration to view the available options.
To view additional application options:
Press and hold the particular item in the1.
application.
Swipe your finger up or down on menu2.
that appears.
Favorites bar
The favorites bar appears at the top of all
panels. The favorites bar has four icons
that provide quick access to your favorite
applications.

7
To zoom-in on text or pictures:
Move two fingers away from
each other to zoom-in on
text or an image.
To zoom-out on text or pictures:
Move two fingers closer
together (pinch) on the
screen to zoom-out on text
or an image.

8
To play sound when touching the screen:
Tap Settings → Language and input→
Android keyboard→To turn sound on, press
“ON” mode→Audible selection ON.
NOTE: The Audible selection is set to OFF
by default.
To change the font size:
Tap Settings →Display settings→font
settings→Small, Normal, or Big.
Title bar
The title bar appears at the top of each
application between the Home/back icon
and the options icon . The title bar may
have additional options that can be accessed
by tapping the title bar.
To delete multiple entries in a list:
You can select entries individually or tap the
Options icon → Select all.
To delete the selected items, tap the Options
icon →Delete.
Weather Widget
The weather widget appears on your home
screen.
To change the city displayed on the widget:
Tap the current city.1.
Type the name of a city in the2. Search bar.
Tap the search icon3. on the on-screen
keypad.
Tap the city to select.4.
Tap5. Save.

9
Customize Your Screen
To rearrange icons:
Tap and hold the icon and then drag it to a
new location.
To delete an icon:
1. Tap and hold the icon you want to delete.
2. Tap the trash can icon that appears.
NOTE: Applications/widgets that are
deleted can be added again at any
time. Press and hold the panel, tap
Applications, and then choose the
application you want to add to the panel.
To add shortcuts:
Ensure that you are on a Home screen or1.
any other screens.
Press the options button (side button)2.
once.
Tap3. Add shortcut from the menu that
appears.
To add wallpapers:
Ensure that you are on a Home screen.1.
Press the options button (side button)2.
once.
Tap3. Add wallpaper from the menu that
appears.
To change navigation effect when switching
between screens:
From any of the screens, tap the Options1.
icon to open the MyPanel pop-up
menu.
Tap2. Settings.
Tap3. Screen switch effect.
Choose one of the following options:4.
Flat — Default, traditional transitioning
between panels, slide panels left or right
Rotate Card — transition panels like
rotating cards
Cube — transition panels in a
3-dimensional view.

10
Corporate Email
To set up corporate email:
Tap the Email icon1. .
Type your email address.2.
Tap3. Next.
Select4. Exchange.
Type the required information.5.
Tap6. Save.
NOTE: To set up an IT-managed
corporate email on your phone you
require a server address from your
corporate IT organization. Contact your
IT administrator for more information.
To view an email:
Tap the Email icon1. .
Tap the email account that you want to2.
open.
Tap an email from the list.3.
To send a new email:
Tap the email icon1. .
Tap the email account that you want to2.
use to send the email.
Tap the Options icon3. →Compose.
Type the recipient’s address or tap the4.
icon to select a contact from the
Phonebook.
Type a subject and message.5.
NOTE: Tap in the area below the
message to invoke the QWERTY keypad
and type your message.
Tap the Options icon6. to select Attach,
Add, Add/Hide Bcc, Discard, or Priority.
Tap7. Send to send the message and exit this
screen.

11
To receive emails:
If you have not set up your email account to
automatically receive emails, but would like to
read your recent mails:
Tap the Email icon1. .
Tap the email account you want to open.2.
Tap the Options icon3. .
Tap4. Send/Receive.
To delete multiple emails:
Tap the Email icon1. .
Tap the email account you want to open.2.
Tap to select the emails you want to3.
delete.
NOTE: To select all emails, tap the
Options icon →Select all.
Tap the Options icon4. .
Tap5. Delete.
To delete an email:
Tap the Email icon1. .
Tap the email account you want to open.2.
Tap to select the email you want to delete.3.
Tap the Options icon4. .
Tap5. Delete.

12
Personal Email
To set up personal email:
Tap the Email icon1. .
Type the2. Email Address, Password, and
From name.
Tap3. Next.
Type information under4. Advanced
settings.
Tap5. Save.
To add more accounts, tap the6. Add
Account tab.
To view email:
Tap the Email icon1. .
Tap the email account that you want to2.
open.
Tap an email from the list.3.
To send a new email:
Tap the Email icon1. .
Tap the email account that you want to2.
use to send the email.
Tap the Options icon3. →Compose.
Type the recipient’s address or tap the4.
icon to select a contact from the
Phonebook.

13
Type a subject and message.5.
NOTE: Tap in the area below the
message to invoke the QWERTY keypad
and type your message.
Tap the Options icon6. to select Attach,
Add, Add/Hide Bcc, Discard, or Priority.
Tap7. Send to send the message and exit this
screen.
To receive emails:
If you have not set up your email account to
automatically receive emails, but would like to
read your recent mails:
Tap the Email icon1. .
Tap the email account you want to open.2.
Tap the options icon3. .
Tap4. Send/Receive.
To delete multiple emails:
Tap the Email icon1. .
Tap the email account you want to open.2.
Tap to select the emails you want to3.
delete.
NOTE: To select all emails, tap the
options icon →Select all.
Tap the options icon4. .
Tap5. Delete.
To delete an email:
Tap the Email icon1. .
Tap the email account you want to open.2.
Tap to select the email you want to delete.3.
Tap the Options icon4. .
Tap5. Delete.

14
Keypad
To enter a letter in upper case:
To enter a letter in upper case, tap the up
arrow icon .
To enter all letters in upper case, tap and hold
the up arrow icon .
To revert to lower case letters, tap the up
arrow icon again.
To use numbers or symbols:
To switch to numbers and symbols tap the
123 icon .
To switch to the alphabet, tap the ABC icon
.
To view more symbols:
Tap the ALT icon while the numbers and
symbols keypad appears.
To close the QWERTY keypad:
Swipe your finger downwards through the R
and Tkeys on the on-screen keypad.
To change to different alphabets:
Tap and hold individual keys to type
multi-language text. For example, tapping
and holding the Okey provides the following
choices:
O Ò Ó Ô Õ Ö
ɶ
Ø

15
Phone/Contacts
To find a phone number when dialing:
Tap the Phone icon1. .
Dial the number you want to call. A list of2.
potential matches appears on the screen.
Tap the appropriate number from the list,3.
and then tap Call.
To add a new contact:
Tap the Contacts icon and then tap Add
contact.
You can add a picture, ringtone, birthday,
email, and so on to personalize your contact.
NOTE: To add pictures, ringtone,
birthday, and so on, the contact must be
stored in the phone.
To check voicemail:
Tap the Phone icon1. .
Tap and hold2. 1.
Follow the voice prompts to check your3.
voicemail.
To store contacts to the SIM card:
NOTE: Your contacts are stored to the
phone memory by default.
Tap the Contacts icon1. .
Tap the Options icon2. .
Tap3. Settings→New entry storage→SIM.
To assign a picture to your contacts:
NOTE: Pictures can be assigned only to
contacts stored in the phone.
Tap the Contacts icon1. .
Tap to select the contact you want to2.
assign a picture to.
Tap3. Edit contact→Add icon.
Tap either4. Insert new picture (to assign
an image stored on the phone) or Take
camera picture.
Tap5. Save.

16
To edit a contact:
Tap the Contacts icon1. .
Tap to select a contact from the list.2.
Tap3. Edit.
Make the required changes and then tap4.
Save.
To call a contact:
Tap the Contacts icon1. .
Tap to select the contact you want to call.2.
Tap the3. icon.
To check your call log:
Tap the Phone icon →Call log icon .
To call a contact from your favorites:
Tap the Phone icon1. .
Tap the Favorites icon2. .
Tap the contact you want to call from the3.
favorites list.
To add a contact to your favorites:
Tap the Phone book icon1. .
Tap the Favorites icon2. .
Tap3. Add favorite.
Tap to select a contact to add to your4.
favorites.
To delete a contact:
Tap the Contacts icon1. .
Tap to hold the contact you want to2.
delete.
Tap3. Delete contact.

17
Search
To search on the phone or the internet:
Enter the search criteria in the Search widget
to search for content in your phone or on the
Internet.
Messaging
To send a new text message:
Tap the Messaging icon1. from the
Favorites panel.
Tap2. New message.
Tap the3. icon to open contacts and
select the contact you want to send a
message to. Or, to enter the number
directly, tap To.
Type your message.4.
Tap5. Send.

18
To switch your text message view:
There are two different methods to view
messages: Message view and Conversation
view.
In the Conversation View screen, messages
are listed as grouped conversation or
message threads that are sent to and received
from a contact.
In the Message View screen, messages can be
sorted according message folders.
Tap the Messaging icon1. .
Tap the Options icon2. .
In the menu that appears, tap3.
Conversation view or Message view.
To access message folders:
The messaging application has several folders
that are preloaded (for example Inbox, Sent,
Draft, Outbox, and SimCard).
Tap the Messaging icon1. .
Tap the Options icon2. →Message view.
Once in Message view, tap the Options3.
icon , and select Folder view.
Select the folder you want to view.4.
To save or add information to your message:
To save a draft message, capture and insert
a photo, video, or other while in a message,
tap the Options icon and then make your
selection.

19
Camera/Video Capture
To launch the camera:
Press and hold the camera button to launch
the camera.
To capture an image:
Press the camera button halfway to auto1.
focus on the image.
Once the image is in focus, press the2.
camera button fully to capture the image.
To record a video:
Open the camera application, and tap the1.
video icon .
Press the camera button to start capturing2.
the video.
Press the camera button again to stop3.
capturing the video.
Corning’s Gorilla Glass
Your phone display is protected with a
product made by Corning known as Gorilla
Glass, which is a unique glass composition
that is strong, durable, and scratch resistant.

20
Information in this document is subject to
change without notice.
© 2010 Dell Inc. All rights reserved.
Reproduction of these materials in any
manner whatsoever without the written
permission of Dell Inc. is strictly forbidden.
Trademarks used in this text: Dell™ and
the DELL logo are trademarks of Dell Inc.
Bluetooth®is a registered trademark owned
by Bluetooth SIG, Inc. and is used by Dell
under license.
Rev. A00
Other manuals for Aero
3
Table of contents
Other Dell Cell Phone manuals

Dell
Dell Mobile Mini 3iW User manual

Dell
Dell Venue Pro User manual

Dell
Dell Aero User manual

Dell
Dell Lightning User manual

Dell
Dell Streak Pro GS01 User manual

Dell
Dell Mini 3ix User manual

Dell
Dell Venue User manual

Dell
Dell Streak SoftBank 001DL User manual

Dell
Dell Aero User manual

Dell
Dell Mobile Beacon User manual