Communications—Wireless LAN...........................................................................................................................28
Communications—Bluetooth................................................................................................................................. 28
Security...................................................................................................................................................................28
Environmental.........................................................................................................................................................29
Software................................................................................................................................................................. 29
Service and support................................................................................................................................................29
4 Detailed engineering specifications...................................................................................... 30
Dimensions and weight.......................................................................................................................................... 30
Product dimensions and weight.......................................................................................................................30
Packaging dimensions and weight.................................................................................................................. 30
Mounting dimensions.......................................................................................................................................30
VESA mounting dimensions............................................................................................................................. 30
Environmental and operating conditions................................................................................................................30
Environmental conditions.................................................................................................................................31
Operating conditions........................................................................................................................................31
Power......................................................................................................................................................................31
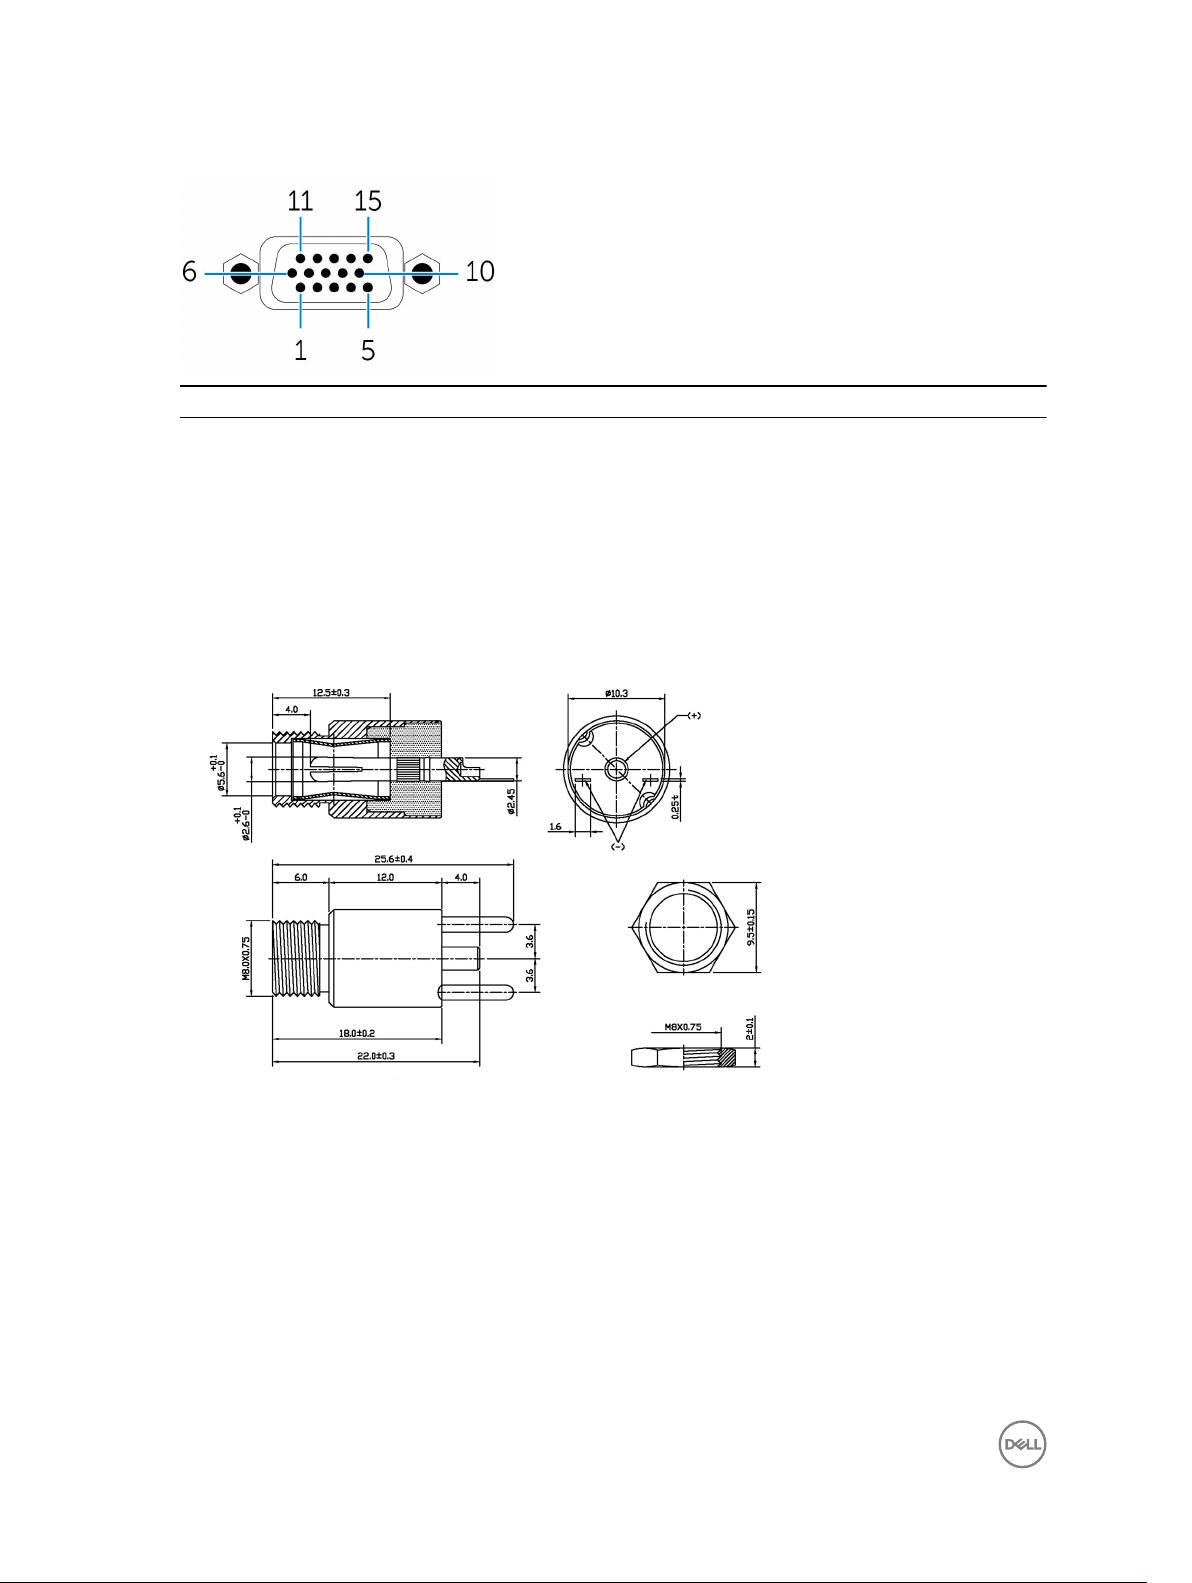
Power adaptor (optional)................................................................................................................................. 31
3.0 V CMOS coin-cell battery........................................................................................................................... 32
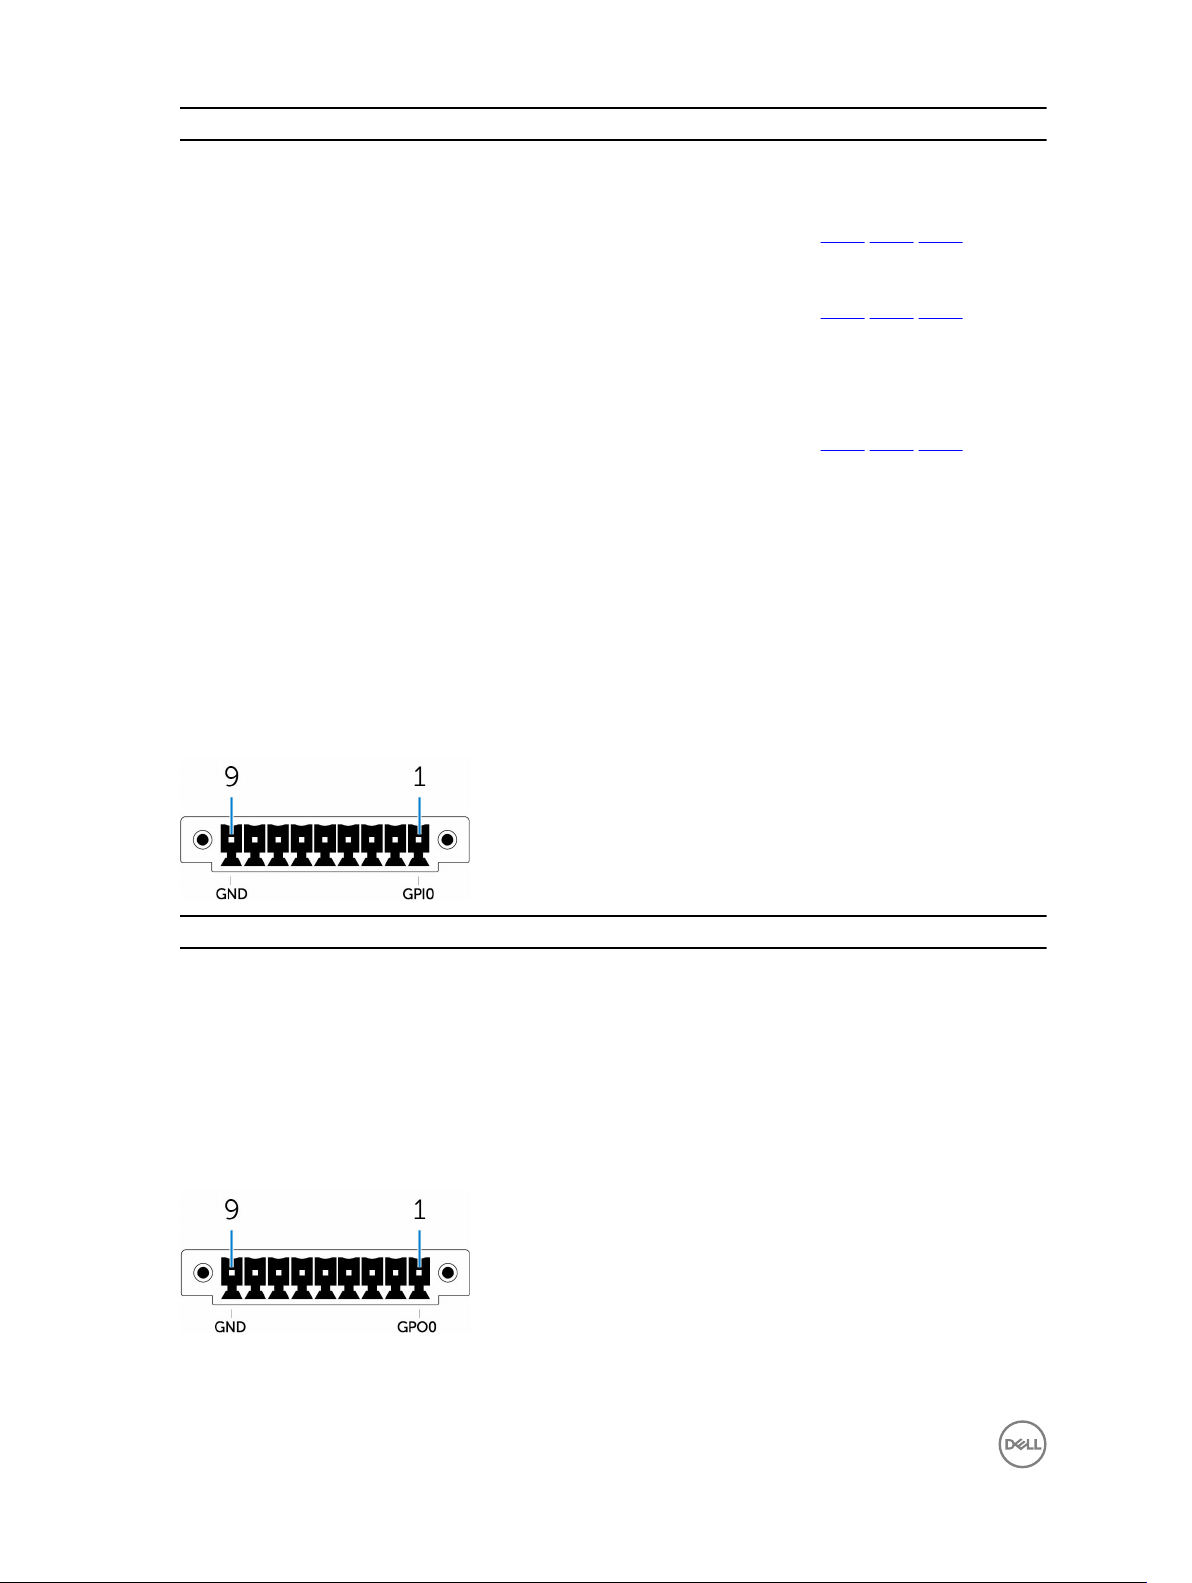
Remote power connector.................................................................................................................................32
Communications—Ethernet................................................................................................................................... 33
Communications—Wireless WAN......................................................................................................................... 33
Wireless WAN DW5812/DW5813 specifications............................................................................................. 33
DW5580 specifications.....................................................................................................................................34
Communications—WWAN antenna................................................................................................................ 35
Communications—Wireless LAN...........................................................................................................................38
Communications—WLAN antenna..................................................................................................................40
Communications—Antenna 4-in-1......................................................................................................................... 41
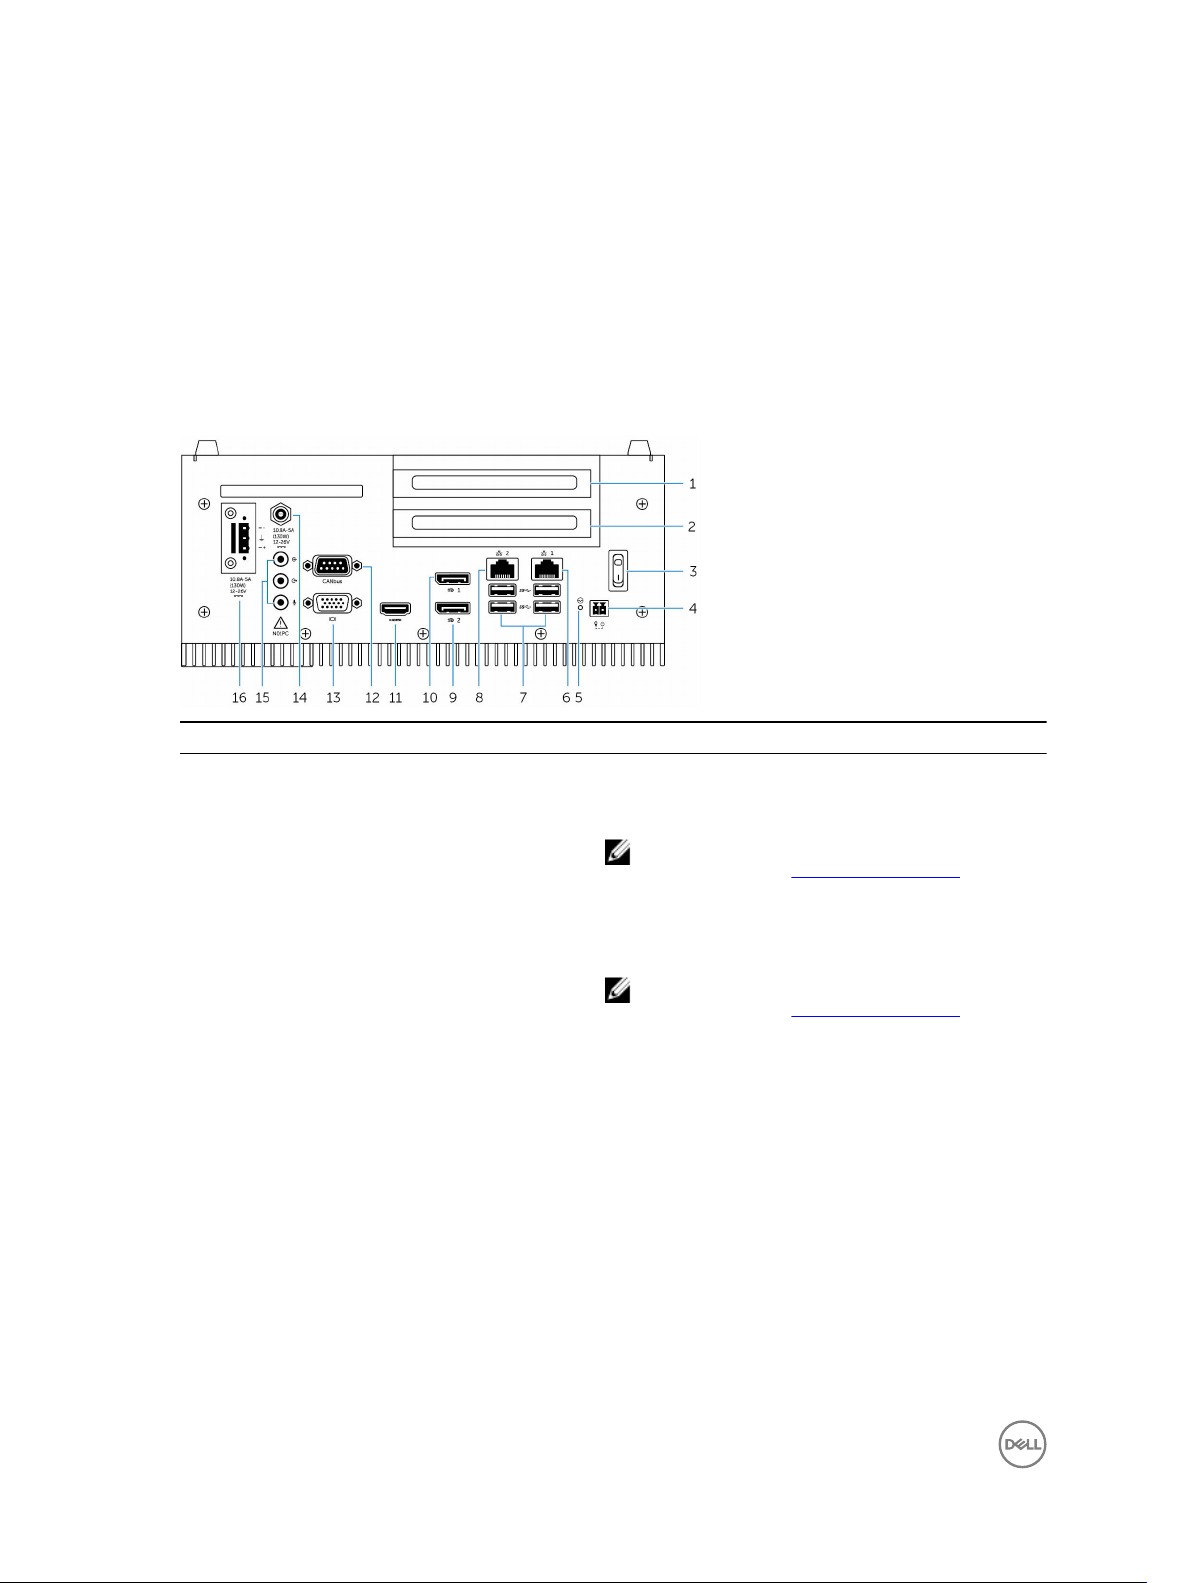
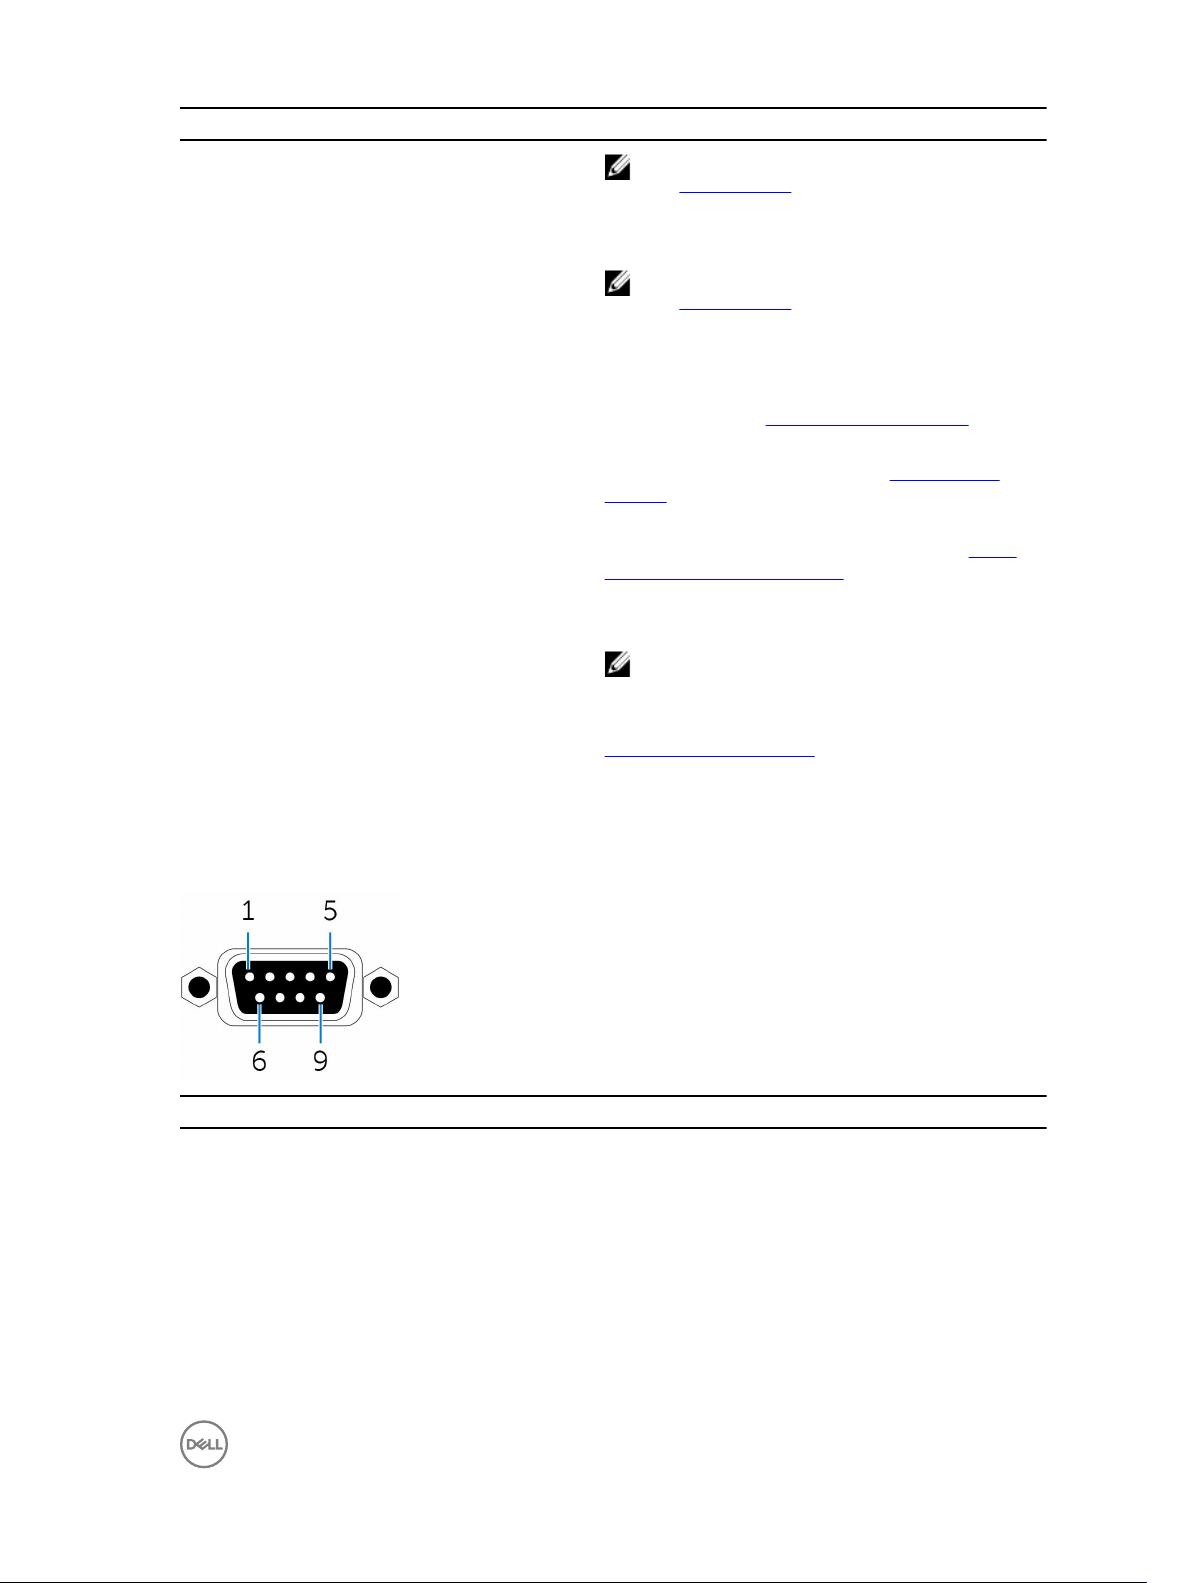
Communications—Serial ports.............................................................................................................................. 43
Graphics..................................................................................................................................................................43
PCI/PCIe..................................................................................................................................................................44
Hard drives—HDD.................................................................................................................................................. 44
Hard drives—SSD...................................................................................................................................................45
CANBus port........................................................................................................................................................... 45
BIOS defaults..........................................................................................................................................................46
General.............................................................................................................................................................46
System configuration (BIOS level 1).................................................................................................................47
Video.................................................................................................................................................................48
Security (BIOS level 1)......................................................................................................................................48
Secure boot......................................................................................................................................................49
Intel software guard extensions...................................................................................................................... 49
Performance.....................................................................................................................................................50
Power management......................................................................................................................................... 50
POST behavior..................................................................................................................................................50
4