manuals.online logo
Brands
  1. Home
  2. •
  3. Brands
  4. •
  5. Dell
  6. •
  7. Laptop
  8. •
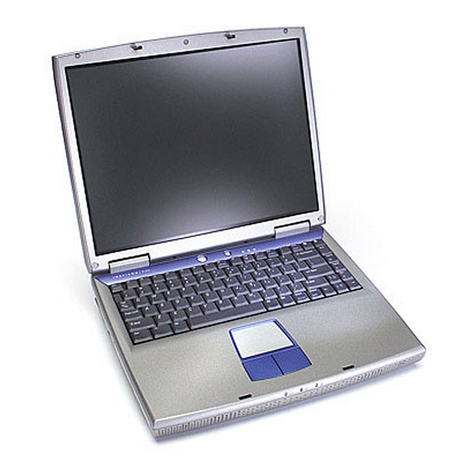
  9. Dell Inspiron 2500 User manual

Dell Inspiron 2500 User manual

Other manuals for Inspiron 2500

4

Other Dell Laptop manuals

Dell Inspiron 8000 User manual

Dell

Dell Inspiron 8000 User manual

Dell Latitude E6540 User manual

Dell

Dell Latitude E6540 User manual

Dell Vostro 3350 User manual

Dell

Dell Vostro 3350 User manual

Dell Inspiron 3800 User manual

Dell

Dell Inspiron 3800 User manual

Dell Inspiron M770H User manual

Dell

Dell Inspiron M770H User manual

Dell 7330 User manual

Dell

Dell 7330 User manual

Dell Studio 1557 User manual

Dell

Dell Studio 1557 User manual

Dell P93F001 User manual

Dell

Dell P93F001 User manual

Dell NOT22106 User manual

Dell

Dell NOT22106 User manual

Dell G3 15 3500 User manual

Dell

Dell G3 15 3500 User manual

Dell Latitude 5300 User manual

Dell

Dell Latitude 5300 User manual

Dell P33S001 User manual

Dell

Dell P33S001 User manual

Dell Inspiron 14 3000 Series User manual

Dell

Dell Inspiron 14 3000 Series User manual

Dell Inspiron 14 5000 Series User manual

Dell

Dell Inspiron 14 5000 Series User manual

Dell NOT20344 Operation and maintenance manual

Dell

Dell NOT20344 Operation and maintenance manual

Dell Vostro 5502 User manual

Dell

Dell Vostro 5502 User manual

Dell Inspiron 14 5458 User manual

Dell

Dell Inspiron 14 5458 User manual

Dell Latitude 9430 Operation and maintenance manual

Dell

Dell Latitude 9430 Operation and maintenance manual

Dell Vostro 3481 User guide

Dell

Dell Vostro 3481 User guide

Dell Inspiron 13 User manual

Dell

Dell Inspiron 13 User manual

Dell Latitude E5430 Owner's manual

Dell

Dell Latitude E5430 Owner's manual

Dell Vostro 3550 User manual

Dell

Dell Vostro 3550 User manual

Dell Latitude 3540 User manual

Dell

Dell Latitude 3540 User manual

Dell Vostro 5460 User manual

Dell

Dell Vostro 5460 User manual

Popular Laptop manuals by other brands

EUROCOM ARMADILLO 2 W840AU Service manual

EUROCOM

EUROCOM ARMADILLO 2 W840AU Service manual

HP EliteBook 8570p Maintenance and service guide

HP

HP EliteBook 8570p Maintenance and service guide

Toshiba L300-EZ1522 Specifications

Toshiba

Toshiba L300-EZ1522 Specifications

HP Compaq 6520s Maintenance and service guide

HP

HP Compaq 6520s Maintenance and service guide

Lenovo ThinkPad T530 null

Lenovo

Lenovo ThinkPad T530 null

IBM THINKPAD T41 - Warranty user manual

IBM

IBM THINKPAD T41 - Warranty user manual

Lenovo ThinkPad X1 Carbon user guide

Lenovo

Lenovo ThinkPad X1 Carbon user guide

Lenovo ThinkPad T400s Ghid de service şi depanare

Lenovo

Lenovo ThinkPad T400s Ghid de service şi depanare

Toshiba TE2000 user manual

Toshiba

Toshiba TE2000 user manual

Acer SP514-51N user manual

Acer

Acer SP514-51N user manual

Fujitsu P1620 - LifeBook - Core 2 Duo 1.2 GHz Getting started
Fujitsu

Fujitsu P1620 - LifeBook - Core 2 Duo 1.2 GHz Getting started
IBM ThinkPad 240 Quick reference guide

IBM

IBM ThinkPad 240 Quick reference guide

Clevo D400P Service manual

Clevo

Clevo D400P Service manual

HP EliteBook 840r G4 Maintenance and service guide

HP

HP EliteBook 840r G4 Maintenance and service guide

Clevo NL51CU Service manual

Clevo

Clevo NL51CU Service manual

Toshiba R700-S1320 Specifications

Toshiba

Toshiba R700-S1320 Specifications

Lenovo ThinkPad 310D reference guide

Lenovo

Lenovo ThinkPad 310D reference guide

Sony PCG-F801A user guide

Sony

Sony PCG-F801A user guide

manuals.online logo
manuals.online logoBrands
  • About & Mission
  • Contact us
  • Privacy Policy
  • Terms and Conditions

Copyright 2025 Manuals.Online. All Rights Reserved.

Thank you for purchasing this Factory Service
Manual CD/DVD from servicemanuals4u.com.
Please check out our eBay auctions for more great
deals on Factory Service Manuals:
servicemanuals4u
Information in this document is subject to change without notice.
© 2001 Dell Computer Corporation. All rights reserved.
Reproduction in any manner whatsoever without the written permission of Dell
Computer Corporation is strictly forbidden.
Dell, the DELL logo, and Inspiron are trademarks of Dell Computer Corporation;
Microsoft and Windows are registered trademarks of Microsoft Corporation. Dell
disclaims proprietary interest in the marks and names of others.
September 001
es informations contenues dans ce document sont sujettes à modification
sans préavis.
© 2001 Dell Computer Corporation. Tous droits réservés.
Toute reproduction sous quelque forme que ce soit sans l'autorisation écrite
de Dell Computer Corporation est strictement interdite.
Dell, le logo DELL et Inspiron sont des marques de Dell Computer Corporation;
Microsoft et Windows sont des marques déposées de Microsoft Corporation.
Dell dénie tout intérêt propriétaire aux marques et noms commerciaux autres
que les siens.
Septembre 001
Irrtümer und technische Änderungen vorbehalten.
© 2001 Dell Computer Corporation. Alle Rechte vorbehalten.
Nachdrucke jeglicher Art ohne die vorherige schriftliche Genehmigung der Dell
Computer Corporation sind strengstens untersagt.
Dell, das DELL-Logo und Inspiron sind Marken der Dell Computer Corporation;
Microsoft und Windows sind eingetragene Marken der Microsoft Corporation. Dell
verzichtet auf alle Besitzrechte an Marken und Handelsbezeichnungen, die nicht ihr
Eigentum sind.
September 001
e informazioni contenute nel presente documento sono soggette a modifiche
senza preavviso.
© 2001 Dell Computer Corporation. Tutti i diritti riservati.
È severamente vietata la riproduzione, con qualsiasi strumento, senza
l'autorizzazione scritta di Dell Computer Corporation.
Dell, il logo DELL e Inspiron sono marchi di fabbrica di Dell Computer
Corporation; Microsoft e Windows sono marchi depositati di Microsoft
Corporation. Dell nega qualsiasi partecipazione di proprietà relativa a marchi
diversi da quelli di sua proprietà.
Settembre 001
a información contenida en este documento puede modificarse sin
previo aviso.
© 2001 Dell Computer Corporation. Reservados todos los derechos.
Queda estrictamente prohibida la reproducción de este documento de cualquier
forma sin la autorización por escrito de Dell Computer Corporation.
Dell, el logotipo de DELL e Inspiron son marcas comerciales de Dell Computer
Corporation; Microsoft y Windows son marcas registradas de Microsoft
Corporation. Dell renuncia a cualquier interés sobre la propiedad de marcas
y nombres comerciales que no sean los suyos.
Septiembre de 001
P/N 0J704 Rev. AOO
Printed in the U.S.A.
Dell™Inspiron™
Start Here
Commencer ici
Zum Einstieg
Procedure preliminari
Comience aquí
dfold
00J704 A00
What's Next?
See “Setting Up” in the Dell Solutions
Guide for additional setup instructions,
including how to connect a printer.
La suite ?
Pour plus d'instructions sur la
configuration, y compris sur le
branchement d'une imprimante,
reporte vous au chapitre
«
Configuration
»
du Guide
de Solutions Dell.
Wie geht es weiter?
Weitere Setup-Anweisungen, . B. für
das Anschließen eines Druckers, finden
Sie unter „Einrichten“ im Dell-
Lösungshandbuch.
Ulteriori procedure
Consultare “Configura ione ini iale”
nella Guida alle soluzioni di Dell per
istru ioni di configura ione aggiuntive,
tra cui la procedura di collegamento di
una stampante.
¿Qué viene ahora?
Consulte la sección de configuración
de la Guía de soluciones de Dell para
obtener instrucciones de configuración
adicionales, incluida cómo conectar
una impresora.
Finding nswers
Press this button to find support and
educational resources that Dell has
installed on your computer, including
the Dell Tell Me How help file.
If your computer is running the
Microsoft®Windows®XP operating
system, view the tour of Windows XP
for instructions and an overview of
new features.
Chercher des réponses
Appuye sur ce bouton pour accéder
aux ressources de support et de
formation que Dell a installées sur
votre ordinateur, y compris le fichier
d'aide Procédure.
Si votre ordinateur utilise le système
d'exploitation Microsoft®Windows®XP,
exécute la présentation de Windows
XP pour obtenir des instructions et une
vue d'ensemble des nouvelles
fonctionnalités.
ntworten finden
Drücken Sie auf diese Taste, um
auf Supportinformationen und
Lernprogramme u ugreifen, die von
Dell auf dem Computer installiert
wurden. Auf diesem Wege können
Sie auch die Hilfedatei Anleitungen
abrufen.
Ist auf dem Computer das
Betriebssystem Microsoft®
Windows®XP installiert, öffnen
Sie die Windows XP-Tour, in der
Sie Anleitungen und eine Übersicht
über neue Funktionen finden.
Risoluzione dei problemi
Premere questo pulsante per accedere
a risorse didattiche e di supporto
installate sul computer da Dell, tra
cui il file della guida di Dell Istruzioni
e procedure.
Se sul computer è in esecu ione
il sistema operativo Microsoft®
Windows®XP, avviare il tour di
Windows XP per istru ioni e
un'introdu ione alle nuove fun ioni.
Búsqueda de respuestas
Pulse este botón para encontrar la
asistencia y los recursos educativos
que Dell ha instalado en el ordenador,
incluyendo el archivo de ayuda de
Dell Procedi ientos.
Si el ordenador tiene el sistema
operativo Microsoft®Windows®XP,
utilice el paseo por Windows XP para
obtener instrucciones y una descripción
general de las nuevas funciones.
Swapping Modules
To swap media bay devices, use the
latch release on the bottom of the
computer. See “Setting Up” in the
Dell Solutions Guide for additional
information.
Échange de modules
Pour changer de périphérique dans la
baie de périphériques, utilise le loquet
de verrouillage situé au bas de
l'ordinateur. Pour plus d'informations,
voir
«
Configuration
»
dans le Guide de
solutions Dell.
ustauschen von Modulen
Um Geräte des Medienschachts
aus utauschen, entfernen Sie diese
mit Hilfe der Freigabeklinke an der
Unterseite des Computers. Weitere
Informationen finden Sie unter
„Einrichten“ im Lösungshandbuch
von Dell.
Sostituzione dei moduli
Per sostituire le periferiche
nell'alloggiamento dei supporti esterni,
usare il fermo di chiusura situato sotto il
computer. Consultare “Configura ione
ini iale” nella Guida alle soluzioni per
ulteriori informa ioni.
Intercambio de módulos
Para intercambiar componentes del
compartimento para dispositivos,
utilice el pestillo de liberación de la
parte inferior del ordenador. Consulte
“Configuración” en la Guía de
soluciones para obtener información
adicional.
0J704am0.qxd 9/3/2001 9:34 AM Page 1
www.dell.com |support.dell.com
2
old fo
1
If your computer has a
networking option, connect a
separately purchased network
cable to the network
connector.
NOTICE: Do not plug a
telephone cable into the
network connector.
NOTICE: If the connector has
a plastic cover, do not remove
it; your computer does not
have the internal networking
option.
Si votre ordinateur possède
une option de mise en réseau,
relie au connecteur réseau un
câble réseau acheté
séparément.
AVIS : Ne branche pas
le câble téléphonique au
connecteur réseau.
AVIS : Si le connecteur est
recouvert d'un capuchon en
plastique, votre ordinateur
n'est pas équipé d'une option
interne de mise en réseau,
il est donc inutile de le retirer.
Wenn der Computer über
eine Net werkoption
verfügt, schließen Sie ein
Net werkkabel, das Sie
getrennt erworben haben,
an den Net werkanschluss an.
VORSICHT: Schließen Sie
kein Telefonkabel an den
Net werkanschluss an.
VORSICHT: Ist der Anschluss
mit einer Kunststoffabdeckung
versehen, entfernen Sie diese
nicht. Der Computer verfügt
dann nicht über die interne
Net werkoption.
Se il computer è dotato di una
solu ione di rete, collegare al
connettore di rete un cavo di
rete acquistato separatamente.
AVVISO: non collegare un
cavo telefonico al connettore
di rete.
AVVISO: se nel connettore è
presente un inserto in plastica,
non rimuoverlo, perché
significa che il computer non
è dotato di adattatore di rete
interno.
Si su ordenador tiene una
opción de red, conecte un
cable de red adquirido
independientemente al
conector de red.
AVISO: No conecte una línea
telefónica al conector de red.
AVISO: Si el conector tiene
una tapa de plástico, no la
retire; eso significa que su
ordenador no dispone de
una opción de red interna.
3
Open the display, and press the
power button to turn on the
computer. Follow the prompts
on the screen to complete the
operating system setup.
HINT: The touch pad will not
work when you first start the
computer. Press any key when
prompted.
Ouvre l'écran et appuye
sur le bouton d'alimentation
pour mettre l'ordinateur sous
tension. Suive les invites
affichées à l'écran pour
terminer l'installation du
système d'exploitation.
CONSEIL : Le touchpad
ne fonctionne pas lors du
premier démarrage de
l'ordinateur. À l'invite,
appuye sur une touche.
Öffnen Sie den Bildschirm,
und drücken Sie den
Net schalter, um den
Computer ein uschalten.
Folgen Sie den Anweisungen
auf dem Bildschirm, um das
Betriebssystem-Setup
ab uschließen.
HINWEIS: Wenn Sie den
Computer das erste Mal
starten, können Sie das Touch-
Pad nicht verwenden. Drücken
Sie eine beliebige Taste, wenn
Sie da u aufgefordert werden.
Sollevare lo schermo e premere
il pulsante di accensione per
accendere il computer. Seguire
le istru ioni visuali ate per
completare la configura ione
del sistema operativo.
SUGGERIMENTO: il
touchpad non fun ionerà
al primo avvio del computer.
Premere un tasto qualsiasi
quando richiesto.
Abra la pantalla y presione el
botón de alimentación para
encender el ordenador. Siga
las instrucciones que aparecen
en la pantalla para completar
la configuración del sistema
operativo.
SUGERENCIA: La
almohadilla de contacto no
funciona cuando se inicia el
ordenador por primera ve .
Presione cualquier tecla
cuando se le solicite.
4
Connect the AC adapter. Connecte l'adaptateur
CA/CC. Schließen Sie den
Net adapter an. Consente di collegare
l’adattatore c.a. al computer. Conecte el adaptador de CA.
1
2
3
4
If your computer has an
internal modem, connect the
telephone cable to the modem
connector and connect the
other end of the cable to a
telephone wall jack.
NOTICE: If the connector has
a plastic cover, do not remove
it; your computer does not
have an internal modem.
Si votre ordinateur dispose
d'un modem interne, raccorde
le câble téléphonique au
connecteur du modem et
l'autre extrémité à la prise
jack murale du téléphone.
AVIS : Si le connecteur est
recouvert d'un capuchon en
plastique, votre ordinateur
n'est pas équipé d'un modem
interne, il est donc inutile de
le retirer.
Wenn Ihr Computer mit
einem internen Modem
ausgestattet ist, schließen
Sie das Telefonkabel an den
Modemanschluss und das
andere Kabelende an eine
Telefonbuchse an.
VORSICHT: Ist der Anschluss
mit einer Kunststoffabdeckung
versehen, entfernen Sie diese
nicht. Der Computer verfügt
dann nicht über ein internes
Modem.
Se il computer è dotato di
modem interno, collegare
un'estremità del cavo
telefonico al connettore del
modem e l'altra estremità allo
spinotto a muro della linea
telefonica.
AVVISO: se nel connettore è
presente un inserto in plastica,
non rimuoverlo, perché
significa che il computer non
è dotato di modem interno.
Si su ordenador tiene un
módem interno, conecte el
cable de teléfono al conector
de módem y el otro extremo
del cable a un enchufe de
teléfono de pared.
AVISO: Si el conector tiene
una tapa de plástico, no la
retire; eso significa que su
ordenador no dispone de un
módem interno.
Dell™Inspiron™
0J704am0.qxd 9/3/2001 9:35 AM Page 2