Delta Core Pack TYXAL+ User manual

www.deltadore.com
Pack TYXAL+
EN Quick installation guide

- 2 -
DMB TYXAL+
CS 8000 TYXAL+
CLT 8000
TYXAL+
TL 2000
TYXAL+
Thank you for purchasing this DELTA DORE alarm pack.
This quick installation guide provides you with the basic installation instructions for your products.
Refer to the system guide for an advanced installation of your Pack.
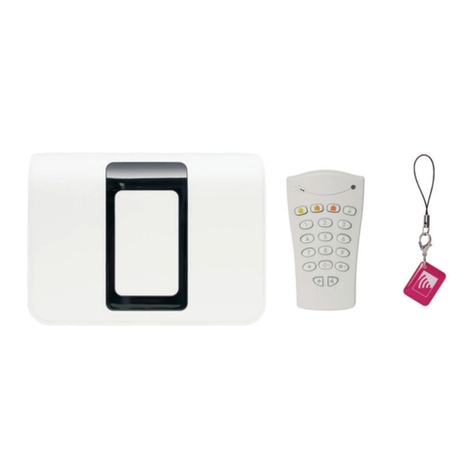
The Pack TYXAL+ comprises:
- 1 CS 8000 TYXAL+ siren control unit
- 2 TL 2000 TYXAL+ remote controls
- 2 DMB TYXAL+ motion detectors
- 1 CLT 8000 TYXAL+ touch screen keypad
Siren control unit
The control unit is the heart of the system
and manages all the information ex-
changed between products.
It sets off the indoor siren in the event of an
alarm.
4-button remote controls
These enable the system to be activated or
deactivated totally or by zone.
Two buttons (1 and 2) can be configured for
control of the alarm by zone, the triggering
of a discreet or audible emergency alarm
or control of control systems (e.g. garage
door).
Touch screen keypad
It is an essential component and is used for
all the control actions of the installation.
With its access code, it enables the system
to be activated or deactivated totally or by
zone. Wall-mounted, it informs you of the
system's status.
It reads the last events occurring, shows
the indoor (measured by the keypad) and
outdoor temperature (if an outdoor siren
is associated with the control unit) and is
used to personalise the system.
Motion detectors
Wall-mounted, they detect any person
moving in the room where they are
installed and report this to the control unit.
The "standard" lens can be replaced with
an "animal" lens (supplied with the
product).
R&TTE 1999/5/CE

- 3 -
Activation: main steps
Installing and mounting the products
starting with:
- the CS 8000 TYXAL+ siren control unit
- the CLT 8000 TYXAL+ touch screen keypad
- the DMB TYXAL+ motion detectors
The TL 2000 TYXAL+ remote controls can be programmed (functions of buttons 1 and 2) and associated with the
control of control systems
Adding additional products (if necessary)
Products that are not part of the Pack TYXAL+ must be associated with the system:
- intruder detectors and technical detectors,
- keypad, badge reader, remote controls, etc.,
- indoor or outdoor siren, telephone transmitter, etc.,
To do this, refer to the "Adding products" chapter of the system guide.
Personalising the installation and products (see system guide).
- Naming the products
- Managing the operating zones
- Creating installer and user access codes. We strongly recommend that you create your own code (123456 on
activation).
- Adjusting advanced settings...
For more detailed explanations, refer to the system guide.
Testing the installation
Overview of your installation
Close the alarm control unit
1
3
4
5
6
2
The products in the Pack TYXAL+ were associated in the factory
so as to make them easier to install.

- 4 -- 4 -
Installing and mounting the products
1
1.1 CS 8000 TYXAL+ control unit
• Location
- On a flat surface, with enough space all around for installation
and opening the battery cover.
- In the centre of the system and fitted in a high position to obtain
the best radio link (avoid basements).
- In an open area to obtain the best dispersion of sound for the
integrated siren.
- In a place difficult to locate by an intruder but easily accessed by
the user.
- In an area protected by an infrared motion detector.
- At least 2 metres away from any other wireless transmitter
• Mounting
ÊSeparate the parts
ËFit the mounting bracket
ÌConnect the battery unit
Lithium battery
BATTERY UNIT 2x3.6V
LSH 20
1
2
Remove protective tab Unscrew Separate the base from the rest of the si-
ren by pushing up and pulling toward you.
Separate the con-
trol unit from the
base.
Incorrect Correct
Incorrect Correct
Mark and drill holes
(A, B, C and D)
Fit the mount (screws A and B) to
the wall (do not fit screws C and D
at this point).
Fit the base back on to the mounting bracket
and secure it with the screws (C and D).
= Tamper alarm on opening. Important: do not damage this part of the
support (required for the tamper alarm). Screw back with care.
1
2
C
B
A
D
!
B
B
A
C
D

- 5 -- 5 -
1.2 CLT 8000 TYXAL+ touch screen
keypad
• Location
It is advisable to install the touch screen keypad inside near one
of the main entrances, if possible protected by an intrusion
detector (e.g. DMB TYXAL+)
The user must have easy access and it can be mounted on a wall
at a height of 1.50 m.
Avoid proximity with metal surfaces or an electrical switchboard.
Important: if the touch screen keypad is protected by a detector
(door/window or motion), you must use a delayed triggering for
the detector when activating it.
• Mounting
Ê Separate the 2
parts of the unit.
Ë Mark and drill holes D1, D2 and D3.
Mount the base using screws V1, V2 and V3.
!Do not damage or lose the rubber part C
(required for the tamper alarm).
1
2
!
UP
HAUT
!
C
12 3
V1
V2
V3
D3D2
D1
Lithium battery
3 x LS 14500 3,6 V
~1,50 m
Ø max = 3 mm
Ê Fit the battery unit, observing the right
polarity.
Close and lock the unit.

- 6 -
Installing and mounting the products
1
1.3 DMB TYXAL+ motion detector
DMB TYXAL+ uses infrared (heat) to detect any moving presence in the room.
It has 2 removable lenses:
- no. 1: standard (fitted on the product supplied).
- no. 2: animal immunity (does not detect animals of a certain size,
or household appliances such as robot vacuum cleaners).
• Location
The motion detector must preferably be placed in a corner:
- prevent any source of heat or motion of a hot body
nearby (convector, fireplace, ...),
- the field of detection must be clear of any obstacles (curtain, cupboard, etc.),
- the detector must not be pointing at an opening to the outside (window),
- you can cross the beams of 2 detectors,
- the detector must be installed between 2.20 m and 2.40 m from the floor.
For a greater height, use a RO DMB ball joint
(unless with the animal immunity lens).
• Field of detection/Restrictions
The fields of detection below are given for a temperature of 19°C and person of average body size.
• Animal immunity
Zone not authorised for animals
Zone authorised for animals ≤than 10 kg
Zone authorised for animals (see details A1, A2, A3)
If there are several animals, add their weights together.
Example 1: a French bulldog weighing 15 kg and 25 cm tall is in zone A1. It is a short coated dog, and will not be detected.
Example 2: a Doberman weighing 30 kg and 50 cm tall is in zone A2. It is short coated dog, and will be detected.
No.2
10 m8 m6 m4 m2 m0 m
0,6 m
1,6 m
2,3 m
≤ 10 Kg
30 kg20 kg10 kg0 kg
0 cm
10 cm
20 cm
30 cm
40 cm
50 cm
60 cm
40 kg 50 kg
A1
A2 A3 A1 A2 A3
Long coated ✔✔✔
Medium coated
✔ ✔ -
Short coated ✔--
Fur authorised zone A
1 m mini
Side view
0,5m 4 m 7 m 12 m
2,30m
H
12m10m8m6m4m2m0m
0m
2m
4m
6m
2m
4m
6m
90°
Side view
Top view Top view
2m 4 m 7 m 10 m
2,30m
H
10 m8 m6 m4 m2 m0 m
0 m
2 m
4 m
6 m
2 m
4 m
6 m
90°
No.1 No.2

- 7 -
• Mounting
- Open the unit
- Mark and drill the holes according to the location
of the detector (see below A, B, Cor D)
- Mount it on the wall
• Change the lens
Example: you want to replace the standard lens by the "animal"
lens.
Push the stops to lift off and remove the lens.
Fit the new lens.
Be careful not to touch the sensor.
• Activation
Insert the battery, observing the right polarity.
Check that the rubber part is present before closing up the
detector.
5
6
4
13
2
n°1 n°2
!
Lithium Battery - AA
LS 17500 - 3.6 V
2,20 2,50 m
✔
✔
> 2,50 m
RO DMB
✔
Do not use ball joint RO DMB
(P/N: 6416221) with the animal
immunity lens.
V1
V2
V3
V4
V5
V6
V7
V8
V9
V10
!
V6
V8
V9
V2
V3
V4
V1
V5
V7
V10
V2
V8
V9
ABCD
Ø max = 3 mm
V3,V7,V8 = Tamper alarm on opening.
Important: do not damage or lose the rubber part (required for
the tamper alarm).
B
123

- 8 -
Installing and mounting the products
1
1.4 Configuring a TL 2000 TYXAL+
remote control
Buttons 1 and 2 can be programmed separately.
You can therefore mix the functions.
Examples:
(1Mode A ,2Mode C );
(1Mode D ,2Mode E );
(1Mode A ,2Mode D )...
Ask your installer for the appropriate equipment if you want
openings to be controlled.
Configuring buttons 1 and 2
1 2
or
1 2
Mode A
Mode B
Mode C
Mode E
Mode D
> 5s
123
1 2
or
1 2
or
1 2
or
1 2
or
ON
... ... ...
... ...
... ...
... ...
... ...
Ê Press the
1and 2buttons simultaneously for
5 seconds until the LED changes to
orange.
Ë Press the 1or 2button.
The LED flashes.
Then, press the 1or 2button briefly as many
times as necessary, select the required operating
mode to apply: Mode A: 1 flash, Mode B:
2 flashes, ..., Mode E: 5 flashes.
Ì Press the ON button
to confirm.
The LED changes to
green.
Activa-
tion
Button 1
programmable
Button 2
programmable
LED
Deactivation
the alarm
You can activate or deactivate the alarm system with the
remote control.
Depending on the configuration defined with your installer,
buttons 1 and 2 can be programmed and have
different functions (see table opposite).
Button 1Button 2
Mode A
Alarm control by zone
ON/OFF zone 1
(e.g. Floor)
ON/OFF zone 2
(e.g. Ground floor)
Mode B
Triggering of an emergency
alarm with siren
SOS
Transmitter
without audible signalling
Mode C
Triggering of an emergency
alarm with siren
+
SOS
Transmitter call + audible alert
Mode D
Pulse control of a control
system or lighting x1
Mode E ON/OFF
ON/OFF control for lighting or
roller shutters
1
2

- 9 -
Adding additional products (if necessary)
3
Example: a telephone transmitter
ËEnter the installer code (123456, by default) and confirm with OK.
ËPress Settings, select the menu:
Installation > Products, then confirm with OK.
The alarm control unit's red LED switches on.
ÌSelect "Add", then confirm with OK.
ÍBriefly press the (T1) button on the front panel of the
transmitter.
The transmitter emits a beep when the button is pressed, then a
second beep to confirm the association.
The alarm control unit emits a beep.
Maintenance
mode
Download
Programming
Access codes
Software version
Settings
Clock
Languages
Ok
Return
Installation Installation
Zones
Door chime
Test
Initialisation
Ok
Products
Return
Add
product
Press the button of the
Return
Products
Delete
Ok
Activate/deactivate
Configure
Return
Add
Access code
XXXXXX
Ok
SOS
12
3
TYXAL TTRTC
RTC 0 03 01
Configure
Added
Return
25/11/14 12:48
SOS Settings
OFF
Enter your code
Info
Settings
My home
OFF
25/11/14 12:48
Close the alarm control unit
2
B
C
1
2
1 2
Ê Replace the cover of the siren Ë Screw in the closing screw
and replace the protective tab

- 10 -
Personalising the installation and the products
4
The CLT 8000 TYXAL+ touch screen keypad allows all the personalisation operations of the system.
The following menus can be accessed by the installer code.
The CLT 8000 TYXAL+ touch screen keypad can be used for all activation actions.
Deactivate the tamper alarm (see § Deactivating the tamper alarm, system guide) and separate it
from its wall mount.
Example: DMB TYXAL+ motion detector
• Name the products
ÊEnter the installer code (123456, by default) and confirm with OK.
ËPress Settings, select the menu:
Installation > Products > Configure, then confirm with OK.
ÌPress the button of the product to rename or select it
from the list of products by clicking on "Browse"
(see table below), then confirm with OK.
ÍOnce the product is identified, select the
"Name" menu, then confirm with OK.
ÎYou can choose a name from the list
(recommended), then a number (optional)
or personalise (Ï) the product name by entering a new name.
Confirm with OK.
• Entry timer on intrusion detectors (immediate/delayed triggering)
ÊEnter the installer code (123456, by default) and confirm with OK.
ËPress Settings, select the menu:
Installation > Products > Configure, then confirm with OK.
ÌPress the button of the product to change or select it
from the list of products by clicking on "Browse",
then confirm with OK.
ÍOnce the product is identified, select the "Entry timer" menu, then confirm with OK.
ÎSelect the type of triggering:
immediate or delayed (5 to 45 seconds), then confirm with OK.
Immediate: if a presence is detected, the alarm is immediately
triggered.
Delayed: if a presence is detected, the alarm is triggered after a
delay (set from 5 to 45 seconds) to give the user time to deac-
tivate the alarm, after entering the building (e.g. activation or
deactivation with a wall-mounted touch screen keypad).
During this time, the alarm control unit emits warning beeps.
abc def
jkl
ghi mno
tuv
pqrs wxyz
25/11/15 12:48
SOS Réglages
OFF
45
Entrance timer
Immediate >
Ok
Return
DMB 0 AD AD
Ok
Return
Tamper alarm
Name
Entrance timer Entrance timer
< 5 s >
Ok
Return
Entrance timer
< 45 s >
Ok
Return
Installation
Zones
Door chime Ok
Products
Return
OR
Name
Ok
Bedroom
Child's bedrm
Master bedrm
Return
Configure
Browse
Return
product
Press the button of the
Products
Ok
Activate/deactivate
Return
Add
Configure
PSTN transmitter
Ok
Return
Tamper alarm
Entrance timer
Name
45
Settings
Clock
Languages
Ok
Return
Installation
Ok
Access code
XXXXXX
Ok
SOS
or Browse
Configure
Ok
Return
CLT 0 54 22
DMB 0 AD AD
1
3
2
RTC 0 03 01
Number
00
Ok
Return
25/11/14 12:48
SOS Settings
OFF
Enter your code
Info Settings
My home
OFF
25/11/14 12:48

- 11 -
Testing the installation
5
Test under operating conditions
Test your installation under actual operating conditions by triggering an alarm
with each of your detectors.
During this test, you must take the “exit timer” into account to achieve effective
surveillance (up to 90 seconds).
Test the motion detectors
The motion detector stores each passage in the detection
zone for 90 seconds (whether or not the system is on).
For the test, enable the surveillance from a point where you will not be detected.
Wait for 2 minutes before entering the detection zone
(irrespective of the exit timer).
Whenever the system is activated or deactivated, the alarm control unit sends a
series of beeps indicating that an event (motion detection in this case) has
occurred. You can view this on a touch screen keypad.
To clear the event:
Press and hold the remote control's OFF button for 5 seconds.
The control unit emits beeps when pressed, then a series of beeps after 5 sec-
onds. Release.
The event is cleared.
The event can also be "cleared" through the Info menu of a CLT 8000 TYXAL+
touch screen keypad.
• If the detector is in delayed triggering mode, the control unit
will only set off the alarm after a programmed time (up to 45
seconds).
During this time, it will emit warning beeps.
• If the alarm control unit does not sound, take another look at
the installation or association of the detector.
• If the installation is equipped with a transmitter, check that the
detection triggers a call cycle to the programmed numbers.
OFF
ON
2'
Activate the
surveillance system
outside of the
detection zone
Enter the detection
zone
Wait for 2 minutes
Stop the
alarm
Beep,
Beep
Alarm control unit
sets off the siren

- 12 -
Activation date: ..................................... Name and stamp of installer: .....................................
Items of the pack:
Type Name No. or name of
zone
Immediate/delayed
triggering Comment (e.g. location)
Example:
Motion detector
DMB 0 01 02
or Corridor 1 Zone 1 or Home Delayed (30 s) Ground floor corridor
Control unit
Touch screen keypad
Remote controls
« « «
Motion detectors
« « «
Additional items:
Type Name No. or name of
zone
Immediate/delayed
triggering Comment (e.g. location)
Notes: .....................................................................................................................................................................................
.................................................................................................................................................................................................
.................................................................................................................................................................................................
.................................................................................................................................................................................................
.................................................................................................................................................................................................
.................................................................................................................................................................................................
................................................................................................................................................................................................
................................................................................................................................................................................................
..................................................................................................................................................................................................
Overview of your installation
6
Table of contents
Popular Security System manuals by other brands
Careline
Careline GO user guide
KJB Security
KJB Security C1197 user manual
Panasonic
Panasonic 4414 quick start guide

Whelen Engineering Company
Whelen Engineering Company 295HFS5 Series Installation & operating manual
DSC
DSC Power832 instruction manual
Smartwares
Smartwares HomeWizard Connect Kit installation instructions

Tunstall
Tunstall liberty300 installation manual
Waeco
Waeco PerfectView CAM26W Installation and operating instructions

NAPCO
NAPCO MAGNUM ALERT-850 operating guide

Intelligent Home
Intelligent Home DT-610 user manual
BV Security
BV Security SK-DVR-DIY-CVI quick start guide
ADEMCO
ADEMCO VISTA-32FB Programming guide

