Environmental Health and Safety | 2408 Wanda Daley Drive | Ames, IA 50011-3602 | Ph: (515) 294-5359 | www.ehs.iastate.edu
Reviewed 2019
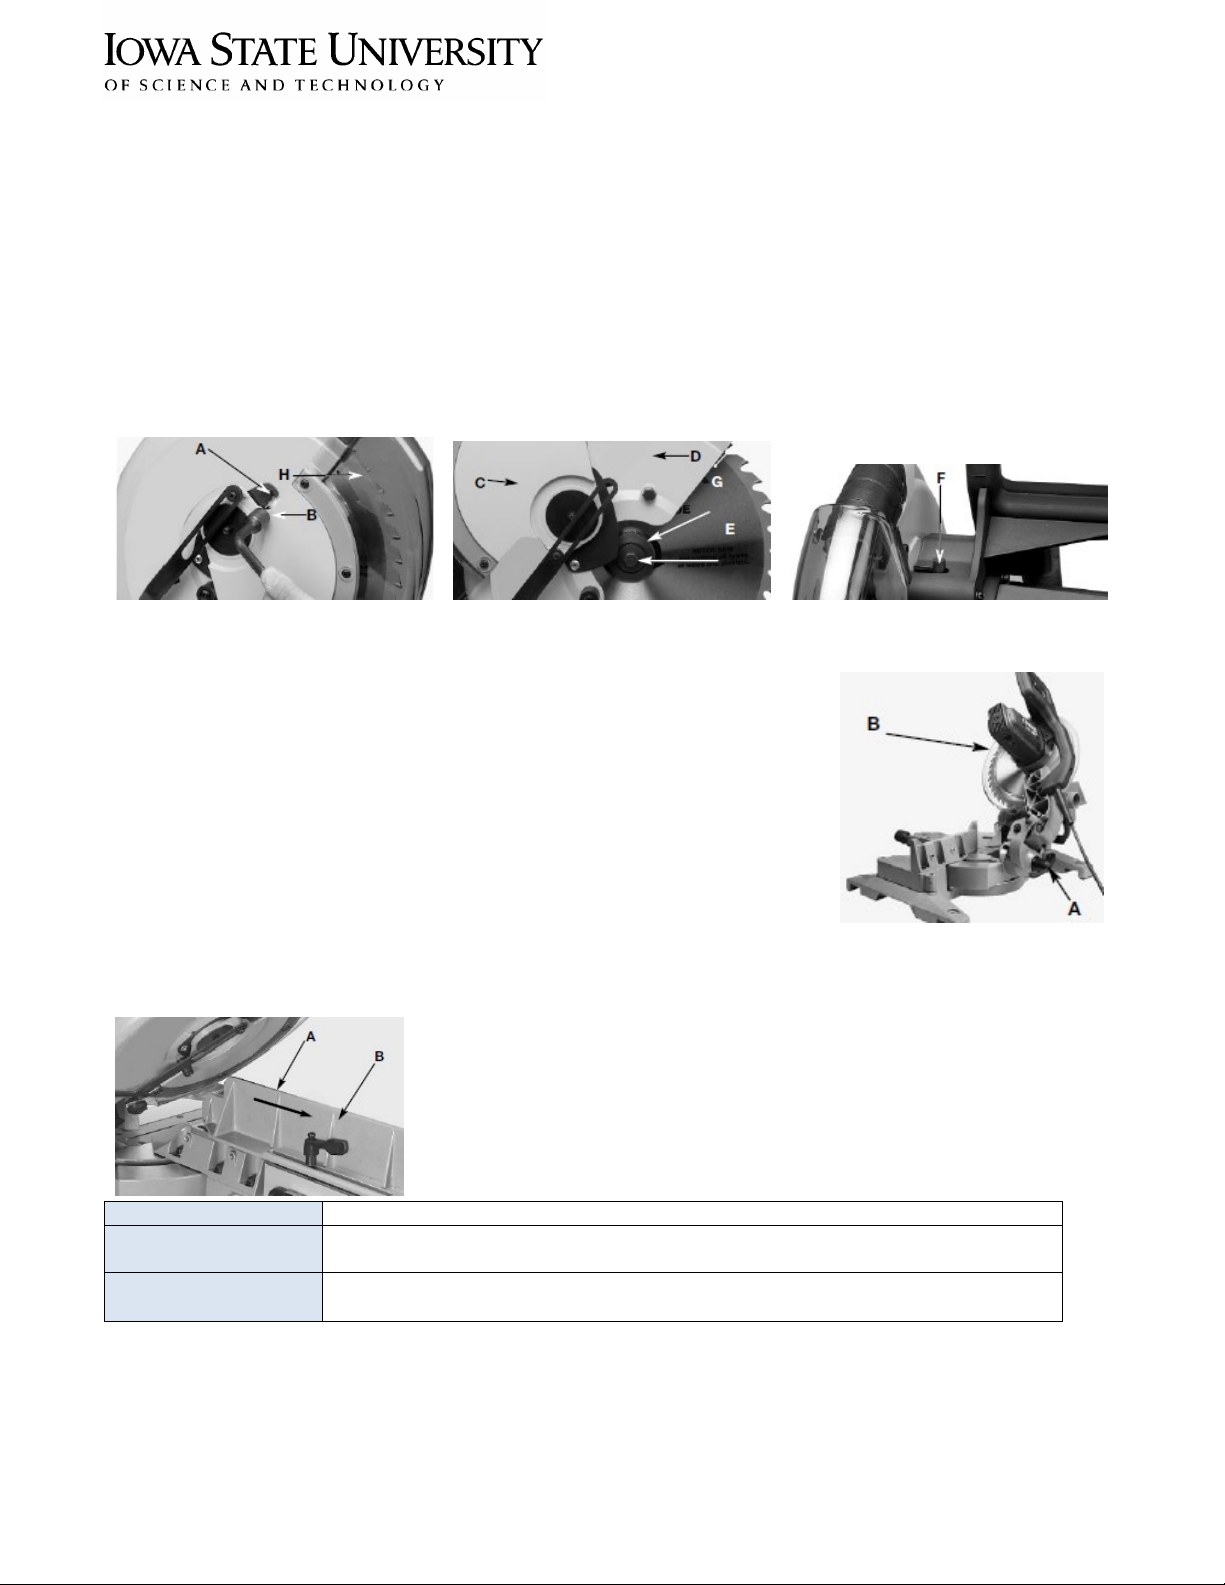
Blade Change – Performed by Authorized Personnel Only
1. DISCONNECT MACHINE FROM POWER SOURCE
2. Loosen screw (A) with wrench (B)
3. Rotate arbor cover (C) and lower guard (D) to the rear, exposing arbor screw (E)
4. Remove arbor screw (E) by turning the screw clockwise with the wrench, while at the same time,
pressing in on the arbor lock (F) to keep the arbor from turning. Remove the outside blade flange (G)
and saw blade (H)
5. Install the new saw blade, MAKING CERTAIN THE TEETH OF THE SAW BLADE ARE POINTING
DOWN AT THE FRONT, and install the outside blade flange (G)
6. Check to see that the flats on the outside blade flange are engage with the flats on the arbor shaft
7. Thread the arbor screw (E) into the saw arbor by turning the screw counterclockwise as far as possible
by hand. Then tighten arbor screw with wrench while at the same time pressing in on the arbor lock
8. Rotate arbor cover (C) and lower guard (D) to the front and tighten screw (A)
Tilting Blade for Bevel Cut
1. DISCONNECT MACHINE FROM POWER SOURCE
2. Loosen the bevel lock handle (A)
3. Tilt the cutting head (B) to the desired angle, and tighten the bevel lock
handle (A)
4. Positive stops are provided at 45⁰and 90⁰
5. A marked indicator (M) is provided on the bevel scale for cutting crown
moulding
Adjusting the Sliding Fence
1. Loosen the lock handle (B)
2. Slide the fence to the desired position
3. Tighten lock handle to secure fence
Maintenance
Only use blades that are 12” in diameter with a 1” arbor hole and are rated for
4000RPM. Use a brush or compressed air to clean the saw


