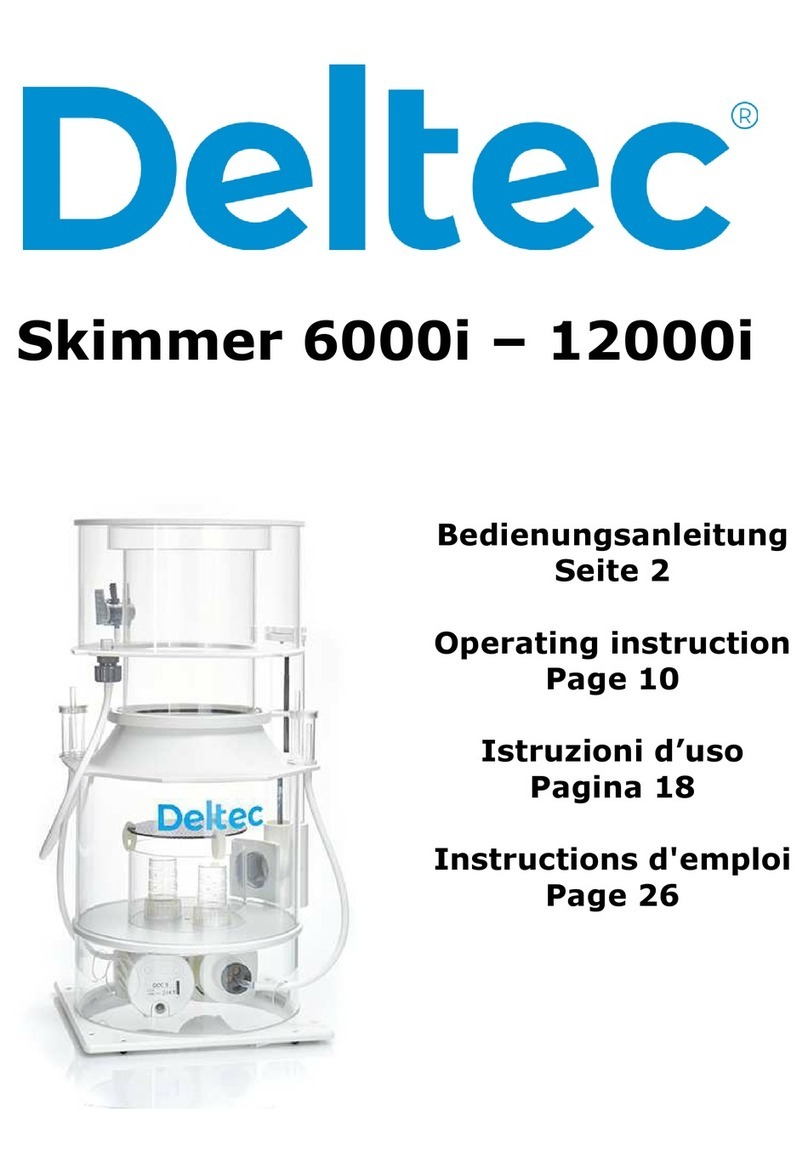
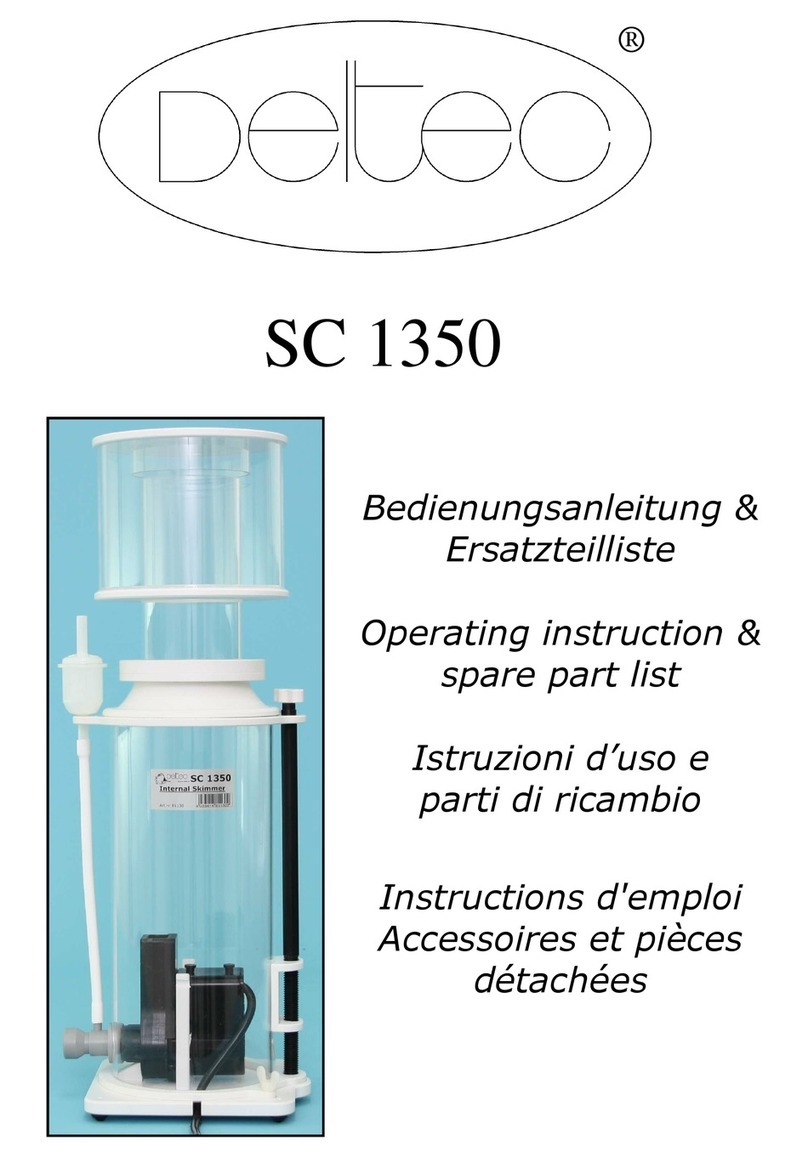
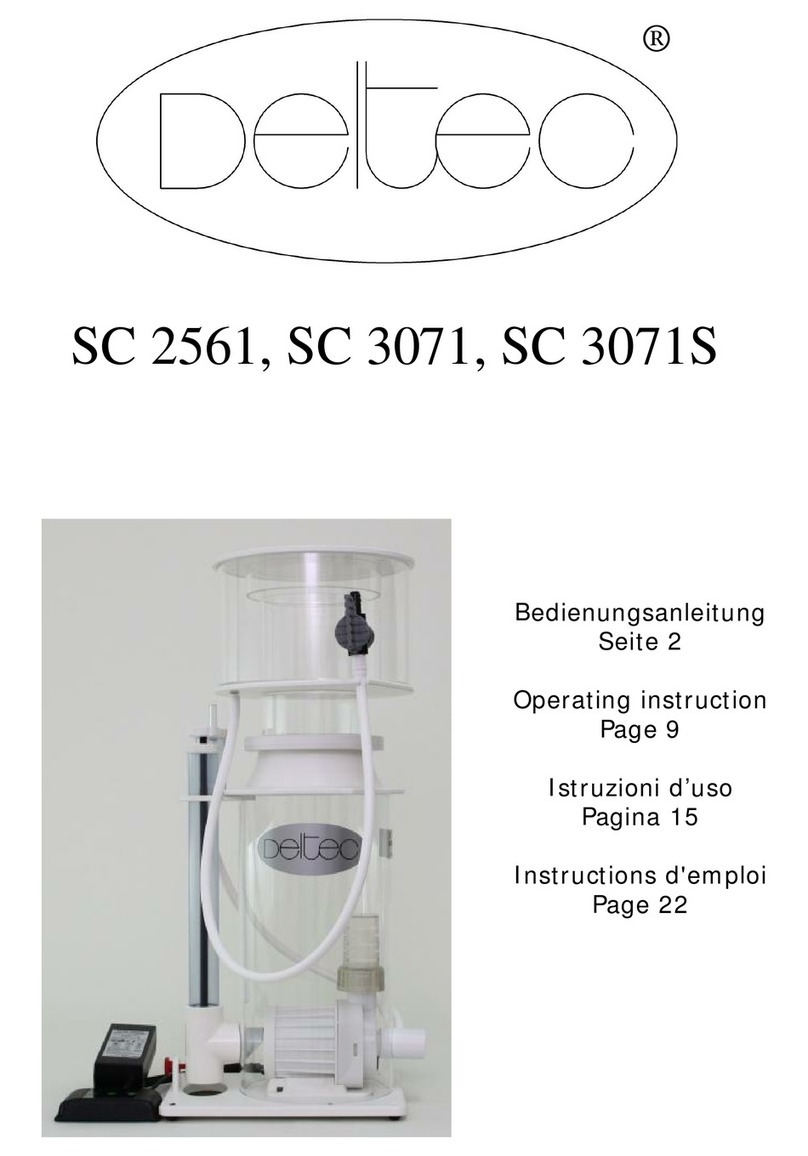
Deltec MCE 300 Guide

®
MCE 300
Bedienungsanleitung
und Ersatzteilliste
Operating instruction and
Spare parts list
Istruzioni d’uso
e parti di ricambio
Instructions d'emploi et
Accessoires et pièces
détaches
Руководство по
эксплуатации
иперечень запчастей

DE
Wichtige Sicherheitshinweise
Warnung: Zum Schutz vor Verletzungen sollten grundlegende Vorsichtsmaßnahmen und folgende Sicherheitshinweise
beachtet werden.
1) Sicherheitshinweise Lesen und befolgen
2) Gefahr: Zur Vermeidung eines elektrischen Schlages sollten alle Aquarium Geräte mit Vorsicht gehandhabt
werden. In keinem der unten aufgeführten Fälle sollte die Reparatur vom Kunden versucht werden. Das Gerät
muss zu einen autorisierten Kundendienst gebracht werden.
a) Wenn das Gerät in das Wasser fällt, NICHT danach greifen. Zuerst den Stecker aus der Netzsteckerdose ziehen
und dann das Gerät aus dem Wasser Holen. Wenn Elektroteile des Gerätes nass werden muss das Gerät sofort
ausgesteckt werden.
b) Wenn am Gerät ein abnormaler Wasseraustritt beobachtet wird, muss es sofort ausgesteckt werden.
c) Nach der Installation sollte das Gerät sorgfältig überprüft werden. Es darf nicht eingesteckt werden, wenn sich auf
Teilen, die trocken bleiben müssen, Wasser befindet.
d) Ein Gerät mit beschädigtem Kabel oder Stecker darf nicht in Betrieb genommen werden. Das gleiche gilt, wenn das
Gerät nicht richtig funktioniert, fallen gelassen oder anderweitig beschädigt wurde.
e) Um ein Nasswerden des Gerätesteckers oder der Steckdose zu vermeiden, sollten der Aquarium Unterschrank und
das Becken seitlich von der Wandsteckdose aufgestellt werden. Somit können keine Tropfen auf den Stecker oder
die Steckdose fallen. Eine „Tropfenschleife“ sollte in jedem Kabel zwischen Aquarium und Wandsteckdose
vorgesehen werden. Die „Tropfenschleife“ ist
der Teil des Kabels, der bei Verwendung eines Verlängerungskabels unter der Steckdose durchhängt (Bild). Auf
diese Weise tropft das Wasser unter der Steckdose vom Kabel ab und kann nicht mit dieser in Berührung kommen.
Wenn der Stecker oder die Steckdose nass wird, NICHT das Kabel herausziehen, sondern die Stromversorgung an
der Sicherung bzw. am Leistungsschalter trennen. Dann erst den Stecker herausziehen und prüfen, ob sich Wasser
in der Steckdose befindet.
3) Kinder müssen beaufsichtigt werden, wenn Sie sich am Aquarium oder in dessen nähe Aufhalten.
4) Zur Vermeidung von Verletzungen keine beweglichen oder heißen Teile, wie z.B. Heizungen, Reflektoren ,
Glühbirnen usw. berühren.
5) Bei Nichtverwendung, vor dem Montieren/Demontieren von Teilen oder vor dem Reinigen müssen die betroffenen
Geräte stets ausgesteckt werden. Nicht am Kabel ziehen. Zum Herausziehen des Kabels immer den Stecker
greifen.
6) Die Geräte dürfen nur für den vorgesehenen Zweck verwendet werden. Die Verwendung von Zubehör, das vom
Hersteller nicht empfohlen oder verkauft wird, kann gefährliche Bedingungen verursachen.
7) Das Gerät nicht an einer Stelle installieren oder lagern, wo es der Witterung oder Temperaturen unter null Grad
ausgesetzt ist.
8) Vor der Inbetriebnahme eines an der Beckenwand montierten Gerätes muss sichergestellt werden, dass dieses
richtig installiert und befestigt ist.
9) Alle Sicherheitshinweise auf dem Gerät müssen gelesen werden.
10) Wenn ein Verlängerungskabel notwendig ist, muss dieses die erforderliche Leistung haben. Ein Kabel, das für
weniger Ampere oder Watt zugelassen ist, kann sich überhitzen. Das Kabel ist so zu verlegen, dass niemand
darüber stolpern oder daran hängen bleiben kann.
11) Das Gerät ist mit einem Schukostecker ausgestattet. Dieser Stecker darf auf keine Weise verändert oder
umgangen werden.
Wird der Stecker entfernt erlischt jeder Garantieanspruch!
Diese Anleitung aufbewahren

DE
Außenabschäumer MCE 300
Der MCE 300 ist ein Außenabschäumer mit in seiner Klasse unerreicht hoher Leistung. Er ist geeignet für
Aquarien bis zu 320 Liter bei leichtem Besatz und bis zu 250 Liter bei normalem Besatz.
Zusammenbau
Der Abschäumer wird aus Transportgründen teilweise zerlegt geliefert. Machen Sie sich unter Zuhilfenahme
der Darstellungen auf den folgenden Seiten mit dem richtigen Zusammenbau vertraut.
Wichtig
Vor der Installation des MCE 300 sollte das Abschäumer Gehäuse mit Wasser gefüllt werden um
sicherzustellen, das es keine Leckstellen durch Transportschäden gibt.
Installation
-Stecken Sie das Rohr No. 17 durch eine leicht drehende Bewegung in das Gehäuse.
-Sichern Sie das Rohr mit Schraube Nr. 23.
-Schieben Sie Halterung Nr. 14 wie illustriert auf Rohr Nr. 17.
-Schieben Sie Schütte Nr. 21 bis zum Anschlag in das Rohr Nr. 17.
-Stellen Sie das Abschäumer Gehäuse mit der Auflagekante auf die gewünschte Stelle des Aquariums
oder der Filters.
-Schieben Sie Halterung Nr. 14 gegen die Innenseite des Aquariums oder der Filterscheibe.
-Sichern Sie die Halterung mit Schraube Nr.23.
-Füllen sie den Abschäumer mit Aquariumwasser bis es aus dem Ablauf austritt.
-Stecken Sie erst nach dem Befüllen die Saugleitung Nr. 18 auf die Lufteinzugdüse Nr. 15.
-Stecken sie den Silikonschlauch Nr. 4 durch das obere seitliche Loch des Abschäumers.
-Stecken Sie das geschlossene Regulierventil Nr. 2 auf den Schlauch.
-Schließen Sie den Abschäumer mit Deckel Nr. 11.
-Schieben Sie den Schaumtopfdeckel Nr. 4 in den Schaumtopf Nr. 5 bis zum Anschlag.
-Stecken Sie den Schaumtopf in das Kontaktrohr Nr. 12.
-Stecken sie die Saugleitung Nr. 19 durch den Anschluss Nr. 23 in den PVC Winkel der Saugleitung Nr.
18
Inbetriebnahme
Der Abschäumer ist nun betriebsbereit, jedoch ist ein Teil der Saugleitung noch mit Luft gefüllt. Die Entlüftung
der Saugleitung geschieht folgendermaßen:
-Abschäumer Gehäuse mit Wasser füllen, erst danach die Saugleitung montieren.
-Regulierventil schließen.
-Pumpe starten.
-Wenn keine Luft mehr in der Saugleitung sichtbar ist, das Regulierventil langsam offnen.
Einstellung der Luftmenge
Zur Erzielung bester Werte ist das Regulierventil von der geschlossenen Position langsam in die Position zu
bringen, die auf einer Uhr ca. 2.15 Uhr entspricht.
Diese Einstellung nicht von der offenen in die geschlossene Position stellen.
Nach jedem Neustart der Pumpe ist zunächst durch Schließen des Absperrhahnes die Saugleitung zu entlüften,
danach ist die Luftmenge neu einzustellen.
Betrieb
Nach kurzer Zeit füllt sich das Kontaktrohr mit feinen Luftblasen, die im oberen Bereich einen Schaum bilden,
der nach und nach in den Schaumbecher gedrückt wird. Es wird empfohlen den Schaumbecher und die obere
Innenseite des Kontaktrohres alle2-4 Tage oder nach Bedarf zu Reinigen. Während der Reinigung sollte die
Pumpe ca. 10min ausgeschaltet bleiben um Ablagerungen durch Staub und Salzkristalle in der
Lufteinzugsdüse wieder aufzulösen. Durch herausziehen des Schaumtopfdeckels wird der Schaum nasser,
durch zusammenschieben trockener.
Betrieb mit Ozon
Deltec Abschäumer können mit Ozon betrieben werden. Ozon ist ein extrem aggressives Gas und sollte auf
keinen Fall eingeatmet werden oder während des Betriebs wahrnehmbar sein. Der MCE 300 darf max. mit
25mg betrieben werden.

DE
Wartung
Deltec Abschäumer benötigen nach der Installation und Einstellung ein Minimum an Wartung.
Durch den hohen Calciumgehalt in vielen Seewasseraquarien kommt es zu Kalkablagerungen die zu Störungen
führen können. Es wird daher empfohlen alle 3 Monate oder bei Bedarf öfter, die komplette Pumpe mit
Lufteinzugsdüse mit einem handelsüblichen Entkalker zu entkalken. Dabei ist zu überprüfen ob sich Rotor Nr.
7 leicht auf der Welle Nr. 6 drehen lässt.
Fehlersuche
Symptom Ursache Maßnahme
Luftzuleitung zur Pumpe verstopft reinigen
Ozongerät verschmutzt reinigen
Luftschlauch abgeknickt Schlauchführung ändern
Pumpe läuft, jedoch keine oder zu
geringe Luftmenge
Luft in Saugleitung entlüften
Kommt bei bestimmten Seesalzen
und bei Zugabe von Wasser-
aufbereitungsmitteln vor
Andere Salze verwenden,
Futtermenge erhöhen,
Lufthahn öffnen
Bei sehr starker Wasser-Belastung
nach Neueinrichtung mit lebenden
Steinen
Lufthahn öffnen
Starke Luftperlung im Ablaufwasser
Luftabsperrhahn zu stark
gedrosselt Lufthahn öffnen
Starke Geräusche Welle (6) im Rotor (7) blockiert,
verkalkt
in Entkalker reinigen und durch
leichten axialen Druck lösen.
Gummilager müssen danach
erneuert werden
Technische
daten
Maße (l/b/h)
ca.
Strom-
aufnahme Luftleistung ca.
min.
Wasserstand
Aquariengröße
normaler
Aquariengröße
leichter Besatz
MCE 300 260x175x445
mm 9,5 Watt 120 Liter 240 mm 250 Liter 320 Liter

EN
IMPORTNT SAFETY INSTRUCTIONS
WARNING To guard against injury, basic safety precautions should be observed, including the following.
1) READ AND FOLLOW ALL SAFETY INSTRUCTIONS.
2) DANGER – To avoid possible electric shock, special care should be taken since water is employed in the use of
aquarium equipment. For each of the following situations, do not attempt repairs by yourself; return the appliance
to an authorized service facility for service or discard the appliance.
a) If the appliance falls into the water DON´T reach for it! First unplug it and then retrieve it. If electrical
components of the appliance get wet, unplug the appliance immediately. (Non-immersible equipment only)
b) If the appliance shows any sign of abnormal water leakage, immediately unplug it from the power source.
(Immersible equipment only)
c) Carefully examine the appliance after installation. It should not be plugged in if there is water on parts not
interned to be wet.
d) Do not operate any appliance if it has a damaged cord or plug, or if it is malfunctioning or has been dropped or
damaged in any manner.
e) To avoid the possibility of the appliance plug or receptacle getting wet, position aquarium stand and tank to one
side of a wall-mounted receptacle to prevent water from dripping onto the receptacle or plug.
A “drip-loop”, shown in the figure below, should be arranged by the user for each cord connecting an aquarium
appliance to a receptacle. The “drip-loop” is that part of the cord below the level of the receptacle, or the
connector if an extension cord is used, to prevent water travelling along the cord and coming in contact with the
receptacle.
If the plug or socket does get wet, DON´T unplug the cord. Disconnect the fuse or circuit breaker that supplies
power to the appliance. Then unplug and examine for presence of water in the receptacle.
3) Close supervision is necessary when any appliance is used by or near children.
4) Always unplug an appliance from an outlet when not in use, before putting an or taking off parts, and before
cleaning. Never yank cord to pull plug from outlet. Grasp the plug and pull to disconnect.
5) Do not use an appliance for other than intended use. The use of attachments not recommended or sold by the
appliance manufacturer may cause an unsafe condition.
6) Make sure an appliance mounted on a tank is securely installed before operating it.
7) Read and observe all the important notices on the appliance.
8) If an extension cord is necessary, a cord with a proper rating should be used. A cord rated for less amperes or
watts than the appliance rating may overheat. Care should bee taken to arrange the cord so that it will not be
tripped over or pulled.
9) This appliance has a polarized plug (one blade is wider than the other). As safety feature, this plug will fit in a
polarized outlet only one way. If the plug does not fit, contact a qualified electrician. Never use with an extension
cord unless plug can be fully inserted. Do not attempt to defeat this safety feature.
Exception: This instruction may be omitted for an appliance that is not provided with a polarized attachment plug.
Removing of the plug invalidates the warranty!
SAVE THESE INSTRUCTIONS

EN
External Protein Skimmer MCE 300
The Multi Compact External skimmer is ideal for ‘hang on’ installation directly onto the outside of the aquarium
or sump and requires no further supply pump for highly efficient operation.
Assembly
The skimmer has been packed in a partially disassembled state to prevent damage in transit. Study the
diagram overleaf to reassemble. Do not switch on the recirculation pump however unless the pump is
immersed or flooded with water.
Important
Before you install the unit in position fill the body with fresh water from the mains supply to ensure that there
has not been any damage in transit.
Installation
Hang the skimmer body on the outside of the aquarium or filter sump in a suitable position. The skimmer is
placed on the support bracket where the inlet and outlet pipes are located and is held in place by the clear
retaining clamp (14).
-Push the outlet pipe (17) into the skimmer body’s outlet adaptor. Secure the pipe (17) with the nylon
screw (23A). If required use only non aggressive grease fluids like silicone grease on the O-Ring.
-Push the clamp (14) over the outlet pipe (17) with the extended bottom plate of the clamp against the
inside of the aquarium or sump. Secure the clamp onto the pipe (17) with the nylon screw (22).
-Insert degassing plate (21) onto outlet pipe (17) as illustrated.
-Fill the skimmer with aquarium water until it exits the skimmer.
-Insert the suction pipe (18) into the skimmer body and push the open end over the air intake adaptor
(15)
-Push the short end of the suction pipe (19) through the housing adaptor and into the elbow of part no.
18.
-Feed the air hose through the 8mm hole in the side of the skimmer body.
-Fit the orange air tap (2) to the hose.
-Place the lid (11) on top of the skimmer body so that the wall fits into the grove of the lid.
-Push the lid of the foam cup against the stops into the foam cup (5).
-Insert the foam cup into the contact tube (12).
-Push suction pipe (19) through Adapter (24) into the elbow of suction pipe (18)
Starting the skimmer
The skimmer is now ready for operation, however the suction line is still partially filled with air witch needs to
be bled. To bleed the suction line it is important to strictly adhere
to the following procedure.
-Ensure that the skimmer body is filled with water before connecting the suction pipe.
-Ensure that the strainer is below the water level of the aquarium.
-Close the air tap (2).
-Start the pump
The pump will now remove the air out of the suction line and the water will slowly flow from the aquarium into
the skimmer. Keep the air tap closed until all air bubbles are removed from the suction line and the pump
produces a full flow. Now open the air tap (2) as described under “Operation and settings”
This bleeding process may take a while.
Operation and settings
After a short while, the contact tube (12) should be filled with fine air bubbles, forming a dense foam wich is
finally pushed into the skimmer cup. Allow the skimmer to settle down for a day or so before fine adjustment.
It is recommended that the skimmer cup is emptied every 2-4 days or as required. The cup and the top of the
contact tube (12) should be wiped clean of any fatty deposits as build up of this waste product will greatly
reduce the performance. Whilst cleaning leave the pump switched off, for 10 minutes to allow any salt
deposits in the venturi tube to dissolve.
By pulling the skimmer cup lid (4) out of the cup (5) somewhat, the foam will be wetter; by pushing it against
the stop it will be dryer. It is recommend to operate the skimmer with the lid pushed against the stop.
Adjusting the air volume
If the suction line has been bled with the air tap (2) closed, the air tap must be opened slowly from the closed
position to app. a quarter past 2° clock position. This setting will produce the best performance and the
highest air volume. If the air tap is opened to much, the air volume drops. Do not close the tap from the open
position to the quarter part 2° clock position.
Every time the pump has been stopped and restarted; the air tap (2) should be closed for a short while in
order to remove any air from the suction line.

EN
Use with ozone
skimmers are suitable for use with ozone and will automatically suck the gas through the venturi
hose. A maximum volume of 25 mg/h should be used on tank volumes that are suitable for this skimmer. Do
not use excessive ozone, as it is dangerous and can cause severe headaches.
Maintenance
The Deltec skimmer range should need very little adjustment and maintenance once set correctly however
due to the high levels of calcium in marine aquariums it is common for deposits to build up on moving parts
requiring periodical cleaning. It is recommended every 3 months, or when required, that the pump is removed
from the skimmer.
Check and clean the impellor of debris. Make sure that the impeller rotates freely on the shaft. If not
submerge in lime scale remover.
A build up of calcium, dust and salt can restrict or block the air inlet (15) and reduce the skimming efficiency.
This should be checked and carefully cleaned with a toothpick or fine drill rotated between the fingertips. It is
advisable to stop the pump for approximately 15 minutes once every week in order to dissolve any dust or
salt crystals that may have collected in the air inlet.
Fault finding
Malfunction Cause Rremedy
tap, airline or venturi blocked clean
airline kinked remove kink
ozonizer blocked clean
Pump produces insufficient air
Air in suction line bleed
caused by additives in certain
sea salts and water conditions
use different salt or feed heavily for a
period, empty skimmer cup frequently,
open air tap fully. This condition may
last for several weeks.
excessive air bubbles in
aquarium water
air tap closed to far open air tap
shaft (6) is blocked in rotor (7)
clean in lime scale remover; free the
shaft by tapping it lightly on is end.
Replace bearing
Pump is noisy
technical
data
Dimensions
(l/w/h) app.
Power
consumption
air flow up
to app.
min. water
level for sump
aquarium
size normal
aquarium
size light
MCE 300 260x175x445mm 9,5 Watt 120 litre 240 mm 250 litre 320 litre
MCE 300 UK 260x175x445mm 9,5 Watt 120 litre 240 mm 55 gallons 70 gallons
MCE 300 US 260x175x445mm 12 Watt 150 litre 240 mm 66 gallons 84 gallons

IT
NORME DI SICUREZZA
AVVERTENZA: Per evitare incidenti si raccomanda di osservare le norme generali di sicurezza, tra cui le seguenti:
1) LEGGERE E SEGUIRE SCRUPOLOSAMENTE TUTTE LE NORME DI SICUREZZA.
2) PERICOLO – Considerato che l’uso di attrezzature per acquario avviene in presenza di acqua, agire sempre con
particolare cautela per evitare scosse elettriche. Per ognuna delle seguenti situazioni possibili, si raccomanda di
non tentare di eseguire da sé eventuali riparazioni, ma di portare l’apparecchio presso un centro assistenza
autorizzato o provvedere alla sua rottamazione.
a. (Solo per apparecchiature che non prevedono l’uso in immersione). Se l’apparecchio cade nell’acqua, NON
tentare di recuperarlo! Per prima cosa scollegare l’alimentazione elettrica, quindi procedere al recupero. Se i
componenti elettrici dell’apparecchio si bagnano, scollegare immediatamente l’alimentazione.
b. (Solo per apparecchi ad immersione). Se l’apparecchio mostra perdite d’acqua anormali, scollegarlo
immediatamente dall’alimentazione.
c. Dopo avere installato l’apparecchio, eseguire un controllo accurato. Non collegare l’apparecchio all’alimentazione
nel caso si osservi la presenza di acqua in parti non destinate ad essere bagnate.
d. Non mettere in funzione l’apparecchio se il cavo d’alimentazione o la spina appaiono danneggiati, se
l’apparecchio è malfunzionante, se è caduto o ha subito un qualsiasi danno.
e. Per evitare il gocciolamento dell’acqua sulla presa o sulla spina, posizionare l’acquario e il mobile di fianco alla
presa montata a parete in modo che questa resti visibile.
Si raccomanda di fare eseguire al cavo una curva “anti-gocciolamento” come mostrato nella figura sottostante.
Eseguire l’operazione per tutti i componenti elettrici dell’acquario. In questo modo una parte di cavo si trova
sotto il livello della presa, o della spina di collegamento nel caso si usi una prolunga, impedendo così che l’acqua
gocciolando lungo il cavo venga a contatto con la presa.
Se la presa o la spina si bagna, NON disinserire il cavo, ma scollegare l’interruttore generale che porta corrente
all’apparecchio. Quindi scollegare la spina e verificare la presenza di acqua all’interno della presa.
3) Se l’apparecchio viene utilizzato da o in presenza di bambini, è necessaria un’attenta supervisione da parte degli
adulti.
4) Scollegare sempre il cavo d’alimentazione quando l’apparecchio è inutilizzato, prima di aggiungere o prelevare
delle parti e prima di effettuare la pulizia. Per scollegare il cavo d’alimentazione, afferrare bene la spina ed estrarla
dalla presa senza tirare mai direttamente il cavo.
5) Non utilizzare l’apparecchio per usi diversi da quelli a cui è destinato. L’uso di accessori non raccomandati o non
venduti dal produttore dell’apparecchio possono essere causa di condizioni di funzionamento non sicure.
6) Assicurarsi che gli apparecchi montati sull’acquario siano correttamente installati prima di avviarli.
7) Leggere ed osservare tutte le informazioni importanti sull’apparecchio.
8) Se è necessario l’uso di una prolunga, assicurarsi che il cavo sia adatto al voltaggio utilizzato. Se il cavo è messo a
punto per meno ampere or watt rispetto all’apparecchio, potrebbe surriscaldarsi. Fare attenzione che il cavo non
sia troppo teso o schiacciato.
9) (Solo per UK) Questo apparecchio è dotato di spina polarizzata (uno spinotto è più largo dell’altro). Come misura di
sicurezza, tale spina potrà essere inserita in un solo modo in una presa polarizzata. Se la spina non è adatta,
rivolgersi ad un elettricista qualificato. Non utilizzare una prolunga se la spina non si inserisce completamente. Non
tentare di eludere questa condizione di sicurezza.
Eccezione: Questa avvertenza può essere omessa se l’apparecchio non è dotato di spina polarizzata.
In caso di manomissione della spina decade ogni garanzia!
“CONSERVATE LE PRESENTI ISTRUZIONI”

IT
Schiumatoio esterno MCE 300
Lo schiumatoio Multi Compact External è concepito per essere montato appeso direttamente all’esterno
dell’acquario o della sump e non richiede l’installazione di pompa supplementare per aumentare la resa. Lo
schiumatoio MCE 300 è adatto ad acquari fino a 320 litri (70 galloni UK / 84 galloni USA) se poco popolati e
250 litri (55 galloni UK / 66 galloni USA) per acquari normalmente popolati.
Montaggio
Lo schiumatoio è imballato semi-assemblato per evitare danni durante il trasporto. Per il montaggio, seguire il
disegno sul retro. Accendere la pompa di ricircolo solo quando questa è immersa o piena di acqua.
Importante
Prima di installare e posizionare l’unità riempire il corpo dell’apparecchio di acqua di rubinetto ed assicurarsi
che non abbia subito danni durante il trasporto.
Installazione
Applicare il corpo dello schiumatoio all’esterno dell’acquario o della sump in posizione idonea. Lo schiumatoio
viene posizionato sulla staffa di supporto, dove sono alloggiati i tubi d’entrata e uscita, ed è fissato mediante il
morsetto di fissaggio trasparente (14).
-Inserire il tubo d’uscita (17) nel raccordo d’uscita sul corpo dello schiumatoio. Fissare il tubo (17) con
la vite in nylon (23A). Se richiesto, usare per l’O-ring solo lubrificante liquido non aggressivo, come
quello al silicone.
-Inserire il morsetto (14) sul tubo d’uscita (17) con il prolungamento inferiore rivolto verso l’acquario o
la sump. Fissare il morsetto sul tubo (17) con la vite in nylon (22).
-Inserire la piastra di degassamento (21) sul tubo d’uscita (17) come illustrato.
-Riempire lo schiumatoio con acqua dell’acquario fino a farla fuoriuscire.
-Applicare il filtro (20) al tubo d’aspirazione (19).
-Inserire il tubo d’aspirazione nel corpo dello schiumatoio e spingere l’estremità aperta sopra il raccordo
per la presa dell’aria (15).
-Alimentare il tubo dell’aria mediante il foro di 8mm sul lato del corpo schiumatoio.
-Applicare il rubinetto dell’aria arancione (2) al tubo.
-Posizionare il coperchio (11) in cima al corpo schiumatoio in modo da fare combaciare le pareti dello
schiumatoio con la scanalatura sul coperchio.
-Spingere il coperchio del bicchiere di raccolta nel bicchiere stesso (5) fino a fissarlo.
-Inserire il bicchiere di raccolta nel tubo di contatto (12).
Nota bene
La parte orizzontale del tubo d’aspirazione (19) è mobile da un lato. Se si desidera, è possibile accorciarla e
reinserirla nel raccordo a gomito.
Avviamento dello schiumatoio
Lo schiumatoio ora è pronto per il funzionamento. La linea d’aspirazione, però, è in parte ancora occupata
dall’aria che deve essere eliminata. Per sfiatare la linea d’aspirazione è importante attenersi alla
seguente procedura:
-Assicurarsi che il corpo dello schiumatoio sia pieno di acqua prima di collegare il tubo d’aspirazione.
-Assicurarsi che il filtro sia al di sotto del livello dell’acqua dell’acquario.
-Chiudere il rubinetto dell’aria (2).
-Azionare la pompa.
La pompa ora eliminerà tutta l’aria dalla linea d’aspirazione e l’acqua fluirà lentamente dall’acquario nello
schiumatoio. Mantenere il rubinetto dell’aria chiuso fino a quando tutte le bolle d’aria siano state rimosse della
linea d’aspirazione e la pompa operi un flusso continuo. A questo punto aprire completamente il rubinetto
dell’aria (2). L’operazione di sfiato dura un po’ di tempo. Accendere e spegnere ripetutamente la pompa può
accelerare l’operazione.

IT
Funzionamento e impostazioni
Dopo poco il tubo di contatto (12) si riempirà di bolle d’aria finissime, fino a formare una schiuma densa che
viene spinta nel bicchiere dello schiumatoio. Attendere circa un giorno che lo schiumatoio si stabilizzi prima di
procedere alla regolazione fine. Si raccomanda di svuotare il bicchiere dello schiumatoio ogni 2-4 giorni o
quando necessario. Eliminare dal bicchiere e dalla parte superiore del tubo di contatto (12) qualsiasi deposito
di grasso la cui formazione riduce notevolmente la resa dell’apparecchio. Durante la pulizia tenere la pompa
spenta per 10 minuti per permettere ai sali depositati nel venturi di dissolversi.
Tirando un poco il coperchio del bicchiere (4) fuori dal bicchiere di raccolta (5) , la schiuma risulterà più
bagnata; al contrario chiudendolo la schiuma sarà più asciutta. Si raccomanda di far funzionare lo schiumatoio
con il coperchio chiuso verso i punti di arresto. Infine regolare il rubinetto dell’aria (2) a ore 2. Ogni volta che
la pompa viene spenta e riavviata, il rubinetto dell’aria (2) deve essere chiuso per rimuovere l’aria dalla linea
d’aspirazione.
Uso con ozono
Gli schiumatoi sono adatti all’uso con ozono. Il gas viene aspirato automaticamente mediante tubo
venturi. Si consiglia un volume massimo di 25 mg/h su volumi d’acquario adatti a questo schiumatoio. Non
esagerare con la quantità di ozono, in quanto il gas è pericoloso e può causare forti emicranie.
Manutenzione
Una volta tarati correttamente gli schiumatoi della gamma Deltec necessitano di poca manutenzione e
regolazione. Tuttavia, considerato l’elevato contenuto di calcio negli acquari marini, è normale che si formino
depositi calcarei sulle parti mobile e che sia quindi necessaria una regolare pulizia. Si raccomanda di
rimuovere la pompa dallo schiumatoio ogni 3 mesi o quando necessario.
Controllare e pulire la girante dai detriti. Assicurarsi che la girante ruoti sull’albero senza impedimenti,
altrimenti immergerla in una soluzione anticalcare.
La formazione di depositi di calcare, polvere e sali può ostruire o bloccare l’entrata dell’aria (15) e ridurre la
resa dello schiumatoio. Controllare e rimuovere con attenzione tali depositi eventualmente servendosi di uno
stuzzicadenti o simile.
Si consiglia di fermare la pompa per circa 15 minuti una volta alla settimana per eliminare eventuali cristalli di
polvere e sale che si depositano nel raccordo d’entrata dell’aria.
Ricerca errori
Malfunzionamento Causa Soluzione
Rubinetto, tubo aria o venturi
bloccati pulizia
Tubo dell’aria schiacciato Ripristinare la posizione corretta del tubo
Ozonizzatore bloccato pulizia
La pompa non produce
sufficiente aria
Aria presente nel tubo
d’aspirazione sfiatare
Causate da additivi contenuti
in certi sali e dalle condizioni
dell’acqua
Usare un sale diverso o aumentare
l’alimentazione per un periodo, svuotare
frequentemente il bicchiere, aprire
completamente il rubinetto dell’aria.
Questa condizione può perdurare per
diverse settimane.
Bolle d’aria in eccesso
nell’acqua dell’acquario
Rubinetto dell’aria troppo
chiuso Aprire il rubinetto dell’aria
La pompa è rumorosa L’alberino di ceramica (6) è
bloccato nel rotore (7)
Pulire l’albero con soluzione anticalcare,
battendo leggermente l’estremità.
Riposizionare il cuscinetto.
Dati tecnici Dimensioni
(l/w/h) ca.
Consumo
energetico
flusso aria
fino a ca.
livello acqua
min. per
installazione
sump
dimensione
acquario
densità di
popol. normale
dimensione
acquario
densità di
popol. bassa
MCE 300 260x175x445
mm 9,5 Watt 120 litri 240 mm 250 litri 320 litri

FR
Instructions de sécurité importantes
Avertissement : Pour protéger contre quelconques blessures, il faut respecter les mesures de prudence et les instructions
de sécurité suivantes :
1) Lire et respecter les instructions de sécurité.
2) Danger : Pour éviter une électrocution, il faut manipuler tous les appareils de l'aquarium avec prudence. Dans
aucun des cas indiqué plus bas, le client ne devrait pas essayer de procéder à une réparation. L’appareil doit être
délivré au service après-vente autorisé.
f) Si l'appareil tombe dans l'eau, NE PAS essayer de le saisir. Retirer d’abord la fiche de la prise de courant secteur
puis sortir l'appareil de l'eau. Si les pièces électriques de l’appareil sont mouillées, il faut retirer immédiatement la
prise de l’appareil.
g) Si vous observez une fuite d'eau anormale sur l'appareil, il faut retirer immédiatement la prise de l’appareil.
h) Après l'installation, il faut vérifier soigneusement l'appareil. Il ne faut pas enficher sa prise quand de l'eau se
trouve sur des pièces qui doivent rester sèches.
i) Un appareil muni d’un câble ou d’une fiche détériorés ne doit pas être mis en service. Ceci est aussi valable quand
l’appareil ne fonctionne pas correctement, est tombé par terre ou a été détérioré d’une autre manière.
j) Pour éviter que la fiche de l'appareil ou la prise de courant se mouille, il faut placer le meuble de l’aquarium et le
bassin à côté de la prise de courant murale. Ainsi aucune goutte d'eau ne tombera sur la fiche ou la prise de
courant. Une « boucle d’égouttage » devrait être prévue entre l'aquarium et la prise de courant murale. La
« boucle d’égouttage » est la partie du câble qui fléchit sous la prise de courant en cas d’emploi d’une rallonge. De
cette manière, l'eau s'égouttera sous la prise de courant du câble et ne pourra pas entrer en contact avec celui-ci.
Si la fiche ou la prise de courant se mouille, NE PAS retirer le câble mais couper l’alimentation en courant au
fusible ou au sectionneur de puissance. Ne retirer la fiche qu’après avoir ceci et vérifier si de l'eau se trouve dans
la prise de courant.
3) Les enfants doivent être surveillés quand vous vous occupez de l'aquarium ou vous vous trouvez à proximité.
4) Pour éviter quelconques blessures, ne pas toucher les pièces mobiles ou chaudes, telles que les chauffages, les
réflecteurs, les ampoules etc.
5) Les fiche des appareils qui ne sont pas utilisés, avant le montage/démontage de pièces de ces appareils ou avant
leur nettoyage, doivent être retirées. Ne pas tirer au câble. Pour sortir le câble, toujours saisir la fiche.
6) Les appareils ne doivent être utilisés qu'aux fins prévues. L’emploi d’accessoires que le fabricant n'a pas
recommandés ou vendus, peut causer des conditions dangereuses.
7) Ne pas installer ou entreposer l’appareil à un endroit où il est exposé aux intempéries ou à des températures en
dessous de zéro.
8) Avant la mise en service d’un appareil monté à la paroi du bassin, il faut garantir que cet appareil est correctement
installé et fixé.
9) Toutes les indications de sécurité sur l'appareil doivent être lues.
10) S'il faut utiliser une rallonge, elle doit avoir la puissance nécessaire. Un câble qui est homologué pour peu
d’ampères ou de watts, peut se surchauffer. Le câble doit être posé de sorte que personne ne trébuche dessus ou
y reste accroché.
11) L’appareil est équipé d’une fiche à contact de protection. Cette fiche ne doit en aucun cas être modifiée ou
contournée.
Si la fiche est retirée, tout droit à garantie sera annulé !
Conserver ces instructions

FR
Écumeur extérieur MCE 300
Le MCE 300 est un écumeur extérieur avec une puissance élevée jamais atteinte dans sas classe. Il est
approprié pour les aquariums jusqu'à 320 litres pour une population faible et jusqu'à 250 litres pour une
population normale.
Assemblage
L'écumeur est livré en partie désassemblée pour des raisons de transport. Consulter les représentations sur
les pages suivantes pour réaliser l'assemblage correctement.
Important
Avant l'installation du MCE 300, il faut remplir le boîtier de l'écumeur d'eau afin de garantir qu’il n'y a aucune
fuite résultant de dommages dus au transport.
Installation
-Introduire le tube n° 17 dans le boîtier en faisant un léger mouvement de rotation.
-Fixer le tube avec la vis n° 23.
-Glisser la fixation n° 14 comme illustré sur le tube n° 17.
-Glisser la glissière n° 21 jusqu'à l'arrêt dans le tube n° 17.
-Placer le boîtier de l'écumeur avec le bord de support à l'endroit souhaité de l'aquarium ou du filtre.
-Glisser la fixation n° 14 contre la face intérieure de l'aquarium ou de la vitre du filtre.
-Fixer la fixation avec la vis n° 23
-Remplir l'écumeur d'eau de l'aquarium jusqu'à ce qu'elle sorte au niveau de l'évacuation.
-N’introduire la conduite d'aspiration n° 18 sur la buse d'aspiration d'air n° 15 qu’après le remplissage.
-Introduire le tuyau en silicone n° 4 dans le trou latéral du haut de l'écumeur.
-Introduire la soupape de réglage fermée n° 2 sur le tuyau.
-Fermer l'écumeur avec le couvercle n° 11
-Glisser le couvercle du pot de mousse n° 4 dans le pot de mousse n° 5 jusqu'à l'arrêt.
-Introduire le pot de mousse dans le tube de contact n° 12.
-Introduire la conduite d'aspiration n° 19 par le raccord n° 23 dans la cornière en PVC de la conduite
d'aspiration n° 18
Mise en service
L'écumeur est à présent prêt à fonctionner mais une partie de la conduite d'aspiration est encore remplie d'air.
La purge de la conduite d'aspiration se fera de la manière suivante :
-Remplir le boîtier de l'écumeur avec de l'eau, ne monter la conduite d'aspiration
qu’après avoir fait ceci.
-Fermer la soupape de réglage.
-Faire démarrer la pompe.
-Quand il n'y a plus d'air dans la conduite d'aspiration, ouvrir lentement la soupape de réglage.
Réglage de la quantité d'air
Pour obtenir les meilleures valeurs, il faut placer lentement la soupape de réglage de la position fermée à la
position qui correspond à 2h15 env. sur une montre. Ne pas faire ce réglage de la position ouverte à la
position fermée. Après chaque nouveau départ de la pompe, il faut d'abord purger la conduite d'aspiration en
fermer le robinet d'arrêt, ensuite il faut régler à nouveau la quantité d'air.
Exploitation
Après un bref instant, le tuyau de contact se remplit de fines bulles d'air qui forment dans la zone supérieure
une mousse qui sera pressé peu à peu dans le pot à mousse. Il est conseillé de nettoyer le pot à mousse et la
face intérieure du haut du tube de contact tous les 2-4 jours ou selon les besoins. Pendant le nettoyage, la
pompe devrait être débranchée durant 10 minutes env. pour dissoudre à nouveau les dépôts dus á la
poussière et aux cristaux de sel dans la buse d'entrée d'air. Sortir le couvercle du pot à mousse, ceci rend la
mousse plus humide, elle sera plus sèche si l'on pousse le couvercle.
Exploitation avec de l'ozone
Les écumeurs Deltec peuvent être exploités avec de l'ozone. L’ozone est un gaz extrêmement agressif et ne
doit en aucun cas être inhalé ou perceptible durant l'exploitation. Le MCE 300 doit être exploité
avec 25 mg max.
Maintenance
Les écumeurs Deltec ont besoin d'un minimum de maintenance après leur installation et leur réglage.
La teneur élevée en calcium dans de nombreux aquariums à eau de mer entraîne des dépôts de calcaire qui
peuvent provoquer des dysfonctions. C'est pourquoi il est conseillé de détartrer tous les 3 mois ou plus
souvent si besoin est, la pompe au complet avec la buse d'entrée d'air avec un détartrant usuel. Ce faisant, il
faut vérifier si le rotor n° 7 se laisse tourner légèrement sur l'arbre n° 6.

FR
Recherche des défauts
Symptome Cause Mesure à prendre
La conduite d'amenée d'air vers la
pompe est bouchée nettoyer
L'appareil à ozone est encrassé nettoyer
Le tuyau d'air est plié Modifier la conduite du tuyau
La pompe marche mais il
n'y a pas d'air ou très peu
d'air
De l'air dans la conduite d'aspiration purger
Se produit en présence de certains sels
marins et à l'addition de produits de
traitement de l'eau
Utiliser d'autres sels, augmenter la
quantité de nourriture,
ouvrir le robinet à air
En cas de charge de l'eau très élevée
après réinstallation avec des pierres
vivantes
ouvrir le robinet à air
Fort pétillement d'air dans
l'eau d'évacuation
Le robinet d'arrêt d'air est trop réprimé ouvrir le robinet à air
Bruits forts Arbre (6) bloqué dans le rotor (7),
entartré
Nettoyer dans un détartrant et
desserrer légèrement la pression
axiale. Ensuite le palier en
caoutchouc doit être remplacé
Caractéristique
s techniques
Dimensions
(Lxlxh) env.
Consommation
de courant
Prestation d'air
env.
Niveau min. de
l'eau pour les
Taille de
l'aquarium
Taille de
l'aquarium
MCE 300 260x175x445
mm 9,5 watts 120 litres 240 mm 250 litres 320 litres

RU
Правила техники безопасности
Внимание! Во избежание травм следует соблюдать основные меры предосторожности иследующие правила техники
безопасности.
1) Внимательно прочитайте исоблюдайте правила техники безопасности.
2) Опасно! Во избежание поражения электрическим током следует проявлять осторожность при обращении со
всеми устройствами аквариума. Вниже приведенных случаях самостоятельное проведение ремонта
запрещено. Устройство следует доставить вавторизованный сервисный центр.
a) При попадании устройства вводу ЗАПРЕЩАЕТСЯ браться за него руками. Сначала следует вынуть штекер
из розетки итолько после этого достать устройство из воды. При образовании влаги на электрических
частях устройства его следует немедленно выключить.
b) При обнаружении выхода большого количества воды из устройства необходимо сразу немедленно
выключить его из розетки.
c) После установки устройство подлежит тщательной проверке. Запрещается подключать его кэлектросети,
если на деталях, которые должны всегда быть сухими, обнаружена влага.
d) Запрещается включать устройство споврежденным кабелем или штекером, атакже при его неисправности,
при наличии каких-либо повреждений ипосле падения.
e) Чтобы не допустить попадания влаги на розетку или штекер, аквариум следует разместить подальше от
розетки. Таким образом, капли воды не попадут на штекер или розетку. Для той части кабеля, которая
находится между аквариумом ирозеткой, должен быть предусмотрен водозащитный изгиб. Водозащитный
изгиб — это та часть кабеля, которая при использовании удлинителя провисает под розеткой (см.
рисунок). Вэтом случае вода стекает скабеля ине попадает врозетку. При наличии влаги на розетке или
штекере ЗАПРЕЩАЕТСЯ отключать кабель, следует отключить подачу тока спомощью предохранителя или
силового выключателя. Только после этого можно вынуть штекер ипроверить розетку на наличие влаги.
3) Запрещается оставлять без присмотра детей, находящихся рядом саквариумом.
4) Во избежание травм запрещается касаться подвижных или горячих деталей, таких как элементы нагрева,
отражатели, лампы ит.п.
5) При простое, перед монтажом или демонтажем деталей, атакже перед очисткой следует отключить
соответствующие приборы от электросети. При этом следует браться за штекер изапрещается тянуть за
кабель.
6) Устройство следует использовать только по назначению. Использование запасных частей иаксессуаров,
которые не рекомендованы или не поставляются производителем, может быть опасным, инесет за собой
утерю заводской гарантии.
7) Запрещается устанавливать или хранить устройство вместах, подверженных воздействию атмосферных
явлений или температуры ниже нуля.
8) Перед вводом вэксплуатацию убедитесь, что все детали правильно собраны изакреплены.
9) Следует ознакомиться со всеми указаниями по технике безопасности, расположенными на самом устройстве.
10) При необходимости следует использовать удлинитель соответствующей мощности. Кабель меньшей
мощности или силы тока может перегреться. Укладывать кабель следует так, чтобы никто не споткнулся и
не зацепился.
11) Прибор оснащен штекером под евророзетку. Запрещается вносить внего изменения или использовать
вместо него иной штекер.
Если по каким либо причинам,штекер будет удалён или повреждён,то пумпа Лишается
всякой гарантии.
Сохраните настоящее Руководство по эксплуатации

RU
Пеноотделитель MCE 300
МСЕ 300 – наиболее производительный всвоём классе внешний пеноотделитель. Устройство
предназначено для установки ваквариумы объемом до 320 литров при небольшой плотности загрузки и
объемом до 250 литров при средней плотности загрузки.
Монтаж
Для удобства транспортировки пеноотделитель поставляется вчастично разобранном виде. Следующие
страницы послужат наглядным пособием, как правильно собрать устройство.
Внимание!
Перед установкой МСЕ 300 следует наполнить корпус пеноотделителя водой, чтобы убедиться, что
транспортировка не привела кобразованию мест утечки.
Установка
-Легкими вращательными движениями установить трубку №17 вкорпусе.
-Закрепить трубку болтом №23.
-Установить на трубку №17 кронштейн №14, как показано на рисунке.
-Желоб №21 просунуть до упора втрубку №17.
-Установить корпус пеноотделителя монтажной стороной внеобходимой части аквариума или
сампа.
-Передвинуть кронштейн №14 квнутренней стороне аквариума или сампа.
-Закрепить кронштейн №14 болтом №23.
-Заполнить пеноотделитель водой из аквариума до выхода воды из выходного отверстия.
-Только после заполнения водой надеть трубку подающей линии №18 на воздухозаборную
насадку №15.
-Просунуть силиконовый шланг №4 через верхнее боковое отверстие пеноотделителя.
-Вставить закрытый регулировочный клапан №2 вшланг.
-Закрыть пеноотделитель крышкой №11.
-Передвинуть крышку пенной насадки №4 кпенной насадке №5 до упора.
-Вставить пенную насадку вцилиндр №12.
-Вставте всасывающий водопровод NR 19, через переходник NR 24 вPVC трубке NR 18.
Внимание!
Горизонтальная часть подающей линии при необходимости может быть укорочена.
Ввод вэксплуатацию
Теперь пеноотделитель готов кприменению, но часть подающей линии еще содержит воздух.
Удалить воздух из подающей линии можно следующим образом:
-корпус пеноотделителя заполнить водой, итолько после этого провести монтаж подающей линии.
-Закрыть регулировочный клапан.
-Включить насос.
-Если воздух вподающей линии больше не наблюдается, медленно открыть регулировочный
клапан.
Регулировка воздушной массы
Чтобы достичь лучших характеристик, клапан следует открывать медленно, из положения закрыто в
положение, которое соответствует часовой стрелке, указывающей на 2.15.
Регулировка воздуха запрещена, при переходе сположения открыто вположение «закрыто».
После каждого запуска насоса следует закрывать запорный кран иудалить воздух вподающей линии,
затем заново регулировать количество воздушной массы.
Рабочий процесс
Цилиндр за короткое время наполняется пузырьками воздуха, образующими вверхней части пену,
которая всвою очередь попадает впенную камеру. Рекомендуется каждые 2—4 дня или по
необходимости чистить пенную камеру иверхнюю внутреннюю часть цилиндра.
Во время очистки насос должен быть выключен приблизительно на 10 минут, чтобы грязь икристаллы
солей растворились ввоздухозаборной насадке.
Если снять крышку пеноотделителя, пена будет влажней, если закрыть — более сухой.
Рабочий процесс сдобавкой озона
Пеноотделитель Deltec может работать сприменением озона. Озон является крайне агрессивным газом,
который запрещается вдыхать иможет быть опасен для здоровья. При работе устройства МСЕ 300
допустимо использование не более 25 мг озона.

RU
Техническое обслуживание
После монтажа ирегулировки пеноотделители Deltec нуждаются вминимальном обслуживании.
Так как многие аквариумы сморской водой содержат большую концентрацию кальция, внутри
устройство возможно образование известкового осадка, который может привести квозникновению
неисправностей. Рекомендуется каждые 3 месяца или по необходимости из насоса ивоздухозаборной
насадки удалять известковый налет доступными средствами. При этом следует проверять, не затруднен
ли ход ротора №7 на оси №6.
Выявление неисправностей
Признак Причина Меры
Трубопровод подачи воздуха к
насосу забит прочистить
Озонатор загрязнён прочистить
Воздушный шланг перегнут Устранить перегиб
Насос работает, но воздух вмалом
количестве или отсутствует
Воздух во впускном
трубопроводе удалить воздух
может быть вызвано
определёнными морскими
солями иособым составом воды
использовать другие соли,
увеличить количество корма,
открыть воздушный кран
При очень сильной нагрузке
воды после укладки живых
камней
открыть воздушный кран
Слишком бурное образование
пузырьков всточной воде
сильно затянут воздушный кран открыть воздушный кран
Сильные шумы Вал (6) блокируется вроторе
(7), известковые отложения
очистить спомощью средства
для удаления извести или
безопасным механическим
способом. После этого
необходимо заменить
подшипники
Технические
характеристик
и
Размеры
(д/ш/в)
Потребление
энергии
Производител
ьность по
воздуху, ок.
Мин. уровень
воды для
сампа
Размер
аквариума
обычная
плотность
загрузки
Размер
аквариума
облегченная
плотность
загрузки
MCE 300 260x175x445
мм 9,5 вт 120 литров 240 мм 250 литров 320 литров


Gehäuse mit Ablauf und Deckel / Housing with outlet and lid / Corpo
esterno con uscita e coperchio /Корпус со сливным отверстием икрышкой

Schaumrohr mit Pumpe und Saugleitung / Neck tube with pump and suction
line / Tubo di contatto con pompa e linea d’aspirazione /
Трубка пеноотделителя снасосом ипитающей линией

Front Ansicht / Front view / Vista frontale / Вид спереди
Table of contents
Languages:
Other Deltec Water Filtration System manuals
Popular Water Filtration System manuals by other brands

Zip
Zip HydroTap G5 Touch-Free Wave Quick start installation guide

Human
Human Arioso Power System manual

Rainfresh
Rainfresh CBF1 Installation & operation manual

wpro
wpro APP100 Procedure for installation and replacement

A.O. Smith
A.O. Smith Puritee user guide

Pontec
Pontec PonDuett 5000 operating instructions

AQUAPHOR
AQUAPHOR APRO WH 1000 LPH manual

Berkey
Berkey Big Assembly

3M
3M Aqua-Pure AP1610SS Installation and operating instructions

EINHELL
EINHELL BT-VC500 Original operating instructions

Drinking Fountain Doctor
Drinking Fountain Doctor EHOA8*1E Installation use and care manual

Komptech
Komptech HURRIFEX operating manual