Den-Mat PSP Pro-Select Platinum Guide
1
Pro-Select Platinum® Operation and Instruction Manual
Operation and instruction manual
easy on you, easy on your patients
Two instruments in one – ultrasonic scaling and heated irrigation
system. PSP® is a superb piezo ultrasonic scaling solution and
the only system that combines scaling with heated subgingival
irrigation. Upgrade your practice today.

1
Pro-Select Platinum® Operation and Instruction Manual
Contents
Page
Product Documentation 2
Overview 3
Accesories 4
Getting Started 6
Operation 10
Operation 11
• Foot pedal
• Scaler mode
• Irrigation mode
Cleaning, Disinfection and Sterilization 13
• Control unit
• Bottles
• Cables
• Handpieces
• Tips
• LED lights
Maintenance and Service 15
• Control unit
• Bottles
• Cables
• Handpieces
• Tips
Warranty 16
Troubleshooting Guide 17
Parts, Accessories and Specifications 18
Disclaimers and Special Conditions 19

Pro-Select Platinum® Operation and Instruction Manual
2
Product Documentation
Date installed: ___/___/_______
Installer:
Control Unit #: Handpiece #: Irrigator #:
Tips:
Tip # Date of first use
Handpiece cable:
Cable # Date started Date finished LED lights
Solution ordered:
NaF CHX Date

3
Pro-Select Platinum® Operation and Instruction Manual
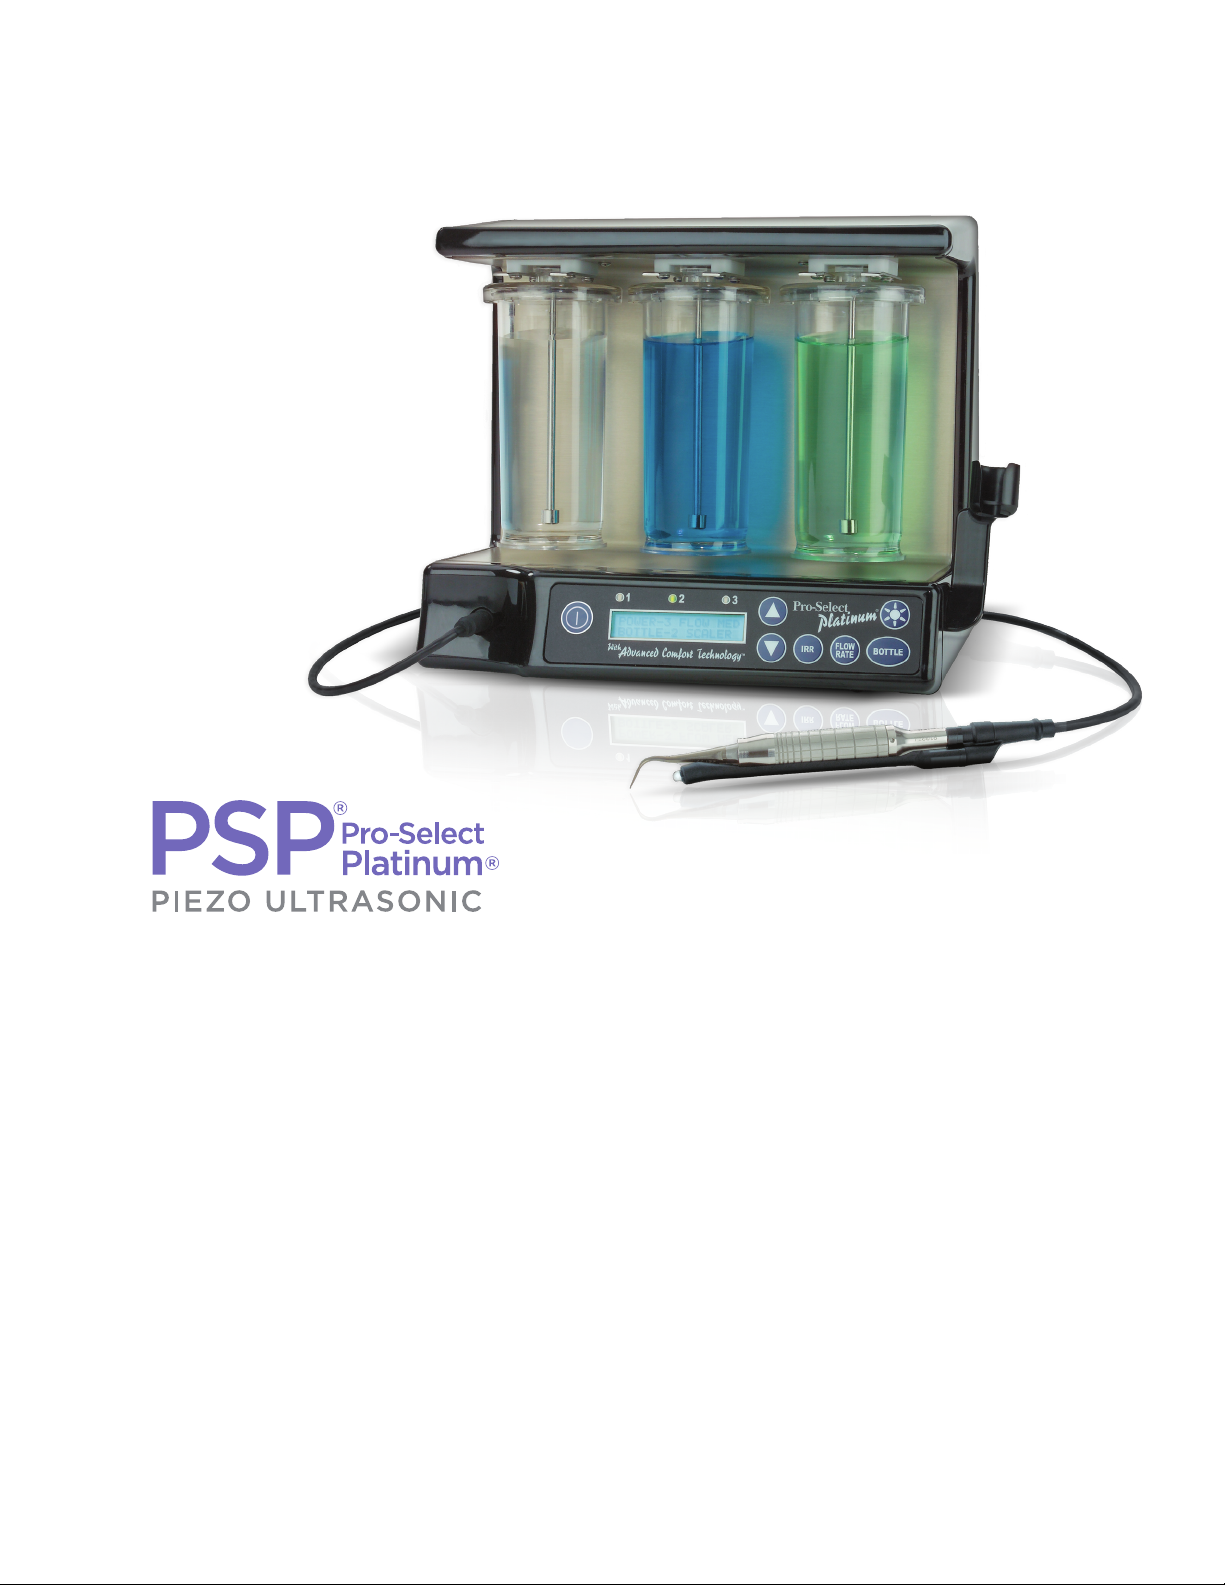
Solution bottles
LED bottle
selection indicators
Power button
Handpiece cable
connector
LCD status display
Brackets
Handpiece holder
Light button
Bottle select button
Flow rate button
Irrigation button
Adjustment buttons
Serial number
Fuse
Power transformer jack
Serial number
bottom module
Foot pedal jack
Control unit
Front view
Back view
Overview

Pro-Select Platinum® Operation and Instruction Manual
4
Item Re-order # Description
Solution bottles S40200 Deliver purified or distilled water
and antimicrobial solutions, such as
chlorhexidine and fluoride
Warning Use distilled or sterile water only in the water bottle. Do not use
tap water. This will void warranty.
Particulate suspensions or viscous fluids should not be used in
PSP® system. This will void warranty.
Scaler handpiece S40801 Connect handpiece to LED cable
and attach tip, see page 8
Irrigator handpiece S40851 Connect handpiece to LED cable
and attach 23g cannula,
see page 8
Foot pedal S40901 Hands-free method for changing
modes and functions,
see page 10
Universal straight tip S30930 Designed to remove calculus and
provide lavage during scaling,
see page 8
23 gauge side 2054 Use for irrigation, see page 9
port cannula
LED cable S40750 Use cable to connect handpieces
to control unit
LED light attachment S40871 Used to illuminate mouth
Accessories
Included with the PSP®

5
Pro-Select Platinum® Operation and Instruction Manual
Item Re-order # Description
Transformer Connect transformer to control
unit then plug into a standard
power outlet
Tip wrench 100773 Tighten and remove tip from
handpiece and measure tip wear
Tip grip 100540 Non-slip rubber makes tip
changing easier
2.0% NaF* 2037MTM • Increased patient comfort because
no trays are required
• In-oce rinse compatible with
composite and porcelain dental
restorations
• Available in both berry or mint
flavors for increased patient
acceptance
0.12% Chlorhexidine* 2193B Antimicrobial rinse
- irrigation solution
*All medicaments packaged separately, not included in Canada.
100200 (US)
S30500 (CAN)

Pro-Select Platinum® Operation and Instruction Manual
6
Getting Started
Note Before use it is recommended that you:
• Lay out all of the components for assembly
• Record date of installation and serial numbers of control unit, scaler handpiece(s),
irrigator handpiece(s) and scaler tip(s)
• Record start use date for handpiece cable(s) and medicament solutions
Warning • To avoid injury, read all operating instructions and safety information before using
PSP®
• Avoid electrical shock, do not plug or unplug transformer with wet hands
• Minimize risk of short circuit and electric shock; prevent water from contacting
control unit
• Do not disassemble or alter handpiece
• Keep away from explosive substances and flammable materials
• Do not use this product in presence of inflammable anesthetics or gases
• Use recommended fuse: 1 Amp / 5x20 Metric / medium time delay
Attention • During vibration, handpiece and cable may aect computer and LAN cables
• Operation near a radio receiver may result in static noise
• Users are responsible for operation control, maintenance and inspection
• Do not subject system to dust, sulfur or salinity
• The handpiece is designed for clinical dental use only
• Always consider patient safety during operation
• Check tip vibration irregularities before use on patient, if found, discontinue use
immediately and contact DenMat Customer Care at 800-433-6628
• Do not force or pull on transformer, handpiece cable or foot pedal
• Do not use tips on metal or ceramic restorations
• Check tip before every use
-
Bent, worn or compromised tips should be replaced
• Contact DenMat at 800-433-6628 for parts and support
!

7
Pro-Select Platinum® Operation and Instruction Manual
Plug in foot control
Warning
PSP® foot pedals are not compatible with any other brand or model.
Interchanging will void warranty.
1. Plug black pedal control connector into black jack on control unit back
2. Push until clicks
3. To remove, depress locking tab and remove connector from jack
Plug in power transformer
1. Plug gray transformer connector into gray jack on control unit back
2. Push until it clicks
3. Control unit will beep
4. To remove, depress locking tab and remove connector from jack
Placing solution bottles
Solution bottles have been designed to slide easily into control unit brackets.
If there is resistance, DO NOT FORCE
1. Fill bottle with appropriate solution. Be sure lid is securely placed on bottle
!

Pro-Select Platinum® Operation and Instruction Manual
8
2. Align bottle with flat sides of lid perpendicular to control unit
3. Grasp bottle by cap
4. Align bottle with control unit bracket. Slide onto bracket until it stops
5. Using cap, rotate bottle right 1/4 turn until it stops
6. Repeat procedure with remaining bottles/brackets
Connect handpiece LED
1. Attach LED on the top of scaler or irrigator handpiece ring, then clip to the bottom
of handpiece
Connect handpiece cable
1. Plug handpiece cable into cable connecter, ensure black ring is seated in opening
2. Plug Scaler handpiece or Irrigator handpiece onto other end of cable
Connect scaler tip
Attention PSP® provides two types of handpieces; one for ultrasonic scaling (threaded);
one for heated subgingival irrigation (non-threaded).
1. Use lint free cloth to wipe all surfaces of threaded scaler handpiece where tip connects
2. Use lint free cloth to wipe threaded end of scaler tip

9
Pro-Select Platinum® Operation and Instruction Manual
3. To connect scaler tip:
• Place handpiece in center of tip grip
• Using a clockwise rotation, screw tip onto handpiece
• Align tip wrench with flat sides of tip base
• Use tip grip and wrench to tighten until tip is secure
4. To remove the scaler tip:
• Place handpiece in center of tip grip
• Turn wrench counterclockwise to loosen tip and remove tip with fingers
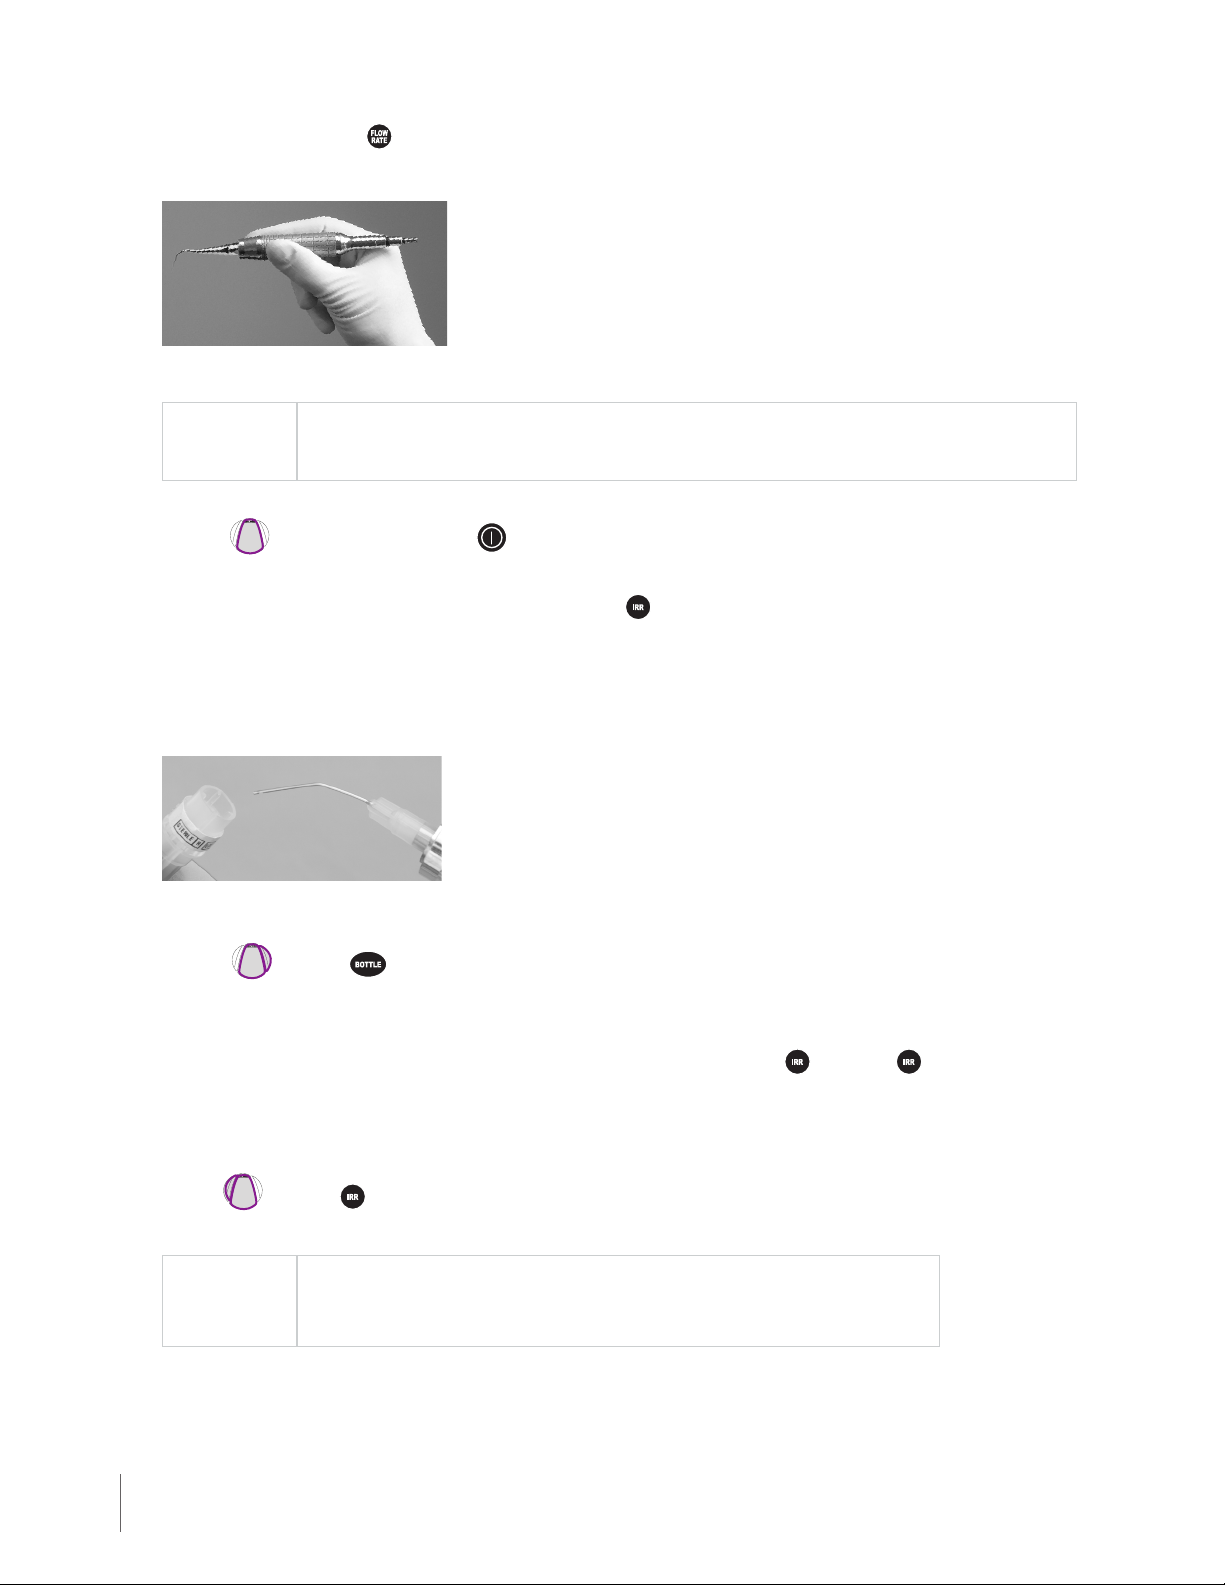
Connect irrigator tip
Warning Irrigation handpiece heater has been designed for use with a 23
gauge side ported cannula. Do not use other gauge cannulas, as
fluid heat variation will result.
1. Slide 23 gauge side ported cannula on irrigation handpiece
2. Using cannula cap, bend cannula for proper adaptation
Attention
An irrigator cannula is a single patient use, disposable item
and should NOT be sterilized.
Connect handpiece to cable
Attention
LED will remain activated for 10 seconds after foot control is released.
1. Plug handpiece into cable
2. Place handpiece in cradle when not in use
!

Pro-Select Platinum® Operation and Instruction Manual
10
Operation
Turn on the PSP®
Press or Press to turn PSP® on or o
Change scaler and irrigation modes
Press and hold down outer pedal, roll foot to center or press to switch from scaler mode to
irrigator mode
Increase power level Decrease power level
Press or press Press or press
Adjust scaler fluid flow rate
Press then use to increase flow and to decrease flow
Select solution bottles
Press and hold down outer pedal, roll foot to center or press to change solution bottles
Using LED handpiece light
Press foot pedal to activate light or press to turn handpiece LED on or o
Monitoring PSP® functions
LCD status display indicates power level, flow rate, current bottle and function mode. LED lights indicate
bottle selection

11
Pro-Select Platinum® Operation and Instruction Manual
Scaler mode
Attention
• Liquid is utilized to flush area and cool frictional heat at tooth surface and scaler tip interface. Liquid flow
should be used at all times during operation.
• Use linear motion similar to hand scaling, move side of tip across tooth surface.
Horizontal orientation Vertical orientation
• Scaler tip length wears with use.
• It is important to regularly measure tip for wear, as shown on page 15.
• Regularly inspect tip for other performance reducing flaws such as a bent tip or tip with flat side(s).
• To flush area for supragingival lavage in scaler mode set power level to “0”, no vibration, and adjust
flow rate as needed.
• Do not place point of scaler tip directly against tooth surface as this could result in tooth damage.
• The last 3 millimeters of scaler tip is the eective working area.
• When scaling, use light, sweeping, eraser-like strokes.
• Do not “tap” tooth or use a start-stop motion.
• For best results, use 3 – 5 grams of lateral pressure.
• The round tip profile allows entire circumference of tip to be used for calculus removal.
1. Press to turn on PSP® or press
2. Select desired fluid bottle
• Press or press on control unit
• A double beep will be heard as you change bottles
• An LED light will illuminate to indicate active bottle and LCD will display which bottle is active
Note
It is common for a clinician to use distilled water, sodium fluoride, or chlorhexidine for periodontal
debridement procedures.
3. Set power level
• Default power level is 3
• Power level has 11 settings shown as 0 - H on LCD
• Use or to change setting
Attention
For a patient with light deposits or for a child, a power setting of “1” or “2” may be adequate.
4. Adjust flow rate
• Default flow rate is 2
• Flow rate has 10 levels; 3 low, 4 medium and 3 high
• Flow rate will be shown on LCD
• Press and then until liquid emits as a fine mist
Pro-Select Platinum® Operation and Instruction Manual
12
5. To reset default press and hold until four beeps are heard
6. A light pen grasp using a stabilizing fulcrum, rather than a power fulcrum, is all that is required using PSP®
Irrigation mode
Attention
• Attach irrigator handpiece while in scaler mode or when power is o.
• Flush distilled water for 30 seconds when finished using medicaments.
1. Place patient in a more upright position
2. Press to turn on PSP® or press
3. Flush irrigator handpiece with water in scaler mode
4. Select irrigator mode by using foot control or pressing on control panel. LCD will show IRR and LCD will
blink while in irrigator mode. Irrigator handpiece will automatically begin a 45 second pre-heat cycle, when pre-
heat cycle is complete a beep will sound
5. Place cannula on irrigator handpiece
6. While waiting for heating cycle activation bend cannula as appropriate for access
7. Select desired fluid bottle
Use or press on control unit. A double beep will be heard as you change bottles. An LED light will
illuminate to indicate active bottle and LCD will show which bottle is active
8. Thorough low volume vacuum is sucient for fluid evacuation from oral cavity
9. Prolonged inactivity will de-activate heater, you must ‘reboot’ by pressing o, then again
to re-activate 45-second pre-heat cycle.
10. Remove and properly discard cannula.
11. Flush irrigator handpiece with distilled water before autoclaving
12. Use or press to switch back to scaler mode. LCD will display scaler mode and current power level.
LCD will stop blinking
Attention
•
Flow rate of liquid from irrigator handpiece is pre-set and not adjustable.
• Studies have shown heated chlorhexidine is more eective than at room
temperature*.
*Data on file

13
Pro-Select Platinum® Operation and Instruction Manual
Cleaning
for Scaler Handpiece, Irrigator Handpiece, and Scaler Tips.
Cleaning protocol (hand piece, irrigator, h/p cable, wrench, tips, tip grip, LEDs)
Step Solution Time (min) Temperature Instructions
1Hospital grade
enzymatic detergent At least 10
Warm, as delivered
from the available
hot water tap
Clean thoroughly - Immerse and soak for
required time, scrub all external surfaces
with a soft bristle brush, or other cleaning
tools as needed. Inspect for visible soil on
exposed surfaces.
2Water At least 1
Warm, as delivered
from the available
hot water tap
Rinse thoroughly immediately after Step 1.
3Air As required Ambient
Allow to air dry in clean area. To speed dry,
place in clean oven at a temperature not to
exceed 40˚ C.
Cleaning for Control Unit
Cover control unit with a disposable barrier or wipe clean with a 70/30 IPA by following disinfectant manufacturer’s
recommendations.
After each patient medicament use and at end of day, each bottle port on control unit, handpiece cable and handpieces
should be flushed with distilled water for 30 seconds. Place distilled water-filled bottles on each of the three brackets
and activate the scaler mode for approximately 30 seconds and repeat process in irrigation mode. It is important no
medicaments are left in control unit lines.
1. Turn o the power switch
2. Remove tip from handpiece using tip wrench and grip
3. Remove handpiece from handpiece cable by grasping the cable connector and pulling straight o connector end of
handpiece, do not pull grasping cable
4. Wipe control unit and foot control with a clean cloth dampened with 70/30 IPA.
5. Do not use an abrasive wipe or cleaning solution, this may damage surface of control unit
6. Safeguards for brushed stainless steel
• Lightly apply high quality stainless steel cleaner on a clean, soft cloth
• Wipe in direction of metal grain. Do not use abrasive cleaning agents or pads which may scratch the finish
• Chlorine compounds can cause stainless steel to discolor if left to stand for more than 5-10 minutes

Pro-Select Platinum® Operation and Instruction Manual
14
Solution bottles
Warning
PSP® bottles are not autoclavable.
Bottles can be wiped clean with a pH neutral surface disinfectant by following
disinfectant manufacturer’s recommendations.
Handpiece cable
After use flush water through cable, wipe cable with a clean cloth dampened
with a surface disinfectant
or
• Roll into autoclave bag for sterilization, avoid crimping
• Follow the autoclave manufacturer’s recommended sterilization procedures
• Cables routinely autoclaved will require more frequent replacement
Handpieces and LED lights
1. Clean outer surface of handpiece and LED light by wiping with a soft cloth
dampened with pH neutral surface disinfection solution
Attention
• Do not use disinfection solution containing phenols.
• Do not spray cleaning solution directly on the handpiece.
2. Remove LED light from handpiece, place handpiece and LED light in a
cassette or sterilization bag and seal
3. Steam sterilize in accordance with autoclave manufacturer’s instructions
Scaler tips
Clean, disinfect, inspect and steam sterilize, per steam autoclave manufacturer’s instructions, before
each use
Tip change kit
1. Tip wrench and tip grip have been designed to be sterilized in a steam autoclave
2. Place tip wrench and tip grip in an autoclave bag and sterilize by following
autoclave manufacturer’s instructions.
Any method of sterilization not specifically recommended in this Operation and Instruction
Manual should be approved by DenMat prior to its use, in order to prevent voiding of warranty
!

15
Pro-Select Platinum® Operation and Instruction Manual
Maintenance
Component Suggested maintenance
Control unit Flush all bottle ports with distilled water at end of every day in both modes
for 30 seconds.
Bottles Clean the filters on the bottom of the stems with soft bristled tooth brush
every 1-2 weeks.
Tip Routinely check tips.
1. Place the tip all the way into the small hole at the end of the tip wrench.
2. If no portion of the tip extends through the hole, then the tip is no longer
functional and needs to be replaced.
3. Regularly inspect for bent tips or wear patterns that result in flattening
of the side(s) of the tip. Tips that exhibit these characteristics need to be
replaced.
4. New tips can be purchased by calling DenMat at 800-433-6628 or at
denmat.com.
Service
To return materials: Please call DenMat Customer Care at 800-433-6628 for an RMA (Return Material
Authorization) number.
Shipping your product in original packaging will oer the best protection against damage during shipping.
All items returned for service must be cleaned, disinfected and sterilized before shipment.

Pro-Select Platinum® Operation and Instruction Manual
16
Limited Hardware Warranty
What does this warranty cover?
Den-Mat Holdings LLC, warrants to the purchaser that the company’s hardware will be free from
defects in workmanship or material under normal use and service for the warranty period as specified
in the warranty schedule below. The warranty period becomes eective on the date of delivery of the
product to the original purchaser. FAILURE ON THE PART OF THE PURCHASER TO USE DISTILLED
WATER OR ANY OTHER NON-APPROVED LIQUID WITH THIS PRODUCT WILL VOID THIS WARRANTY.
What is the Company’s obligation under this warranty?
During the period of this warranty, the company agrees to repair or replace, as its sole option, without
charge to purchaser, any defective hardware (workmanship or material) according to the warranty
schedule below:
WARRANTY SCHEDULE
Item Warranty Period Eligible for Repair
Control Unit 12 months Yes*
Foot Pedal 12 months No, replacement only
Scaler Handpiece 12 months No, replacement only
Irrigator Handpiece 12 months No, replacement only
A/C Adapter 12 months No, replacement only
6’ Autoclave Cable 6 months No, replacement only
Bottles 6 months No, replacement only
Scaler Tips 6 months No, replacement only
LED Light 6 months No, replacement only
Wrench 6 months No, replacement only
Tip Grip 6 months No, replacement only
*If the Control Unit needs to be sent in for repair, all components of the PSP must be included so that DenMat’s
technical support team can repair the unit and test it for functionality prior to returning to the customer.
Hardware may only be returned to the company after a Return Material Authorization (RMA) number
has been obtained. To obtain an RMA number and information on where to deliver the hardware, call
Customer Care at 800-433-6628. Purchaser must return the hardware to the company in an adequate
container for shipping, with freight and insurance prepaid. The RMA number must appear on the outside
of the shipping container. Upon receipt, the company will promptly repair or replace the defective
hardware, and return said hardware to purchaser, freight and insurance prepaid. The company may use
reconditioned or like new parts or systems, at its sole option, when fulfilling its obligations under this
warranty. In any event, the company’s liability for defective hardware is limited to repairing or replacing
the hardware. If hardware is replaced at the option of the company, returned hardware will become the
property of the company.
What does this warranty not cover? This warranty is contingent upon proper use of the hardware.
Normal wear to scaler tips, cables and bottles are not covered. The warranty does not cover damage
due to accident, unusual physical, electrical or electromechanical stress, neglect, misuse, unauthorized
sterilization procedures, improper installation, failure of electric power, air conditioning, humidity
control, transportation, or tampering with or altering the hardware. The company assumes no
responsibility or obligation to purchaser resulting from future hardware changes made by the company
or its component suppliers, after purchase of the hardware.

17
Pro-Select Platinum® Operation and Instruction Manual
Troubleshooting Guide
Problem Solution
System produces water,
but has no tip vibration or
has pulsing tip vibration
• Make sure cable is firmly attached to handpiece and control unit
• Measure tip
• Make sure tip is cleaned and tightened with tip wrench and tip grip
• Try second cable
• Try second handpiece
• Try second tip
• If problem persists, contact DenMat Customer Care at 800-433-6628
No water flow in scaler or
irrigator mode
• Check to ensure that the flow rate is set on Low, Med, or Hi on the LCD display
• Make sure the bottles are locked in and there is liquid in the bottles
• Check flow rate directly from control unit
• Select a dierent bottle, replace bottle
• Check flow rate from the cable, try a second cable
• Check flow rate from the handpiece, try a second handpiece
• Check flow rate from the tip or cannula, try a second tip or cannula
• If problem persists, contact DenMat Customer Care at 800-433-6628
LED light not working
• To activate handpiece LED light press center foot pad or on the keypad
• Make sure the metal connection at the top of the LED light is secured to the handpiece ring
• Make sure cable is firmly attached to handpiece and control unit
• Try a second LED light
• Try a second cable
• If problem persists, contact DenMat Customer Care at 800-433-6628
Irrigator not working
• Make sure irrigator assembly/set up has been precisely followed
• Make sure system is in irrigator mode
• Make sure irrigator handpiece is being used
• Make sure cable is firmly attached to handpiece and control unit
• Try a second cable
• Try a second irrigator handpiece
• If problem persists, contact DenMat Customer Care at 800-433-6628
Too much water
• Lower the flow rate (see page 8) in scaler mode only
• Make sure to use the proper cannula in irrigator mode only
• If problem persists, contact DenMat Customer Care at 800-433-6628
Will not change to irrigation
mode with foot pedal
• Check foot pedal (up/down) to verify foot pedal
• Manually change to irrigator mode with keypad
• If problem persists, contact DenMat Customer Care at 800-433-6628
To contact DenMat Customer Care, call 800-433-6628
What are the limits on the company’s liability? In any case, the company shall not be liable for the loss of
profits, lost savings, special, incidental, consequential, indirect or other similar damages arising from the
breach of contract, negligence, or other legal theory even if the company or its agent has been advised of the
possibility of such damages, or for any claim by any other party.
THIS WARRANTY IS EXCLUSIVE AND IN LIEU OF ALL OTHER REPRESENTATIONS AND WARRANTIES,
EXPRESS OR IMPLIED; AND SELLER EXPRESSLY DISCLAIMS AND EXCLUDES ANY IMPLIED WARRANTY OF
MERCHANTABILITY OR FITNESS FOR ANY PARTICULAR PURPOSE. SELLER SHALL NOT BE LIABLE FOR ANY
INCIDENTAL OR CONSEQUENTIAL DAMAGES FOR BREACH OF ANY EXPRESS OR IMPLIED WARRANTY ON
THIS PRODUCT.

Pro-Select Platinum® Operation and Instruction Manual
18
Parts, Accessories and Specifications
Replacement part numbers
When inquiring about new or replacement parts for your PSP®
system, please refer to the following part numbers
2037MTM 2.0% Neutral NaF irrigation solution (64oz)
2054 Irrigator cannulas (100/Box)
2193B 0.12% Chlorhexidine irrigation solution (16 oz.)
100351 Autoclave cassette
100540 Tip grip
100773 Tip gauge/wrench
100200* Power transformer
S30500* Power transformer
S30550 6 ft. Autoclavable cable (non-LED)
S30920 Set of three tips (left, right, straight)
S30930 Universal straight tip
S30940 Set of three left curve tips
S30950 Set of three right curve tips
S30960 Set of three universal straight tips
S40200 Solution bottle with lid assembly
S40750 LED handpiece cable
S40871 LED light
S40801 Scaler handpiece
S40851 Irrigator handpiece
S40901 Multi-function foot pedal
*Refer to label on back of control box
Specifications
Device classification: Class II equipment
Type bf applied part
Dimensions
Control unit
Length 11.25 In (28.6Cm) depth 6.2 In (15.75Cm)
Height 8.6 In (21.9Cm)
Handpiece w/tip Length 6.5 In (16.5Cm)
Weight
Control unit 114 oz (3228 grams)
Handpiece 1.8 oz (52 grams)
Voltage, frequency 120v, 50/60 hz
Transducer piezoelectric
Transformer 24vac, 50/60 hz /model #S30500
Fuse 1 amp / 5x20 metric / medium time delay
Power consumption 35 watts max.
Tip design Universal straight tip, similar to periodontal probe
Tip operating frequency Approx. 45,000 Hz (vibrations per second)
Operating temperature 15°c to 35°c
Table of contents
Other Den-Mat Dental Equipment manuals


Popular Dental Equipment manuals by other brands


Zubler
Zubler VARIOstar Series instructions

W&H
W&H Endea Endo Cursor EB-62 Instructions for use

Aseptico
Aseptico ADU-40CF Command Air OPERATION, MAINTENANCE & SERVICE MANUAL

Blancone
Blancone ARCUS+ Instructions for use

Dekema
Dekema AUSTROMAT 624i operating instructions

Vista Apex
Vista Apex EndoUltra Instructions for use