manuals.online logo
Brands
  1. Home
  2. •
  3. Brands
  4. •
  5. Denon
  6. •
  7. Amplifier
  8. •
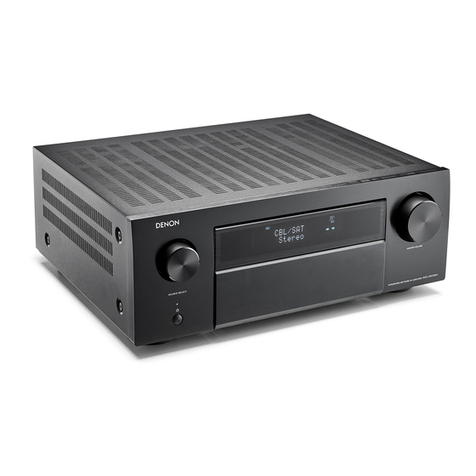
  9. Denon PMA-600NE User manual

Denon PMA-600NE User manual

Other manuals for PMA-600NE

2

This manual suits for next models

1

Other Denon Amplifier manuals

Denon AVR-3310CI User manual

Denon

Denon AVR-3310CI User manual

Denon DN-A7100 - AV Surround Preamplifier User manual

Denon

Denon DN-A7100 - AV Surround Preamplifier User manual

Denon PMA-1510AE User manual

Denon

Denon PMA-1510AE User manual

Denon POA-3012CI - Multi-Zone Audio Distribution Power... User manual

Denon

Denon POA-3012CI - Multi-Zone Audio Distribution Power... User manual

Denon AVC-X8500H User manual

Denon

Denon AVC-X8500H User manual

Denon Professional DN-A200 User manual

Denon

Denon Professional DN-A200 User manual

Denon PMA-700V User manual

Denon

Denon PMA-700V User manual

Denon PMA-720AE User manual

Denon

Denon PMA-720AE User manual

Denon PMA-2000IVR User manual

Denon

Denon PMA-2000IVR User manual

Denon POA-A1HDCI User manual

Denon

Denon POA-A1HDCI User manual

Denon PMA-770 User manual

Denon

Denon PMA-770 User manual

Denon PMA-1600NE User manual

Denon

Denon PMA-1600NE User manual

Denon POA-A1HDCI User manual

Denon

Denon POA-A1HDCI User manual

Denon PMA-1510AE User manual

Denon

Denon PMA-1510AE User manual

Denon PMA-300V User manual

Denon

Denon PMA-300V User manual

Denon PMA-1600NE User manual

Denon

Denon PMA-1600NE User manual

Denon AVC-X3700H User manual

Denon

Denon AVC-X3700H User manual

Denon PMA-60 User manual

Denon

Denon PMA-60 User manual

Denon POA-3012CI - Multi-Zone Audio Distribution Power... User manual

Denon

Denon POA-3012CI - Multi-Zone Audio Distribution Power... User manual

Denon POA-6600 User manual

Denon

Denon POA-6600 User manual

Denon PMA-1600NE User manual

Denon

Denon PMA-1600NE User manual

Denon PMA-30 User manual

Denon

Denon PMA-30 User manual

Denon AVC-X3800H User manual

Denon

Denon AVC-X3800H User manual

Denon AVC-X6700H User manual

Denon

Denon AVC-X6700H User manual

Popular Amplifier manuals by other brands

Magnat Audio EDITION FOUR Owner's manual/warranty document

Magnat Audio

Magnat Audio EDITION FOUR Owner's manual/warranty document

Inter-m PA-2000A Operation manual

Inter-m

Inter-m PA-2000A Operation manual

Yamaha TX6n owner's manual

Yamaha

Yamaha TX6n owner's manual

Peavey TNT 150 user guide

Peavey

Peavey TNT 150 user guide

Bosch LBB 1903/10 Installation and user instructions

Bosch

Bosch LBB 1903/10 Installation and user instructions

Avocent Emerge DA1200D Installer/user guide

Avocent

Avocent Emerge DA1200D Installer/user guide

Redgum RGi35 operating instructions

Redgum

Redgum RGi35 operating instructions

Cambridge Audio AXA25 user manual

Cambridge Audio

Cambridge Audio AXA25 user manual

Alpine MRP-M200 owner's manual

Alpine

Alpine MRP-M200 owner's manual

Technical Pro H1502UrBT user manual

Technical Pro

Technical Pro H1502UrBT user manual

FMS EMGZ307 operating manual

FMS

FMS EMGZ307 operating manual

Racal Instruments 5601 user manual

Racal Instruments

Racal Instruments 5601 user manual

Valcom V-1094A Technical specifications

Valcom

Valcom V-1094A Technical specifications

Cambridge Audio 851D user manual

Cambridge Audio

Cambridge Audio 851D user manual

QSC 3800 Specifications

QSC

QSC 3800 Specifications

NAD C300 owner's manual

NAD

NAD C300 owner's manual

Rotel RMB-1077 owner's manual

Rotel

Rotel RMB-1077 owner's manual

Peavey Monitor 300 Series operating guide

Peavey

Peavey Monitor 300 Series operating guide

manuals.online logo
manuals.online logoBrands
  • About & Mission
  • Contact us
  • Privacy Policy
  • Terms and Conditions

Copyright 2025 Manuals.Online. All Rights Reserved.

.
PMA-600NE
INTEGRATED AMPLIFIER
Owner’s Manual
.
Contents Connections Playback Settings Tips Appendix
1
Front panel Rear panel
Remote control
unit
Index
Accessories 4
Inserting the batteries 5
Operating range of the remote control unit 5
Features 6
High quality sound 6
High performance 6
Part names and functions 7
Front panel 7
Rear panel 10
Remote control unit 12
Connections
Connecting speakers 17
Subwoofer connection 18
Speaker connection 18
Connecting a playback device 19
Connecting a recording device 20
Connecting to a device with digital audio output connectors 21
Connecting the power cord 22
Playback
Turning the power on 24
Switching the power to standby 24
Selecting the input source 25
Adjusting the volume 25
Turning off the sound temporarily (Muting) 25
Adjusting the tone 25
Playing CDs 26
Listening to music on a Bluetooth device 28
Connecting and playing back from a digital device (Coaxial/
Optical) 30
Recording 31
Settings
Setting the Auto Standby mode 32
Contents Connections Playback Settings Tips Appendix
2
Front panel Rear panel
Remote control
unit
Index
Tips
Tips 34
Troubleshooting 35
Power does not turn on / Power is turned off 36
Operations cannot be performed through the remote control unit 37
No sound comes out 38
Desired sound does not come out 39
Sound is interrupted or noise occurs 40
Bluetooth cannot be played back 41
Audio from digital devices cannot be played back (Coaxial/
Optical) 42
Appendix
D/A converter 43
Playing back a Bluetooth device 43
Explanation of terms 44
Trademark information 45
Specifications 46
Index 50
Contents Connections Playback Settings Tips Appendix
3
Front panel Rear panel
Remote control
unit
Index
Thank you for purchasing this Denon product. To ensure proper operation, please read this owner’s manual carefully before using the product.
After reading this manual, be sure to keep it for future reference.
Accessories
Check that the following parts are supplied with the product.
.
Quick Start Guide CD-ROM
(Owner’s Manual)
Safety Instructions Warranty
(for North America model only)
R03/AAA batteries
Remote control unit
(RC-1234)
Notes on radio
Contents Connections Playback Settings Tips Appendix
4
Front panel Rear panel
Remote control
unit
Index
Inserting the batteries
1Remove the rear lid in the direction of the arrow and
remove it.
.
2Insert two batteries correctly into the battery
compartment as indicated.
.
Batteries
3Put the rear cover back on.
NOTE
0To prevent damage or leakage of battery fluid:
0Do not use a new battery together with an old one.
0Do not use two different types of batteries.
0Remove the batteries from the remote control unit if it will not be in use for long
periods.
0If the battery fluid should leak, carefully wipe the fluid off the inside of the battery
compartment and insert new batteries.
Operating range of the remote control
unit
Point the remote control unit at the remote sensor when operating it.
.
30°
Approx. 23 ft/7 m
30°
Contents Connections Playback Settings Tips Appendix
5
Front panel Rear panel
Remote control
unit
Index
Features
High quality sound
0Equipped with an advanced high current single push-pull circuit
that achieves a perfect balance of delicacy with power
This unit is equipped with a HC transistor that allows a peak current that
is two to three times that of an ordinary audio power transistor, enabling
clear and stable musical expression from minute sound to high
volumes.
High performance
0DIGITAL AUDIO IN connectors (COAXIAL/OPTICAL)
You can play back PCM signals up to 192 kHz/24 bits by inputting digital
audio signals from an external device into this unit.
0Phono input connectors for turntables
This unit is equipped with a phono amplifier so that you can directly
connect a turntable and play records. (Only the MM cartridge can be
used.)
Contents Connections Playback Settings Tips Appendix
6
Front panel Rear panel
Remote control
unit
Index
Part names and functions
Front panel
.
rueqw y
ti
Q
1
Q
2
Q
3
Q
5
Q
0
o Q
6
Q
4
For details, see the next page.
Contents Connections Playback Settings Tips Appendix
7
Front panel Rear panel
Remote control
unit
Index
.
ruey
ti
qw
o
APower operation button (X)
This turns the power on/off. (v p. 24)
BPower indicator
This is displayed as follows according to the power status:
0Lit in green: Power on
0Lit in red: Bluetooth standby (v p. 27)
0Off: Normal standby
CRemote control sensor
This receives signals from the remote control unit. (v p. 5)
DANALOG MODE button
This turns the analog mode on/off.
(v p. 27)
EANALOG MODE indicator
This is displayed as follows, according to the analog mode status.
0Lit in green: Analog mode on
0Off: Analog mode off
FSOURCE DIRECT indicator
This is displayed as follows according to the source direct status.
0Lit in green: Source direct mode on
0Off: Source direct mode off
GSOURCE DIRECT button
This turns source direct mode on/off. (v p. 26)
HVOLUME knob
This adjusts the volume level. (v p. 25)
IHeadphones jack (PHONES)
Used to connect headphones.
When the headphones are plugged into this jack, audio will no longer
be output from the connected speakers or from the PRE OUT
connectors.
NOTE
0To prevent hearing loss, do not raise the volume level excessively when using
headphones.
Contents Connections Playback Settings Tips Appendix
8
Front panel Rear panel
Remote control
unit
Index
.
Q
1
Q
2
Q
3
Q
0
Q
5
Q
6
Q
4
JBASS control knob
This setting adjusts the volume level for the bass. (v p. 25)
KTREBLE control knob
This setting adjusts the volume level for the treble. (v p. 25)
LBALANCE control knob
This adjusts the balance of the volume output from the left and right
speakers. (v p. 25)
MBLUETOOTH/PAIRING button
This switches the input source to “BLUETOOTH”. It is also pressed
during the pairing operation. (v p. 28)
NDIGITAL IN/BLUETOOTH indicator
0This is displayed as follows, according to the status of the digital
audio signals that are input to the digital audio input terminals on this
unit.
0Lit in green: Playback is supported on this unit
0Blinking in green: Playback is not supported on this unit
0Off: Sampling frequency cannot be detected
0For details on the audio signal specifications that are compatible with this
unit, see “D/A converter” (v p. 43).
0This is displayed as follows according to the Bluetooth connection
status:
0Blinking in blue (intervals of about 1 second): Pairing mode
0Blinking in blue (intervals of about 2 seconds): Searching mode
(searching for a paired Bluetooth device and attempting to
connect via Bluetooth)
0Lit in blue: Connecting mode (a Bluetooth connection has been
made with a Bluetooth device)
0Off: Waiting mode (a Bluetooth connection has not been made
with any Bluetooth device)
OINPUT SELECTOR knob
This selects the input source. (v p. 25)
PInput indicators (v p. 25)
00, a and b can be adjusted when 6 is off (SOURCE DIRECT mode is off).
Contents Connections Playback Settings Tips Appendix
9
Front panel Rear panel
Remote control
unit
Index
Rear panel
.
y i
er tqw
u
For details, see the next page.
Contents Connections Playback Settings Tips Appendix
10
Front panel Rear panel
Remote control
unit
Index