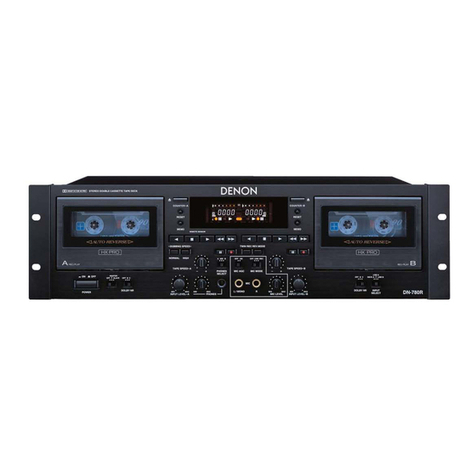
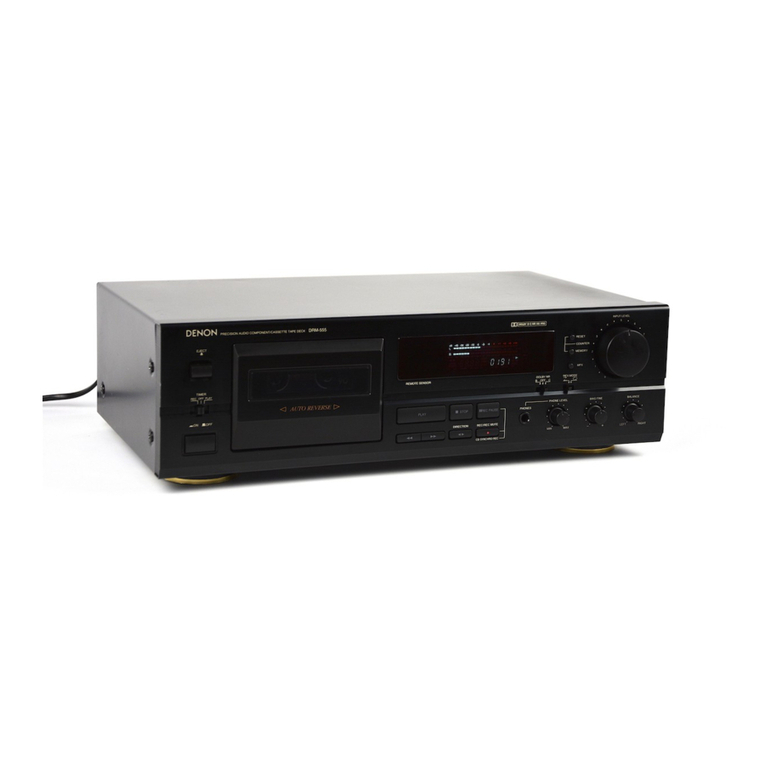
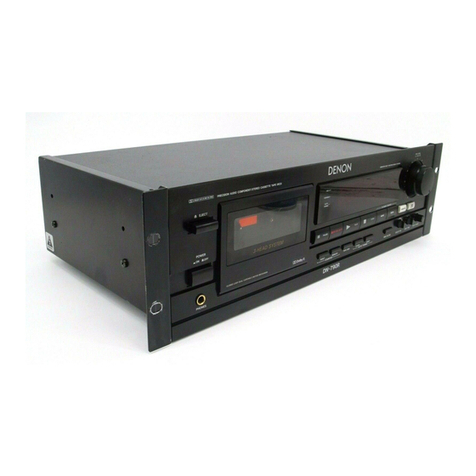
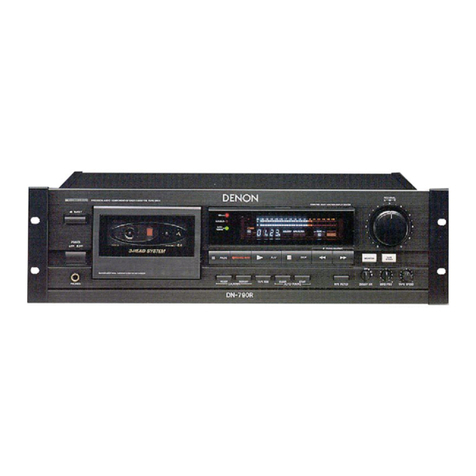
Denon DN-780R User manual

Hi-Fi Component
SERVICE MANUAL
MODEL
DN-780R
STEREO CASSETTE TAPE DECK
Some illustrations using in this service manual are slightly different from the actual set.
16-11, YUSHIMA 3-CHOME, BUNKYOU-KU, TOKYO 113-0034 JAPAN
Telephone: 03 (3837) 5321
X0147 NC 0207

DN-780R
2
SAFETY PRECAUTIONS
The following check should be performed for the continued protection of the customer and service technician.
LEAKAGE CURRENT CHECK
Before returning the unit to the customer, make sure you make either (1) a leakage current check or (2) a line to
chassis resistance check. If the leakage current exceeds 0.5 milliamps, or if the resistance from chassis to either
side of the power cord is less than 460 kohms, the unit is defective.
■Dolby noise reduction and HX Por headroom extension manufactured under license from Dolby Laboratories
Licensing Corporation. HX pro originated by Bang & Olufsen.
■“DOLBY”, the double-D symbol and “HX Pro” are trademarks of Dolby Laboratories Licensing Corporation.
SPECIFICATIONS
Type: Vertical tape loading; 4-track 2-channel stereo double cassette deck
Heads: Recording/playback head (hard permalloy) ×2
Erase head (Double-gap ferrite) ×2
Motors: Capstan (DC servo motor) ×2
Reel (DC motor) ×2
Tape Speed: 4.8 cm/sec.
Variable (PLAY): Approx. ±12%
Fast Forward, Rewind Time: Approx. 110 sec. with a C-60 cassette
Recording Bias: Approx. 105 kHz
Overall S/N Ratio
(at 3% THD level): Dolby C NR on: more than 74 dB (CCIR/ARM)
Overall Frequency Response: 20~18,000 Hz ±3 dB (at −20 dB, Metal tape)
Channel Separation: More than 40 dB (at 1 kHz)
Wow & Flutter: 0.06% WRMS, ±0.14% w.peak
Input
LINE: 50 mV (input level at maximum)
Input impedance: 240 kohm unbalanced
MIC: 0.775 mV (mic level at maximum)
Output
LINE: 775 mV (0 dB)
(with 47 kohm load, recorded level of 200 nWb/m)
PHONES: 7 mW output level at maximum
(optimum load impdance 8 ohm~1.2 kohm)
Power Supply: 33 W
Dimensions: 438 (W) ×134 (H) ×275 (D) mm
Wehght: 6.5 kg (14 lbs 5 oz)
Installation: 19-inch rack mountable (3U)
* For improvement purposes, specifications and functions are subject to change without advanced notice.

3
DN-780R
DISASSEMBLY
( Follow the procedure below in reverse order when reassembling. )
1. Top Cover
(1) From both sides, remove 4 screws 1, Bracket, and
2 screws 2.
(2) Remove 3 screws 3on the rear, then detach the
Top Cover to the arrow direction.
1
2
1
2. Front Panel
(1) Remove 2 screws 4and 3 screws 5from top
and bottom of the Front Panel.
(2) Disconnect the wire and 3 connectors from the
Cassette Mecha., then detach the Front Panel to
the arrow direction.
(3) Remove the screw 6to free earth wire.
(4) Disconnect FFC.
(5) From the Cassette Mecha., disconnect
2 connectors.
(6) Remove 2 screws 7to detach the SWA UNIT and
SWB UNIT.
3
2
Connector
4
4
6
SWA UNIT Connector
Earth Wire
SWB UNIT
Connector
FFC
Wire
5
7
7

4
DN-780R
3. DISPLAY P.W.B./VOLUME P.W.B.
(1) Pull out 6 knobs on the front.
(2) Remove 9 screws 8on the DISPLAY P.W.B.
(3) Remove 2 screws 9on the MIC UNIT.
4. Cassette Mecha. A & B
Remove 4 screws each on both Cassette
Mecha. A and B.
5. Cassette Door
(1) Take off the Cassette Window on the front.
(2) Remove the screw
to detach
the Mini-damper.
(3) Remove the screw to detach the Door
Bracket.
(4) With pushing the shaft in the arrow directions,
no spring side first, detach the Cassette Door.
knob knob
DISPLAY P.W.B.
MIC UNIT
8
Cassette Mecha. A
Cassette Mecha. B
Cassette Window
Cassette Door
Mini-damper
Spring
Shaft
9
Door Bracket

5
DN-780R
6. Audio P.W.B.
(1) From the Audio P.W.B., disconnect the connector.
(2) Remove 3 screws ! .
(3) Remove 4 screws " and # each on the rear.
7. Power P.W.B.
(1) Disconnect the power connector.
(2) Remove the screw $ and 4 screws % .
(3) Release the P.W.B. holder.
$
%
Power Connector
P.W.B. Holder
!
Audio P.W.B.
!
#
#
"
Connector

6
DN-780R
4
32
15678
D
C
B
A
E
BLOCK DIAGRAM
(Option)
DN780RBlock.p65 02/06/27, 16:04Page 6 AdobePageMaker6.5J/Win

7
DN-780R
4
32
15678
D
C
B
A
E
LEVEL DIAGRAMS
XLR -17.5dB
MIC -62dB
DCA -24dB -24.5dB
-8.2dB
-19dB
+2.5dB(METAL)
+1dB (CHROME)
-1dB (NORMAL)
+2.5dB
-10dB
-50dB
-60dB
-70dB
-20dB
-40dB
-30dB
0dB
(dBV)
IC103(403)
HA12170
IC605(606)
XLR
7(1)
IC707(708) VR804(805)
VR103(403)
IC108(408) IC110(410)
RCA
1(7) 30(1) 16(15) 1(7)
IC807
7(1)
IC801(805)
7
LINE IN
MIC
ACD 780 (Option)
0dB=0.775V
* MIC MIDE = REC
MIC AGC = OFF
RECORDING SYSTEM
INPUT FREQUENCY 400Hz
DN780RLevel.p65 02/06/27, 16:05Page 7 AdobePageMaker6.5J/Win

8
DN-780R
4
32
15678
D
C
B
A
E
-71dB
-19dB
-28dB
+4dB(XLR)
0dB(RCA)
-5dB(HEAD PHONE)
-10dB
-50dB
-60dB
-70dB
-20dB
-40dB
-30dB
0dB
(dBV)
0dB=0.775V
IC103(403)
HA12170
XLR
TR101(401)
VR101(401)
IC105(405)
IC601(603)
LOAD
600 ohm
LOAD
33 ohm
IC104(404)
IC101(401)
NJM2068
3(5)
1(7) 1(7) 1(7)
28
(3) 22
(9)
LINE OUT
HEAD PHONE
RCA
ACD 780 (Option)
PLAYBACK SYSTEM
TCC-130 DOLBY B-TYPE
DN780RLevel.p65 02/06/27, 16:05Page 8 AdobePageMaker6.5J/Win

9
DN-780R
ADJUSTMENT
ADJUSTING AND CHECKING THE
MECHANISM SECTION
1. Replacing Pinch Roller
Before replacing the pinch roller, clean the tape contact
surface of the pinch roller and the capstan shaft.
Most causes of poor tape transport can be traced to dirty
pinch roller and capstan shaft.
Removing the pinch roller
Remove the clips that press the pinch roller and pull the
pinch roller forward remove it.
After replacing, run a padles C-90 tape to check for tape
curls at the tape guide section of the head.
2. Checking the pressure Force of the Pinch
Roller
In the playback mode, hook a spring weight onto the
bracket at the center of the pinch roller. After separating
the pinch roller from the capstan shaft allow the pinch roller
to contact the capstan shaft again. Check to make sure
the spring weight reads between 250 ~ 350g when the
pinch roller starts to rotate.
Replace the pinch roller when it does not conform to the
standard specification values.
3. Replacing the Head Ass'y
(1) Removing the head Ass'y
1. Remove the head base mounting screws.
2. Remove the head base from the lead holder and
the wire connectors.
(2) Head Ass'y Installation
1. Assembly is the reverse of disassembly.
4. Adjusting the R/P HEAD
Azimuth adjustments
Set test tape A-BEX TCC-153 so that the A surface faces
forward, and adjust accordingly.
(1) Playback FWD. Turn the azimuth adjustment nut so
that the Lissajous waveform (A) is at maximum scale
and the Lissajous waveform (B) is at minimum scale.
(2) Playback REV. Turn the azimuth adjustment nut in
the same manner as (1), above.
(3) Make further adjustments to (1) and (2), above.
(4) Apply torsion locks to the adjusted nuts.
Note: Only the azimuth adjustment is necessary; no height
and tilt angle adjustments are required.
Capstan shaft
Pinch roller
250 ~ 350g
L
R
PB Amp
A-BEX TCC-153
LINE OUT
V
H
A
B
FWD REV
R/P Head

10
DN-780R
5. Checking the Take-up Torque
Load the cassette type torque meter
FWD side ......... SONY TW2111A
REV side ..........SONY TW2121A
Check to make sure that the average torque meter reading
is within 30 ~ 70g-cm during playback. If it is not within
this range, check the voltage (approx. 4V) of the reel motor.
After the verification, replace the reel motor if there is no
problem with the voltage value.
6. Checking the FF and REW Torques
Load the cassette type torque meter (SONY TW2231).
Check to make sure the torque meter indicates within
90 ~ 180g-cm at the end of FF and REW.
7. Checking the Back Tension Torque During
Record/Playback
Load the cassette type torque meter
FWD side ......... SONY TW2111A
REV side ..........SONY TW2121A
Check to make sure the torque meter reads between
2 ~ 6g-cm during playback and that there is no unevenness.
8. Checking the FF and REW Times
Load a C-60 cassette tape (TDK AC-514); check to make
sure the tape is fast forwarded or rewound within 85 ~
115 seconds. If it is not within this range, check sections 5
and 7.
9. Checking the Operation of the Erase
Prevention, Metal and Chrome Switch
Confirm that the sensor arm properly detecting the tape
type detection holes on the cassette housing.
ADJUSTING THE ELECTRICAL SECTIONS
Measuring instruments necessary for
adjustments
(1) Audio signal generator
(2) Variable resistance attenuator
(3) Electronic voltmeter
(4) Oscilloscope
(5) Frequency counter
(6) Adjustment screwdriver.
(7) Trap coil adjustment square stick
(8) Test tapes (SONY TY-224)
(A-BEX TCC-130, TCC-153, TCC-262B/162B)
(TDK AC-514)
(9) Transport Check cassette tape (A-BEX TCC-902)
Caution on adjusting
(1) Before adjusting, clean the head surface, capstan and
the pinch roller with a gauze or cotton swab moistened
with alcohol.
(2) Demagnetize the R/P HEAD and the E HEAD with a
head eraser.
(3) Completely demagnetize the adjustment screwdriver.
(4) Unless instructed otherwise, set the various controls
as follows:
INPUT volume ....................... maximum
DOLBY NR button ................. OFF
TAPE SPEED-A (-B) ............. Center click position
PHONES SELECT ................ MIX
INPUT SELECT .................... LINE B
1. Tape Transport Check
Load the transport check cassette. In the operational mode,
illuminate the fixing guides of the R/P HEAD with a lamp
and check to make sure the tape edge does not come in
contact with the tape guide section.
The tape transport is the most important element in
determining the performance of a cassette deck.
Avoid moving the various adjustment screws, nuts, etc.,
as much as possible. Refer to the pages on "Adjusting
and Cheking the Mechanism Section" when replacing or
adjusting the R/P HEAD.
2. Adjusting the Azimuth
(1) After completing the tape transport check, load the
test tape (A-BEX TCC-153).
(2) Playback (both FWD side and REV side) the test tape;
adjust the azimuth screw so that section A of the
Lissajous waveform is maximum and section B is
minimum.
L
R
PB Amp
A-BEX TCC-153
LINE OUT
V
H
A
B
FWD REV
R/P Head
11
DN-780R
3. Checking and Adjusting the Tape Speed
(1) Connect the frequency counter to the LINE OUT
terminal and load test tape (SONY TY-224).
(2) Load cassette tapes on both cassette decks A and B.
Next, on the deck (A or B) whose speed is to be
adjusted, while holding down the , , and
buttons of deck A together, press the POWER switch.
After the power has been on for about two seconds,
the Remote Control Indicator " " in Display will light
up and the cassette deck will begin to play in speed
adjustment mode.
(Speed adjustments can not be made, unless this
mode is first selected.)
(3) First high speed adjustments, press the DUBBING
SPEED "HIGH" Button and use VR101 for Casette
Deck A and VR102 for Cassette Deck B.
(Note that speed adjustment mode is cancelled when
the tape is ejected.)
(4) After completing high speed adjustments, press the
DUBBING SPEED "HIGH" Button again then tape
speed is slow (Normal speed). And start normal speed
adjustments, use Control Unit VR103 for Cassette
Deck A and VR104 for Cassette Deck B.
4. Playback System Adjustment
(1) Playback level
Playback a test tape for Dolby standard level (A-BEX
TCC-130). Adjust (Lch) and (Rch) so that the LINE
OUT terminal level is at 0 dB (775 mV).
(2) Verifying playback frequency characteristics
Playback the test tape (A-BEX TCC-262B/162B) and
verify that the frequency characteristics conform to
the specified standard.
Note: Before checking the playback frequency response,
first adjust the azimuth using the 8 kHz signal at the
beginning of the test tape (A-BEX TCC-262B). Also,
after checking the playback frequency, make sure
to readjust the azimuth with the test tape (A-BEX
TCC-153) and then lock the adjustment screw.
A-BEX TCC-130
A-BEX TCC-262B/162B
PB Amp
PB Amp
LINE OUT
LINE OUT
V.V
V.V
(db)
+6
+5
+4
+3
+2
+1
0
−1
−2
−3
−4
−5
−6
20 10050 200 500 1 k 2 k 5 k 10 k 12 k 20 k (Hz)
Tape: A-BEX TCC-262B/162B
SONY TY-224
PB Amp
LINE OUT
F. Counter
Playback frequency characteristics
Mode
Normal
speed
High
speed
A/B
AVR-103 3005±5
VR-104 3005±5
VR-101 6010±10
VR-102 6010±10
B
B
A
Adjusting volume
number
F. counter
(Hz)
DECK L/R
L VR-101
VR-102
VR-401
VR-402
R
R
L
Adjusting volume number
Playback Level
A
B

12
DN-780R
5. Recording System Adjustment
5-1. Adjusting recording/playback comprehensive
frequency characteristics.
(1) Load a test tape TDK AC-514.
Record with a -20 dB 1 kHz input level signal into
the LINE IN terminal and playback.
(2) Make a sample recording using a 12 kHz input
signal and playback this recording. Adjust (left
channel) and (right channel) so that they conform
to the following specified characteristics.
(db)
+6
+5
+4
+3
+2
+1
0
−1
−2
−3
−4
−5
−6
20 10050 200 500 1 k 2 k 5 k 10 k 12 k 20 k (Hz)
Tape
Dolby NR
Level
: AC-514
: Off
: −20 dB From Dolby Level
5-2. Recording/Playback Level Adjustment
(1) Load the test tape TDK AC-514. Make a sample
recording with the 1 kHz (-20 dB) signal and play
this section back.
(2) Adjust (Lch) and (Rch) so that the output from
LINE OUT terminal is the same as the output at
recording monitoring time.
5-3. Dolby C recording and playback comprehensive
frequency characteristics verification
(1) Set the Dolby NR switch at "C" position.
(2) Use a test tape TDK AC-514 and record and
playback as in item 5-1 to verity that they satisfy
the characteristics standards.
(db)
+6
+5
+4
+3
+2
+1
0
−1
−2
−3
−4
−5
−6
20 10050 200 500 1 k 2 k 5 k 10 k 12 k 20 k (Hz)
Tape
Dolby NR
Level
: AC-514
: On C
: −20 dB From Dolby Level
Record/Playback Overall Frequency Response
ATT
LINE IN
LINE OUT
V.V
REC Amp
PB Amp
Dolby C Record/Playback Overall Frequency Response
DECK L/R
LVR-105
VR-106
VR-405
VR-406
R
R
L
Adjusting volume number
Frequency Responce
A
B
DECK L/R
L VR-103
VR-104
VR-403
VR-404
R
R
L
Adjusting volume number
R/P Level Adjustment
A
B

13
DN-780R
1. Displaying the Operating Time
(1) Set the power to on while pressing the “STOP ( )”, “RESET”, and “MEMO” buttons of the Deck A together.
(2) The and buttons of the Deck A are used to switch the display for the Deck A mechanism or for the Deck B mechanism.
MECHANISM OPERATING TIME CHECK
The total operating time of the mechanism is registered in this unit.
Check and refer to it when replacing the mechanism, head, or motor.
Ex.: The operating time of the Deck A mechanism
The operating time of the Deck B mechanism
Operating time (unit: hour)
* “FuLL”is displayed when exceeding “9999”.
2. Deleting the Operating Time
When replacing the associated parts, delete the registered operating time as follows.
Press the “COUNTER MEMO”and “RESET”buttons of the Deck A together at once.
The displayed mechanism operating time of the selected Deck is set to “0000”.

14
DN-780R
SEMICONDUCTORS
IC’s
MN102L62G (IC105)
µµ
µµ
µCOM
75
76
100
125
26
50
51
Pin Name Function
MN102L62G Terminal Function
Pin
No. I/O
Symbol DET Ext Ini Res
1 P60, WAIT PRECSEL O Pd L L Recording selection to B mechanism.
L: Slide switch setup / H: Deck A line in
2 P61, _RE PIRINH O Pd L L Infrared remote control selection. L: Infrared remote control
use is possible./ H: Infrared remote control use is impossible.
3 P62, _WEL PMASTER O Pd L L
MASTER function setup, turns on at the time of DUPLICATE operation.
4 P63, _WEH PSLAVE O Pd L L
SLAVE function setup, turns on at the time of DUPLICATE operation.
5 P50, _CS0 PSWMST I Pu H Selection switch. L: MASTER /H: Other
6 P51, _CS1 PSWSLV I Pu H Selection switch. L: SLAVE /H: Other
7 P52, _CS2 PSWADLB I Pu H Selection switch. L: Dolby B /H: Other
8 P53, _CS3 PSWADLC I Pu H Selection switch. L: Dolby C /H: Other
9 P54, _BREQ PSWBDLB I Pu H Selection switch. L: Dolby B /H: Other
10 P55, _BRACK PSWBDLC I Pu H Selection switch. L: Dolby C /H: Other
11
P56, ALE, _ALE, _BSTRE
Reserved I 0V L Not used.
12 P57, _WORD Reserved I 0V L Not used.
13 P20, A00 PRMUTB O Pu H H B mechanism REC MUTE change signal. H: MUTE ON
14 P21, A01 PDOLOFB O Pd L L B mechanism Dolby on / off change signal. H: Dolby OFF
15 P22, A02 PDOLBCB O Pu H H B mechanism Dolby B / C change signal. H: Dolby B
16 P23, A03 PDOLSWB O Pd L L B mechanism Dolby Switch change signal. H: PLAY mode
17 Vdd Vdd Power supply (+5V)
18 SYSCLK SYSCLK O OSCI ×1/2 is outputted.
19 VSS VSS GND(0V)
20 XI XI I 0V L L Not used. It connects with GND.
21 XO XO Not used. OPEN
22 VDD VDD Power supply (+5V)
23 OSCI OSCI I There is 0.16% of an error by baud rate 9600bps setup
24 OSCO OSCO O OSCI is outputted.
25 MODE MODE I H: Single tip mode
26 P24, A04 PRMUTA O Pu H H A mechanism REC MUTE change signal. H: MUTE ON
27 P25, A05 PDOLOFA O Pd L L A mechanism Dolby on / off change signal. H: Dolby OFF
28 P26, A06 PDOLBCA O Pu H H A mechanism Dolby B / C change signal. H: Dolby B
29 P27, A07 PDOLSWA O Pd L L A mechanism Dolby Switch change signal. H: PLAY mode
30 P30, A08 PRSVI1 I Pu H Preliminary input terminal 1
31 P31, A09 PRSVI2 I Pu H Preliminary input terminal 2
32 P32, A10 PRSVI3 I Pu H Preliminary input terminal 3
33 P33, A11 PRSVI4 I Pu H Preliminary input terminal 4
34 VDD VDD Power supply (+5V)
35 P34, A12 Reserved I 0V L Not used.
36 P35, A13 Reserved I 0V L Not used.
37 P36, A14 Reserved I 0V L Not used.

15
DN-780R
38 P37, A15 Reserved I 0V L Not used.
39 P40, A16 PSCL O Pu H H EEPROM communication clock signal.
40 P41, A17 PSDA I/O Pu H In EEPROM communication data input¾and¾output signal.
(The input port of the time of a power supply injection is carried out.)
41 P42, A18 PSELEEP I Pd L L EEPROM selection signal. L: Old EEPROM(X24C00)
H: New EEOPRM(S24C01)
42 P43, A19 PMIX O Pd L L A mechanism line out. H: The mix output of A+B
43 VSS VSS GND(0V)
44 P44, AN4, A20 PKIN2 I Lv Pu H A / D conversion is used.
45 P45, AN5, A21 PREMO I Lv Pu H A / D conversion is used.
46 P46, AN6, STOP, A22 PADINRB I Lv Pd L A / D conversion is used.
47
P47, AN7, WDOUT, A23
PADINLB I Lv Pd L A / D conversion is used.
48 P80, TM0IO PRECR I Pu H Mechanism input signal. H: REC of RVS is improper.
49 P81, TM1IO PRECF I Pu H Mechanism input signal. H: REC of FWD is improper.
50 P82, TM2IO PHALH I Pu H Mechanism switch. H: No tape.
51 P83, TM3IO PSWCOM O Pu H H Mechanism scan signal. H: A mechanism selection
52 P84, TM4IO PDUB O Pd L L Duplicate output signal. H: Duplicate
53 P85, TM5IO PRSVO4 O 0V L L Preliminary output terminal 4
54 VDD VDD Power supply (+5V)
55 P86, TM6IOA PRMTOUT O Pu H H Remote output signal.
56 P87, TM6IOB Reserved I 0V L GND(0V) and connection.
57 P90, TM6IC PQSENA I Pu H
A mechanism leader tape detected signal. L: Leader tape detection.
58 P91, TM7IOA PQSENB I Pu H
B mechanism leader tape detected signal. L: Leader tape detection.
59 P92, TM7IOB PRSVO1 O 0V L L Preliminary output terminal 1
60 P93, TMI7IOC PRSVO2 O 0V L L Preliminary output terminal 2
61 VSS VSS GND(0V)
62 P94, AN0 PADINRA I Lv Pd L A / D conversion is used
63 P95, AN1 PADINLA I Lv Pd L A / D conversion is used
64 P96, AN2 PKIN0 I Lv Pu H A / D conversion is used
65 P97, AN3 PKIN1 I Lv Pu H A / D conversion is used
66 VDD(VPP)VDD Power supply (+5V)
67 P70, SBT0 _PFLNCS O Pu H H Connects with NCS. L: Select
68 P71, SBI0 RxD I Pu H It is used as a serial port. (It is 9615.38bps in 20MHz.)
69 P72, SBO0 TxD O Pu H H It is used as a serial port. (It is 9615.38bps in 20MHz.)
70 P73, SBT1 PFLCLK O Pu H H Connects with a clock.
71 P74, SBI1 PFLRD I Pu H Connects with SDO. (Key input data)
72 P75, SBO1 PFLSD O Pu H H Connects with SDI
73 TEST1 TEST1 I Pu A pull-up is carried out by 47k. (Recommendation)
74 TEST2 TEST2 I Pu A pull-up is carried out by 47k. (Recommendation)
75 _NMI _NMI I Pu H A pull-up is carried out.
76 PA0, _IRQ0 PPLSB I Ed Pu H It counts by DOWN EDGE. It rotates one time at three counts.
(DN-770R was taken as one rotation by six pulses by both edge.)
77 PA1, _IRQ1 PPLSA I Ed Pu H It counts by DOWN EDGE. It rotates one time at three counts.
(DN-770R was taken as one rotation by six pulses by both edge.)
78 PA2, _IRQ2 PPOFF I Pu H
An electric-power-failure detected signal. L: Electric-power-failure detection.
79 PA3, _IRQ3 PEXTIN I Pu H EXT. IN input signal.
80 PA4, _IRQ4 PREMOTE I Ed Pu H RC-5/Infrared remote signal input.
81 PA5, DSEP PEXTOUT O Pu H H EXT.OUT output signal.
82 _RST _RESET I Lv LReset signal. L: Reset
83 VDD VDD Power supply (+5V)s
84 P00, D00, AD00 PSOLHB O Pd L L B mechanism solenoid hold signal. H: Hold
85 P01, D01, AD01 PSOLKB O Pd L L B mechanism solenoid kick signal. H: kick
86 P02, D02, AD02 PRELRB O Pd L L B mechanism reel motor inversion signal. H: Inversion signal ON.
87 P03, D03, AD03 PRELFB O Pd L L B mechanism reel motor rotation signal. H: rotation signal ON.
88 P04, D04, AD04 PCAPB O Pd L L B mechanism capstan control signal. H: Capstan motor-on
89 P05, D05, AD05 PBIASB O Pd L L B mechanism bias signal. H: Bias
90 P06, D06, AD06 PLMUTB O Pd L L B mechanism line mute signal. L: Mute on
91 P07, D07, AD07 PHIGHB O Pd L H High speed signal B mechanism. L: High
92 VSS VSS GND(0V)
93 P010, D08, AD08 PSOLHA O Pd L L A mechanism solenoid hold signal. H: Hold
94 P011, D09, AD09 PSOLKA O Pd L L A mechanism solenoid kick signal. H: kick
95 P012, D10, AD10 PRELRA O Pd L L A mechanism reel motor inversion signal. H: Inversion signal ON.
96 P013, D11, AD11 PRELFA O Pd L L A mechanism reel motor rotation signal. H rotation signal ON.
97 P014, D12, AD12 PCAPA O Pd L L A mechanism capstan control signal. H: Capstan motor-on.
98 P015, D13, AD13 PBIASA O Pd L L A mechanism bias signal. H: Bias
99 P016, D14, AD14 PLMUTA O Pd L L A mechanism line mute signal. L: Mute on
100 P017, D15, AD15 PHIGHA O Pu L H High speed signal A mechanism. L: High
Pin Name Function
Pin
No. I/O
Symbol DET Ext Ini Res

16
DN-780R
MN12510F (IC301)
FL DRIVER
44
34
33 23
12
22
111
MN12510F Terminal Function
Pin
No. S
y
mbol I/O Function
1 P21 O Segment output15 (hi-voltage proof output).
2 P20 O LED drive output (hi-voltage proof output).
3 P03 O No connection.
4 P02 O No connection.
5 P01 O Digit output10 (hi-voltage proof output).
6 P00 O Digit output9 (hi-voltage proof output).
7 DGT7 O Digit output8 (hi-voltage proof output).
8 DGT6 O Digit output7 (hi-voltage proof output).
9 DGT5 O Digit output6 (hi-voltage proof output).
10 DGT4 O Digit output5 (hi-voltage proof output).
11 NC No connection.
12 DGT3 O Digit output4 (hi-voltage proof output).
13 DGT2 O Digit output3 (hi-voltage proof output).
14 DGT1 O Digit output2 (hi-voltage proof output).
15 DGT0 O Digit output1 (hi-voltage proof output).
16 Vpp I ELP driver power supply, VPP: VDD -35V.
17 NC No connection.
18 VDD I Power supply terminal, VDD: +5V r0.5V.
19 OSC1 I Clock oscillation input terminal.
20 OSC2 O Clock oscillation output terminal.
21 Vss I Power supply terminal, Vss: 0V.
22 NCS I Chip select input, “L”: Serial input enable, “H”: Disable.
23 SCK I Clock input for serial transference.
24 SDI O Serial data input terminal.
25 SDO O Serial data output terminal.
26 P30 I Key scan input terminal.
27 P31 I Key scan input terminal.
28 P32 I Key scan input terminal.
29 P33 O LED drive output terminal.
30 P34 O LED drive output terminal.
31 SEG0 O Segment output1 (hi-voltage proof output).
32 SEG1 O Segment output2 (hi-voltage proof output).
33 SEG2 O Segment output3 (hi-voltage proof output).
34 SEG3 O Segment output4 (hi-voltage proof output).
35 SEG4 O Segment output5 (hi-voltage proof output).
36 SEG5 O Segment output6 (hi-voltage proof output).
37 SEG6 O Segment output7 (hi-voltage proof output).
38 SEG7 O Segment output8 (hi-voltage proof output).
39 P10 O Segment output9 (hi-voltage proof output).
40 P11 O Segment output10 (hi-voltage proof output).
41 P12 O Segment output11 (hi-voltage proof output).
42 P13 O Segment output12 (hi-voltage proof output).
43 P23 O Segment output13 (hi-voltage proof output).
44 P22 O Segment output14 (hi-voltage proof output).

17
DN-780R
NJM7805FA(S) (IC903)
NJM7808FA(S) (IC901)
NJM7908FA (IC902)
HA12170NT (IC103, 403)
REC IN
REC IN
GND
Vcc
PB IN
PB IN
BIAS
REF
M/R/P
C/B/OFF
IA OUT
IA OUT
NR IN
NR IN
VREF
VREF
PB OUT
PB OUT
SS1
SS1
1
2
3
4
5
6
7
8
9
10
28
27
26
25
24
23
22
30
29
21
SS2
SS2
11 20
CCR
CCR
12 19
HLS DET
HLS DET
13 18
LLS DET
LLS DET
14 17
A OUTPUT
A –INPUT
A+INPUT
V
B OUTPUT
V
B –INPUT
B +INPUT
1
2
3
45
7
8
6
BA10393F (IC103, 104)
BA15218F (IC104, 105, 107,
109, 110, 404, 405,
407, 409, 410, 701,
707~709, 807~810)
M5220FP (IC101, 401, 801, 805)
1
2
REC OUT
REC OUT
15 16
FRONT
VIEW
Input
GND
Output
FRONT
VIEW
Input
GND
Output
m
PC1297CA (IC111, 411)
18
17
16
15
14
13
12
11
10
1
2
3
4
5
6
7
8
9
Vcc
VR2
CIN (R) 2
PH2
CIN2
COUT2
VOUT21
VOUT22
VIN (0)
VST
VR1
VIN (R) 1
PH1
CIN1
COUT1
VOUT11
VOUT12
GND
STABI-
LIZER
PRO-
TECTER
PRE DRIVER
VCA
ABSO
DET
PEAK
DET
VCA
ABSO
DET
PEAK
DET
MAX202CSE (IC107)
C1+
V+
C1-
C2+
C2-
V-
T2OUT
R2IN
1
2
3
4
5
6
7
8
16
15
14
13
12
11
10
9
Vcc
GND
T1OUT
R1IN
R1OUT
T1IN
T2IN
R2OUT
TC4053BF (IC102, 106, 108,
402, 406, 408, 702~706, 804)
IY
OY
IZ
Z-COM
OZ
INH
V
EE
V
SS
1
2
3
4
5
6
7
8
16
15
14
13
12
11
10
9
V
DD
Y-COM
X-COM
IX
OX
A
B
C
X24C00S (IC106)
EEPROM
1
2
3
4
8
7
6
5
NC
NC
NC
Vss
Vcc
NC
CLK
DATA
1
GND
2
V OUT 1
3
VZ 1
4
VR
5
F IN
6
R IN
7
V
CC
1
8
V
CC
2
9
VZ2
10
V OUT 2
BA6109U1 (IC101, 102)
110
FRONT VIEW

18
DN-780R
TOP
VIEW
E
B
C
B
C
E
R1
R2
DTA114EK
R1
10kohm /W
R2
DTC Series
10kohm /W
DTA144EK 47kohm /W
DTA Series
2SA933
2SB562(C)
2SC5395(E/F)
2SD2144
2SD468(C)
FRONT
VIEW
B
C
E
2SK373(Y)
1SS355
1SR35-400A
HZS4C
HZS5C
HZS12B
HZS6C
HZS22C
HZS7B
MTZJ9.1A
B
C
E
R1
R2
47kohm /W
TOP
VIEW
E
B
C
2SC2412K(S)
KTC2875B
l
TRANSISTORS
l
DIODES/LED
DTA114EK
DTA144EK
DTC114EK
DTC144EK
DTC114EK
R1
10kohm /W
R2
10kohm /W
DTC114ES 10kohm /W10kohm /W
GP1U271X (Remote Control Sensor)
(IC551)
GND
V
CC
V
OUT
Head
Amp BPF Integrator
TOP VIEW
V
OUT
V
CC
GND
Limiter
Amp
Detector &
Comparator
Hysteresis
Comparator
FRONT
VIEW
D
G
S
DTA144ES 47kohm /W47kohm /W
FRONT
VIEW
B
C
E
DTC124XS 22kohm /W47kohm /W
DTC143ES 4.7kohm /W4.7kohm /W
DTC144EK 47kohm /W47kohm /W
l
OTHERS
DTA144ES
DTC114ES
DTC124XS
DTC143ES
PNP
NPN
PNP
NPN

19
DN-780R
PIN NO.
CONNECTION
3
9
F
2
3
8
F
2
3
7
N
P
3
6
N
P
3
5
P
1
6
3
4
P
1
5
3
3
P
1
4
3
2
P
1
3
3
1
P
1
2
3
0
P
1
1
2
9
P
9
2
8
P
8
2
7
P
7
2
6
P
6
2
5
P
5
2
4
P
4
2
3
N
P
2
2
N
P
2
1
N
P
2
0
N
P
1
9
N
P
1
8
N
P
1
7
N
P
1
6
P
4
1
5
P
3
1
4
P
2
1
3
P
1
1
2
1
G
1
1
2
G
1
0
3
G
9
4
G
8
5
G
7
6
G
6
7
G
5
8
G
4
N
P
3
N
P
2
F
1
1
F
1
2G 1G
3G
[2G,1G]
5G 6G 8G
7G
4G
PIN CONNECTION
GRID ASSIGNMENT
ANODE CONNECTION
NOTE 1) F1,F2 ---------- Filament
2) NP ------------- No pin
3) NX ------------- No extend pin
4) DL ------------ Datum line
5) 1G~8G ------- Grid
(NC pin should be electorically open on the PC board)
1a 1a1a2a 1a 1a1a2a
Dp2 Dp1
b
fg
e
d
c
B6
B12
B1
B7
COLOR ILLUMINATION
Reddish Orange ----- Above pattern part
Green ------------------ Other
FL DISPLAY BJ881GHK (FL301)
8G
1a 1a 1a 1a 1a 1a B1 B1
1b 1b 1b 1b 1b 1b B2 B2
1f 1f 1f 1f 1f 1f B3 B3
1g 1g 1g 1g 1g 1g B4 B4
1c 1c 1c 1c 1c 1c B5 B5
1e 1e 1e 1e 1e 1e
1d 1d 1d 1d 1d 1d
B6 B6
Dp1 Dp2 S1 S1
P1
P2
P3
P4
P5
P6
P7
P8
7G 6G 5G 4G 3G 2G 1G 8G
2a 2a B7 B7
2b 2b B8 B8
2f 2f B9 B9
2g 2g B10 B10
2c 2c B11 B11
2e 2e
2d 2d
B12 B12
P9
P10
P11
P12
P13
P14
P15
P16
7G 6G 5G 4G 3G 2G 1G
139
Other manuals for DN-780R
2
Table of contents
Other Denon Tape Deck manuals

Denon
Denon DRR-M33 User manual

Denon
Denon DRW-695 User manual

Denon
Denon DRW-585 User manual

Denon
Denon DRM-555 User manual

Denon
Denon DRM-550 User manual

Denon
Denon DN-730R User manual

Denon
Denon DN-770R User manual

Denon
Denon DRM-400 User manual

Denon
Denon DRW-585 User manual

Denon
Denon DRW-585 User manual

Denon
Denon DR-M4 User manual

Denon
Denon DRR-M30 User manual

Denon
Denon DRM-800A User manual

Denon
Denon DR-M2 User manual

Denon
Denon DN-720R User manual

Denon
Denon DRW840 - Stereo Double Cassette Deck User manual

Denon
Denon DRM-550 User manual

Denon
Denon DRW-5830 User manual

Denon
Denon DN-780R User manual

Denon
Denon DR-F6 User manual