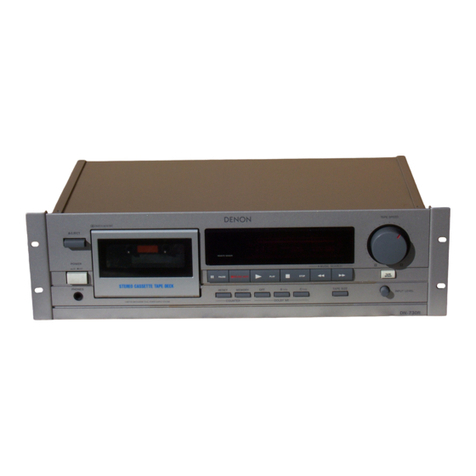
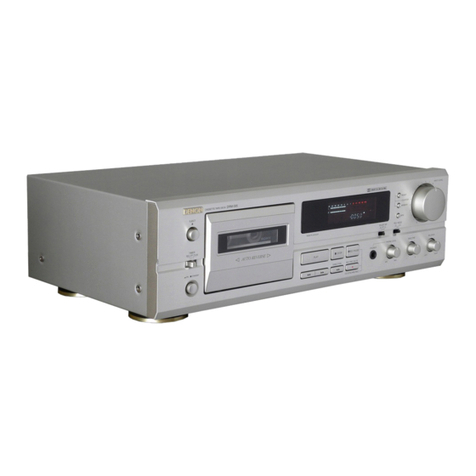
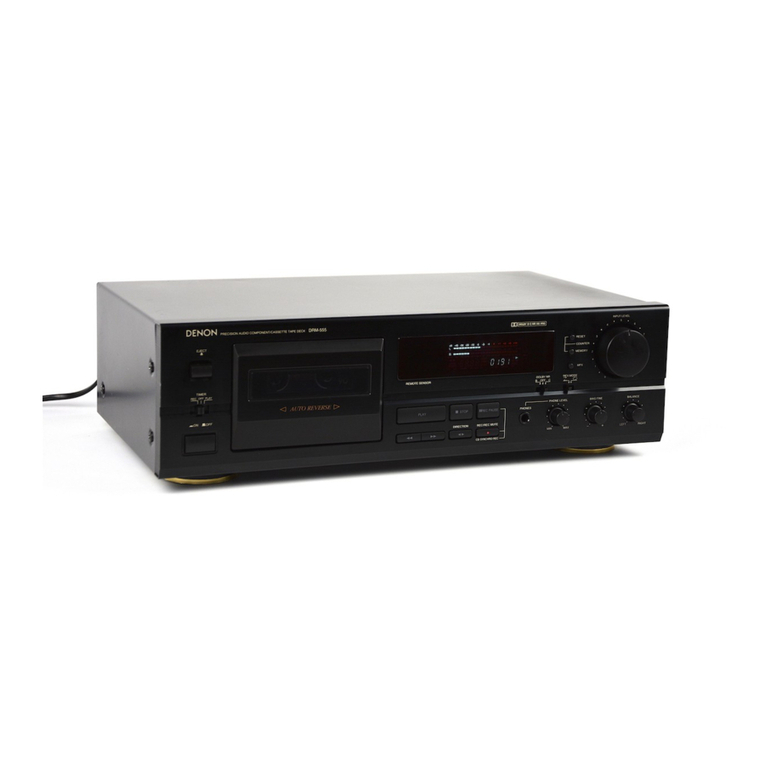
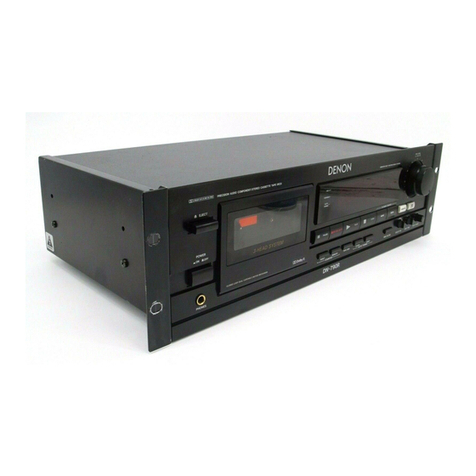
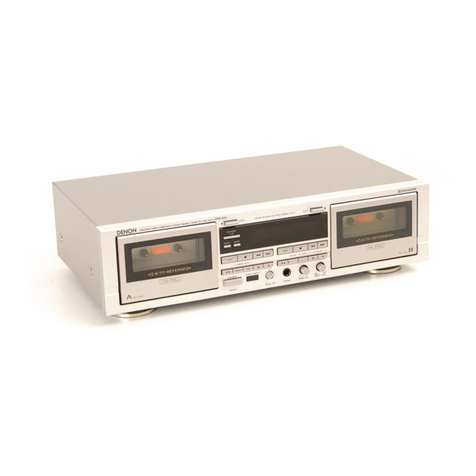
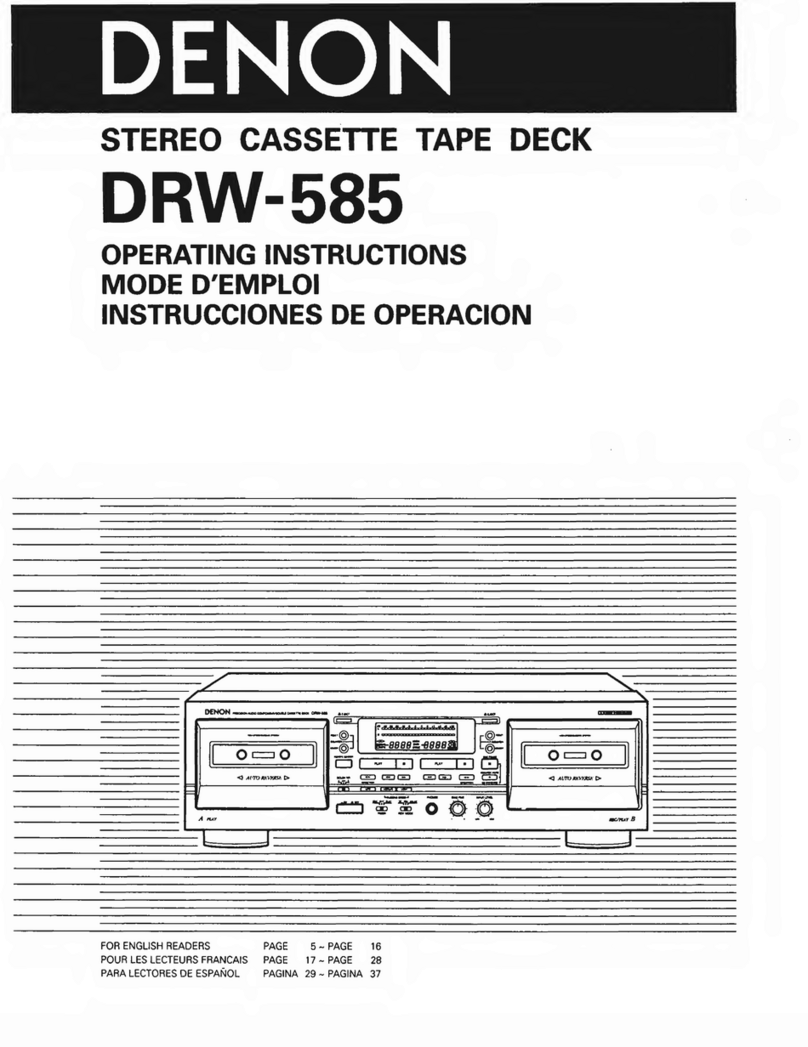
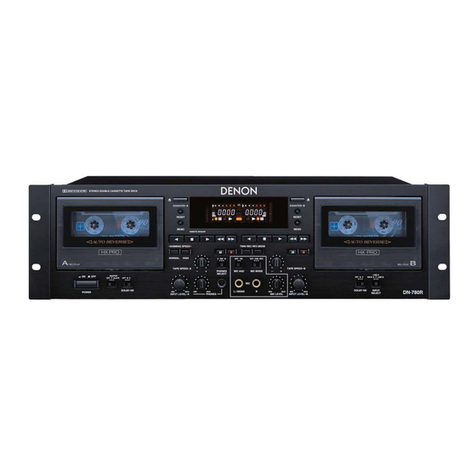
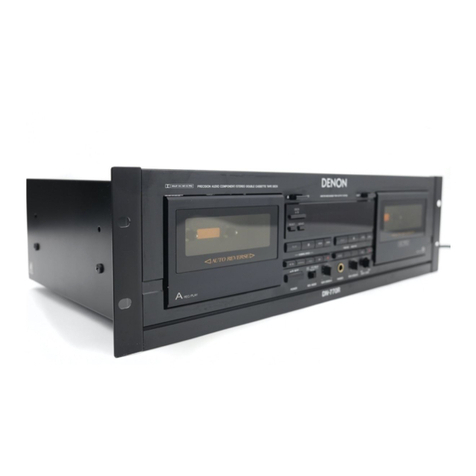
Denon DRW840 - Stereo Double Cassette Deck User manual

~~
Pa
a
ee
ae
Bane!
at
is
MANUAL
DewSS5
iva
ar
fail
faa
a
STEREO
CASSETTE
TAPE
DECK
DRW-840
OPERATING
INSTRUCTIONS
BEDIENUNGSANLEITUNG
MODE
D’EMPLOI
ISTRUZIONI
PER
L’USO
INSTRUCCIONES
DE
OPERACION
GEBRUIKSAANWIJZING
BRUKSANVISNING
INSTRUCOES
DE
OPERACAO
FOR
ENGLISH
READERS
PAGE
5
~
PAGE
14
PARA
LECTORES
DE
ESPANOL
PAGINA
44
~
PAGINA
51
FUR
DEUTSCHE
LESER
SEITE
15
~
SEITE
24
VOOR
NEDERLANDSTALIGE
LEZERS
PAGINA
52
~
PAGINA
59
POUR
LES
LECTEURS
FRANCAIS
PAGE
25
~
PAGE
34
FOR
SVENSKA
LASARE
SIDA
60
~
SIDA
67
PER
IL
LETTORE
ITALIANO
PAGINA
36
~
PAGINA
43
PARA
LEITORES
PORTUGUESES
PAGINA
68
~
PAGINA
75

Avoid
high
temperatures
Allow
for
sufficient
heat
dispersion
when
installed
on
a
rack.
Vermeiden
Sie
hohe
Temperaturen
Beachten
Sie,
da&
eine
zureichende
Luftzir-
kulation
gewdhrleistet
wird,
wenn
das
Gerat
auf
ein
Regal
gestelit
wird.
Eviter
des
températures
élevées
Tenir
compte
d'une
dispersion
de
chaleur
suffisante
lors
de
|'installation
sur
une
étagére.
Evitate
di
esporre
l’unita
a
temperature
alte.
Assicuratevi
che
ci
sia
un’adeguata
disper-
sione
del
calore
quando
installate
|’unita
in
un
mobile
per
componenti
audio.
Evite
altas
temperaturas
Permite
la
suficiente
dispersion
del
calor
cuando
esta
instalado
en
la
consola.
Vermijd
hoge
temperaturen.
Zorg
voor
een
degelijk
hitteafvoer
indien
het
apparaat
op
een
rek
wordt
geplaatst.
Undvik
héga
temperaturer.
Se
till
att
det
finns
mdjlighet
till
god
varmeavledning
vid
montering
i
ett
rack.
Evite
temperaturas
altas
Conceda
suficiente
dispersao
de
calor
quando
o
equipamento
for
instalado
numa
prateleira.
Handle
the
power
cord
carefully.
Hold
the
plug
when
unplugging
the
cord.
Gehen
Sie
vorsichtig
mit
dem
Netzkabel
um.
Halten
Sie
das
Kabel
am
Stecker,
wenn
Sie
den
Stecker
herausziehen.
Manipuler
le
cordon
d’alimentation
avec
précaution.
Tenir
la
prise
lors
du
débranchement
du
cordon.
Manneggiate
il
filo
di
alimentazione
con
cura.
Agite
per
la
spina
quando
scollegate
i]
cavo
dalla
presa.
Maneje
el
cordon
de
energia
con
cuidado.
Sostenga
el
enchufe
cuando
desconecte
el
cordén
de
energia.
Hanteer
het
netsnoer
voorzichtig.
Houd
het
snoer
bij
de
stekker
vast
wanneer
deze
moet
worden
aan-
of
losgekoppeld.
Hantera
natkabeln
varsamt.
Hall
i
kabeln
nar
den
kopplas
fran
el-
uttaget.
Manuseie
com
cuidado
o
fio
condutor
de
energia.
Segure
a
tomada
ao
desconectar
o
fio.
NOTE
ON
USE/HINWEISE
ZUM
GEBRAUCH/
OBSERVATIONS
RELATIVES
A
L’UTILISATION
NOTE
SULL’'USO/NOTAS
SOBRE
EL
USO/ALVORENS
TE
GEBRUIKEN/OBSERVERA
OBSERVACOES
QUANTO
AO
USO
Keep
the
set
free
from
moisture,
water,
and
dust.
Halten
Sie
das
Gerat
von
Feuchtigkeit,
Wasser
und
Staub
fern.
»
Protéger
l'appareil
contre
I’humidité,
l'eau
et
la
poussiére.
Tenete
I’unita
lontana
dall’umidita,
dall‘ac-
qua
e
dalla
polvere.
Mantenga
el
equipo
libre
de
humedad,
agua
y
polvo.
Laat
geen
vochtigheid,
water
of
stof
in
het
apparaat
binnendringen.
Utsatt
inte
apparaten
for
fukt,
vatten
och
damm.
Mantenha
o
aparelho
livre
de
qualquer
umidade,
agua
ou
poeira.
Unplug
the
power
cord
when
not
using
the
set
for
long
periods
of
time.
Wenn
das
Gerat
eine
langere
Zeit
nicht
verwendet
werden
soll,
trennen
Sie
das
Netzkabel
vom
Netzstecker.
Débrancher
le
cordon
d’alimentation
Jors-
que
l'appareil
n’est
pas
utilisé
pendant
de
longues
périodes.
Disinnestate
il
filo
di
alimentazione
quando
avete
l'intenzione
di
non
usare
il
filo
di
alimentazione
per
un
lungo
periodo
di
tempo.
Desconecte
el
cordén
de
energia
cuando
no
utilice
el
equipo
por
mucho
tiempo.
Neem
altijd
het
netsnoer
uit
het
stopkon-
takt
wanneer
het
apparaat
gedurende
een
lange
periode
niet
wordt
gebruikt.
Koppla
ur
natkabeln
om
apparaten
inte
kommer
att
anvandas
i
lang
tid.
Desligue
o
fio
condutor
de
forga
quando
o
apareltho
nao
tiver
que
ser
usado
por
um
longo
periodo.
*(For
sets
with
ventilation
holes)
Do
not
obstruct
the
ventilation
holes.
Die
Beliftungséffnungen
durfen
nicht
ver-
deckt
werden.
Ne
pas
obstruer
les
trous
d’aération.
Non
coprite
i
fori
di
ventilazione.
No
obstruya
los
orificios
de
ventilacion.
De
ventilatieopeningen
mogen
niet
worden
beblokkeerd.
Tapp
inte
til!
ventilationséppningarna.
Nao
obstrua
os
orificios
de
ventilagao.
Do
not
let
foreign
objects
in
the
set.
Keine
fremden
Gegenstande
in
das
Gerat
kommen
ltassen.
Ne
pas
laisser
des
objets
étrangers
dans
l'appareil.
E’
importante
che
nessun
oggetto
é
inserito
all’interno
dell’unita.
No
deje
objetos
extrafos
dentro
del
equipo.
Laat
geen
vreemde
voorwerpen
in
dit
apparaat
vallen.
Se
till
att
frammande
foremal
inte
tranger
in
i
apparaten.
Nao
deixe
objetos
estranhos
no
aparelho.
Do
not
let
insecticides,
benzene,
and
thin-
ner
come
in
contact
with
the
set.
Lassen
Sie
das
Gerat
nicht
mit
Insektiziden,
Benzin
oder
Verdinnungsmitteln
in
Be-
ruhrung
kommen.
Ne
pas
mettre
en
contact
des
insecticides,
du
benzéne
et
un
diluant
avec
l'appareil.
Assicuratevvi
che
l'unita
non
venga
in
contatto
con
insetticidi,
benzolo
o
solventi,
No
permita
el
contacto
de
insecticidas,
gasolina
y
diluyentes
con
el
equipo.
Laat
geen
insektenverdelgende
middelen,
benzine
of
verfverdunner
met
dit
apparaat
in
kontakt
komen.
Se
till
att
inte
insektsmedel
pa
spraybruk,
bensen
och
thinner
kommer
i
kontakt
med
apparatens
hdlje.
Nao
permita
que
inseticidas,
benzina
e
dissolvente
entrem
em
contacto
com
0
aparelho.
—
%
des
o
A
Never
disassemble
or
modify
the
set
in
any
way.
Versuchen
Sie
niemals
das
Gerat
auseinan-
der
zu
nehmen
oder
auf
jegliche
Art
zu
verandern.
Ne
jamais
démonter
ou
modifier
|'appareil
d'une
maniére
ou
d'une
autre.
Non
smontate
mai,
né
modificate
l’unita
in
nessun
modo.
Nunca
desarme
o
modifique
el
equipo
de
ninguna
manera.
Nooit
dit
apparaat
demonteren
of
op
andere
wijze
modifiéren.
Ta
inte
isdér
apparaten
och
férs6k
inte
bygga
om
den.
Nunca
desmonte
ou
modifique
o
aparelho
de
alguma
forma.

FRONT
PANEL
PANEL
FRONTAL
FRONTPLATTE
VOORPANEEL
PANNEAU
AVANT
FRAMSIDA
PANNELLO
ANTERIORE
PAINEL
FRONTAL

IMPORTANT
TO
SAFETY
WARNING:
TO
PREVENT
FIRE
OR
SHOCK
HAZARD,
DO
NOT
EXPOSE
THIS
APPLIANCE
TO
RAIN
OR
MOISTURE.
CAUTION:
1.
Handle
the
power
supply
cord
carefully
Do
not
damage
or
deform
the
power
supply
cord.
If
it
is
damaged
or
deformed,
it
may
cause
electric
shock
or
malfunction
when
used.
When
removing
it
from
wall
outlet,
be
sure
to
remove
by
holding
the
plug
attachment
and
not
by
pulling
the
cord.
Do
not
open
the
top
cover
In
order
to
prevent
electric
shock,
do
not
open
the
top
cover.
If
problems
occur,
contact
your
DENON
DEALER.
Do
not
place
anything
inside
Do
not
place
metal
objects
or
spill
liquid
inside
the
cassette
tape
deck.
Electric
shock
or
malfunction
may
result.
Please,
record
and
retain
the
Model
name
and
serial
number
of
your
set
shown
on
the
rating
label.
Model
No.
DRW-840
Serial
No.
CAUTION
RISK
OF
ELECTRIC
SHOCK
DO
NOT
OPEN
CAUTION:
TO
REDUCE
THE
RISK
OF
ELECTRIC
SHOCK,
DO
NOT
REMOVE
COVER
(OR
BACK).
NO
USER
SERVICEABLE
PARTS
INSIDE.
REFER
SERVICING
TO
QUALIFIED
SERVICE
PERSONNEL.
7X
A
The
lightning
flash
with
arrowhead
symbol
within
an
equilateral
triangle
is
intended
to
alert
the
user
of
the
presence
of
uninsulated
“dangerous
voltage”
within
the
product's
enclosure
that
may
be
of
sufficient
magnitude
to
constitute
a
risk
of
electric
shock
to
persons.
The
exclamation
point
within
an
equilateral
triangle
is
intended
to
alert
the
user
of
the
presence
of
important
operating
and
maintenance
(servicing)
instruction
in
the
literature
accompanying
the
ap-
pliance.
e
NUR
FUR
EUROPAISCHE
MODELLE
r—
e
FOR
U.S.A.
&
CANADA
MODEL
ONLY
CAUTION
TO
PREVENT
ELECTRIC
SHOCK
DO
NOT
USE
THIS
(POLARIZED)
PLUG
WITH
AN
EXTENSION
CORD,
RECEPTACLE
OR
OTHER
OUTLET
UNLESS
THE
BLADES
CAN
BE
FULLY
INSERTED
TO
PREVENT
BLADE
EXPOSURE.
e
POUR
LES
MODELES
AMERICAINS
ET
CANADIENS
UNIQUEMENT
ATTENTION
POUR
PREVENIR
LES
CHOCS
ELECTRIQUES
NE
PAS
UTILISER
CETTE
FICHE
POLARISEE
AVEC
UN
PROLONGATEUR
UNE
PRISE
DE
COURANT
OU
UNE
AUTRE
SORTIE
DE
COURANT,
SAUF
Si
LES
LAMES
PEUVENT
ETRE
INSEREES
A
FOND
SANS
EN
LAISSER
AUCUNE
PARTIE
A
DECOUVERT.
IMPORTANT
(BRITISH
MODEL
ONLY)
The
wires
in
this
mains
lead
are
coloured
in
accordance
with
the
following
code:
Blue:
Neutral
Brown:
Live
The
colours
of
the
wires
in
the
mains
lead
of
this
apparatus
may
not
correspond
with
the
coloured
markings
identifying
the
terminals
in
your
plug
proceed
as
follows.
The
wire
which
is
coloured
blue
must
be
connected
to
the
terminal
which
is
marked
with
the
letter
N
or
coloured
black.
The
wire
which
is
coloured
brown
must
be
connected
to
the
terminal
which
is
marked
with
the
letter
L
or
coloured
red.
FOR
YOUR
SAFETY
(AUSTRALIAN
MODEL
ONLY)
To
ensure
safe
operation,
the
three-pin
plug
supplied
must
be
connected
only
with
a
standard
three-pin
power
point
which
is
effectively
earthed
through
the
normal
household
wiring.
Extension
cords
used
with
the
equipment
must
be
three-core
and
be
correctly
wired
to
provide
connection
to
earth.
Wrongly
wired
extension
cords
are
a
major
cause
of
fatalities.
The
fact
that
the
equipment
operates
satisfactorily
does
not
imply
that
the
power
point
is
earthed
and
that
the
installation
is
completely
safe.
For
your
safety,
if
in
any
doubt
about
the
effective
earthing
of
the
power
point,
contact
a
qualified
electrician.
Konformitatserklarung
Die
DENON
Electronic
GmbH
HalskestraBe
32
4030
Ratingen
1
Erklart
als
Hersteller/Importeur,
da&
das
in
dieser
Bedienungsanleitung
beschriebene
Gerat
den
Technischen
Vorschriften
fir
Ton-
und
Fernseh-Rundfunkempfanger
nach
der
Amtsblattverfligung
868/1989
(Amtsblatt
des
Bundesministers
fur
Post
und
Telekommunikation
vom
31.
8.
1989)
entspricht.

Thank
you
very
much
for
purchasing
the
DENON
component
stereo
cassette
tape
deck.
DENON
proudly
presents
this
advanced
tape
deck
to
audiophiles
and
music
lovers
as
a
further
proof
of
DENON’s
non-
compromising
pursuit
of
the
ultimate
in
sound
quality.
The
high
quality
performance
and
easy
operation
are
certain.to
provide
you
with
many
hours
of
outstanding
listening
pleasure.
—
TABLE
OF
CONTENTS
—
e
Leave
your
entire
system
(including
this
cassette
deck)
turned
off
unti!
all
connections
between
the
deck
and
other
components
have
been
completed.
Receiver
or
amplifier
M
Connecting
the
Deck
to
an
Amplifier
e
Before
connecting
the
deck
to
your
amplifier,
please
review
your
amplifier’s
instruction
manual.
e
Use
the
white
plugs
for
the
left
channel
and
red
plugs
for
the
right
channel.
M
Tape
Dubbing
e
Many
stereo
amplifiers
and
receivers
have
tape
dubbing
circuitry
so
that
tape
duplication
can
be
performed
between
two
or
more
tape
decks,
Review
your
amplifier’s
instruction
manual
for
a
full
explanation
of
this
mode
of
operation.
ENGLISH
Please
check
to
make
sure
the
following
items
are
included
with
the
main
unit
in
the
carton:
FEATURES
(1)
Operating
Instructions
(2)
Connection
Cords
wcrc
(3).
(MinicPlGG:Cablessscscay.aicestacsancecsracnectasretecetens
Computer
Controlled
Mechanism
SAF
EAT
URE
Srisccsscciesccvvsas
tevncs
isenn
ceaveceosesdesateveten
iyo
suysbascusdtseseasecveasenentes
Mi
Dual
Power
Supply
CONNECTION
.....ccceeccctceeseeressereeseeseenes
MB
Dolby
HX-Pro
Headroom
Extension
System
NAMES
AND
FUNCTION
OF
PARTS
..
WM
Dolby
B
&
C
Noise
Reduction
Systems
CASSETTE
TAPES
ou...
eceecceeeeeteeeteenee
33
M@
Manual
Bias
Adjustment
Control
AUTOMATIC
TAPE
SELECTION
oc
cccccsssesssserscrsetsetsseressessesseeees
Hi
Computing
Tape
Counter
with
4-Digit
Readout
and
Memory
PLAYBACK
iteccccicis
cotd
tact
sce
cveey
ooh
esi
taasaav
Waves
ikea
lees
ieeshapertenedsensinre
Stop
RELAY
PLAY
u....ccccceesseeeeeee
MM
Music
Search
System
MUSIC
SEARCH
SYSTEM
...
MB
FL
Peak
Level
Meters
RECORDING
vieecccccscececscercecseesseeee
HM
Auto
Tape
Selector
PROPER
RECORDING
LEVEL
........
Mi
2-Speed
Dubbing
RECORDING
BIAS
ADJUSTMENT
MM
Relay
Playback
REC/REC
MUTE
AND
REC
PAUSE
BUTTON
.
.
9
@
Synchronized
Recording
TWIN
RECORDING
uu..ccceccsscssssscsssssesessesscscsessessescsnrsseeeseeesesees
10
Mi
Optional
Remote
Controllable
RELAY:
RECORDING
siececscsecscccscsetecndectasetchadens
cvseteeacccavnavecsseeteen
10
@
Twin
Recording
and
Relay
Recording
DUBBING
viiccccevsiccssciceieedt
extovaoncenespectc
oteavevexet
.
10
SYNCHRONIZED
RECORDING
FUNCTION
uu...
eeeeeteseeee
rece
11
TWIN
SYNCHRONIZED
RECORDING
uu.
eccsctseecseesteeneeseees
11
TAPE
COUNTER
AND
MEMORY
STOP
........:.ecccceeees
«
12
DOLBY
B
AND
C
NOISE
REDUCTION
SYSTEM
.............
«
12
DOLBY
HX-PRO
HEADROOM
EXTENSION
SYSTEM
..
«
12
MAINTE
NANGE
vices
iecoicesdectasateheecuedoctSelantosscadauauisvisunssbennecayeves¥ousss
13
TROUBLESHOOTING
uo.
ccc
cceetsseesetesesssensesseeescevsssasarsasasseseees
13
SPECIFICATIONS:
cosesesdecciaver.
cidens
sivesed
vationdeuedateeeste
sie
eens
etoeas
14
CONNECTION
Cassette
deck
ty
This
jack
is
for
the
synchro-
nized
recording
function
only.
Do
not
plug
in
microphones,
headphones
nor
other
plugs.
Power
supply
(=
outlet.
{=!
50/60
Hz
Connecting
Headphones
To
listen
through
headphones,
plug
your
headphones
into
the
PHONES
jack,
Installation
Precautions
If
the
deck
is
placed
near
an
amplifier,
TV
or
tuner,
noise
(induced
hum)
or
beat
interference
may
result,
especially
during
FM
or
AM
reception.
lf
this
occurs,
place
the
deck
further
away
from
other
components
or
reorient
its
position.
NAMES
AND
FUNCTIONS
OF
PARTS
o ©
Power
Switch
(POWER)
Press
once
to
turn
the
power
to
deck
on,
and
once
more
to
turn
the
power
off.
The
deck
remains
in
a
stand-by
(non-operative}
mode
for
approx-
imately
2
seconds
after
it
is
switched
on.
Eject
Button
(EJECT
&
)
Press
this
button
to
open
the
cassette
compartment
cover.
When
the
tape
is
running,
press
the
STOP
(
MM
)
button
first
to
stop tape
transport,
then
press
the
Eject
button.
Counter
Reset
Button
(COUNTER
RESET)
Press
this
button
to
reset
the
tape
counter
to
zero.
Counter
Display
Deck
A/B
Selector
(COUNTER
A/B)
Press
this
button
to
switch
the
tape
counter
display
between
deck
A
and
deck
B.
Counter
Memory
Button
(MEMO)
When
this
button
is
pressed
during
forward
tape
travel
(>),
fast
rewinding
(
€4
)
will
stop
automatically
at
the
tape
counter
position
“0000”.
When
this
button
is
pressed
during
reverse
tape
travel
(<),
fast
forwarding
(
PP
)
will
stop
automatically
at
the
tape
counter
position
“0000”.
See
page
12.
Dolby
NR
Switch
(DOLBY
NR)
To
record
or
playback
tapes
with
Dolby
B-
or
C-type
noise
reduction,
set
this
switch
to
“B”
or
“C”.
Turn
it
off
when
not
using
the
Dolby
NR
system.
Reverse
Mode
Button
(REV.
MODE)
Select
the
type
of
tape
transport.
The
reverse
mode
canbe
set
to
="
{one
side),
CZ)
(continuous
playback),
RELAY
(relay
playback).
If
you
further
press
the
button
during
the
display,
the
reverse
mode
will
change
in
the
following
cycle.
ae
Es
Cc
PAY
|
Tape
Transport
Buttons
Dubbing
Speed
Buttons
(DUBBING
SPEED)
Pressing
the
NORMAL
button
starts
regular
speed
dubbing
from
deck
A
to
deck
B.
Press
the
HIGH
button
to
perform
dubbing
at
double
speed.
See
page
10.
Bias
Fine
Contro!
(BIAS
FINE)
(For
Normal,
CrO,
and
Metal
tape)
Use
this
control
to
fine-adjust
the
bias.
Standard
bias
is
obtained
at
the
center
click-stop
position.
See
page
9.
Input
Level
Control
(INPUT
LEVEL)
2
This
knob
adjusts
the
recording
input
level.
It
affects
the
level
in
both
channels.
See
page
8.
Cassette
Compartment
Cover
if
the
cover
is
not
closed
completely,
the
tape
transport
buttons
will
remain
inoperative.
Headphone
Jack
(PHONES)
For
private
music
enjoyment
without
disturbing
others,
or
for
monitoring
a
recording,
a
headphone
set
may
be
connected
to
this
jack.
Use
a
headphone
with
an
impedance
rating
of
8
to
1200
ohms.
Remote
Sensor
(REMOTE
SENSOR)
With
the
cassette
deck
the
remote
control
unit
is
not
included.
Each
of
“PLAY,
FF,
REW,
STOP,
REC
PAUSE
and
REC/REC
MUTE”
functions
can
be
remote
controlled
with
wireless
handset
of
the
receiver
(DRA
Series
receivers).
For
details
refer
to
the
DRA
Series
operating
instructions.
NOTE:
Note
that
only
the
A
deck
can
be
operated
with
remote
control
units
which
have
no
A/B
selector
button.
When
operating
the
B
deck
with
remote
control
units
equipped
with
an
A/B
selector
button,
press
A/B
selector
button
before
pressing
the
operation
button.
Twin
Recording
Button
(TWIN
REC)
Pressing
this
button
will
set
both
deck
A
and
B
to
the
recording
pause
mode.
See
page
10.
PLAY
Play
Button
Press
to
playback
tape.
|
Stop
Button
Press
to
stop
the
tape
in
any
mode.
S|
Fast
Rewind
Button
Press
for
fast
rewind.
[
»>
Fast
Forward
Button
Press
for
fast
forwarding.
Press
the
REC/REC
MUTE
(@)
button
and
PLAY
button
simultaneously
to
start
e
Rec/Rec
Mute
recording.
If
only
the
REC/REC
MUTE
(@)
button
is
pressed,
the
deck
enters
the
REC/REC
MUTE
Button
Recording
Pause
mode.
Pressing
this
button
in
the
Recording
Pause
mode
will
start
Auto
Rec
Mute,
and
a
5-second
silent
space
is
recorded
onto
the
tape.
See
page
9.
i
Press
this
button
to
enter
the
recording
pause
mode
from
the
recording
or
recording
REC
PAUSE
Rec
Pause
Button
mute
mode.
This
button
can
only
be
used
during
recording.
See
page
9.
+>
Direction
Button
Changes
the
tape
transport
direction
from
forward
“Pb”
to
reverse
“q”,
and
vice
versa.

@
Display
Indicators
with
an
encircled
number
light
up
when
the
correspond-
ing
button
is
pressed.
Synchro
Rec
Indicator
See
page
11
Remote
Control
Indicator
Lights
up
when
the
remote
control
is
operated.
Tape
Counter
Deck
A
Tape
Transport
Indicators
a
9998
CB
~40.
30 20
-10]
5-9.
<1
O41
13:15
110
ooannoeosHnaGsc0oD
=
4)
RELAY
=
Twin
Rec
Indicator
See
page
10
R
aonmoaneos
ABMEMO
®
Il
(PLAY
PDUB
HIGH@
It
qPLAYD
Deck
B
Tape
Transport
Indicators
Fluorescent
Peak
Level
Meter
Indicates
the
recording
and
playback
signal
levels
for
the
left
and
right
channels.
O}4t
43
+5
+410
Relay
Mode
indicator
Reverse
Mode
Indicator
Dubbing
Speed
Indicators
Memory
Indicator
Counter
Display
Deck
A/B
Selection
Indicators
CASSETTE
TAPES
@
Handling
Precautions
e
C-120
Cassettes
C-120
cassette
tapes
are
not
recommended
as
they
use
a
very
thin
tape
base
which
may
become
tangled
around
the
capstan
or
pinch
roller.
e
Tape
Slack
Before
putting
a
tape
into
the
deck,
take
up
any
slack
with
a
pencil
or
your
finger
tip.
This
precaution
prevents
the
tape
from
becoming
entangled
around
the
capstan
or
pinch
roller.
AUTOMATIC
TAPE
SELECTION
@
Storage
Precautions
Do
not
store
cassette
tapes
in
a
place
where
they
will
be
subject
to:
«
Extremely
high
temperature
or
excessive
moisture
e
Excessive
dust
e
Direct
sunlight
e
Magnetic
fields
(near
TV
sets
or
speakers)
e
Toeliminate
tape
slack,
store
your
cassettes
in
cassette
cases
with
hub
stops
H@
Accidental
Erasure
Prevention
All
cassettes
have
erasure
prevention
tabs
for
each
side.
To
protect
valuable
recordings
from
accidental
or
inadvertent
erasure,
remove
the
tab
for
the
appropriate
side
with
a
screwdriver
or
another
tool.
e
To
record
on
a
tape
whose
erasure
prevention
tabs
have
been
removed,
cover
the tab
holes
with
adhesive
tape.
Erasure
prevention
tab
for
side
A
Erasure
prevention
tab
for
side
B
This
Stereo
Cassette
Deck
contains
an
automatic
tape
selector
which
automatically
selects
the
optimum
bias
and
equalization
for
the
tape
in
use.
This
is
accomplished
by
detection
of
the
tape type
detections
holes
in
the
cassette
housing.
e
If
atape
without
tape type
detection
holes
is
used,
the
dexk
will
be
set
for
normal
tapes.
Detection
holes
for
metal
tape
;
Detection
holes
fo
Fr
chrome
tape

PLAYBACK
e
The
operations
described
below
apply
to
deck
A
and
deck
B
alike.
e
Switch
on
your
amplifier
or
receiver.
e
Set
the
Tape
Monitor
switch
on
your
amplifier
or
receiver
to
the
TAPE
position.
e
The
numbers
in
the
illustration
below
depict
the
order
in
which
operation
steps
are
carried
out.
@
Press
the
POWER
switch
@
to
the
ON
(
-m
}
position.
@
Press
the
EJECT
(
#
)
button
@
to
open
the
cassette
compartment
cover
@.
(6)
Load
the
cassette
tape
and
close
the
cassette
compartment
cover
@.
@
When
listening
to
a
tape
that
has
been
recorded
with
Dolby
noise
reduction,
set
the
DOLBY
NR
switch
@
to
match
the
system
used
at
the
time
of
recording.
Dolby
NR
System
Switch
Setting
OFF
B
8
c
DOLBY
NR
DOLBY
NR
OFF
OFF
:
A
DOLBY
NR
©®
Press
the
Direction
(>)
button
@
to
select
the
direction
of
tape
transport.
Indicator
Transport
Direction
Forward
Reverse
©
Select
the
type
of
tape
transport
with
the
REVERSE
MODE
button
@.
Indicator
To
listen
to
one
side
only
To
listen
to
repeat
playback
of
both
sides
To
listen
to
continuous
playback
of
both
sides
and
both
decks.
RELAY
@
Press
the
PLAY
button
®
to
begin
playback.
The
PLAY
(<)
or
>)
indicator
will
light
during
playback.
Press
the
stop
(
ll)
button
®
to
stop
the
playback.
e
In
the
continuous
playback
mode
(REVERSE
MODE
set
to
C2},
playback
of
both
tape
sides
will
be
repeated
5
times
and
then
stop
automatically.
e
lf
different
types
of
Dolby
noise
reduction
are
used
for
record
and
playback,
playback
response
will
be
adversely
effected.
@
When
power
is
turned
off
during
tape
transport,
it
may
not
be
possible
to
remove
the
cassette
by
pressing
the
EJECT
(
&
)
button.
n
this
case,
turn
on
power
again
before
you
press
the
EJECT
(
4}
button,
i
RELAY
PLAY
(continuous
playback
of
the
tapes
in
deck
A
and
deck
B)
e
Load
a
cassette
tape
into
deck
A
and
B,
and
set
the
Dolby
NR
switch
correctly.
@
REVERSE
MODE
set
to
“RELAY”
@.
@
Press
the
PLAY
button
®
of
the
deck
you
first
wish
to
listen
to.
The
PLAY
indicator
of
the
deck
playing
back
the
tape
will
light
up.
;
@
To
stop
relay
play,
press
the
stop
(
Il}
button
®
of
the
deck
currently
playing
the
tape.
e
Relay
play
will
play
decks
A
and
B
in
succession
for
5
cycles,
upon
which
playback
stops.
When
playback
starts
from
deck
B,
when
.
switching
to
deck
A,
the
first
deck
A
playback
cycle
will
be
counted
as
the
second
cycle.
The
completion
of
5
cycles
will
always
be
at
the
opposite
side
of
the
tape
in
deck
B.
@
MUSIC
SEARCH
SYSTEM
The
music
search
system
detects
blank
sections
(lasting
for
at
least
4
seconds)
between
selections
in
order
to
locate
the
beginning
of
selections
in
the
forward
or
reverse
direction.
1,
To
advance
from
the
current
selection
to
the
beginning
of
the
next
selection
(CUE):
Press
the
PLAY
button
simultaneously
with
the
Fast
Forward
({
PP
)
button
when
the
tape
is
travelling
in
the
forward
([>)
direction.
Press
the
PLAY
button
simultaneously
with
the
Rewind
(
44
)
button
when
the
tape
is
travelling
in
the
reverse
(<])
direction.
The
deck
will
skip
the
rest
of
the
current
selection
and
automatically
resume
play
from
the
beginning
of
the
next
selection.
2.
To
repeat
playback
from
the
beginning
of
the
current
selection:
Press
the
PLAY
button
simultaneously
with
the
Rewind
(
44
)
button
when
the
tape
is
travelling
in
the
forward
(>)
direction.
Press
the
PLAY
button
simultaneously
with
the
Fast
Forward
(
PP
)
button
when
the
tape
is
travelling
in
the
reverse
(<j)
direction.
The
deck
will
rewind
the
tape
to
the
beginning
of
the
current
selection
and
automatically
resume
play
from
that
point.
This
is
very
convenient
for
repeating
playback
of
the
current
selection.
Notes
on
Music
Search
Operation:
The
search
functions
operates
by
detecting
comparatively
jong,
blank
sections
approximately
4
to
5
seconds
long,
in
between
recorded
selections.
Therefore,
the
system
may
not
operate
normally
in
the
following
cases:
Recordings
with
discontinuous
speech
or
conversation.
Recordings
with
long
periods
of
pianissimo
(softly
played
music),
Recordings
with
long
silences.
Blank
sections
with
a
high
level
of
noise.
Biank
sections
shorter
than
4
seconds.
If
noise-emitting
appliances,
such
as
electric
razors,
drills,
refrigerators,
etc.,
are
operated
nearby.
e
REV
close
the
beginning
of
the
program
or
CUE
close
to
the
ending.

RECORDING
ENGLISH
e
The
operations
described
below
apply
to
deck
A
and
deck
B
alike.
e
Switch
on
your
amplifier
or
receiver
and
the
source
component.
e
Set
the
Tape
Monitor
switch
on
your
amplifier
or
receiver
to
the
SOURCE
position.
@
Press
the
POWER
switch
@
to
the
ON
{
=
)
position.
@
Load
the
cassette
tape
@,
@.
(Check
that
the
erasure
prevention
tabs
of
the
cassette
housing
have
not
been
broken
off.)
@
Set
the
DOLBY
NR
switch
@
to
the
appropriate
position.
Recording
with
Dolby
Bee
NR
type
B
S
DOLBY
NR
Recording
with
Dolby
Pm
NR
type
C
@
DOLBY
NR
Recording
without
Dolby
NR
DOLBY
NR
@
Press
the
Direction
(4>)
button
@
to
select
the
direction
of
tape
transport,
©
Select
the
type
of
tape
transport
with
the
REVERSE
MODE
button
@.
C2)
or
RELAY
©
Press
the
REC/REC
MUTE
(@)
button
@®
to
set
the
recording
pause
mode.
The
@II
indicator
will
light
up.
@
Adjust
the
recording
level
with
the
INPUT
LEVEL
control
@
while
watching
the
Peak
Level
Meter.
Press
the
PLAY
button
@®
to
start
the
recording.
The
PLAY
(<]
or
)
and
the
@
indicator
will
light
during
recording.
©
To
stop
recording,
press
the
stop
(
Ml)
button
©.
@
To
pause
the
recording,
press
the
REC
PAUSE
(If)
button
@®.
Press
the
PLAY
button
@
to
resume
recording.
|
Mode
Indicator
ft
To
record
on
only
one
side
To
continuously
record
on
both
sides
OUTPUT
LEVEL
(dB)
Caution:
e
Be
careful
not
to
erase
important
recordings
by
mistake.
Inadvertent
start
of
recording
will
happen
in
the
following
cases:
1.
If
the
PLAY
button
is
pressed
while
the
@
indicator
lights,
recording
starts.
2.
If
the
PLAY
and
REC/REC
MUTE
(@)
button
are
pressed
at
the
same
time,
recording
starts.
The
best
way
to
avoid
accidental
erasure
is
to
break
off
the
two
erasure
prevention
tabs
on
the
cassette
housing.
M@
PROPER
RECORDING
LEVEL
A
too
high
recording
level
can
saturate
the
tape
and
cause
distortion.
On
the
other
hand,
if
the
recording
level
is
set
too
low,
soft
passages
will
be
marked
by
residual
noise.
A
proper
recording
level
is
the
single
most
important
factor
for
making
well
balanced
recordings.
Guideline
for
maximum
recording
level
TYPE
I
(Normal)
TYPE
II
(CrOz)
TYPE
IV
(Metal)
0
dB
level
on
peaks
+1
dB
level
on
peaks
+3 dB
level
on
peaks
Note:
The
optimum
recording
level
differs
depending
on
the
program
source
and
the
type
of
tape
used.
Hi
RECORDING
BIAS
ADJUSTMENT
For
best
recording
results,
monitoring
during
recording
and
comparing
different
recordings
using
your
own
judgement
are
essential.
The
DENON
cassette
deck
is
equipped
with
a
BIAS
FINE
control
to
assist
you
in
setting
the
proper
bias
for
different
types
and
brands
of
tape.
At
the
center
stop-click
position,
the
deck
is
set
to
the
reference
bias
level
for
Normal,
CrO2
and
Metal
tape.
If
the
resulting
recording
in
this
position
has
too
much
or
too
little
high
frequency
content,
adjusting
the
BIAS
FINE
control
can
be
useful
to
achieve
better
results.
"+
BIAS
FINE
If
the
high
frequencies
(treble
sounds)
are
to
be
boosted,
turn
the
BIAS
FINE
control
counter-clockwise
to
decrease
the
bias
current.
Turn
the
control
clockwise
to
increase
bias
current.
By
the
use
of
this
control,
you
can
record
tapes
with
a
frequency
response
that
will
perfectly
match
your
listening
taste.
Counterclockwise
Clockwise
FREQUENCY
(Hz)
Mi
REC/REC
MUTE
AND
REC
PAUSE
Button
To
record
a
5-second
blank
section
during
recording:
Press
the
REC/REC
MUTE
(@)
button.
A
5-second
blank
will
be
recorded
and
the
deck
will
enter
the
recording
standby
mode.
=
2.
To
record
a
5-second
blank
section
during
the
recording
standby
mode:
Press
the
REC/REC
MUTE
(@)
button
from
the
recording
standby
mode.
A
5
second
blank
will
be
recorded
and
the
deck
will
enter
the
recording
standby
mode
again.
3.
To
cancel
recording
of
blank
space:
Press
the
REC
PAUSE
(I)
button.
Blank
space
recording
will
be
cancelled
and
the
deck
enters
the
recording
standby
mode.
4.
To
extend
the
blank
section
with
another
5
seconds
or
more:
Simply
press
the
REC/REC
MUTE
(@)
button
and
the
blank
section
will
be
increased
with
another
5
seconds.

ENGLISH
Mi
TWIN
RECORDING
(simultaneous
recording
on
deck
A
and
deck
B)
This
is
a
convenient
feature
for
recording
the
same
program
source
onto
two
tapes
at
the
same
time.
e
Load
cassette
tapes
into
both
deck
A
and
B.
Set the
Dolby
NR
switch
@
and
the
REVERSE
MODE
button
@.
@
Press
the
TWIN
REC
button
@.
The
Gb
indicator
will
light
up
and
both
decks
will
enter
the
recording
pause
mode.
@
Adjust
the
INPUT
LEVEL
control
@
for
the
best
recording
input
levels
while
watching
the
Peak
Level
Meter.
@®
Press
the
PLAY
button
@®
of
deck
B
to
start
twin
recording.
@
To
stop
twin
recording,
press
the
STOP
(
Mf)
button
®
of
each
deck.
e
By
pressing
the
deck
B
REC
PAUSE
(I)
button
or
the
REC/REC
MUTE
(@)
button,
the
recording
pause
or
recording
mute
mode
on
both
decks
can
be
set
automatically.
The
deck
A
(NH)
and
(@)
buttons
cannot
be
used.
e
To
set
the
twin
recording
mute
mode
from
the
twin
recording
pause
mode,
press
the
REC/REC
MUTE
button
(@)
on
deck
B
for
at
least
0.5
seconds.
e
The
retay
mode
cannot
be
set
with
the
REVERSE
MODE
button
when
in
the
twin
recording
mode.
DUBBING
(from
deck
A
to
deck
B)
e
Switch
on
the
amplifier
or
receiver.
e
Set
the
Tape
Monitor
switch
on
your
amplifier
or
receiver
to
the
TAPE
position.
@
Press
the
POWER
switch
@
to
the
ON
(
-m
)
position.
@
Load
the
cassette
tape
to
be
played
in
deck
A
and
the
one
to
be
recorded
in
deck
B
@, @.
@
Select
the
type
of
tape
transport
with
the
REVERSE
MODE
button
@.
Reverse
mode
Operation
Dubbing
is
performed
only
for
one
side.
The
decks
stop
when
either
deck
A
or
B
reaches
the
end
of
the
tape.
The
tape
direction
is
reversed
on
each
C5
deck
when
they
reach
the
end
of
the
tape.
i
(This
is
convenient
for
dubbing
to
a
tape
with
a
different
length.)
RELAY
During
dubbing
of
the
side
facing
you,
the
deck
that
first
reaches
the
end
of
the
tape
will
stand
by
until
the
other
deck
reaches
the
end
of
the
tape,
then both
decks
will
reverse
the
tape
direction
together.
(Depending
on
the
manufacturer,
the
length
of
tapes
having
the
same
recording
time
may
differ
somewhat.
Setting
this
mode
permits
the
arrange-
ment
of
the
beginning
portion
of
the
opposite
side
of
the
tape.)
10
M
RELAY
RECORDING
(continues
recording
from
deck
A
to
deck
B)
To
record
a
long
program,
start
recording
on
deck
A,
and
when
both
sides
of
the
tape
in
deck
A
have
been
recorded,
the
relay
recording
feature
continues
to
record
on
the
tape
in
deck
B.
e
Load
cassette
tapes
into
decks
A
and
B,
and
set
the
Dolby
NR
switch.
@
REVERSE
MODE
set
to
“RELAY”
@.
The
RELAY
indicator
will
light.
Recording
Order
Deck
A
Deck
B
|
Side
facing
you
6
Side
facing
you
~+
Opposite
side
i
-+
Opposite
side
@
Press
the
REC/REC
MUTE
(@)
button
®
of
deck
A
to
set
the
recording
pause
mode.
@
Adjust
the
INPUT
LEVEL
contro!
@
for
the
best
recording
input
level
while
watching
the
Peak
Level
Meter.
@
Press
the
PLAY
button
®
of
deck
A
to
start
relay
recording.
©
To
stop
relay
recording,
press
the
STOP
(
ll)
button
®
of
the
deck
that
is
recording.
@
To
begin
normal
speed
dubbing,
press
the
DUBBING
SPEED
NORMAL
button
@.
The
DUB
indicator
will
light
at
this
time.
To
high
speed
dubbing,
press
the
DUBBING
SPEED
HIGH
button
@.
The
HIGH
indicator
will
light
at
this
time.
©
To
stop
dubbing,
press
the
stop
(
HM
)
button
®
of
deck
A
or
deck
B.
e
When
deck
A
is
in
the
playback
mode
and
deck
B
is
in
the
stop
condition,
setting
deck
B
to
the
recording
pause
mode
will
engage
the
normal
speed
dubbing
pause
mode.
Dubbing
is
then
started
by
pressing
the
PLAY
button.
e
When
dubbing,
the
recording
level
and
the
Dolby
NR
coding
will
be
the
same
as
those
of
the
playback
tape,
regardiess
of
the
positions
of
the
INPUT
LEVEL
control
and
the
DOLBY
NR
switch.
e
When
listening
to
the
playback
sound
during
normai
speed
dubbing,
set
the
DOLBY
NR
switch
to
match
the
Dolby
NR
system
with
which
the
playback
tape
was
recorded.
This
will
assure
correct
sound
reproduc-
tion,
but
does
not
affect
the
recording.
e
The
playback
sound
cannot
be
heard
during
high
speed
dubbing.
e
Operation
using
the
REC/REC
MUTE
(@)
and
REC
PAUSE
(If)
buttons
of
deck
B
is
permitted
during
normal
speed
dubbing.
e
Buttons
other
than
the
stop
{
Ml)
button
cannot
be
used
during
high
speed
dubbing.

SYNCHRONIZED
RECORDING
FUNCTION
ENGLISH
e
Convenient
synchronized
recording
can
be
performed
when
used
in
combination
with
a
DENON
CD
player
equipped
for
the
synchronized
recording
function.
e
SYNCHRO
Jack
Connection
Connect
the
SYNCHRO
Jack
with
a
DENON
CD
player
which
is
equipped
with
a
SYNCHRO
jack,
then
make
a
synchronized
recording.
Use
the
connection
cord
supplied
with
this
cassette
deck
e
Switch
on
your
amplifier
or
receiver
and
the
CD
player.
e
Set
the
tape
Monitor
switch
on
your
amplifier
or
receiver
to
the
source
position.
@
Load
the
tape
onto
which
you
want
to
record
into
Deck
B,
the
disc
you
want
to
record
into
the
CD
player.
@
Following
the
recording
instructions
on
page
9,
set
the
Dolby
NR
mode,
the
direction,
the
reverse
mode
and
the
input
level.
@®
Set
the
CD
player
to
the
stop
or
pause
mode.
@
Press
the
REC/REC
MUTE
(@)
button
and
REC
PAUSE
(H)
button
simultaneously.
The
cassette
deck
and
CD
player
are
automatically
set
to
the
synchronized
recording
mode.
The
“Ml”
indicator
lights
on
the
cassette
deck
and
the
synchronized
recording
mode
is
indicated
on
the
CD
player.
(For
details,
refer
to
the
CD
player's
operating
instructions.)
®
To
stop
synchronized
recording,
press
the
stop
button
on
Deck
B.
The
synchronized
recording
mode
is
cancelled
for
both
the
cassette
deck
and
CD
player.
©
To
stop
synchronized
recording
temporarily,
press
the
stop
button
on
the
CD
player.
A
5-second
blank
space
is
created
on
the
tape,
after
which
the
recording
pause
mode
is
set.
The
“MB”
indicator
flashes.
To
resume
synchronized
recording,
press
the
PLAY
button
on
the
CD
player.
CD
player
Cassette
deck
Note:
e
If
synchronized
recording
is
started
when
the
CD
player
is
in
a
mode
other
than
the
stop
or
pause
mode
or
when
no
disc
is
set,
the
“J”
.
indicator
on
the
cassette
deck
flashes
and
the
recording
pause
mode
is
set
until
synchronized
recording
is
possible
on
the
CD
player.
e
In
the
synchronized
recording
mode,
only
the
STOP
button
on
Deck
B
and
the
STOP,
FF
and
REW
buttons
on
Deck
A
will
function.
*
Caution:
e
Do
not
set
the
cassette
deck
to
the
synchronized
recording
mode
when
the
CD
player
is
in
the
play
mode.
Also,
do
not
turn
off
the
power
of
the
cassette
deck
or
the
CD
player
during
synchronized
recording.
Doing
so
can
result
in
malfunction.
e
During
the
editing
operation,
when
using
the
editing
functions
on
the
CD
player,
be
sure
to
select
a
tape
with
a
sufficiently
long
recording
time.
For
the
CD
player’s
editing
functions,
refer
to
the
CD
player's
operating
instructions.
@
TWIN
SYNCHRONIZED
RECORDING
This
is
a
convenient
feature
for
synchronized
recording
the
same
program
source
onto
two
tapes
at
the
same
time.
e
Load
cassette
tapes
into
both
deck
A
and
deck
B.
Set
the
Dolby
NR,
the
direction,
the
reverse
mode
and
the
input
level.
@
Set
the
CD
player
to
the
stop
or
pause
mode.
@
Press
the
TWIN
REC
button.
The
indicator
will
light
up
and
both
decks
will
enter
the
recording
pause
mode.
@
Press
the
REC/REC
MUTE
(@)
button
@®
and
REC
PAUSE
(H)
button
®
of
deck
B
simultaneously.
The
cassette
deck
and
CD
player
are
automatically
set
to
the
twin
synchronized
recording
mode.
The
“Ml”
indicator
lights
on
the
cassette
deck
and
the
synchronized
recording
mode
is
indicated
on
the
CD
player.
@
Stop
synchronized
recording,
press
the
STOP
button
on
both
deck
A
and
B.
®
To
stop
twin
synchroized
recording
temporarily,
press
the
stop
button
on
the
CD
player.
A
5-seconds
blank
space
is
created
on
the
tape,
after
which
the
recording
pause
mode
is
set.
The
"I"
indicator
flashes.
To
resume
twin
synchronized
recording,
press
the
PLAY
button
on
the
CD
player.
11

TAPE
COUNTER
AND
MEMORY
STOP
1}
DOLBY
B
AND
C
NOISE
REDUCTION
SYSTEM
DOLBY
HX-PRO
HEADROOM
EXTENSION
SYSTEM
ENGLISH
COUNTER
A/B
as
6B
~-40
-30
-20-10
-5 -3
-1
0
#1
+3
+5
410
88
Bg?
aaa
R
eno
ovooDvonoMooOeAoOARAoeAANMMo
RESET
MEMO
oe
i
ABMEMO
@
If
QPLAYDOUB
HIGHe
It
GPLAYD
=
@
revay
ED]
oe
T=l=)
Ge
=
Operation
of
the
Tape
Counter
(1)
Press
the
RESET
button
to
reset
the
counter
to
“0000”.
(2)
By
using
the
PLAY,
FF,
or
REW
functions,
the
reading
of
the
counter
will
change
to
indicate
index
position.
e
During
recording
and
playback
operations,
the
counter
is
useful
for
noting
the
location
of
existing
programs
or
positions
where
recording
is
to
be
started.
e
The
reading
of
this
counter
does
not
correspond
with
that
of
any
other
deck,
(3)
Deck
A
and
Deck
B
have
the
memory
of
their
own
counter.
Operate
COUNTER
A/B
to
change
Deck
A
or
B
to
display
its
counter.
The
Dolby
noise
reduction
system
substantially
reduces
the
tape
background
noise
(hiss)
inherent
in
the
cassette
medium.
Dolby
B
NR
is
most
widely
in
use.
However
Dolby
C
NR
is
a
much
more
recent
development
and
represents
significant
improvements
over
Dolby
B
NR.
Tape
background
noise
consists
primarily
of
high
frequency
informa-
tion,
which
is
particularly
annoying
during
soft
passages.
The
Dolby
NR
system
increases
the
level
of
low
volume
mid-
and
high-frequency
signals
during
recording
and
reduces
the
level
of
these
signals
by
an
identical
amount
during
playback.
As
a
result,
the
playback
signal
is
identical
to
the
original
source,
but the
level
of
background
noise
generated
by
the
tape
is
greatly
reduced.
This
deck
is
equipped
with
the
Dolby
HX-PRO
headroom
extension
system.
Since
the
system
functions
automatically
during
recording,
no
switching
Operation
or
adjustment
is
required.
The
system
is
effective
with
any
type
of
Normal,
CrO,
and
Metal
tape.
The
Dolby
HX-PRO
headroom
extension
system
functions
during
recording
to
raise
the
saturation
level
in
the
treble
range.
Therefore,
most
of
the
treble
range
components
distorted
or
lost
during
recording
on
convention-
al
cassette
decks
are
more
faithfully
recorded
on
the
new
DENON
cassette
deck.
12
2)
MEMORY
STOP
Operation
(1)
During
recording
or
playback,
the
Memory
Stop
feature
can
be
used
to
locate
a
particular
point
on
the
tape.
Press
the
COUNTER
MEMO
button
at
the
desired
point.
(2)
The
MEMO
indicator
lights.
(3)
When
the
Rewind
(
€€
)
button
is
pressed
during
forward
tape
travel
(D>),
or
the
Fast
Forward
(
>»
)
button
is
pressed
during
reverse
tape
travel
(<)),
the
tape
is
rapidly
rewound
(or
advanced)
until
the
counter
indication
of
“0000”
is
reached.
e
The
Memory
Stop
feature
will
rewind
or
forward
the
tape
to
within
-5
counts
in
the
forward
(>)
direction
(from
“0000”
to
“-0005”")
and
to
within
+5
counts
in
the
reverse
(<])
direction
(from
“0000”
to
“0005").
After
this,
several
seconds
are
required
for
corrective
operations.
e
The
Memory
Stop
function
operates
independently
in
both
direc-
tions
for
deck
A
and
deck
B.
The
MEMO
indicator
will
switch
over
with
the
use
of
the
COUNTER
A/B
button.
Caution:
lf
the
memory
stop
operation
is
performed
after
repeated
fast-
forwarding
or
rewinding,
the
tape
may
not
stop
at
the
proper
position.
@
The
operating
principle
of
Dolby
C
NR
is
similar
to
that
of
Dolby
B
NR
except
for
the
encoding/decoding
response
curves.
The
noise
reduc-
tion
effect
obtained
with
Dolby
C
NR
is
up
to
20
dB,
compared
to
10
dB
with
Dolby
B
NR.
In
addition,
Dolby
C
NR
uses
an
anti-saturation
network
and
spectral
skewing
circuitry
for
a
significant
improvement
in
the
dynamic
range
of
the
mid-
to
high-frequencies.
Features
of
the
Dolby
HX-PRO
Headroom
Extension
System
(1)
{2)
{3)
(4)
Performance
of
Normal
and
CrO,
tapes
can
be
improved
to
very
close
of
that
offered
by
Metal
tape.
The
dynamics
in
the
treble
range
are
improved
significantly.
Since
no
decoding
is
necessary
during
playback,
the
improved
sound
can
be
enjoyed
on
any
type
of
tape
deck,
including
portable
players
and
car
audio
systems.
The
system
functions
whether
the
Dolby
B/C
NR
system
is
engaged
or
not.
.

MAINTENANCE
ENGLISH
HE
Head
Cleaning
After
long
usage,
tape
coating
or
dust
may
adhere
to
the
heads,
causing
deterioration
of
sound.
Therefore,
the
parts
depicted
in
the
illustration
should
be
cleaned
regularly.
Use
a
cotton
swab
moistened
with
a
tape
head
cleaning
solution
(such
as
alcohol).
Note:
1,
Some
cleaning
cassettes
on
the
market
have
strong
abrasive
effects
and
may
scratch
the
heads.
Always
use
cotton
swabs
instead
of
cleaning
cassettes.
Since
the
use
of
metal
tape
is
apt
to
collect
more
dust
on
the
heads,
the
heads
should
be
cleaned
more
often
to
enjoy
the
best
possible
sound.
@
Cleaning
the
Pinch
Roliers
and
Capstans
lf
the
pinch
rollers
or
capstans
accumulate
dust,
tape
transport
may
become
unstable,
as
a
result
from
slippage,
during
recording
or
playback.
The
tape
can
also
be
damaged
if
it
gets
entangled
in
the
capstan.
Clean
these
parts
with
a
cotton
swab
or
a
soft
cloth
moistened
with
a
tape
head
cleaning
solution
(such
as
alcohol).
Demagnetizing
the
Heads
The
heads
will
become
magnetized
after
long
usage
or
if
strongly
magnetized
objects
are
brought
near
them.
The
result
is
a
generation
of
noise,
loss
of
the
high
frequency
range,
and
in
extreme
cases
erasure
of
treble
components
on
pre-recorded
tapes
in
combination
with
added
noise.
Thus,
the
heads
should
be
demagnetized
at
regular
intervals.
(Head
demagnetizers
are
separately
available
from
your
dealer.)
@
How
to
Demagnetize
the
Tape
Heads
1.
Turn
off
the
power.
2.
Turn
on
the
demagnetizer
while
it
is
at
least
30
cm
away
from
the
heads.
Bring
the
demagnetizer
near
the
heads
and
slowly
move
it
in
small
circles
four
or
five
times
in
front
of
each
head,
making
sure
you
do
not
touch
them.
3.
Slowly
move
the
demagnetizer
away
and
turn
it
off
when
it
is
at
least
30
cm
away
from
the
heads.
TROUBLESHOOTING
Check
the
following
before
you
draw
the
conclusion
that
your
Stereo
Cassette
Deck
is
malfunctioning.
1.
Are
all
the
connections
correct?
2.
Are
all
system
components
being
operated
correctly
in
accordance
with
the
operating
instructions?
3.
Are
the
speakers
and
amplifier/receiver
functioning
correctly?
If
the
tape
deck
still
does
not
function
properly,
check
the
symptom
against
the
list
below.
If
the
symptom
does
not
correspond
to
the
check
list,
please
contact
your
DENON
dealer.
Problem
Cause
Remedy
Tape
does
not
run
e
Power
cord
is
disconnected.
e
Check
power
cord.
e
Tape
ts
loose.
e
Tighten
tape
with
a
pencil,
etc.
e
Cassette
is
not
loaded
properly.
e
Load
cassette
properly.
e
Defective
cassette.
e
Replace
cassette.
Tape
is
not
recorded
when
REC/REC
MUTE
(@)
|
e
No
cassette
is
loaded.
e
Load
cassette.
button
is
pressed.
e
Erase
prevention
tabs
are
broken
off.
e
Cover
holes
with
adhesive
tape.
Sound
is
warbled
and
distorted.
e
Heads,
capstan
or
pinch
roller
are
dirty.
e
Clean
them.
e
Tape
is
wound
too
tight.
e
Fast
forward
or
rewind
to
loosen
tape
winding.
e
Recording
input
level
is
too
high.
e
Adjust
recording
input
level.
e
Tape
is
worn
out
and
has
“drop-outs”.
e
Replace
tape.
a
Excessive
noise
e
Tape
is
worn.
e
Replace
them.
e
Heads,
capstan
or
pinch
roller
are
dirty.
e
Clean
them.
e
Heads
are
magnetized.
e
Demagnetize
heads.
e
Recording
input
level
is
too
low.
e
Adjust
recording
input
level.
High
frequency
range
(treble)
is
emphasized.
@
Dolby
NR
switch
is
set
improperly.
e
Set
Dolby
NR
Switch
properly.
wad
High
frequency
range
(treble)
is
lost.
e
Heads
are
dirty.
e
Clean
them.
e
Tape
is
worn.
e
Replace
tape.
his
at
The
cassette
tape
cannot
be
removed.
e
lf
the
POWER
switch
is
turned
off
either
|
e
Turn
the
POWER
switch
ON
(=)
again,
and
during
recording
or
playback
and
the
unit
is
then
press
the
STOP
(
@
)
button.
stopped,
there
may
be
cases
when
the
e
Now,
press
the
EJECT
(
&
)
button
to
cassette
cannot
be
removed,
even
if
the
remove
the
cassette
tape.
EJECT
(
&
)
button
is
pressed.
L
13

ENGLISH
SPECIFICATIONS
Type
Heads
Motors
Tape
Speed
Fast
Forward,
Rewind
Time
Recording
Bias
Overall
S/N
Ratio
(at
3%
THD
level)
Overall
Frequency
Response
Channel
Separation
Wow
&
Flutter
Input
LINE
Output
LINE
PHONES
Power
Supply
Power
Consumption
Dimensions
Weight
Vertical
tape
loading;
4-track
2-channel
stereo
double
cassette
deck
Recording/playback
head
x
2
Erase
head
(Double-gap
ferrite)
x
2
Capstan
(DC
servo
motor)
x
2
Real
(DC
motor)
x
2
4.8
cm/sec.
Approx.
110
sec.
with
a
C-60
cassette
Approx
105
kHz
Dolby
C
NR
on:
more
than
74
dB
(CCIR/ARM)
20
~
18,000
Hz
+3
dB
(at—20
dB,
Metal
tape)
More
than
40
dB
(at
1
kHz)
0.06%
WRMS,
+0.14%
w.
peak
80
mV
(-—20
dBm)
input
level
at
maximum
Input
impedance:
50
kohm
unbalanced
775
mV
(0
dB)
output
level
at
maximum
(with
47
kohm
load,
recorded
level
of
200
pwb/mm)
1.2
mW
output
level
at
maximum
(optimum
load
impedance
8
ohm
~
1.2
kohm)
50
Hz/60
Hz,
voltage
is
shown
on
rating
label
27W
434
(W)
x
124
(H)
x
275
(D)
mm
(17-3/32"
x
4-57/64"
x
10-53/64”)
4.4
kg
(9
lbs
11
02)
*
Above
specifications
and
design
are
subject
to
change
without
prior
notice.
Best
results
will
be
obtained
with
use
of
DENON
DX
and
HD
Series
cassette
tapes.
Dolby
noise
reduction
and
HX
Pro
headroom
extension
manufactured
under
license
from
Dolby
Laboratories
Licensing
Corporation.
HX
Pro
originated
by
Bang
&
Olufsen.
“DOLBY”,
the
double-D
symbol
QO
and
“HX
PRO”
are
trademarks
of
Dolby
Laboratories
Licensing
Corporation.
14
|
|
Other manuals for DRW840 - Stereo Double Cassette Deck
1
Other Denon Tape Deck manuals

Denon
Denon DRW-585 User manual

Denon
Denon DN-790R User manual

Denon
Denon DRW-5830 User manual

Denon
Denon DRW-695 User manual

Denon
Denon DN-730R User manual

Denon
Denon DRW-585 User manual

Denon
Denon DRR-M33 User manual

Denon
Denon DRW840 - Stereo Double Cassette Deck User manual

Denon
Denon DN-770R User manual

Denon
Denon DN-780R User manual