DENT Instruments ELITEpro XC Manual

Operator’s Guide
ELITEpro XC™
and
ELOG™ 14
Software
ELITEpro XC™/ELOG™14
October 23, 2014
Shop for Dent products online at: 1.877.766.5412
www.PowerMeterStore.com

ii
Operator’s Guide: ELITEpro XC™and ELOG™Software ©2014 DENT Instruments, Inc. All rights reserved.
This manual may not bereproduced or distributed without written permission from DENT Instruments.
Congratulations!
You now own one of the world’s most versatile, accurate, feature-rich, and lowest priced power/energy
loggers, the ELITEpro XC™. The ELITEpro XC logger contains many features, some of which enable you to
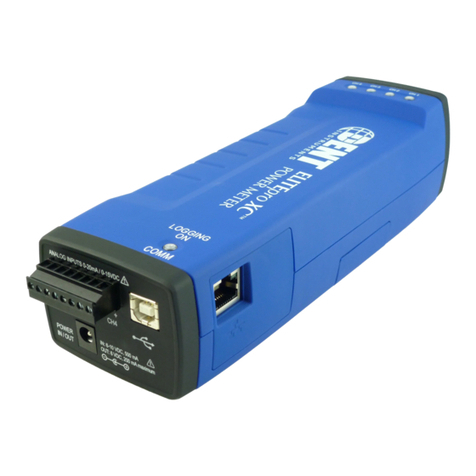
measure data across multiple platforms, view and graph real-time data, and retrieve data remotely.
In addition, this manual describes the features andfunctionality of the accompanying software
ELOG™ 14,which isdesigned tobeuser-friendly, intuitive, andan easy-to-use component ofyour
energy measuring projects.
NOTE:The ELITEpro XCpower meter and ELOG 14 software have received a number of improvements
and have plenty of new features added, so besure toreview the Introduction, New Features section.
Thank You for your business!
Trademarks
ELITEpro XC™,ELOG™,and PhaseChek™ are trademarks of DENT Instruments, Inc.
Windows®, Windows® Vista, Windows® 7,Windows® 8,Windows® XP, and Notepad® are registered
trademarks of Microsoft Corporation.
Bluetooth®wireless technology is a registered trademark ofthe Bluetooth SIG. If your unit isequipped
with Bluetooth wireless technology, look forthe following trademark symbol:
Shop for Dent products online at: 1.877.766.5412
www.PowerMeterStore.com

iii
TABLE OF CONTENTS
Introduction....................................................................................................................... 6
New Features...................................................................................................................................6
ELITEpro XC™ SAFETY SUMMARY and SPECIFICATIONS....................................................... 8
ELITEpro XC™ RÉSUMÉ DE SÉCURITÉ ET SPÉCIFICATIONS................................................... 11
ELITEpro XC™TECHNICAL SPECIFICATIONS........................................................................ 14
ELITEpro XC™CONNECTIONS............................................................................................ 16
SECTION I: Installing, Setting Up, and Using the ELITEpro XC™........................................... 17
Install the ELOG Software on the Computer..................................................................................17
Mount the ELITEpro XC ..................................................................................................................18
ELITEpro XC Connections.........................................................................................................19
Complete the Wiring Connections.................................................................................................20
CT Connections........................................................................................................................20
Voltage Connections ............................................................................................................... 24
Analog Channel Connections...................................................................................................24
Power In/Out Connection .......................................................................................................28
Digital Channel Connections ...................................................................................................28
Connecting the USB Cable.......................................................................................................31
Other Communication Connections........................................................................................32
Communicating with the ELITEpro XC............................................................................................33
Terminating the ELITEpro XC to Computer Connection.......................................................... 35
SECTION II: ELITEpro XC, Best Practices............................................................................. 36
Creating and Using the Logger Setup Tables .................................................................................36
Create a New Setup Table.......................................................................................................36
Open an Existing Setup Table on Your PC ...............................................................................37
Retrieve an Existing Setup Table from the ELITEpro XC ..........................................................38
Configure the Setup Table.......................................................................................................39
Data Logging Controls ............................................................................................................. 40
Memory Capacity ....................................................................................................................40
Quick Setups............................................................................................................................41
Physical Power Channels.........................................................................................................42
Shop for Dent products online at: 1.877.766.5412
www.PowerMeterStore.com

iv
Calculated Power Channels.....................................................................................................45
Analog Output Channels .........................................................................................................46
Send a Setup Table to the Logger............................................................................................47
Save a Setup Table on the Computer...................................................................................... 48
LED Diagnostics.............................................................................................................................. 49
PhaseChek™ LEDs....................................................................................................................49
COMM—Communications LED ...............................................................................................49
Power Measurement—Connecting Sensors & Configuring Channels...........................................50
Wiring Label Conventions........................................................................................................51
Current Transformer (CT) Selection ........................................................................................51
CT Selection Examples.............................................................................................................53
Connecting CTs and Configuring Channels.............................................................................. 53
ELOG Quick Setup Wiring Diagrams........................................................................................54
Using the ELOG Software............................................................................................................... 59
ELOG Speed Buttons................................................................................................................59
File Menu.................................................................................................................................61
Edit Menu ................................................................................................................................ 62
View Menu ..............................................................................................................................63
Logger Menu ...........................................................................................................................64
Tools Menu..............................................................................................................................79
Data Menu...............................................................................................................................81
Section III: Appendices ..................................................................................................... 91
Appendix A—Installing Firmware Updates.................................................................................... 91
Firmware Updates...................................................................................................................91
Appendix B—Unusual Metering Systems ......................................................................................92
3-Phase Delta with a “Wild” (Red) Leg....................................................................................92
2–½ Element Meters ...............................................................................................................93
Using The 2-Watt Element (2 Ct) Method On A 3-Wire Delta Service....................................94
Using The 3-Watt Element (3 Ct) Method On A 3-Wire Delta Service....................................95
Appendix C—Troubleshooting ELITEpro XC Driver Installation .....................................................97
Appendix D—AUTOPOLL: Unattended Data Collection...............................................................101
AutoPoll Menu Options.........................................................................................................101
Understanding the Logger Lists.............................................................................................106
Appendix E—Calculated Power Channel Formulas .....................................................................110
Wye Configuration L1-N, L2-N, L3-N .....................................................................................110
DELTA Configuration: L1-L2 and L3-L2 ..................................................................................111
Shop for Dent products online at: 1.877.766.5412
www.PowerMeterStore.com

v
Appendix F—Communication Options ........................................................................................112
USB (Standard) ......................................................................................................................112
Ethernet LAN (Standard) ....................................................................................................... 113
WiFi and Wireless Access Point Connection (Optional) ........................................................116
ELITEpro Mobile App (Optional)............................................................................................ 122
Bluetooth (Optional).............................................................................................................. 126
Cell Modem Connection (Optional).......................................................................................129
Index ............................................................................................................................. 130
Shop for Dent products online at: 1.877.766.5412
www.PowerMeterStore.com

6
INTRODUCTION
The ELITEpro XC is a powerful and versatile tool for pinpointing electric usage and quantifying energy
usage. It is capable of measuring, storing, and analyzing consumption data including Volts, Amps, Watts,
Volt-Amps (VA), Volt-Amps reactive (VAR), Kilowatts (kW), Kilowatt Hours (kWh), KVAh, kVARh, and
Power Factor of an electrical load or an entire building. Analog input channels are especially helpful
when used in conjunction with power measurements to correlate the consumption of electricity with
environmental, HVAC plant performance or other process conditions. The ELITEpro XC also offers some
power quality features such as the ability to view in real-time voltage, current, and power waveforms
and calculate harmonics to the 63rd order.
The ELITEpro XC is line-powered from the service being measured, eliminating the need for external
power or space-consuming batteries at the job site. The measurements are stored in on-board, non-
volatile memory in a time series format at an interval selected by the user. The ELITEpro XC can be
mounted anywhere with its magnetic back and is small enough to be secured inside the electrical panel.
The Windows-based ELOG software package is used to setup the meter, display metered values, and
retrieve and analyze the collected data. ELOG graphically displays recorded data, performs analysis and
facilitates automatic remote data collection. Data is also easily exported to popular spreadsheet and
database programs for additional analysis.
The ELITEpro XC™requires a computer and ELOG™ software for setup, data retrieval, and data analysis.
Download and test the software prior to the field installation of the logger.
If your installation is using ELOG with legacy devices, contact DENT Instruments for a prior version of this
manual.
New Features
What’s new in the ELITEpro XC and ELOG 14 software? A number of new features, some standard, some
optional, have been added.
Added Scan button to the WiFi Setup dialog to let user pick a network from a list.
Fixed issue where field validation of WiFi setup ignored DHCP.
Sends correct antenna source when configuring WiFi.
Removes analog channel labels if all channels off.
Reset analog channel values to default when channel type is changed.
Increased number of columns that can be graphed at one time.
Various minor bug fixes when graphing, AutoLaunch, etc.
Shop for Dent products online at: 1.877.766.5412
www.PowerMeterStore.com

7
And there’s much more: As always, there have been anumber of improvements made tothesoftware
to improve performance, increase ease ofuse, and reduce issues. Enjoy these new features!
Shop for Dent products online at: 1.877.766.5412
www.PowerMeterStore.com

8
ELITEpro XC™SAFETY SUMMARY AND SPECIFICATIONS
This general safety information is to be used by both
the Logger operator and servicing personnel. DENT
Instruments, Inc. assumes no liability for user’s
failure to comply with these safety guidelines. 4RH8
E186827
Conforms to UL Std 61010-1
Certified to CSA Std C22.2 No.
61010-1
The ELITEpro XC™ is an Over-Voltage Category III device. Use approved rubber gloves with mechanical
protection and goggles when operating the device.
CAUTION: This LOGGER may contain life threatening voltages. QUALIFIED PERSONNEL MUST disconnect all high
voltage wiring before using or servicing the LOGGER.
Warning: Use of this device in a manner for which it is not intended may impair its
means of protection.
SYMBOLS ON EQUIPMENT
Denotes caution. See manual for a description of the meanings.
When connecting the ELITEpro XC to an AC load, follow these steps in sequence to
prevent a shock hazard.
1. If possible, de-energize the circuit to be monitored.
2. Connect the CTs to the phases being monitored.
3. Connect the voltage leads to the different phases. Use proper safety
equipment (gloves, mask, and protective clothing) as required for the
voltages monitored.
Risk of electric shock. Life threatening voltages may be present. Qualified personnel
only.
DO NOT EXCEED 600V Phase to Phase. This logger is equipped to monitor loads up
to 600V. Exceeding this voltage will cause damage to the logger and danger to the
user. Always use a Potential Transformer (PT) for loads in excess of 600V. The
ELITEpro XC is a 600 Volt Over Voltage Category III device.
Dispose of properly.
IN: 6-10 VDC, 500 mA
OUT: 6 VDC, 200 mA maximum
Shop for Dent products online at: 1.877.766.5412
www.PowerMeterStore.com

9
USB port
SENSOR LIMITATIONS
USE ONLY SHUNTED CURRENT TRANSFORMERS (CTs).
Do not use other CTs. Only use shunted CTs with a 333mV maximum output only.
Serious shock hazard and logger damage can occur if unshunted CTs are used. The
UL listing covers the use of the following DENT Instruments CTs that are UL
Recognized and have been evaluated to IEC 61010-1:
CT-HSC-020-X(20A Mini), CT-HSC-050-X(50A Mini), CT-HMC-0100-X(100A Midi),
and the CT-HMC-0200-X(200A Midi). The use of any other CT will invalidate the UL
Listing of the ELITEpro XC.
Pulse: Use only "dry contact" non-energized pulse inputs (ELITEpro SP only).Use
of energized pulse initiators can cause damage to the logger and a potential shock
hazard to the user. Wiring must meet 600V AC CAT III rating.
Equipment protected throughout by double insulation (IEC 536 Class II). CAT III 80-
600 VAC 125mA 50/60 Hz
FCC COMPLIANCE
This device has been tested and found to comply with the limits for a Class A digital device, pursuant to
part 15 of the FCC Rules. These limits are designed to provide reasonable protection against harmful
interference when the equipment is operated in a commercial environment. This equipment generates,
uses, and can radiate radio frequency energy and, if not installed and used in accordance with the
instruction manual, may cause harmful interference to radio communications. Operation of this
equipment in a residential area is likely to cause harmful interference in which case the user will be
required to correct the interference at user’s own expense.
Operation is subject to the following two conditions: (1) This device may not cause harmful interference,
and (2) this device must accept any interference received, including interference that may cause
undesired operation.
Shop for Dent products online at: 1.877.766.5412
www.PowerMeterStore.com

10
MAINTENANCE
There isnorequired maintenance with the ELITEpro XC. Abide bythe following items:
Cleaning: No cleaning agents, including water, shall be used onthe ELITEpro XC.
Battery Life: The lithium battery isonly used tomaintain the date and clock settings during power
failure andhas a life expectancy of greater than 10years. Contact DENT Instruments for service.
No accessories are approved for use with the ELITEpro XCother than those specified inthe DENT
Instruments product literature and price sheets.
If the logger appears damaged or defective, first disconnect all power and sensors. Call or email
technical support for assistance.
Shop for Dent products online at: 1.877.766.5412
www.PowerMeterStore.com

11
ELITEpro XC™RÉSUMÉ DE SÉCURITÉ ET SPÉCIFICATIONS
Cette information de sécurité est destinée à être
utilisée à la fois par l'opérateur de l'enregistreur et
le personnel de service. DENT Instruments, Inc
n'assume aucune responsabilité pour l'utilisateur qui
ne respecte pas les directives en matière de
sécurité.
4RH8
E186827
Conforme à UL Std 61010-1
Certifié CSA Std C22.2 No. 61010-1
Le ELITEpro XC est un appareil de surtension de catégorie III. Utiliser des gants en caoutchouc
approuvé avec protection mécanique et des lunettes lors de l'utilisation de l'appareil.
ATTENTION: Ce LOGGER peut contenir de hautes tensions qui peuvent être dangereuses. UN PERSONNEL QUALIFIÉ
DOIT débrancher tous les câbles à haute tension avant d’utiliser ou de réparer du LOGGER.
Attention: L'utilisation de cet appareil d'une manière pour laquelle il n'est pas destiné peut
annuler ses moyens de protection.
SYMBOLES DES EQUIPEMENTS
Signifie prudence. Voir le manuel pour une description de la signification.
En faisant la connexion du ELITEpro XC à une prise de courant alternatif, suivez ces étapes
en ordre pour empêcher un risque de choc.
1. Décharger le circuit à contrôler.
2. Connectez le TC aux phases à surveiller.
3. Connectez les fils de tension à des phases différentes. Utiliser des équipements de
sécurité (gants et des vêtements de protection) qui sont nécessaires pour les tensions
surveillées.
Indique haute tension. Risque de choc électrique. Hautes tensions peuvent être présentes
qui mettent la vie en danger. Personnel qualifié uniquement.
NE PAS DEPASSER 600V Phase à Phase. Ce compteur peut contrôler les charges jusqu'à
600V. Le dépassement de cette tension peut causer des dommages à l'appareil et du
danger pour l'utilisateur. Utiliser toujours le potentiel transformateur (PT) pour des charges
de plus de 600V. Le ELITEpro XC est un appareil à 600 V de surtension de catégorie III.
Se débarrasser de correctement.
Shop for Dent products online at: 1.877.766.5412
www.PowerMeterStore.com

12
IN: 6-10 VDC, 500 mA
OUT: 6 VDC, 200 mA maximum
USB port
LIMITATIONS DE DÉTECTEUR
UTILISEZ SEULEMENT TRANSFORMATEURS DE COURANT (TC) SHUNTÉE.
N’utilisez pas d'autres TC. Utilisez seulement des TC shuntée avec une puissance maximale
333mV. Un sérieux risque de décharge électrique et des dommages à l'enregistreur peut se
produire si des TC pas shuntée sont utilisés. Utiliser seulement les CTs des DENT
Instruments suivants qui sont énumérés jusqu'au 600V/CATIII.
CT-HSC-020-U,CT-HSC-050-U,CT-HMC-0100-U,CT-HMC-0200-U
Impulsion: n'utilisez que "contact sec" impulsion intrants non charger (ELITEpro SP
uniquement). Utilisation de impulsion initiateurs charger peut causer des dommages à
l'enregistreur et une décharge électrique potentielle pour l'utilisateur. Il faut que
l'installation électrique satisfasse l'évaluation de 600V AC CATIII.
L'équipement protégé en double isolation (IEC 536 Classe II). CAT III 80-600 VAC 125mA
50/60 Hz
Shop for Dent products online at: 1.877.766.5412
www.PowerMeterStore.com

13
Entretien
Il n'y a aucun entretien requis avec le ELITEpro XC.Respectez les points suivants:
Nettoyage:Aucun agents denettoyage, ycompris l'eau, doit être utilisé sur le ELITEpro XC.
Espérance de Viede laBatterie: La pile au lithium est utilisée uniquement pour maintenir les
paramètres dedate etd'heure encas decoupure delecourant eta une espérance devie deplus de10
ans. Contactez DENT Instruments pour le service.
Pas d'accessoires approuvés pour une utilisation avec leELITEpro XC sauf ceux spécifiés parDENT
Instruments dans ses documentations surles produits et également sur les prix.
Si le compteur semble endommagé ou défectueux, tout d'abord déconnecter lepouvoir de l'appareil.
Alors s'il vous plaît appelez 541.388.4774 ou contacter par courriel l'assistance technique pour obtenir
de l'aide.
Shop for Dent products online at: 1.877.766.5412
www.PowerMeterStore.com

14
ELITEpro XC™TECHNICAL SPECIFICATIONS
Specification Description
Memory 16 MB non-volatile
Service Types Single Phase-Two Wire, Single Phase-Three Wire, Three Phase-Four Wire (WYE), Three
Phase-Three Wire (DELTA), DC Systems (solar/battery).
Voltage Channels 3 channels, CAT III, 0-600 VAC (line-to-line) or 600 VDC
Current Channels 4 channels, .67 VAC max, +/- 1 VDC max; ideal for 333 mV full scale CTs
Maximum Current Channel
Input Voltage
External transducer dependent; 200% of current transducer rating (mV CTs); Measure
up to 6000A with RoCoil CTs
Measurement Type True RMS using high-speed digital signal processing (DSP)
Line Frequency DC/50/60Hz
Waveform Sampling 12 kHz
Channel Sampling Rate
(internal sampling)
200 samples/cycle at 60Hz
240 samples/cycle at 50Hz
Data Interval The default integration period is fifteen minutes. The choices are 1, 3, 15, 30 seconds; 1,
2, 5, 10, 15, 20 and 30 minutes; 1 and 12 hours; 1 day.
Energy Measurements Volts, Amps, Amp-Hrs (Ah), kW, kWh, kVAR, kVARh, kVA, kVAh, Displacement Power
Factor (dPF). All parameters for each phase and for system total. 1
Analog Measurements 0–10 Volts, 0 or 4–20 ma current loop non-isolated, external power for current loop.
User scaling for sensor reporting in physical units.
Accuracy Better than 1% (<0.2% typical) for V, A, kW, kVAR, kVA, PF 2
Resolution 0.01 Amp, 0.1 Volt, 0.1 Watt, 0.1 VAR, 0.1 VA, 0.01 Power Factor, 0.01 ANA
LED Indicators
Tri-colors (red, green, and blue): 1 LED to indicate communication, 4 LEDs for correct
phasing (green when voltage and current on the same phase; red when incorrectly
wired, blue for wireless, Bluetooth wireless technology, and Ethernet).
Communication
USB (Standard) USB standard (Type B). 1.8 M (6 FT) A-to-B USB Cable (included)
ETHERNET (Standard) Standard RJ-45 Connector supports 10/100 MB Ethernet over Cat 5 or better. Configure
for DHCP or Static IP address.
BLUETOOTH®WIRELESS
TECHNOLOGY (Optional)
Internal antenna: typical conditions <10ft up to 100ft range. Requires Bluetooth
wireless technology adapter on Window PC. Adapter must support the Serial Port
Profile (SPP).
WiFi ADAPTER (Optional)
Internal WiFi adapter with two separate configurations:
Internal antenna: typical conditions <75ft up to 300ft
External 5 dbi antenna: typical conditions <150ft up to 300ft
Shop for Dent products online at: 1.877.766.5412
www.PowerMeterStore.com

15
Power
Line Power Supply
From L1 Phase to L2 Phase. 80-600V (AC or DC) CAT III DC/50/60Hz, 125 mA, 5 W, or 10
VA max.
Non-user replaceable .5 Amp internal fuse protection.
Power In (optional) 6-10 VDC maximum, 500 mA minimum
Mechanical
Operating Temperature -7 to + 60°C (20 to 140°F)
Humidity 5% to 95% non-condensing
Enclosure ABS plastic, 94-V0 flammability rating
Weight 340 g (12 ounces, excluding sensors and leads)
Dimensions 69 x 58 x 203 mm (2.7” x 2.2” x 8.0”)
Minimum System Requirements
Operating System Windows® 7 (32 or 64 bit), Windows 8, Vista (32 or 64 bit) or XP
Processor Pentium Class 1 GHz or more recommended
Hard Drive 50 MB minimum available
Communications Port One USB
CD Drive CD or DVD drive required if using the CD software installation
Shop for Dent products online at: 1.877.766.5412
www.PowerMeterStore.com

16
ELITEpro XC™CONNECTIONS
ELITEpro XC Top End View
Power In/Out
Terminal Block for
Analog Input
Connections
Logging On/Comm LED
USB Connection
PhaseChek
™
LEDs
Magnetic Mounting Feet
Ethernet connection
Optional WiFi
—External
5
dbi antenna
CT Connections
Voltage Lead
Connections
Shop for Dent products online at: 1.877.766.5412
www.PowerMeterStore.com

17
SECTION I: INSTALLING, SETTING UP, AND USING THE
ELITEpro XC™
IMPORTANT: DO NOT CONNECT THE ELITEpro XC TO YOUR COMPUTER UNTIL YOU HAVE INSTALLED ELOG 14
Install the ELOG Software on the Computer
Complete this step prior to installation and ascertain that communication between the ELITEpro XC and
PC is established before going into the field.
NOTE: The new path for Data files in ELOG 14 is: C:\ Users\UserName\Documents\DENT\ELOG\Data
ELOG is compatible with Windows® 7 (32 or 64 bit), Windows® 8 (32 or 64 bit), Vista (32 or 64 bit) or XP.
1) Insert the ELOG CD into the CD/DVD drive.
The installer starts automatically. If it does not, browse to the CD and locate the ELOGInstaller.exe
program. Start the installer by double-clicking ELOGInstaller.exe.
-OR-
Insert the ELOG USB memory stick into the USB port.
Browse to the memory stick and locate the ELOGInstaller.exe program. Start the installer by double-
clicking ELOGInstaller.exe.
2) Follow the directions on the screen to install the software.
NOTE:When ELOG is installed, another program, AutoPoll, is also installed. AutoPoll may be used for
unattended and automatic data retrieval from a number of remote loggers where the computer calls the
loggers. See Appendix D—AUTOPOLL: Unattended Calling from the PC to the Logger.
3) Install the ELITEpro XC Driver on your computer.
a) Connect the USB cable to a USB port on your computer, inserting the other end in the USB port
on the ELITEpro XC (Hint: Look for this USB symbol: ). If a USB cable is to be used inside an
electrical panel it must be rated to the appropriate voltage or wrapped in an appropriately rated
insulating sleeve. The DENT-supplied cable does not meet this requirement without an
insulating sleeve.
b) Perform the setup steps onscreen. You must allow ELOG to install the USB driver for the
ELITEpro XC to work correctly.
c) If the driver installation fails, see Appendix C: Troubleshooting ELITEpro XC Driver Installation.
Shop for Dent products online at: 1.877.766.5412
www.PowerMeterStore.com

18
Mount the ELITEpro XC
The ELITEpro XC must be installed in an approved electrical panel or enclosure, following proper
installation practices according to the local electrical codes.
WARNING! Remove the LOGGER from all sources of voltage before mounting.
AVERTISSEMENT! ENLEVEZ L'ENREGISTREUR DE TOUTES LES SOURCES DE TENSION AVANT DE
MONTER.
1) To mount the ELITEpro XC, use the black tab on the end of the case containing the PhaseChek and
voltage lead connections. Using a screw, securely mount the ELITEpro XC near a dedicated circuit
disconnect breaker.
NOTE:Allow adequate space for accessing all ports and connectors. The mounting tab is intended for
short term metering (less than 6 months) and must be subject to monthly monitoring by qualified
personnel to verify the ELITEpro XC or its wiring have not shifted.
To remove the logger,remove the screw and roll the magnets off the cabinet it is mounted to.
NOTE: For temporary, spot load monitoring, the four magnets on the back of the ELITEpro XC case can
be utilized to hold the logger on unpainted metal. The maximum combined weight of the logger and any
attachments the magnets can support with a 4 times safety margin is 18oz (500 gm). The logger must be
attended by the electrician when it is temporarily mounted by the four magnets.
In order to prevent injury upon removal, it is recommended practice to roll the device off, due to the
strength of the magnets.
2) Mark the dedicated circuit as the disconnect for the ELITEpro XC.
“Roll” the device, as seen below.
Shop for Dent products online at: 1.877.766.5412
www.PowerMeterStore.com

19
D
ID
Y
OU
K
NOW
?It is often easier to
connect the CTs and voltage leads
to the load to be monitored first,
then simply plug the voltage leads
and CT connectors into the
ELITEpro XC before mounting.
ELITEPRO XC CONNECTIONS
The ELITEpro XC has the following connections:
Four current transformers (CTs).
Four voltage wire leads for connecting to voltage sources (L1, L2, L3, and Neutral).
Four analog input channels can be individually used to record process or environmental
correlation studies with power
Power In/Out for connecting a DENT-provided external power supply or for powering external
devices. Maintain polarity as marked on the case:
In: 6-10 Vdc, maximum input of 500 mA
Out: 6 Vdc output, up to 200 mA for powering other external devices
USB connector for high speed downloads, setup, and communication with a computer. The
ELITEpro XC is also powered from the USB connection. If a USB cable is to be used inside an
electrical panel, it must be rated to the appropriate voltage or wrapped in an appropriately
rated insulating sleeve. The DENT-supplied cable does not meet this requirement without an
insulating sleeve.
Ethernet port for connecting the device to a
network.
An external coax connector for a WiFi antenna
may also be present.
Shop for Dent products online at: 1.877.766.5412
www.PowerMeterStore.com

20
Complete the Wiring Connections
The following connections must be completed to install the ELITEpro XC. ALL WORK SHOULD BE
PERFORMED BY A QUALIFIED ELECTRICIAN USING PROPER SAFETY EQUIPMENT.
CAUTION: THE ELITEpro XC SHOULD ONLY BE WIRED BY QUALIFIED PERSONNEL. HAZARDOUS
VOLTAGES EXIST.
ATTENTION: LE ELITEpro XC ne doit être branché QUE par un personnel qualifié. TENSIONS
DANGEREUSES sont présentEs.
CT CONNECTIONS
NOTE:Use only inherently safe 333mV output CTs supplied by DENT. Never use current output CTs. The
UL listing covers the use of the following DENT Instruments CTs that are UL Recognized and have been
evaluated to IEC 61010-1:
CT-HSC-020-X (20A Mini), CT-HSC-050-X (50A Mini), CT-HMC-0100-X(100A Midi), and the CT-HMC-0200-
X (200A Midi). The use of any other CT will invalidate the UL Listing of the ELITEpro XC.
1) Connect the CTs to the channel(s) on the ELITEpro XC labeled CH 1, CH 2, CH 3 and CH 4. The CT
leads need to be connected to the terminal block using a small screwdriver. For RōCoils, also
connect the shield (bare) wires to the right-most ground terminal marked “S” (shield).
2) Place the CTs on the phase wires of the load to be monitored and corresponding to the phase of the
voltage loads. The CTs must be placed as follows for each channel:
Left connector pin is the positive or high-side wire
Right pin is the negative or low-side
When using DENT Instruments current transformers, connect them as follows:
Split-core CTs (removable leg)—the white CT wire is (+) and the black wire is (-).
Clamp-on CTs (clothes-pin type)—the red wire is positive (+) and the black wire is negative (-).
RōCoil CTs (flexible, Rogowski-style)—the white CT wire is (+) and the brown wire is (-). If you
are using RōCoil CTs, be sure to connect the bare wire to the “S” (shield) screw terminal.This
reduces interference and improves the accuracy of the CT.
Shop for Dent products online at: 1.877.766.5412
www.PowerMeterStore.com
Other manuals for ELITEpro XC
2
Table of contents
Other DENT Instruments Data Logger manuals
Popular Data Logger manuals by other brands
TFA
TFA KlimaLogg Base 30.5022 instruction manual
RS Flight Systems
RS Flight Systems iS CANaerospace Logger Installation & operation manual

Ocean Sonics
Ocean Sonics icListen AF user guide
MadgeTech
MadgeTech UltraShock-5-EB Product Information Card
ESPEC
ESPEC RT-14WB quick start guide
Ebro
Ebro EBI-2 PT-8 Series manual
