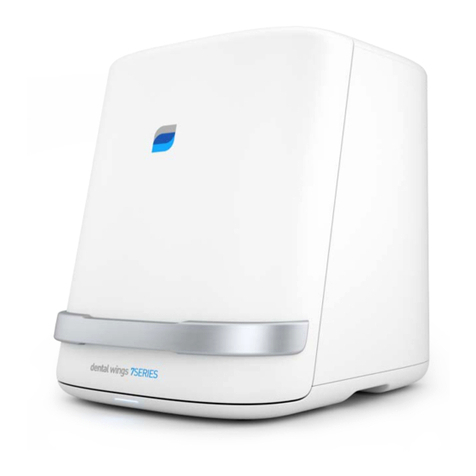
Dental Wings 3 Series User manual

dental wings
3Series
Instructions for Use
Original Instructions for Use
Model DW-3-90


CONTENTS
1. About this guide 5
1.1 Disclaimer 5
1.2 License, trademarks and other rights 6
2. Introduction and overview 8
2.1 Intended use 8
2.2 Device description and features 8
2.3 Accessories and products used in combination 9
2.4 Indications 10
2.5 Contraindications 10
2.6 Precautions 10
2.7 Compatibility information 11
2.8 Further information 11
2.9 Scope of delivery 12
2.10 Disposal 12
3. Installation 14
4. Basic principles and user interface 18
4.1 Starting scanner and software 18
4.2 User interface 19
5. Scanning 21
5.1 Scanning portfolio 22
5.2 Step-by-step scanning instructions 22
6. Maintenance 28
6.1 Calibration (pre-use check) 28
6.2 Handling 30
6.3 Cleaning and disinfection 31
6.4 Service 32
7. Troubleshooting 33
8. Packing the scanner 34
9. Distributors and service 35
10. Technical data and label 36
11. Explanation of symbols 42
EU Declaration of Conformity 44


1. About this guide
These Instructions for Use are valid for the product life cycle of your device and its software unless new instructions are
published within this period.
The provided instructions contain important information on the safe and appropriate use of your scanner and its
software. Make sure to have read and understood this document prior to working with the device. In case of
questions, contact your local distributor.
Please keep this document for future reference.
Electronic Instructions for Use
Instructions for Use for your scanner are provided in electronic form. They are stored on your scanner.
Additionally, Dental Wings Instructions for Use may be accessed from our IFU website at:
http://ifu.dentalwings.com
1.1 Disclaimer
This device is designed for use by persons who have appropriate knowledge in dentistry and dental laboratory
technology.
The user of this device is solely responsible for determining whether or not this device is suitable for a particular
patient case and circumstances. The user is solely responsible for the correctness, completeness and adequacy
of all data entered into this device and the provided software. The user has to check the correctness and accuracy
of the results and to assess each individual case.
Dental Wings products must be used in accordance with their accompanying instructions for use. Improper use
or handling of Dental Wings products will void the warranty, if any, given for Dental Wings products. If you require
additional information on the proper use of Dental Wings products, contact your local distributor. The user is not
allowed to modify Dental Wings products.
DENTAL WINGS, ITS AFFILIATES OR DISTRIBUTORS DISCLAIM REPRESENTATIONS AND WARRANTIES OF ANY
KIND, WHETHER EXPRESSED OR IMPLIED, WRITTEN OR ORAL, WITH RESPECT TO THE PRODUCTS, INCLUDING
ANY WARRANTY OF MERCHANTABILITY, FITNESS FOR A PARTICULAR PURPOSE, ERROR-FREE OPERATION OR
NON-INFRINGEMENT, AND THE PRODUCTS ARE SOLD “AS IS”.
CHAPTER 1 | 3Series Instructions for Use 5

Our maximum liability arising out of the products or their use, whether based upon warranty, contract, tort or
otherwise, shall not exceed the actual payments received by us in respect of the purchase price thereof. In no
event shall we be liable for special, incidental or consequential damages, including, but not limited to, loss of
profits, loss of data or loss of use damages, arising hereunder or from the sale of the products.
Updates to hardware and software components are made regularly. Therefore, some of the instructions,
specifications and pictures contained in these Instructions for Use may differ slightly from your particular
situation. Dental Wings reserves the right to revise or make changes or improvements to this product or
documentation at any time without obligation to notify any person of such revisions or improvements. The user
is obliged to study the latest developments regularly.
Third party products and product data
When scanning and designing cases, the user may work with third party products and/or product data. Dental
Wings, its subsidiaries, or distribution partners disclaim any liability for damages in connection with or arising
from such third party product data or products being used within this scope.
1.2 License, trademarks and other rights
Software licenses
Your scanner software is protected by a license agreement and may be used or copied only in accordance with
the terms of this agreement. It is illegal to copy or use the software on any medium except those permitted in the
license agreement.
Some of the software applications may require an additional license key. Contact your local distributor for more
information.
Availability
Some of the products and accessories mentioned in these Instructions for Use may not be available in all
countries.
Trade names and trademarks
Dental Wings, DWOS®and coDiagnostiX™ are trademarks or registered trademarks of Dental Wings.
6CHAPTER 1 | 3Series Instructions for Use

All other trademarks and logos mentioned in this document are trademarks, registered trademarks or logos of
their respective owners.
Copyright
Dental Wings documents may not be reprinted or published, in whole or in part, without the written authorization
of Dental Wings.
CHAPTER 1 | 3Series Instructions for Use 7

2. Introduction and overview
2.1 Intended use
The 3Series is intended to be used by dental laboratory professionals as dental 3D scanner for positive and
negative models (impressions).
2.2 Device description and features
This device is an optical 3D scanner.
Device variants and configuration
The device is delivered in the following variants and configuration:
nWith the distributor logo and color
nWith a distributor-specific set of accessories
nWith a distributor-specific software configuration
nWith a country-specific power cord
nWith or without standard PC peripherals
If standard PC peripherals are not included in the delivery, the following items will be required to use the
scanner as intended:
nMonitor (21 inches) with DVI, VGA or HDMI ports and a minimum screen resolution of 1600 X 1080 pixels
nKeyboard (USB or PS/2)
nTwo-button mouse with scroll wheel (USB or PS/2)
nNetwork cable (RJ45)
nUninterruptible power supply to protect against power interruption and voltage fluctuation; for the operating
voltage of your device see Technical data and label (p.36).
8CHAPTER 2 | 3Series Instructions for Use

The multi-die holder contains mounting putty to hold the dies. You may replace the delivered mounting putty with
an equivalent material which:
nis non-reflecting, non-staining, non-toxic, removable without trace
nhas sufficient plasticity in the operating temperature range
Principles of operation
Cases scanned and designed with DWOS are called "order". The order number is a unique identifier used to identify
the order and manage the case during the entire process. Generation of such order number is the first of four
main steps most commonly used in the system.
The four main steps are:
1. Creating the order (see Step-by-step scanning instructions, p.22)
2. Scanning the physical model to create a digital 3D model (see Step-by-step scanning instructions, p.22)
3. Designing the restoration
4. Exporting the order for production (choose between in-house and out-sourced production)
For complete software instructions, refer to DWOS User Help.
2.3 Accessories and products used in combination
Only use accessories specified by the manufacturer. A list of accessories and products which may be used in
combination with this scanner is included in chapterTechnical data and label (p.36).
The scanner scans all lambertian materials. Scanning accuracy has been validated with the material LeanRock XL5
(Whip Mix Corporation). Other plaster, wax-up and impression materials may, in principle, be suitable as well.
However, the user has to validate their compatibility with the device. Surface coating may improve the
scannability of the material.
Please note, the scanner is available in different configurations.For device variants and optional PC peripherals,
see chapter Device variants and configuration (p.8). Information on distributor specific accessory sets can be
obtained from your local distributor.
CHAPTER 2 | 3Series Instructions for Use 9

2.4 Indications
The scanner is a non-contact optical 3D scanning device for use in dental laboratories or dental practice. The
device is designed for use by persons who have appropriate knowledge in dentistry and dental laboratory
technology. Users must also have basic skills to operate a computer. The device combines laser triangulation
technology with free movement of axes and scans both positive and negative models (impressions). The
software digitally replicates the obtained data on the PC screen.
2.5 Contraindications
The scanner is not intended to be used in direct contact with the patient nor is it intended to be used with life-
sustaining devices.
2.6 Precautions
This scanner is capable of very precise scanning. To achieve scanning accuracy, comply with all the given
instructions.Keep the scanner door closed while scanning.
The scanner is suitable for use in laboratories, dental offices and equivalent environment. However, the
protection against dust and water has not been specifically tested.
Install the scanner in accordance with the instructions. Before any maintenance action, unplug the scanner from
the power outlet.
Keep the original packaging of the scanner for safe transportation in case of service, repair and disposal. Unpack
and pack your scanner following the instructions.
The scanner is a class 1 laser product. Do not open the scanner door while scanning (power button fading in and
out blue). Viewing directly or with optical instruments into the laser beam will lead to physical injury of your eyes.
According to applicable EMC regulation, this is a class A product. In a domestic environment this product may
cause radio interference, in which case the user may be required to take adequate measures.
The scanner contains moving parts. Do not open the scanner door while scanning (power button fading in and
out blue). Reaching into moving scanner parts will lead to physical injury of body parts or damage your scanner,
accessories or objects.
Disinfect physical models, which had been in patient contact, according to the material manufacturer's
instructions before placing them into the scanner. Never put contaminated physical models into the scanner.
10 CHAPTER 2 | 3Series Instructions for Use

Cleaning & disinfection shall be done before and immediately after each use, and prior to service, repair and
disposal to prevent cross-contamination.
Calibrate the scanner after each transport, when the scanner had been exposed to high temperature changes and
in all cases when you are requested by the software or when you are not sure of the device's scanning accuracy.
Be very careful with your calibration elements, their surface is fragile. The calibration elements have to be
protected from any alteration. If not in use, the calibration element should be stored in the accessory box. If you
are running several scanners, take care not to exchange calibration elements.
Always ensure a biunique relationship between patient, scan and treatment case.
Backup your data at regular intervals. It is the responsibility of the user to perform and maintain data backups in
order to prevent loss of data.
Use a strong password to reduce the risk of intrusion.
Do not install or uninstall software on the system.
Use surface coating only if it is absolutely necessary. Apply a uniform and very thin layer to ensure model
characteristics are not modified by the coating. Do not apply surface coating directly within the scanner. Always
comply with the instructions given by the surface coating manufacturer.
Make sure the scanner is placed in a safe and stable position.
Do not dispose of this device as unsorted municipal waste. Collect separately.
2.7 Compatibility information
This scanner is compatible with DWOS version 5.0 and higher.
2.8 Further information
Dental Wings and its products are registered in the main markets. If you have any questions, please contact your
local distributor.
For more information on the products used in combination with your scanner, please refer to the following
sources of information:
CHAPTER 2 | 3Series Instructions for Use 11

DWOS:
nDWOSInstructions for Use
–– Open the Dental Desktop, navigate to the Resources panel and click the DWOS Instructions for Use
icon. In addition to this, DWOS Instructions for Use may be accessed from our IFU website at:
http://ifu.dentalwings.com
nDWOSUser Help providing complete software instructions
–– Click on the Help icon in the toolbar to open the DWOSUser Help.
–– For context-sensitive help, click the small icons placed in the designer windows
throughout the software.
coDiagnostiX
ncoDiagnostiX Instructions for Use
ncoDiagnostiX User Help
2.9 Scope of delivery
Your scanner is delivered in a box.
For accessories which are included with your delivery, see chapterTechnical data and label (p.36). Information on
the contents of distributor specific accessory sets can be obtained from your local distributor.
PC peripherals do not come standard with your delivery, but may be included in distributor specific configuration
variants. Contact your local distributor for information.
For instructions on how to unpack and install your scanner, see chapter Installation (p.14).
2.10 Disposal
Caution
Clean & disinfect prior to disposal to prevent cross-contamination.
12 CHAPTER 2 | 3Series Instructions for Use

Electrical and electronic devices must be disposed of separately from normal household waste in order to
promote reuse, recycling and other forms of recovery, to avoid adverse effects on the environment and human
health as a result of the presence of hazardous substances in some of their components and to reduce the
quantity of waste to be eliminated with a view to reducing landfill. This includes accessories such as remote
controls, power cords, etc.
Caution
Do not dispose of this device as unsorted municipal waste. Collect separately.
For details on how to dispose of your device and its packaging, please contact your local distributor.
CHAPTER 2 | 3Series Instructions for Use 13

3. Installation
Your scanner is sent in a box.
Caution
Keep the original packaging of the scanner for safe transportation in case of service, repair and disposal.
Unpack and pack your scanner following the instructions.
For instructions on how to unpack your delivery and set up your system, see below. For instructions on how to
pack the scanner, see chapter Packing the scanner (p.34).
Unpacking the scanner
Remove the individual components (foam parts) while unpacking the scanner. Store the foam components in a
safe place in case you need to transport or ship the scanner in future.
1. 2. 3.
14 CHAPTER 3 | 3Series Instructions for Use

Removing the transportation lock
There is a knob inside the scanner to protect the device during transportation. The knob must be removed before
use.
To remove the transportation lock, open the scanner,
unscrew and remove the knob.
The knob should be stored for later use and reinstalled
prior to transportation. We suggest that it is stored in the
accessory box.
Setting up the scanner
Caution
Install the scanner in accordance with the manufacturer's instructions.
The scanner is suitable for use in laboratories, dental offices and equivalent environment. However, the
protection against dust and water has not been specifically tested. For details see chapter Technical data and
label (p.36).
Do not install the scanner in places with high temperature differences, near heat sources, in direct sunlight or
in damp environment (e.g. exposed to splash water). Do not expose this device to rain or moisture. Do not
install the scanner in dusty environment.
To prevent fire or shock hazard, do not use the plug with an extension cord.
Protect the power cord from being walked on and from pinching.
Do not block any ventilation openings.
To reduce the risk of electric shock, do not remove the cover (scanner top panel). Refer servicing to
authorized service personnel.
The scanner must be turned off before plugging or unplugging any device or cable.
You must unplug the power supply cord to disconnect the device from the power supply. With this in mind,
the power outlet should be located close to the device and should also be readily accessible.
Do not install or uninstall software on the system.
CHAPTER 3 | 3Series Instructions for Use 15

Scanner control elements and ports
Power button
USB 3.0 port
ON/OFF switch Power socket
Connector
panel
Connector panel
1
3
4
2
USB 2.0
USB 3.0
eSATA
HDMI VGA
DVI
Network
PS/2
nPlug the monitor in the DVI (white), HDMI or VGA (blue) port [1].
nPlug the mouse and the keyboard in the USB 2.0 ports [2].
nPlug the network cable in the network port [3].
nPlug the dongle in a USB 3.0 port [4] .
nAssemble the power supply. Plug it into the scanner first and then into the power outlet. Turn on the
ON/OFF Switch on the back.
You must unplug the power supply cord to disconnect the device from the power supply. With this in mind,
the power outlet should be located close to the device and should also be readily accessible.
16 CHAPTER 3 | 3Series Instructions for Use

To start the scanner, press the Power button on the front of the scanner. The button will light up in white.
After booting, your scanner is ready to be driven by DWOS®(Dental Wings Open Software). For further
instructions read Basic principles and user interface (p.18) and Scanning (p.21).
Please note, the dongle holds the software license information. Without the dongle, the software of the scanner
will not start.
Installation check
To confirm correct installation of your device, proceed as follows:
nCalibrate your scanner (see Calibration (pre-use check), p.28).
nScan a model or an impression (see Step-by-step scanning instructions, p.22).
If you are satisfied with the results, the device has been installed correctly.
System language
The system language is usually preset. If this is not the case, contact your local distributor.
CHAPTER 3 | 3Series Instructions for Use 17

4. Basic principles and user interface
4.1 Starting scanner and software
Scanner controls
The Power button is used to switch on the scanner. Its color indicates the status of the scanner.
Color Scanner status
White, fading in Power on
White, fading out Power off
Blue, fading in & out Scanning
Starting scanner and software
1. Make sure the ON/OFF switch on the back is turned on.
2. Press the Power button on your scanner.
3. Enter your Windows®login.
4. The Dental Desktop starts after you have logged in. Switch between the tiles by moving the mouse cursor
and select an app or icon by clicking on the respective symbol.
18 CHAPTER 4 | 3Series Instructions for Use

Exiting the software and shutting down the scanner
nClick the cross in the upper right corner to exit the software.
If a multi-station configuration is installed, repeat the exit procedure on all PCs to completely shut down the
DWOS application.
nRight-click on the DWOS icon in the lower right corner of the Windows taskbar and close the DWOS server.
nShut down Windows®with the usual procedure.
4.2 User interface
DWOS software is mainly icon-driven. The main horizontal toolbar allows running DWOS software applications,
such as order creation, scanning, restoration design etc. The symbols included in and functions available through
the toolbar may vary and depend on the software package and the applications finally installed on your scanner
(see Software applications, p.41).
Order creation
Start model or impression scanning
Start multi-die scanning
Start restoration design
Exit the DWOS software
For complete software instructions, refer to DWOS User Help.
Mouse handling
DWOS software requires a mouse with two buttons and a wheel. Mouse interaction follows the principles below:
CHAPTER 4 | 3Series Instructions for Use 19

nLeft click: menu, icon selection, point definition
nRight click: definition, validation, access to local menu
nRotate the wheel: zoom in/out
nPress and hold the wheel while dragging the mouse: translate view
nPress and hold the right button while dragging the mouse: rotate view
nPress and hold the CTRL button while rotating the wheel: generates a cross-section of the view
nDouble click on the left button: center and resize the view
nDouble-click on the right button: switch between perspective and parallel projection
20 CHAPTER 4 | 3Series Instructions for Use
This manual suits for next models
1
Table of contents
Other Dental Wings Dental Equipment manuals
