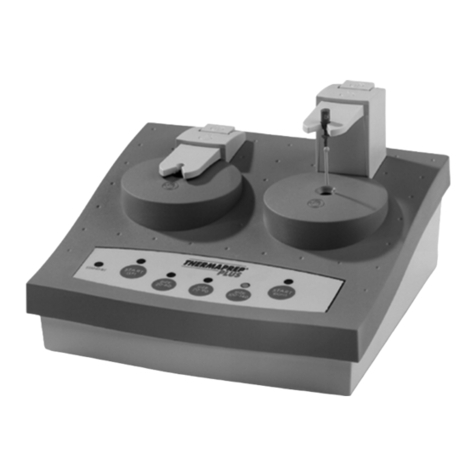
Dentsply Maillefer GUTTA CORE A Series Manual

Maillefer Instruments Holding S.à.r.l. et ses filiales (Trading S.à.r.l., Manufacturi ng S.à.r.l., Consulting S.
à.r.l.)
Chemin du Verger 3, CH – 1338 Ballalgues Tél +41 (0)21 843 92 92 in o@dentsplymaille er.com
Switzerland Fax +41 (0)21 843 92 93 www.dents plym aillefe r.com
F1902125.X/04/2011 – updated 11/2014 – EN FR DE ES IT
1 / 32
Product:
GUTTA CORE
®
Ref: A1703 – A1803
Ref doc.: F19 02 125.X/ 04 / 2011 updated 11/2014
# Page
GB DIRECTION FOR USE 2
FR PROTOCOLE D’UTILISATION 8
ALL GEBRAUCHSANWEISUNG 14
ESP INSTRUCCIONES DE USO 20
IT ISTRUZIONI PER L’USO 26

Maillefer Instruments Holding S.à.r.l. et ses filiale s (Trading S.à.r.l., Manufacturing S.à.r.l., Consulting S.
à.r.l.)
Chemin du Verger 3, CH – 1338 Ballalgues Tél +41 (0)21 843 92 92 in o@dentsplymaille er.com
Switzerland Fax +41 (0)21 843 92 93 www.dents plym aillefe r.com
F1902125.X/04/2011 – updated 11/2014 – EN FR DE ES IT
2 / 32
For dental use only
Directions for Use
Ref
A1703 – A1803
DESCRIPTION
GUTTACORE
®
Obturators are used for filling root canal systems.
I. INDICATIONS FOR USE
These products have to be used only in a clinical or dental environment, by qualified dental users.
Application field: GUTTACORE
®
Obturators are used to fill the cleaned, shaped and irrigated root
canal space.
II. CONTRAINDICATIONS
None known.
III. WARNINGS
This product contains dry natural rubber.
IV. PRECAUTIONS
• Select the GUTTACORE
®
Obturator according to the size verifier that fits the shaped canal
passively.
• GUTTACORE
®
Obuturator cores should not be used as size verifiers.
• Do not remove gutta-percha from the apical section of GUTTACORE
®
Obturator prior to filling
the root canal space. Removing the gutta-percha may damage the obturator.
V. ADVERSE REACTIONS
Patients with latex sensitivity may experience allergic reactions to gutta-percha, which contains dry
natural rubber.
VI. STEP-BY-STEP INSTRUCTIONS
DIRECTIVES
Prior to using any new product, read all of the manufacturer’s instructions. Make sure that you are
competent when using the product and the technique prior to clinical use.
Consider the following directives to ensure successful applications and outcomes.
1. Create straight-line access to all root canal systems for application of both rotary and hand files.
Remember, the use of a rubber dam is the standard of care for endodontic procedures.
2. Use only clean files when entering the canal.
3. Establish a coronal reference point.
4. Determine the ideal working length position with an apex locator, radiograph or both.
5. Do not force any root canal instruments when negotiating or shaping the canal. With rotary
instruments a crown-down technique is recommended.

Maillefer Instruments Holding S.à.r.l. et ses filiale s (Trading S.à.r.l., Manufacturing S.à.r.l., Consulting S.
à.r.l.)
Chemin du Verger 3, CH – 1338 Ballalgues Tél +41 (0)21 843 92 92 in o@dentsplymaille er.com
Switzerland Fax +41 (0)21 843 92 93 www.dents plym aillefe r.com
F1902125.X/04/2011 – updated 11/2014 – EN FR DE ES IT
3 / 32
6. Shape and clean canals to sizes compatible with the root shape, size and curvature.
Over-enlargement of root canal systems should be avoided to preserve sound dentin and to
prevent possible instrument damage in the canal space, e.g., ledging, creation of false canals,
separation of instruments.
7. Flare the canal coronally and ensure the GUTTACORE
®
Obturator has sufficient space to enter
the root canal along the straight line access by using an orifice shaping instrument as
necessary such as X-GATES, PROTAPER NEXT
®
XA, PROTAPER
®
UNIVERSAL SX or
PROFILE
®
O.S.
8. Proceed slowly with all instruments in areas of canal irregularity and curvature.
9. Consider all root canal instruments for “single patient use” applications, as wear and fatigue may
impact the integrity of the instrument and result in separation with excessive use.
10. Verify the canal size prior to obturating.
11. Irrigate frequently throughout the cleaning and shaping procedure.
STEP-BY-STEP INSTRUCTIONS
These instructions are designed to help gain an understanding of the technique and safe application of
the product. Practice on plastic blocks and extracted teeth is strongly recommended prior to clinical
applications.
1. Crosslinking
Crosslinking is a well-known chemical process of linking polymer chains together.
Crosslinking creates the subtle strength needed in a centrally compacting obturator.
GUTTACORE
®
Obturators create the hydraulics you expect from DENTSPLY MAILLEFER obturators
with the added benefit of having a gutta-percha core. It is important to note that crosslinked gutta-
percha is not sticky, does not melt and will not dissolve with dental solvents.
2. Hydraulics
GUTTACORE
®
Obturators move warm gutta-percha 3-dimensionally into the root canal system. Many
obturation techniques use lateral or vertical compaction, however the hydraulic force from these
techniques generally moves gutta-percha in one or two unequal directions (laterally or apically).
GUTTACORE
®
Obturators use a crosslinked gutta-percha core for centrally compacting the flowing
gutta-percha in the canal. The hydraulic force compacts warm gutta-percha flowing equally in 3-
dimensions. Proper cleaning, shaping and irrigation, along with the central compacting hydraulic force
facilitate the flow of gutta-percha in the root canal system.
3. Shaping
Proper shaping removes pulpal tissue and dental debris permitting the GUTTACORE
®
Obturator to
move passively through the canal. Shaping begins by creating straight-line access and shaping the
canal – crown down.
• Create Glide Path
Establish working length and create a glide path for the rotary files to follow.
Negotiate all root canals to their terminus with stainless steel K-Files, in the presence of GLYDE
File Prep
®
root canal conditioner. Establish patency by taking a #10 K-File past the canal
terminus, and expand the glide path by using alternatively a mechanized glide path
(PROGLIDER
®
or PATHFILE
®
) or a manual #15 K-File to the terminus.

Maillefer Instruments Holding S.à.r.l. et ses filiale s (Trading S.à.r.l., Manufacturing S.à.r.l., Consulting S.
à.r.l.)
Chemin du Verger 3, CH – 1338 Ballalgues Tél +41 (0)21 843 92 92 in o@dentsplymaille er.com
Switzerland Fax +41 (0)21 843 92 93 www.dents plym aillefe r.com
F1902125.X/04/2011 – updated 11/2014 – EN FR DE ES IT
4 / 32
• Shape Canal – Crown Down
Initiate crown down shaping technique. Consult the file system’s directions for use to determine the
starting file in small canals (mesial and buccal canals of molars, small premolars and mandibular
anteriors). Take the file to resistance or working length (whichever occurs first). If resistance is
encountered before working length is obtained, go to next smaller instrument following the same
protocol until working length is achieved. Between each rotary file recapitulate with a #10 or #15 tip
hand file to maintain the glide path to the canal terminus. Frequent irrigation with sodium hypochlorite
(NaOCl) is used throughout the shaping procedure.
• Flare the Canal
Flare the canal coronally and ensure the GUTTACORE
®
Obturator has sufficient space to enter
the root canal along the straight line access by using an orifice shaping instrument as necessary
such as X-GATES, PROTAPER NEXT
®
XA, PROTAPER
®
UNIVERSAL SX file or PROFILE
®
O.S.
• Consult the File System Directions for Use
Consult the file system’s directions for use to determine the file size for larger canals (palatal and
distal canals of molars, larger premolars, maxillary anteriors).
Use the crown down technique to resistance or working length. If resistance is encountered before
working length is achieved, move on to smaller sized instruments until working length is achieved.
Between instruments, recapitulate with small hand instrument to maintain a glide path to working
length.
Follow the file system’s directions for use when creating access, shaping the canal and flaring the
coronal portion of the canal.
A properly shaped canal preserves the natural shape of the anatomy and allows for a more
effective volume of disinfecting irrigants to penetrate, circulate and clean all areas of the root
canal system.
4. Verify the Shape at Working Length and the Passive Fit
Following proper cleaning and shaping, confirm the final working length measurement using a size
verifier that reaches the apical constriction passively, with no significant resistance or twisting. It is
necessary to use a size verifier to confirm the shape at working length and passive fit.
Verifying the shape at working length and passive fit ensures that the GUTTACORE
®
Obturator
being used matches the correct apical canal diameter.
The size verifiers are made of nickel titanium and are fluted, making them excellent for minor apical
shaping, if necessary. If the size verifier is slightly short of your working length, you can use it to enlarge
to your working length by rotating it in a clockwise direction while exerting slight apical pressure.
i. Use a size verifier to confirm a passive fit at working length; set the silicone stopper at your working
length using the size verifier’s calibration mark. Check passivity by taking the size verifier to working
length and confirm by rotating in the canal 180˚.
ii. If the fit is passive, remove a GUTTACORE
®
Obturator from the package and proceed to step 5.
iii. If the fit is not passive, use the size verifier as a finishing file to gently enlarge the canal terminus or
select a smaller size verifier. If the smaller size verifier fits passively, remove a GUTTACORE
®
Obturator of the same size as the verifier and proceed to step 5.

Maillefer Instruments Holding S.à.r.l. et ses filiale s (Trading S.à.r.l., Manufacturing S.à.r.l., Consulting S.
à.r.l.)
Chemin du Verger 3, CH – 1338 Ballalgues Tél +41 (0)21 843 92 92 in o@dentsplymaille er.com
Switzerland Fax +41 (0)21 843 92 93 www.dents plym aillefe r.com
F1902125.X/04/2011 – updated 11/2014 – EN FR DE ES IT
5 / 32
5. Irrigate the Canal
The cleaning of the shaped root canal sytem is accomplished primarily through the use of copious
irrigation with NaOCl. Irrigants can be activated using a cavitation and acoustic streaming device or
ultrasonic irrigation needle.
The activated irrigants improve debridement and disrupts the smear layer and biofilm inside the
canal, promoting deep cleaning and disinfection of lateral canals, fins, webs, isthmuses,
anastomoses, and dentinal tubules. Dry the canal thoroughly using absorbent points.
6. Selecting the Obturator and Setting Working Length
Select a GUTTACORE
®
Obturator of the same size as the size verifier used to verify the shape of the
working length and passive fit. Available GUTTACORE
®
Obturator sizes include:
Final Shape
.04 Taper GuttaCore
®
Obturators
Final Shape
.06 Taper GuttaCore
®
Obturators
20/.04 -
20/.06 20
25/.04 20
25/.06 25
30/.04 25
30/.06 30
35/.04 30
35/.06 35
40/.04 35
40/.06 40
45/.04 40
45/.06 45
50/.04 45
50/.06 50
55/.04 50
55/.06 55
60/.04 55
60/.06 60
70+/.04 60
70+/.06 70
80+/.04 70
80+/.06 80
90+/.04 80
90+/.06 90
When the final shape is a .04 taper, select a GUTTACORE
®
Obturator package one size smaller that the
last file taken to working length. When the final shape is a .06 taper or larger, select a GUTTACORE
®
Obturator package of the same size as the last file taken to working length.
Set the top of the silicone stopper on the GUTTACORE
®
Obturator to coincide with the working
length established. Calibration rings are set at the following working lengths (in millimeters): 18, 19,
20, 22, 24, plus 27 and 29 on the obturator handles.
7. Asepsis
Disinfect the obturator in a 5.25 sodium hypochlorite solution (bleach) for one minute.
Gently wipe the gutta-percha on the GUTTACORE
®
Obturator with gauze moistened with 70% alcohol.
8. Drying the Canal and Applying Sealer
Use a sterile paper point of the same tip and taper as the last file taken to working length. Brush a very
light coating of sealer (TOPSEAL
®
) in the canal with the paper point. To help ensure the obturator
reaches working length, use an additional paper point to remove any excess sealer that may have
accumulated on the canal walls or pooled in the apex. If obturating more than one canal in a single tooth,
place sealer in all the canals at the same time. This facilitates removal of excess gutta-percha by
preventing the gutta-percha from sticking to other orifices or dentin.

Maillefer Instruments Holding S.à.r.l. et ses filiale s (Trading S.à.r.l., Manufacturing S.à.r.l., Consulting S.
à.r.l.)
Chemin du Verger 3, CH – 1338 Ballalgues Tél +41 (0)21 843 92 92 in o@dentsplymaille er.com
Switzerland Fax +41 (0)21 843 92 93 www.dents plym aillefe r.com
F1902125.X/04/2011 – updated 11/2014 – EN FR DE ES IT
6 / 32
9. Heating GUTTACORE
®
Obturators in the Obturator Oven
For details on the use of the obturator oven, please refer to THERMAPREP
®
Oven Instruction
Manual.
For an optimal use the GUTTACORE
®
Obturators, always use DENTSPLY ovens.
10. Placing the Obturator in the Canal
After the first signal “beep” of the THERMAPREP
®
Oven, the obturator is ready for use. Push the
obturator holder and guide the holder with your finger. Take the obturator carefully out of the holder by
first lifting it up a little and then pulling it toward you. The oven will “beep” every 15 seconds to remind
you that the obturator is still in the oven. After 90 seconds, the oven will switch off automatically. Insert
GUTTACORE
®
Obturator directly into orifice of canal.
Avoid touching the walls of the occlusal opening.
We strongly recommend not to wait more than one “beep” for an optimal use of the GUTTACORE
®
Obturator.
Note: If the canal has been properly shaped and the gutta-percha properly heated, the obturator should
seat to place without twisting or forcing. To avoid overextension, don’t force the GUTTACORE
®
Obturator
beyond the working length. You will note a backflow of sealer and gutta-percha resulting in an
accumulation at the orifice. This is to be expected, especially in multi-rooted teeth, because the obturator
is designed with excess gutta-percha to accommodate event the most widely flared or anatomically
irregular canals.
11. Removing the GUTTACORE
®
Obturator Shaft and Handle
Remove the shaft and handle at the orifice by bending to either side of the canal wall. Alternatively, while
stabilizing the GUTTACORE
®
Obturator with your index finger, use a round bur or an inverted cone bur
in a high-speed handpiece, or use a sharp spoon excavator. Dispose of obturators in an appropriate
biohazard container.
12. Compacting Gutta-Percha in Large, Oval or Irregular Shaped Canals
Insert a small segment of conventional gutta-percha, 4 – 6 mm long, alongside the shaft of the
GUTTACORE
®
Obturator with a lubricated plugger and compact. The gutta-percha segment compacts
the heat softened gutta-percha and becomes an integral part of the filling. This will also prevent
inadvertent removal of gutta-percha from the orifice with an inadequately lubricated plugger, as well as
compensate for the lack of gutta-percha in uncommonly large canals or those with internal resorption
defects. Due to the tacky nature of the plasticized gutta-percha, you must use a lubricant such as GLYDE
File Prep
®
root canal conditioner, sealer, topical anesthetic, etc., on the plugger.
13. Removing Excess Gutta-Percha
Clean the canal chamber using a spoon excavator, explorer, etc., to remove any excess gutta-percha
that may block access to the chamber and other canals. Repeat all of the above steps on each canal of a
multi-rooted tooth. If necessary, protect adjacent canal orifices from debris and gutta-percha with tiny
cotton pellets or a paper point until time for obturation. Obturation is complete once excess gutta-percha
is removed.
14. Create an occlusal leakage barrier with a composite restorative to help prevent contamination
of the root canal system.
15. Removing GUTTACORE
®
Obturation Materials
Creating post space and retreating are accomplished using traditional methods for removing obturation
material.
For creating post space, remove the GUTTACORE
®
Obturator by selecting an appropriately sized Post
Space Bur.
When removing the obturation material for retreatment purposes, use the same size rotary file used for
shaping and engage the obturation material (a non-landed rotary file is preferable).

Maillefer Instruments Holding S.à.r.l. et ses filiale s (Trading S.à.r.l., Manufacturing S.à.r.l., Consulting S.
à.r.l.)
Chemin du Verger 3, CH – 1338 Ballalgues Tél +41 (0)21 843 92 92 in o@dentsplymaille er.com
Switzerland Fax +41 (0)21 843 92 93 www.dents plym aillefe r.com
F1902125.X/04/2011 – updated 11/2014 – EN FR DE ES IT
7 / 32
Take a radiograph to confirm the removal of all obturation material.
Use a hand file with solvent to soften the gutta-percha on the GUTTACORE
®
Obturator if
retreating and encountering intricate anatomy in the apical 1/3 of the canal.
VII. DISINFECTION, CLEANING AND STERILIZATION
Disinfect the obturator in a 5.25 sodium hypochlorite solution (bleach) for one minute.
Gently wipe the gutta-percha on the GUTTACORE
®
Obturator with 70% alcohol.
Do not use disinfecting solutions containing Phenol or any products which are not compatible with the
treated filling material.
GUTTACORE
®
Obturator is intended for Single use only.
Non sterilizable device.
Expiry date
Manufacturer
Consult Instructions for use
www.dentsplymaillefer.com
Non sterilizable
One use only
Batch number
Gutta-Percha
Keep away from sunlight and heat
Caution, this product contains natural
rubber latex which may cause allergic
reactions
The upper and lower limits of
temperature of use, storage and
transportation
Opened packages are not replaced

Maillefer Instruments Holding S.à.r.l. et ses filiale s (Trading S.à.r.l., Manufacturing S.à.r.l., Consulting S.
à.r.l.)
Chemin du Verger 3, CH – 1338 Ballalgues Tél +41 (0)21 843 92 92 in o@dentsplymaille er.com
Switzerland Fax +41 (0)21 843 92 93 www.dents plym aillefe r.com
F1902125.X/04/2011 – updated 11/2014 – EN FR DE ES IT
8 / 32
Réservé à l'usage dentaire
Mode d'emploi
Réf.
A1703 – A1803
ESCRIPTION
Les obturateurs GUTTACORE
®
sont destinés à l'obturation de systèmes canalaires.
I.
IN ICATIONS 'UTILISATION
Ces produits sont réservés à un usage en milieu clinique ou dentaire par des praticiens dentaires
qualifiés.
Champ d'application : les obturateurs GUTTACORE
®
sont destinés à l'obturation de l'espace canalaire
après nettoyage, mise en forme et irrigation.
II.
CONTRE-IN ICATIONS
Aucune connue.
III.
MISES EN GAR E
Ce produit contient un caoutchouc naturel sec.
IV.
PRECAUTIONS
•
••
•
Sélectionner l'obturateur GUTTACORE
®
correspondant au tenon de vérification s'ajustant de
manière passive au canal mis en forme.
•
••
•
Ne pas utiliser le cœur des obturateurs GUTTACORE
®
en tant que tenons de vérification.
•
••
•
Ne pas retirer la gutta-percha de la section apicale d'un obturateur GUTTACORE
®
avant l'obturation
de l'espace canalaire. Le retrait de la gutta-percha peut endommager l'obturateur.
V.
EFFETS IN ESIRABLES
Les patients souffrant de sensibilité au latex peuvent présenter des réactions allergiques à la gutta-
percha qui contient du caoutchouc naturel sec.
VI.
INSTRUCTIONS ETAILLEES
DIRECTIVES
Avant toute utilisation de nouveau produit, lire l'intégralité des instructions du fabricant. S'assurer de ses
compétences lors de l'utilisation du produit et de la technique associée avant tout usage clinique.
Suivre les directives suivantes pour garantir une mise en œuvre réussie et des résultats satisfaisants.
1. Créer un accès direct au système canalaire pour l'utilisation des limes manuelles et rotatives. Ne pas
oublier que l'utilisation d'une digue en caoutchouc fait partie du protocole standard pour les
traitements endodontiques.
2. Utiliser uniquement des limes propres pour pénétrer dans le canal.
3. Choisir un point de référence coronaire.
4. Déterminer la longueur de travail idéale à l'aide d'un localisateur d'apex, d'une radiographie ou de
ces deux éléments.

Maillefer Instruments Holding S.à.r.l. et ses filiale s (Trading S.à.r.l., Manufacturing S.à.r.l., Consulting S.
à.r.l.)
Chemin du Verger 3, CH – 1338 Ballalgues Tél +41 (0)21 843 92 92 in o@dentsplymaille er.com
Switzerland Fax +41 (0)21 843 92 93 www.dents plym aillefe r.com
F1902125.X/04/2011 – updated 11/2014 – EN FR DE ES IT
9 / 32
5. Ne pas forcer avec les instruments canalaires lors de leur progression dans le canal.
La technique corono-apicale est recommandée avec les instruments rotatifs.
6. Mettre en forme les canaux en respectant la forme et la taille originelles du canal notamment en cas
de courbure radiculaire.
Eviter tout sur-élargissement afin de conserver la dentine saine et d’éviter toute détérioration du
système endodontique due aux instruments (épaulement, faux canaux, fractures des instruments).
7. Donner au canal une forme évasée au niveau coronaire et s'assurer que l'espace soit suffisant pour
pouvoir insérer l'obturateur GUTTACORE
®
dans le canal radiculaire sans contrainte. Cet évasement
peut être obtenu avec des instruments dédiés tels que les limes X-GATES, PROTAPER NEXT
®
XA,
PROTAPER
®
UNIVERSAL SX ou PROFILE
®
O.S.
8. Procéder lentement, quel que soit l'instrument, dans les zones irrégulières ou courbes du canal.
9. Considérer tous les instruments de préparation canalaire comme « à usage unique », car l'usure et
la fatigue peuvent affecter leur intégrité et entraîner une fracture en cas d'utilisation excessive.
10. Vérifier la taille du canal préparé avant de procéder à l'obturation.
11. Irriguer souvent tout au long de la procédure de mise en forme et de nettoyage.
INSTRUCTIONS DETAILLEES
Ces instructions ont pour but de faciliter la compréhension de la technique pour une mise en œuvre sans
danger. Il est fortement recommandé de s'exercer sur des simulateurs en plastique et des dents extraites
avant toute utilisation clinique.
1. Réticulation
La réticulation est un procédé chimique bien connu de liaison des chaînes polymères les unes aux
autres.
La réticulation crée la résistance nécessaire dans un obturateur à compactage central.
Les obturateurs GUTTACORE
®
génèrent l'effet hydraulique attendu des obturateurs DENTSPLY
MAILLEFER, et offrent en outre l'avantage d'obtenir une obturation uniquement en gutta-percha. Il est
important de noter que la gutta-percha réticulée ne colle pas, ne fond pas et ne se dissout pas sous
l'action de solvants à usage dentaire.
2. Hydraulique
Les obturateurs GUTTACORE
®
déplacent la gutta-percha chaude dans le système canalaire dans toutes
les dimensions de l’espace. De nombreuses techniques d'obturation nécessitent un compactage latéral
ou vertical, mais la force hydraulique ainsi générée déplace généralement la gutta-percha dans une ou
deux directions inégales (dans le sens latéral ou apical). Les obturateurs GUTTACORE
®
utilisent un
cœur de gutta-percha réticulée qui permet de compacter le flux de gutta-percha dans le canal du centre
vers les parois latérale. La force hydraulique compacte la gutta-percha chaude qui s'écoule de manière
égale sur un plan tridimensionnel. Effectués correctement et associés à la force hydraulique de
compactage central, le nettoyage, la mise en forme et l’irrigation préalables du canal facilitent
l'écoulement du matériau dans le système endodontique.
3. Mise en forme
Une mise en forme appropriée permet d’éliminer les débris dentinaire et de tissus pulpaires pour
permettre le déplacement passif de l'obturateur GUTTACORE
®
dans le canal. La mise en forme
commence par la création d'un accès direct et rectiligne au canal puis de sa préparation au moyen de la
technique corono-apicale.
•Création d'un accès rectiligne
Déterminer la longueur de travail et assurer la perméabilité du canal pour faciliter le passage des
limes rotatives.
Atteindre l'extrémité apicale de chaque canal radiculaire à l'aide de limes K-File en acier inoxydable,
en combinaison avec un agent chélatant tel que le GLYDE File Prep
®
. Déterminer la perméabilité en
amenant une K-File n°10 au-delà de l'extrémité du c anal, et élargir le couloir d’irrigation en amenant
une lime mécanique (PROGLIDER
®
ou PATHFILE
®
) ou manuelle (K-File n°15) jusqu'à l'extrémité.

Maillefer Instruments Holding S.à.r.l. et ses filiale s (Trading S.à.r.l., Manufacturing S.à.r.l., Consulting S.
à.r.l.)
Chemin du Verger 3, CH – 1338 Ballalgues Tél +41 (0)21 843 92 92 in o@dentsplymaille er.com
Switzerland Fax +41 (0)21 843 92 93 www.dents plym aillefe r.com
F1902125.X/04/2011 – updated 11/2014 – EN FR DE ES IT
10 / 32
•Mise en forme du canal — Technique corono-apicale
Commencer la mise en forme par technique corono-apicale. Se référer au mode d'emploi du
système de limes pour déterminer la lime à utiliser en premier dans les petit canaux (canaux
mésiaux et vestibulaires des molaires, petites prémolaires et dents antérieures mandibulaires). Faire
progresser la lime jusqu'à rencontrer une résistance ou jusqu'à la longueur de travail (le cas
échéant). Si une résistance est rencontrée avant d'atteindre la longueur de travail, utiliser
l'instrument de taille immédiatement inférieure et répéter le même mode opératoire jusqu'à atteindre
la longueur de travail. Entre chaque instrument rotatif, répéter l'opération avec une lime manuelle
n°10 ou n°15 pour entretenir le couloir d’irrigatio n jusqu'à l'extrémité du canal. Irriguer souvent à
l'hypochlorite de sodium (NaOCl) tout au long de la procédure de mise en forme.
•Évasement du canal
Donner au canal une forme évasée au niveau coronaire et s'assurer que l'espace soit suffisant pour
pouvoir insérer l'obturateur GUTTACORE
®
dans le canal radiculaire sans contrainte. Cet évasement
peut être obtenu avec des instruments dédiés tels que les limes X-GATES, PROTAPER NEXT
®
XA,
PROTAPER
®
UNIVERSAL SX ou PROFILE
®
O.S.
•Consultation du mode d'emploi du système de limes
Se référer au mode d'emploi du système de limes pour déterminer la taille de la lime à utiliser dans
les grands canaux (canaux palatins et distaux des molaires, grandes prémolaires et dents
antérieures du maxillaire supérieur).
Utiliser la technique corono-apicale pour faire progresser les instruments jusqu'à rencontrer une
résistance ou atteindre la longueur de travail. Si une résistance apparaît avant d'atteindre la
longueur de travail, passer à l'instrument de taille immédiatement inférieure et recommencer
l’opération jusqu'à atteindre la longueur de travail. Entre chaque instrument, répéter l'opération avec
une lime manuelle de petite taille pour entretenir le couloir d'irrigation jusqu'à la longueur de travail.
Suivre le mode d'emploi du système de limes lors de la création de l'accès, de la mise en forme du
canal et de l'évasement de la partie coronaire du canal.
Un canal correctement mis en forme respecte l'anatomie naturelle et permet à un volume plus
efficace d'irrigants de désinfection de pénétrer et de s'écouler dans toutes les zones du système
canalaire pour les nettoyer.
4. Vérification de la mise en forme à la longueur de travail et ajustement passif
Une fois la mise en forme et le nettoyage correctement effectués, confirmer la mesure de la longueur de
travail finale à l'aide d’un tenon de vérification pouvant atteindre la constriction apicale de manière
passive, sans torsion ni résistance significative. Il est nécessaire d’utiliser un tenon de vérification pour
confirmer la mise en forme à la longueur de travail et l’ajustement passif.
Cette vérification permet de s'assurer que l'obturateur GUTTACORE
®
sélectionné correspond bien au
diamètre apical du canal.
Les tenons de vérification fournis avec les obturateurs GUTTACORE
®
sont en titane-nickel et présentent
des cannelures, ils sont donc parfaits pour une mise en forme apicale mineure, le cas échéant. Si le
tenon de vérification n'atteint pas la longueur de travail souhaitée, il peut être utilisé pour y parvenir. Pour
cela, le faire tourner dans le sens des aiguilles d'une montre tout en exerçant une légère pression dans le
sens apical.
i.
Utiliser un tenon de vérification pour confirmer son ajustement passif à la longueur de travail.
Placer le stop en caoutchouc à la longueur de travail en utilisant la marque de calibration du
tenon. Vérifier la passivité en amenant le tenon à la longueur de travail, puis confirmer sa
passivité et son adaptation en effectuant une rotation à 180°dans le canal.
ii.
Si l'ajustement passif se vérifie, sortir un obturateur GUTTACORE
®
de l'emballage et passer à
l'étape 5.
iii.
Si l'ajustement passif n'est pas obtenu, utiliser le tenon en tant que lime de finition pour agrandir
doucement l'extrémité du canal ou choisir un tenon plus petit. Si ce dernier s'ajuste de façon
passive, sortir un obturateur GUTTACORE
®
de taille correspondante et passer à l'étape 5.

Maillefer Instruments Holding S.à.r.l. et ses filiale s (Trading S.à.r.l., Manufacturing S.à.r.l., Consulting S.
à.r.l.)
Chemin du Verger 3, CH – 1338 Ballalgues Tél +41 (0)21 843 92 92 in o@dentsplymaille er.com
Switzerland Fax +41 (0)21 843 92 93 www.dents plym aillefe r.com
F1902125.X/04/2011 – updated 11/2014 – EN FR DE ES IT
11 / 32
5. Irrigation du canal
Pour le nettoyage du système canalaire mis en forme, irriguer copieusement au NaOCl. Les solutions
peuvent être activées à l'aide d'un dispositif à vibrations acoustique et cavitation ou d'une aiguille
d'irrigation à ultrasons.
L’activation des solutions améliore le débridement et élimine la boue dentinaire et le biofilm formé à
l'intérieur du canal, favorisant une désinfection et un nettoyage en profondeur des canaux latéraux et
accessoires, voiles, isthmes, anastomoses et tubules dentinaires. Sécher soigneusement le canal à l'aide
de pointes absorbantes.
6. Choix de l'obturateur et détermination de la longueur de travail
Choisir un obturateur GUTTACORE
®
correspondant au tenon de vérification utilisé précédemment. Les
tailles d'obturateur GUTTACORE
®
disponibles sont les suivantes :
Forme finale Obturateurs
GuttaCore
®
Forme
finale Obturateurs
GuttaCore
®
20/.04 -
20/.06 20
25/.04 20
25/.06 25
30/.04 25
30/.06 30
35/.04 30
35/.06 35
40/.04 35
40/.06 40
45/.04 40
45/.06 45
50/.04 45
50/.06 50
55/.04 50
55/.06 55
60/.04 55
60/.06 60
70+/.04 60
70+/.06 70
80+/.04 70
80+/.06 80
90+/.04 80
90+/.06 90
Lorsque la forme finale présente une conicité de .04, choisir un obturateur GUTTACORE
®
d’un diamètre
immédiatement inférieur à celui de la dernière lime amenée à la longueur de travail. Lorsque la conicité
apicale finale est de .06 ou plus, choisir un obturateur GUTTACORE
®
de diamètre identique à celui de la
dernière lime amenée à la longueur de travail.
Placer le stop en caoutchouc sur l'obturateur GUTTACORE
®
pour matérialiser la longueur de travail.
Les bagues du tueur repèrent les longueurs de travail suivantes (en millimètres) : 18, 19, 20, 22 et 24,
puis 27 et 29 pour les repères sur le manche des obturateurs.

Maillefer Instruments Holding S.à.r.l. et ses filiale s (Trading S.à.r.l., Manufacturing S.à.r.l., Consulting S.
à.r.l.)
Chemin du Verger 3, CH – 1338 Ballalgues Tél +41 (0)21 843 92 92 in o@dentsplymaille er.com
Switzerland Fax +41 (0)21 843 92 93 www.dents plym aillefe r.com
F1902125.X/04/2011 – updated 11/2014 – EN FR DE ES IT
12 / 32
7. Asepsie
Désinfecter l'obturateur dans une solution à 5,25 % d'hypochlorite de sodium (agent de blanchiment)
pendant une minute.
Essuyer doucement la gutta-percha de l'obturateur GUTTACORE
®
à l’aide d’une compresse de gaze
imbibée d'alcool à 70 %.
8. Séchage du canal et application du ciment
Utiliser une pointe de papier stérile présentant la même extrémité et la même conicité que la dernière
lime amenée à la longueur de travail. Déposer à l'aide de la pointe de papier une fine couche de ciment
(TOPSEAL
®
) dans le canal. Pour permettre de placer l'obturateur à la longueur de travail sans ambiguïté,
utiliser une autre pointe de papier pour éliminer tout excès de ciment susceptible de s'être accumulé sur
les parois du canal ou à l’apex. Si plusieurs canaux d'une même dent sont obturés, déposer le ciment
dans tous les canaux en même temps. Cela facilite l'élimination de l'excès de gutta-percha en empêchant
la gutta-percha d’obturer les autres entrées canalaires.
9. Chauffage des obturateurs GUTTACORE
®
dans le four à obturateurs
Pour de plus amples informations concernant l’utilisation du four, se référer au manuel du four
THERMAPREP
®
.
Pour un usage optimal des obturateurs GUTTACORE
®
, toujours utiliser des fours DENTSPLY.
10. Positionnement de l'obturateur dans le canal
Lorsque le four THERMAPREP
®
émet un premier bip sonore, l'obturateur est prêt à l'emploi. Pousser le
support d'obturateur et le guider avec le doigt. Retirer avec précaution l'obturateur du support en le
soulevant légèrement avant de le tirer vers soi. L’appareil émet un « bip » toutes les 15 secondes pour
rappeler que l'obturateur est toujours dans le four. Après 90 secondes, le four s'éteint automatiquement.
Insérer l'obturateur GUTTACORE
®
directement dans l'orifice du canal.
Éviter de toucher les parois de la cavité d’accès occlusale.
Pour un usage optimal de l’obturateur GUTTACORE
®
, il est fortement recommandé de ne pas attendre
que le four émette plus d’un bip sonore.
Remarque :si le canal a été correctement mis en forme et la gutta-percha réchauffée de façon
appropriée, l'obturateur doit se mettre en place sans se tordre ni forcer. Pour éviter tout dépassement de
matériau, ne pas forcer l'obturateur GUTTACORE
®
au-delà de la longueur de travail. Un reflux de ciment
et de gutta-percha, entraînant une accumulation au niveau de la cavité d’accès peut survenir. Ceci est
normal, en particulier sur les dents pluri-radiculées, car l'obturateur contient un excès de gutta-percha
pour s'adapter même aux canaux les plus largement évasés ou à l'anatomie la plus irrégulière.
11. Retrait de l'axe et du manche de l'obturateur GuttaCore
®
Retirer l'axe et le manche au niveau de l'orifice en les pliant d'un côté de la paroi canalaire. L’obturateur
GUTTACORE
®
peut également être sectionné en le stabilisant avec l'index, et en utilisant une fraise
ronde ou une fraise à cône inversé dans une pièce à main à grande vitesse, ou un excavateur bien
tranchant. Jeter les obturateurs dans un récipient à déchets biologiques.
12. Compactage de la gutta-percha dans des canaux de grande taille, ovales ou irréguliers
Insérer un cône de gutta-percha conventionnel, de 4 à 6 mm, le long de l'obturateur GUTTACORE
®
à
l'aide d'un fouloir lubrifié, puis compacter. Ce cône va compacter la gutta-percha ramollie par
réchauffage, et faire partie intégrante de l’obturation finale. Ceci limite le risque de retrait involontaire de
gutta-percha de l'orifice à cause d'un fouloir mal lubrifié, et compense le manque de gutta-percha dans
les canaux inhabituellement grands ou présentant des irrégularités telles que les résorptions internes. En
raison de la nature collante de la gutta-percha plastifiée, il est nécessaire d'utiliser un lubrifiant tel que le
GLYDE File Prep
®
, un ciment, un anesthésique topique, etc., sur le fouloir.

Maillefer Instruments Holding S.à.r.l. et ses filiale s (Trading S.à.r.l., Manufacturing S.à.r.l., Consulting S.
à.r.l.)
Chemin du Verger 3, CH – 1338 Ballalgues Tél +41 (0)21 843 92 92 in o@dentsplymaille er.com
Switzerland Fax +41 (0)21 843 92 93 www.dents plym aillefe r.com
F1902125.X/04/2011 – updated 11/2014 – EN FR DE ES IT
13 / 32
13. Élimination de l'excès de gutta-percha
Nettoyer le canal à l'aide d'un excavateur, d'une sonde exploratrice, etc., pour éliminer tout excès de
gutta-percha susceptible de bloquer l'accès aux entrées canalaires. Répéter l'ensemble des étapes ci-
dessus pour chaque canal en cas de dent pluri-radiculées. En cas de nécessité, protéger les entrées
canalaires adjacentes des débris et de la gutta-percha à l'aide de petites boulettes de coton ou d'une
pointe de papier jusqu'au moment de l'obturation. L'obturation est terminée une fois l'excès de gutta-
percha éliminé.
14. Mettre en place une obturation coronaire avec un composite pour limiter les risques de
contamination du système endodontique.
15. Retrait des matériaux d'obturation GUTTACORE
®
La désobturation partielle pour la mise en place d’un tenon et le retraitement sont réalisés de manière
conventionnelle.
Pour créer l’espace nécessaire à la mise en place d’un tenon, retirer l'obturateur GUTTACORE
®
avec un
foret de désobturation approprié.
Pour la désobturation dans le cadre d’un retraitement, utiliser une lime rotative de même taille que celle
ayant servi à la mise en forme et éliminer le matériau d'obturation (une lime rotative active et sans méplat
est préférable).
Faire une radiographie pour confirmer que tous matériaux d'obturation ont été supprimés.
Utiliser une lime manuelle et un solvant pour ramollir la gutta-percha de l'obturateur GUTTACORE
®
en
cas d'anatomie complexe dans le tiers apical du canal.
VII.
ÉSINFECTION, NETTOYAGE ET STÉRILISATION
Désinfecter l'obturateur dans une solution à 5,25 % d'hypochlorite de sodium (agent de blanchiment)
pendant une minute.
Essuyer doucement la gutta-percha de l'obturateur GUTTACORE
®
avec de l'alcool à 70 %.
Ne pas utiliser de solutions désinfectantes contenant du phénol ou tout produit non compatible avec le
matériau d’obturation utilisé.
L'obturateur GUTTACORE
®
est à usage unique.
Appareil non stérilisable.
Date d'expiration
Fabricant
Se reporter aux instructions
d'utilisation
www.dentsplymaillefer.com
Non stérilisable
Usage unique
Numéro de lot
Gutta-percha
Conserver à l'abri de la lumière
du soleil et de la chaleur
Attention : ce produit contient
un latex à base de caoutchouc
naturel qui peut entraîner des
réactions allergiques
Limites supérieure et inférieure
de température d'utilisation, de
conservation et de transport
Emballage ouvert, non remplacé

Maillefer Instruments Holding S.à.r.l. et ses filiale s (Trading S.à.r.l., Manufacturing S.à.r.l., Consulting S.
à.r.l.)
Chemin du Verger 3, CH – 1338 Ballalgues Tél +41 (0)21 843 92 92 in o@dentsplymaille er.com
Switzerland Fax +41 (0)21 843 92 93 www.dents plym aillefe r.com
F1902125.X/04/2011 – updated 11/2014 – EN FR DE ES IT
14 / 32
Nur für den zahnärztlichen Gebrauch
Gebrauchsanleitung
Ref. : A1703 – A1803
PRO UKTBESCHREIBUNG
GUTTACORE
®
Obturatoren dienen zur Füllung von Wurzelkanalsystemen.
I.
IN IKATIONEN
Dieses Produkt darf nur von qualifizierten Personen in Kliniken oder Zahnarztpraxen und nur von
approbierten Zahnärzten verwendet werden.
Anwendungsbereich: GUTTACORE
®
Obturatoren dienen zur Füllung gereinigter, aufbereiteter und
gespülter Wurzelkanäle.
II.
KONTRAIN IKATIONEN
Keine bekannt.
III.
WARNHINWEISE
Dieses Produkt enthält trockenen Naturkautschuk.
IV.
VORSICHTSMASSNAHMEN
•
••
•
Den GUTTACORE
®
Obturator
entsprechend dem Size Verifier auswählen, der sich passiv in den
aufbereiteten Wurzelkanal einführen lässt.
•
••
•
Die Kernstücke der GUTTACORE
®
Obturatoren sollten nicht als Size Verifier benutzt werden.
•
••
•
Vor dem Füllen des Kanals keine Guttapercha vom apikalen Teil des GUTTACORE
®
Obturators
entfernen.
Dadurch kann der Obturator beschädigt werden.
V.
UNERWÜNSCHTE WIRKUNGEN
Bei Patienten mit Latexempfindlichkeit sind allergische Reaktionen auf Guttapercha möglich, da diese
trockenen Naturkautschuk enthält.
VI.
ANWEN UNG SCHRITT FÜR SCHRITT
HINWEISE
Wie bei jedem neuen Produkt zunächst die Gebrauchsanleitung des Herstellers durchlesen. Vor dem
ersten klinischen Gebrauch sicherstellen, dass Produkt und Technik beherrscht werden. Für eine
erfolgreiche Anwendung und gute Resultate die folgenden Hinweise beachten:
1. Bei allen Wurzelkanalsystemen einen geradlinigen Zugang herstellen, sowohl für rotierende als auch
für manuelle Feilen. Zudem sollte bei endodontischen Behandlungen standardmäßig ein Kofferdam
angelegt werden.
2. Nur saubere Feilen in den Kanal einführen.
3. Einen koronalen Referenzpunkt festlegen.
4. Die ideale Arbeitslänge mittels Apex Locator, Röntgenbild oder beidem bestimmen.
5. Die Instrumente beim Erkunden oder Aufbereiten des Kanals nie forcieren. Bei rotierenden
Instrumenten ist die Crown-Down-Technik zu empfehlen.

Maillefer Instruments Holding S.à.r.l. et ses filiale s (Trading S.à.r.l., Manufacturing S.à.r.l., Consulting S.
à.r.l.)
Chemin du Verger 3, CH – 1338 Ballalgues Tél +41 (0)21 843 92 92 in o@dentsplymaille er.com
Switzerland Fax +41 (0)21 843 92 93 www.dents plym aillefe r.com
F1902125.X/04/2011 – updated 11/2014 – EN FR DE ES IT
15 / 32
6. Die Kanäle so weit aufbereiten und reinigen wie mit Form, Größe und Krümmung der Wurzel
vereinbar. Das Wurzelkanalsystem sollte nicht zu stark erweitert werden, damit gesundes Dentin
erhalten bleibt und mögliche Aufbereitungsfehler und Schäden im Kanal, z.B. Stufen, Viae falsae,
Instrumentenbruch, vermieden werden.
7. Den Kanal koronal erweitern, so dass genug Platz ist, um den GUTTACORE
®
Obturator entlang dem
geradlinigen Zugang einzuführen. Dafür eignen sich, je nach Bedarf, verschiedene Instrumente zur
Bearbeitung des Kanaleingangs, wie X-GATES, PROTAPER NEXT
®
XA, PROTAPER
®
UNIVERSAL
SX oder PROFILE
®
O.S.
8. Mit allen Instrumenten im Bereich von Unregelmäßigkeiten und Krümmungen des Kanals vorsichtig
arbeiten.
9. Wurzelkanalinstrumente nur bei einem Patienten verwenden, da Verschleiß und Ermüdung die
Instrumente schwächen und bei übermäßigem Gebrauch zum Bruch führen können.
10. Vor der Obturation die Kanalgröße kontrollieren.
11. Während der Reinigung und Aufbereitung häufig spülen.
ANWENDUNG SCHRITT FÜR SCHRITT
Die folgende Anleitung soll das Verständnis der Technik und die sichere Anwendung des Produkts
erleichtern. Es wird dringend empfohlen, das Produkt vor dem klinischen Gebrauch an Kunststoffblocks
und extrahierten Zähnen auszuprobieren.
1. Vernetzung
Die Vernetzung ist ein gängiges chemisches Verfahren zur Querverbindung von Polymerketten. Durch
Vernetzung erhält der zentral kondensierende Obturator exakt die nötige Festigkeit. GUTTACORE
®
Obturatoren bieten die hydraulische Wirkung, die Sie von DENTSPLY Maillefer Obturatoren erwarten,
und zusätzlich den Vorteil, dass auch der Kern aus Guttapercha besteht. Allerdings handelt es sich dabei
um vernetzte Guttapercha, die nicht klebt, schmilzt oder sich in den in der Zahnmedizin verwendeten
Lösungsmitteln auflöst.
2. Hydraulik
GUTTACORE
®
Obturatoren bewegen erwärmte Guttapercha dreidimensional in das Wurzelkanalsystem.
Bei vielen Obturationstechniken wird lateral oder vertikal kondensiert, aber die hydraulische Kraft bewegt
die Guttapercha meist ungleichmäßig in eine oder zwei Richtungen (lateral oder apikal). Bei
GUTTACORE
®
Obturatoren wird die thermoplastische Guttapercha dagegen durch den Kern aus
vernetzter Guttapercha im Kanal zentral kondensiert. Die hydraulische Kraft verdichtet die flüssige
Guttapercha gleichmäßig und dreidimensional. Fachgerechte Reinigung, Aufbereitung und Spülung
sowie zentrale Kondensation durch die hydraulische Kraft erleichtern das Fließen der Guttapercha im
Wurzelkanalsystem.
3.
Aufbereitung
Bei der Wurzelkanalaufbereitung werden Pulpagewebe und Dentin-Debris so weit entfernt, dass sich der
GUTTACORE
®
Obturator passiv einführen lässt. Zunächst wird ein geradliniger Zugang präpariert, dann
wird der Kanal in der Crown-Down-Technik aufbereitet.
•Präparation eines Gleitpfads
Die Arbeitslänge bestimmen und einen Gleitpfad für die rotierenden Feilen herstellen.
Alle Kanäle mit K-Feilen aus Edelstahl bis zum apikalen Endpunkt erkunden. Dabei GLYDE File Prep
®
Wurzelkanal-Conditioner verwenden. Zur Sicherstellung der Gängigkeit eine K-Feile 010 über den
Endpunkt hinaus einführen, dann zur Erweiterung des Gleitpfads entweder eine rotierende Gleitpfadfeile
(PROGLIDER
®
oder PATHFILE
®
) oder eine manuelle K-Feile 015 bis zum Endpunkt einführen.
•Kanalaufbereitung – Crown-Down-Technik
Den Kanal in der Crown-Down-Technik aufbereiten. In der Gebrauchsanleitung des Feilensystems
nachsehen, welche Feile bei engen Kanälen (mesiale und bukkale Kanäle von Molaren, kleinere
Prämolaren, untere Frontzähne) zuerst verwendet wird. Die Feile einführen, bis sie entweder zuerst auf
Widersand stößt oder die Arbeitslänge erreicht. Bei Widerstand vor Erreichen der Arbeitslänge das
nächstkleinere Instrument auf dieselbe Weise anwenden, bis die Arbeitslänge erreicht ist. Zwischen den
rotierenden Feilen jeweils mit einer Handfeile der Größe 010 oder 015 rekapitulieren, um einen Gleitpfad
bis zum apikalen Endpunkt zu schaffen. Während der Aufbereitung häufig mit Natriumhypochlorit
(NaOCI) spülen.

Maillefer Instruments Holding S.à.r.l. et ses filiale s (Trading S.à.r.l., Manufacturing S.à.r.l., Consulting S.
à.r.l.)
Chemin du Verger 3, CH – 1338 Ballalgues Tél +41 (0)21 843 92 92 in o@dentsplymaille er.com
Switzerland Fax +41 (0)21 843 92 93 www.dents plym aillefe r.com
F1902125.X/04/2011 – updated 11/2014 – EN FR DE ES IT
16 / 32
•Kanalerweiterung
Den Kanal koronal erweitern, so dass genug Platz ist, um den GUTTACORE
®
Obturator entlang dem
geradlinigen Zugang einzuführen. Dafür eignen sich, je nach Bedarf, verschiedene Instrumente zur
Bearbeitung des Kanaleingangs, wie X-GATES, PROTAPER NEXT
®
XA, PROTAPER
®
UNIVERSAL SX
oder PROFILE
®
O.S.
•Gebrauchsanleitung des Feilensystems beachten
In der Gebrauchsanleitung des Feilensystems nachsehen, welche Feile bei weiten Kanälen (palatinale
und distale Kanäle von Molaren, größere Prämolaren, obere Frontzähne) zuerst verwendet wird.
Die Crown-down-Technik anwenden, bis die Feile auf Widerstand stößt oder die Arbeitslänge erreicht.
Bei Widerstand vor Erreichen der Arbeitslänge mit kleineren Instrumenten weiterarbeiten, bis die
Arbeitslänge erreicht ist. Zwischen den Instrumenten jeweils mit einer kleinen Handfeile rekapitulieren,
um einen Gleitpfad bis zur Arbeitslänge zu schaffen.
Zur Präparation der Zugangskavität, Aufbereitung des Kanals und Erweiterung des koronalen Abschnitts
die Gebrauchsanleitung des Feilensystems beachten.
Eine optimale Aufbereitung folgt der natürlichen Kanalanatomie und sorgt dafür, dass desinfizierende
Spüllösungen in effektiveren Mengen eindringen, zirkulieren und alle Bereiche des Wurzelkanalsystems
reinigen können.
4.
Kontrolle der Kanalform bei Arbeitslänge und passivem Sitz
Nach der korrekten Reinigung und Aufbereitung die gemessene endgültige Arbeitslänge mit einem Size
Verifier kontrollieren, der die apikale Konstriktion passiv und ohne größeren Widerstand oder Verdrehung
erreicht. Die Kanalform bei Arbeitslänge und der passive Sitz müssen mit einem Size Verifier überprüft
werden. Nur so wird sichergestellt, dass der verwendete GUTTACORE
®
Obturator im Apikalbereich den
passenden Durchmesser hat.
Die Size Verifier bestehen aus Nickel-Titan und haben Schneiden. Daher eignen sie sich bei Bedarf
besonders gut zur feinen apikalen Nachbearbeitung. Falls der Size Verifier die Arbeitslänge nicht ganz
erreicht, kann der Kanal durch Drehen des Instruments im Uhrzeigersinn und mit leichtem Druck nach
apikal erweitert werden, so dass die Arbeitslänge erreicht wird.
i.
Mit dem Size Verifier den passiven Sitz bei Arbeitslänge prüfen; den Gummistopper anhand der
Tiefenmarkierungen des Size Verifiers auf Arbeitslänge einstellen. Ein passiver Sitz ist gegeben,
wenn sich der Size Verifier bis zur Arbeitslänge einführen und dann im Kanal um 180°drehen lässt.
ii.
Wenn ein passiver Sitz vorliegt, einen GUTTACORE
®
Obturator aus der Packung nehmen und mit
Schritt 5 fortfahren.
iii.
Wenn kein passiver Sitz vorliegt, das apikale Ende des Kanals mit dem Size Verifier wie mit einer
Finishing File vorsichtig erweitern oder einen kleineren Size Verifier wählen. Wenn sich der kleinere
Size Verifier passiv einführen lässt, einen GUTTACORE
®
Obturator derselben Größe zur Hand
nehmen und mit Schritt 5 fortfahren.
5.
Spülen des Kanals
Gereinigt wird das aufbereitete Wurzelkanalsystem hauptsächlich durch gründliches Spülen mit NaOCl.
Die Spüllösungen können durch Kavitation und akustische Strömung oder mittels einer Ultraschall-
Spülnadel aktiviert werden. Aktivierte Spüllösungen fördern das Debridement und das Entfernen von
Schmierschicht und Biofilm aus dem Kanal und sorgen für eine tiefgehende Reinigung und Desinfektion
bis in Seitenkanäle, Fins, Webs, Isthmen, Anastomosen und Dentintubuli. Den Kanal sorgfältig mit
saugfähigen Papierspitzen trocknen.
6. Wahl des Obturators und Einstellung der Arbeitslänge
Einen GUTTACORE
®
Obturator aus der Packung nehmen, aus der auch der Size Verifier stammt, mit
dem die Kanalform bei Arbeitslänge und der passive Sitz kontrolliert wurden. GUTTACORE
®
Obturatoren
sind in den folgenden Größen erhältlich:

Maillefer Instruments Holding S.à.r.l. et ses filiale s (Trading S.à.r.l., Manufacturing S.à.r.l., Consulting S.
à.r.l.)
Chemin du Verger 3, CH – 1338 Ballalgues Tél +41 (0)21 843 92 92 in o@dentsplymaille er.com
Switzerland Fax +41 (0)21 843 92 93 www.dents plym aillefe r.com
F1902125.X/04/2011 – updated 11/2014 – EN FR DE ES IT
17 / 32
Endgültige Form
Konizität .04 GUTTACORE
®
Obturatoren Endgültige Form
Konizität .06 GUTTACORE
®
Obturatoren
20/.04 - 20/.06 20
25/.04 20 25/.06 25
30/.04 25 30/.06 30
35/.04 30 35/.06 35
40/.04 35 40/.06 40
45/.04 40 45/.06 45
50/.04 45 50/.06 50
55/.04 50 55/.06 55
60/.04 55 60/.06 60
70+/.04 60 70+/.06 70
80+/.04 70 80+/.06 80
90+/.04 80 90+/.06 90
Wenn die endgültige Kanalform die Konizität .04 besitzt, eine GUTTACORE
®
Obturatorpackung wählen,
die eine Größe kleiner ist als die letzte bis zur Arbeitslänge eingeführte Feile. Wenn die endgültige Form
die Konizität .06 oder größer besitzt, eine GUTTACORE
®
Packung wählen, die dieselbe Größe hat wie
die letzte bis zur Arbeitslänge eingeführte Feile.
Die Oberseite des Gummistoppers am GUTTACORE
®
Obturator auf die festgelegte Arbeitslänge
einstellen. Tiefenmarkierungen gibt es für die folgenden Arbeitslängen (in Millimeter): 18, 19, 20, 22, 24
sowie 27 und 29 am Griff des Obturators.
7. Desinfektion
Den Obturator 1 Minute in 5,25% Natriumhypochlorit (Bleichlösung) desinfizieren. Dann die Guttapercha
am GUTTACORE
®
Obturator mit einem mit 70 % Alkohol angefeuchteten Stück Gaze sanft abwischen.
8.
Trocknen des Kanals und Applikation des Sealers
Eine sterile Papierspitze von der Größe und Konizität der letzten bis zur Arbeitslänge eingeführten Feile
wählen. Mit dieser Papierspitze eine sehr dünne Schicht Sealer (TOPSEAL
®
)
in den Kanal applizieren.
Damit der Obturator die Arbeitslänge sicher erreicht, mit einer weiteren saugfähigen Papierspitze
Überschüsse des Sealers, die sich eventuell an den Kanalwänden oder am Apex angesammelt haben,
entfernen.
Wenn bei einem Zahn mehrere Kanäle obturiert werden, den Sealer gleichzeitig in alle Kanäle geben.
Dies erleichtert die Entfernung von Guttapercha-Überschüssen. Die Guttapercha kann dann nicht an
anderen Kanaleingängen oder am Dentin anhaften.
9.
Erwärmen der GUTTACORE
®
Obturatoren im Obturator-Ofen
Nähere Angaben zur Verwendung des Obturator-Ofens bitte der Gebrauchsanleitung des
THERMAPREP
®
Ofens entnehmen.
Für optimale Resultate mit GUTTACORE
®
Obturatoren stets Öfen von DENTSPLY verwenden.
10. Einführen des Obturators in den Kanal
Nach dem ersten Signalton des THERMAPREP
®
Ofens ist der Obturator gebrauchsfertig. Auf den
Obturatorhalter drücken und ihn mit dem Finger führen. Den Obturator vorsichtig aus dem Halter
nehmen. Zuerst ein wenig anheben, dann in waagerechter Richtung entnehmen. Bleibt der Obturator
länger im Ofen, so folgt alle 15 Sekunden ein weiterer Signalton zur Erinnerung. Nach 90 Sekunden
schaltet sich der Ofen automatisch ab. Den GUTTACORE
®
Obturator direkt in den Kanaleingang
einführen. Dabei die Wände der Zugangskavität nicht berühren.
Für optimale Resultate empfehlen wir dringend, den GUTTACORE
®
Obturator gleich nach dem ersten
Signalton herauszunehmen.

Maillefer Instruments Holding S.à.r.l. et ses filiale s (Trading S.à.r.l., Manufacturing S.à.r.l., Consulting S.
à.r.l.)
Chemin du Verger 3, CH – 1338 Ballalgues Tél +41 (0)21 843 92 92 in o@dentsplymaille er.com
Switzerland Fax +41 (0)21 843 92 93 www.dents plym aillefe r.com
F1902125.X/04/2011 – updated 11/2014 – EN FR DE ES IT
18 / 32
Hinweis: Bei korrekter Aufbereitung des Kanals und Erwärmung der Guttapercha sollte sich der
GUTTACORE
®
Obturator ohne Verdrehen oder Forcieren einsetzen lassen. Zur Vermeidung einer
Überfüllung den Obturator nicht über die Arbeitslänge hinaus pressen. Sealer und Guttapercha werden
zurückfließen und sich am Kanaleingang ansammeln. Dies ist normal, besonders bei mehrwurzeligen
Zähnen, da der Obturator mit ausreichend Guttapercha versehen ist, um auch sehr stark erweiterte oder
anatomisch unregelmäßige Kanäle sicher zu füllen.
11.
Abtrennen von Schaft und Griff des GUTTACORE
®
Obturators
Schaft und Griff am Kanaleingang durch Biegen von einer Seite der Kanalwand zur anderen abtrennen.
Alternativ den GUTTACORE
®
Obturator mit dem Zeigefinger stützen und zum Abtrennen ein rundes oder
umgekehrt kegelförmiges Instrument im hochtourigen Handstück oder einen scharfen Löffelexkavator
benutzen. Die Obturatoren im Spezialbehälter für biogefährliche Abfälle entsorgen.
12. Kondensation der Guttapercha in sehr weiten, ovalen oder unregelmäßigen Kanälen
Ein kleines, etwa 4-6 mm langes Stück konventionelle Guttapercha entlang dem Schaft des
GUTTACORE
®
Obturators mit einem geschmierten Plugger einführen und kondensieren. Das
Guttapercha-Stück verdichtet die thermoplastische Guttapercha und wird zu einem Teil der Füllung. Dies
verhindert außerdem das ungewollte Entfernen von Guttapercha vom Kanaleingang mit einem
ungenügend geschmierten Plugger und kompensiert den Mangel an Guttapercha in ungewöhnlich weiten
Kanälen oder solchen mit internen Resorptionsdefekten. Wegen der Klebrigkeit der erwärmten
Guttapercha muss der Plugger mit einem Schmiermittel, z.B. GLYDE File Prep
®
Wurzelkanal-
Conditioner, Sealer, topisches Anästhetikum, verwendet werden.
13.
Entfernen von überschüssiger Guttapercha
Die Pulpakammer mittels Löffelexkavator, Sonde etc. reinigen, um Guttapercha-Überschüsse, die
eventuell den Zugang zur Pulpakammer und anderen Kanälen blockieren, zu entfernen. Im Fall
mehrwurzeliger Zähne die obigen Schritte bei jedem Kanal durchführen. Wenn nötig, benachbarte
Kanaleingänge bis zur Obturation mit kleinen Wattepellets oder einer Papierspitze vor Ablagerungen und
dem Eindringen von Guttapercha schützen. Nach dem Entfernen der überschüssigen Guttapercha ist die
Obturation abgeschlossen.
14. Zum Schutz vor Verunreinigung des Wurzelkanalsystems einen okklusalen Durchlaufschutz
mit einer Kompositfüllung schaffen.
15. Entfernen von GUTTACORE
®
Obturationsmaterialien
Für die Präparation eines Stiftbetts oder eine endodontische Revision das Obturationsmaterial auf
konventionelle Weise entfernen. Bei Stiftpräparationen das GUTTACORE
®
Material mit einem Post
Space Bur in der geeigneten Größe abtragen.
Zum Entfernen des Obturationsmaterials bei Revisionen eine rotierende Feile in derselben Größe wie bei
der Aufbereitung in das Material einführen (möglichst eine rotierende Feile ohne Fase). Anhand des
Röntgenbildes kontrollieren, ob das Obturationsmaterial restlos entfernt wurde.
Die Guttapercha am GUTTACORE
®
Obturator mittels Handfeile mit Lösungsmittel erweichen, falls das
apikale Kanaldrittel bei der Revision eine komplizierte Anatomie aufweist.
VII.
ESINFEKTION,
REINIGUNG
UN
STERILISATION
Den Obturator 1 Minute in 5,25% Natriumhypochlorit (Bleichlösung) desinfizieren. Dann die Guttapercha
am GUTTACORE
®
Obturator mit 70 % Alkohol sanft abwischen.
Keine phenolhaltigen Desinfektionslösungen oder Produkte verwenden, die mit dem behandelten
Füllungsmaterial nicht kompatibel sind.
GUTTACORE
®
Obturatoren sind nur für den Einmalgebrauch vorgesehen.
Nicht sterilisierbares Produkt.

Maillefer Instruments Holding S.à.r.l. et ses filiale s (Trading S.à.r.l., Manufacturing S.à.r.l., Consulting S.
à.r.l.)
Chemin du Verger 3, CH – 1338 Ballalgues Tél +41 (0)21 843 92 92 in o@dentsplymaille er.com
Switzerland Fax +41 (0)21 843 92 93 www.dents plym aillefe r.com
F1902125.X/04/2011 – updated 11/2014 – EN FR DE ES IT
19 / 32
Verfallsdatum
Hersteller
Siehe Gebrauchsanweisung
www.dentsplymaillefer.com
Nicht sterilisierbar
Nur zum Einmalgebrauch
LOT-Nummer
Guttapercha
Vor Sonneneinstrahlung und Wärme
schützen
Achtung: Dieses Produkt enthält
Naturkautschuklatex, der allergische
Reaktionen hervorrufen kann
Zulässiger Temperaturbereich für
Verwendung, Lagerung und
Transport
Offene Verpackungen werden nicht
ersetzt

Maillefer Instruments Holding S.à.r.l. et ses filiale s (Trading S.à.r.l., Manufacturing S.à.r.l., Consulting S.
à.r.l.)
Chemin du Verger 3, CH – 1338 Ballalgues Tél +41 (0)21 843 92 92 in o@dentsplymaille er.com
Switzerland Fax +41 (0)21 843 92 93 www.dents plym aillefe r.com
F1902125.X/04/2011 – updated 11/2014 – EN FR DE ES IT
20 / 32
Solo para uso dental
Instrucciones de Uso
Ref
A1703 – A1803
ESCRIPCIÓN
Los obturadores GUTTACORE
®
se usan para obturar sistemas de conductos radiculares.
I.
IN ICACIONES E USO
Estos productos solo deben ser utilizados en ambientes clínicos o en consultorios dentales por
profesionales cualificados.
Campo de aplicación: los obturadores GUTTACORE
®
se usan para obturar conductos limpios,
conformados e irrigados.
II.
CONTRAIN ICACIONES
Ninguna conocida.
III.
A VERTENCIAS
Este producto contiene goma natural seca.
IV.
PRECAUCIONES
•
Seleccionar el obturador GUTTACORE
®
según el verificador de tamaño GUTTACORE
®
que se
ajuste pasivamente al conducto preparado.
•
Los vástagos de los obturadores GUTTACORE
®
no deberían usarse como verificadores de tamaño.
•
No retirar la gutapercha de la parte apical del obturador GUTTACORE
®
antes de obturar el conducto
radicular, dado que se puede dañar el obturador.
V.
REACCIONES A VERSAS
Los pacientes con sensibilidad al látex pueden presentar reacciones alérgicas a la gutapercha, ya que
contiene goma natural seca.
VI.
INSTRUCCIONES PASO A PASO
NORMAS
Antes de usar cualquier producto nuevo, leer todas las instrucciones del fabricante. Asegurarse de
conocer la técnica de uso del producto antes de utilizarlo.
Tener en cuenta las siguientes normas para garantizar el éxito en las aplicaciones y conseguir un
resultado perfecto.
•
••
•
Crear un acceso recto al sistema de conductos radiculares para el uso de limas rotatorias y
manuales. Recordar la conveniencia de utilizar el dique de goma durante los procedimientos
endodóncicos.
•
••
•
Solo usar limas esterilizadas para ingresar en el conducto.
•
••
•
Establecer un punto de referencia coronal.
This manual suits for next models
2
Table of contents
Languages:
Other Dentsply Maillefer Dental Equipment manuals
Dentsply Maillefer
Dentsply Maillefer ProTaper Series Manual

Dentsply Maillefer
Dentsply Maillefer PROPEX II User manual
Dentsply Maillefer
Dentsply Maillefer ProTaper Universal Treatment Manual
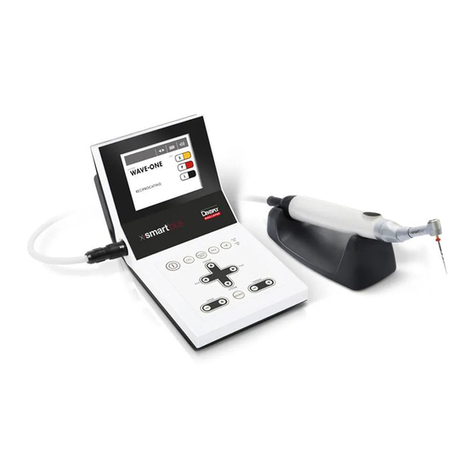
Dentsply Maillefer
Dentsply Maillefer X-SMART Plus User manual
Dentsply Maillefer
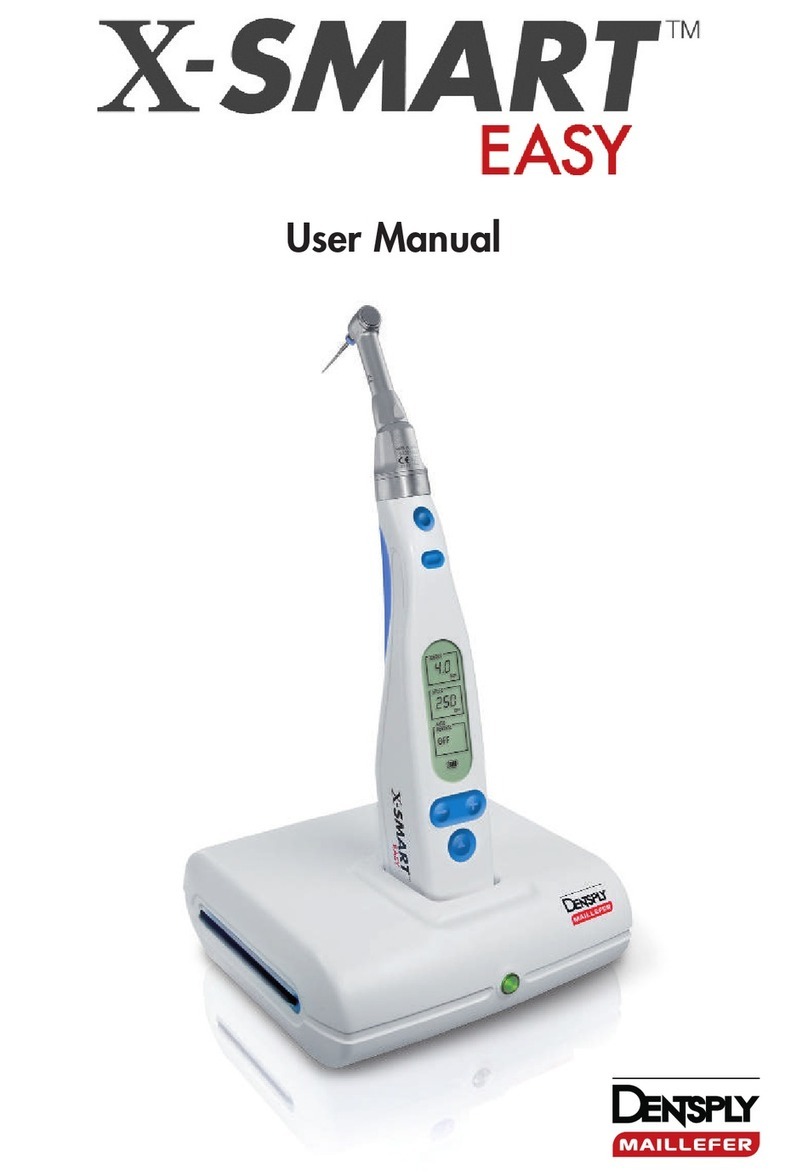
Dentsply Maillefer X-SMART EASY User manual
Dentsply Maillefer
Dentsply Maillefer START-X A0660 Manual

Dentsply Maillefer
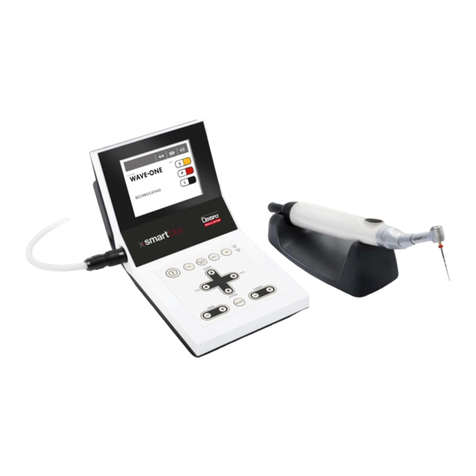
Dentsply Maillefer X-SMART User manual
Dentsply Maillefer
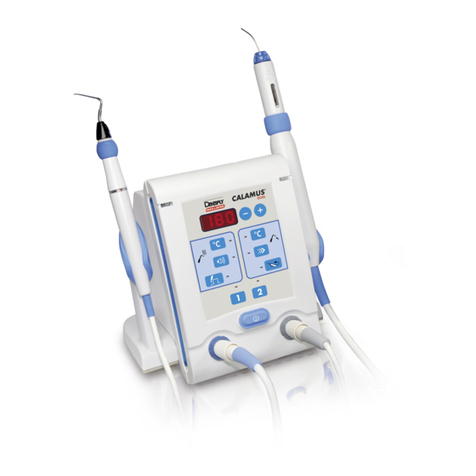
Dentsply Maillefer CALAMUS DUAL Manual
Dentsply Maillefer
Dentsply Maillefer X-SMART PLUS NE274 User manual
Dentsply Maillefer
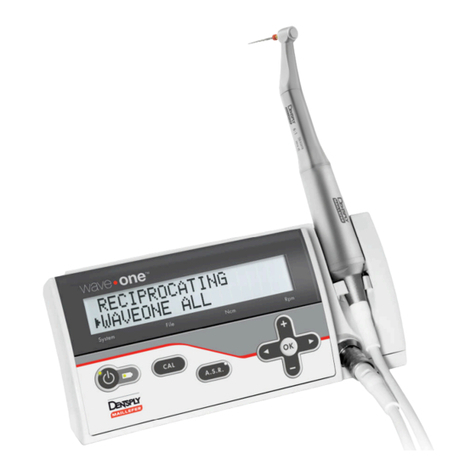
Dentsply Maillefer WaveOne endo motor User manual
