Dentsply Maillefer X-SMART EASY User manual
User Manual

CONTENTS
English . . . . . . . . . . . . . . . . . . . . . . . . . . . . . . . . . . . . . . . . .5
Français . . . . . . . . . . . . . . . . . . . . . . . . . . . . . . . . . . . . . . 25
Deutsch . . . . . . . . . . . . . . . . . . . . . . . . . . . . . . . . . . . . . . . 45
Español . . . . . . . . . . . . . . . . . . . . . . . . . . . . . . . . . . . . . . . 65
Italiano . . . . . . . . . . . . . . . . . . . . . . . . . . . . . . . . . . . . . . .85
Português. Este manual de utilização está também disponível, quando
requisitado, nas seguintes línguas: português, holandês, dinamarquês,
sueco, finlandês e grego.
Nederlands. Deze gebruiksaanwijzing is, op aanvraag, eveneens
verkrijgbaar in de volgende talen: Portugees, Deens, Zweeds, Fins
en Grieks.
Suomi. Käyttöohje on saatavana myös seuraavilla kielillä: portugali,
hollanti, tanska, ruotsi, suomi ja kreikka.
Svenska. Denna bruksanvisning finns även att tillgå på följande
språk:portugisiska, holländska, danska, svenska, finska och grekiska.
Dansk. Denne brugsanvisning kan også rekvireres på følgende sprog:
portugisisk, hollandsk, dansk, svensk, finsk og græsk.
Ελληνικ.Αυτ η οδηγα εναι επση διαθσιµη, κατπιν ζτηση,
στι ακλουθε γλσσε: Πορτογαλζικη, Oλλaνδικ, ανζικη,
Σουηδικ, Φιλανδζικη και Ελληνικ.
Visit our website: www.dentsplymaillefer.com


Thank you for purchasing the X
–SMART
™Easy.
TABLE OF CONTENTS
Introduction
1. Indications For Use . . . . . . . . . . . . . . . . . . . . . . . . . . . . . . . . . . . . 6
2. Contra-indications . . . . . . . . . . . . . . . . . . . . . . . . . . . . . . . . . . . . 6
3. Safety Precautions . . . . . . . . . . . . . . . . . . . . . . . . . . . . . . . . . . . . 6
– Warning . . . . . . . . . . . . . . . . . . . . . . . . . . . . . . . . . . . . . . . . . 7
– Precaution . . . . . . . . . . . . . . . . . . . . . . . . . . . . . . . . . . . . . . . . 7
– Adverse Reactions . . . . . . . . . . . . . . . . . . . . . . . . . . . . . . . . . . . 9
A. Classifications of Equipment . . . . . . . . . . . . . . . . . . . . . . 9
B. Contents of the Package . . . . . . . . . . . . . . . . . . . . . . . . 10
C. Product Main Specifications . . . . . . . . . . . . . . . . . . . . . 10
D. Motor Handpiece & Charging Stand Feature Identification . . 11
E. Preparing the Motor Handpiece For Use
1. Connecting the Power Cord . . . . . . . . . . . . . . . . . . . . . . . . . . . . 12
2. Connecting the Battery . . . . . . . . . . . . . . . . . . . . . . . . . . . . . . . . 12
3. Charging the Battery . . . . . . . . . . . . . . . . . . . . . . . . . . . . . . . . . 13
4. Connecting and Disconnecting the Contra-Angle Attachment . . . . . . . 13
5. Inserting and Removing the File . . . . . . . . . . . . . . . . . . . . . . . . . . 13
6. Calibration . . . . . . . . . . . . . . . . . . . . . . . . . . . . . . . . . . . . . . . . 14
F. Main Directions For Use
1. Button Functions . . . . . . . . . . . . . . . . . . . . . . . . . . . . . . . . . . 14-15
(Power, Forward, Reverse, +/– Increment, Select)
2. Reading the Display . . . . . . . . . . . . . . . . . . . . . . . . . . . . . . . . 15-16
(Torque, Speed, Auto Reverse, Battery Indicator)
3. Preparatory Operations . . . . . . . . . . . . . . . . . . . . . . . . . . . . . . . . 16
4. Operation . . . . . . . . . . . . . . . . . . . . . . . . . . . . . . . . . . . . . . . . 17
5. Auto Reverse Function . . . . . . . . . . . . . . . . . . . . . . . . . . . . . . . . . 17
6. Completion of Medical Treatment . . . . . . . . . . . . . . . . . . . . . . . . . 18
G. Lubricating the Contra-Angle Attachment . . . . . . . . . . . . . 18
H. Cleaning, Disinfection and Sterilization . . . . . . . . . . . . 19-20
I. Changing the Battery . . . . . . . . . . . . . . . . . . . . . . . . . . 21
J. Troubleshooting . . . . . . . . . . . . . . . . . . . . . . . . . . . . . . 22
K. Warranty . . . . . . . . . . . . . . . . . . . . . . . . . . . . . . . . . . 23
L. Disposing of the Product . . . . . . . . . . . . . . . . . . . . . . . 23
M. Identification of Symbols . . . . . . . . . . . . . . . . . . . . . . . 24
5

6
1. Indications for Use:
X
–SMART
™Easy is designed for use by dentists in standard endodontic proce-
dures using rotary endodontic files and rotary endondontic drills (Gates–Glidden).
2. Contra-indications
The X
–SMART
™Easy handpiece body cannot be sterilized. Therefore, the
X
–SMART
™Easy is not recommended for use in oral surgery procedures that
require a fully sterilized handpiece.
In cases where a patient has been fitted with an implanted heart pacemaker (or other
electrical equipment) and has been cautioned against the use of small electrical
appliances (such as electric shavers, hair dryers, etc.) it is recommended that the
X
–SMART
™Easy is not to be used.
This motor should not be used for severely curved root canal preparation.
Do not use X
–SMART
™Easy for implant or any other dental procedure outside
endodontics.
3. Safety Precautions
• Read these safety precautions thoroughly before use.
• These precautions allow you to use the product safely, preventing harm to you
and others.
• These are classified by degree of possible harm.
Classification of Hazardous Conditions
Classification Degree of Danger, Damage, or Seriousness
WARNING Explains an instruction where bodily injury or damage to device
may occur.
PRECAUTION Explains an instruction where there is a possibility of minor to
mediumbodily injury, or damage to the device may occur.

Warning
• Use the specified battery for this product. Never use any other batteries than
those that Dentsply specifies.
• The battery contains an organic solvent that is clear or yellowish in color. Should the
solvent come into contact with your eyes, immediately wash eyes thoroughly with
clean water and contact your doctor. Failure to do so may result in loss of sight.
• Should the solvent come into contact with skin or clothing, immediately wash the
exposed skin thoroughly with clean water and completely wash away the fluid.
Contact your doctor in case of skin irritation.
• The battery contains an organic solvent with vapors that can be vented when the bat
tery is abused, disassembled or overheated. Do not inhale the vapors.
• Do not disassemble or alter the motor handpiece.
• If you should notice a battery fluid leak, deformation of the motor handpiece casing
or partial discoloring, immediately stop use and contact your distributor.
• If the product is not going to be used for a long period of time, disconnect the battery.
• The system may present the possibility of malfunction when used in the presence of
electromagnetic interference (EMI). Do not install the system in the vicinity of any
device that emits EMI.
• Do not use in the presence of flammable products.
• This motor is equipped with an electronic circuit to limit file separation. Nevertheless,
files may still separate due to incorrectly set torque or speed, or the use of fatigued files.
• Dental low voltage electric motors should not be used in the presence of a flammable
anesthetic gas mixed with air, oxygen, or nitrous oxide.
(Note: nitrous oxide by itself is not a flammable anesthetic gas.)
• The contra-angle must be steam sterilized prior to initial use and between patients to
prevent cross contamination. After sterilization, make sure the contra-angle attachment
has reached a temperature below 40 °C (104 °F) before use (see chapter H:
Cleaning,disinfection and sterilization).
Precaution
• This product is intended for use by dental professionals only.
• The appliance must only be used with the manufacturer's original accessories.
• Use the Dentsply charging stand for this product. Never use any other battery
chargers.
• Use only 16:1 ratio contra-angle attachments with this product. Contra-angle
attachments with gear ratios other than 16:1 will cause errors in the display
readings and torque limitation system.
• If the motor stops or runs too fast, discontinue use and call for assistance.
• Do not introduce any oil into the micromotor.
• The system functions normally in the environment where the temperature is at
10 - 40 ˚C (50 - 104 ˚F), humidity at 10 - 85% RH, atmospheric pressure at
500-1060hPa, and with no moisture condensation in the Handpiece or Charging
Stand. Any use outside these limits may cause malfunction.
7

• Do not use a bent, damaged, deformed or non-ISO-conforming file. Using such a file
may result in injury.
• Check the product before use by turning it on, paying attention to looseness,
vibration, noise and temperature (heat generation). If any abnormal condition is
found, no matter how slight, immediately stop use and contact your distributor.
• For your own safety, please wear personal protective equipment (Gloves,
glasses, mask).
• Always clean the shank of the file or the Gates Glidden to be installed. Allowing
dirt to enter the chuck could cause loss of concentricity and deterioration of
chucking force.
• Before changing the head or file, turn off the power to the motor handpiece.
Changing with the power kept on may cause unintended rotation by accidental
touch of the Forward or Reverse buttons.
• Pay attention to the direction of the battery connector when installing. Forcible
installation in the wrong direction may cause damage and fluid leakage due to
a short circuit.
• Do not use the handpiece unless the rotary file is secure within the contra-angle
attachment.
• Never mount an attachment to the handpiece body while it is running.
• Never press the push-button on the contra-angle attachment while the handpiece
is running.
• The “torque limit” feature is intended as an aid to help reduce breakage of rotary
files. It is not a substitute for professional judgment and clinical good practice.
• Follow all the sterilization, cleaning, lubrication and maintenance directions in the
user instructions. Use only approved parts and supplies. Failure to do so will void the
warranty, can degrade product performance, and may lead to unsafe operation.
• If you observe water in the charging stand, disconnect the electrical power. The
charging stand has been designed to allow water and debris to drain from the
charging contact area, however, debris could potentially plug the drain, increasing risk
of electrical shock. Disconnect electrical power prior to cleaning debris from the drain.
• This product is designed for use with a rechargeable 1500mAH Lithium-Ion battery.
Any other battery type may cause degraded system performance.
• Other than battery replacement, there are no user-serviceable items in the
X
–SMART
™Easy handpiece body or charging stand; opening either of these
can result in unsafe operation.
• The handpiece body is not waterproof. Do not immerse the handpiece body in
water or a chemical solution. Do not spray liquids onto this device – wipe only.
(See section H: Cleaning, disinfection and sterilization)
• Fully-charged rechargeable batteries generally discharge gradually over time even
though the motor handpiece is not used. It is recommended to place the handpiece
in the charger when not in use.
8

9
• The motor handpiece can stop automatically on detecting a low battery voltage.
After the motor handpiece is stopped for a short time, it may start again even
though the battery is drained. This is not a fault condition of the battery, it is
a normal characteristic.
• The Lithium-Ion battery is recyclable, but disposal may not be permitted by law
in your location. Return them to your distributor if you are unsure of the proper
disposal method.
• When disposing of the X
–SMART
™Easy, follow the instructions of your local
government for disposal, as it may contain materials which could become
industrial waste.
• When discarding the contra-angle attachment, dispose of it as medical waste.
• Users are responsible for operational control, maintenance and inspection.
• Store the system in a place where the temperature is at -10 to +60 ˚C (14 – 140 ˚F),
humidity at 10 – 85% RH, atmospheric pressure at 500 – 1060 hPa, and the system
is not subject to air with dust, sulfur or salinity.
Adverse Reactions
• There are no known adverse reactions.
A. CLASSIFICATIONS OF EQUIPMENT
• Type of protection against electric shock:
– Class II equipment
• Degree of protection against electric shock:
– Type B applied part
• Method of sterilization or disinfection recommended by the manufacturer:
– See Cleaning, Disinfection, & Sterilization
• Degree of protection against ingress of water as detailed in the current edition of
IEC 529: IPX0
X
–SMART
™Easy complies to IEC60601-1 safety standard and the requirements
of the CE Marking of Conformity.

2
Fig. 1
4
5
6
B. CONTENTS OF THE PACKAGE
Before use, please refer to the packaging labels.
(Note: Some items are contained in plastic bags.)
1) Charging Base 4) Pocket Screwdriver 7) Power Cord
2) Contra-Angle Attachment (in case) 5) Torque Card 8) F-Type Spray Nozzle (in case)
3) Motor Handpiece 6) User Manual 9) Battery
C. PRODUCT MAIN SPECIFICATIONS
X-SMART™ EASY motor handpiece
Rated input DC 3.7V 2.0 A
Charging time 1.5 hours approx.
Dimensions W30 x L160 x H32
Weight 150g (with contra-angle attachment)
X-SMART™ EASY charging stand
Rated input 100-240VAC 50-60Hz., 0.5A
Dimensions W125 x D130 x H57
Weight 330g
10
9
1
3
8
7
11
1) Charging Stand (front and rear shown) 8) Display
2) Charging Indicator 9) Selection Buttons
3) Power Receptacle (in rear) • Increment Button (+)
4) Power Indicator (in rear) • Decrement Button (–)
5) Contra Angle attachment • Select Button
6) Forward Button 10) Motor Handpiece
7) Reverse Button 11) Battery Door
D. MOTOR HANDPIECE & CHARGING STAND
FEATURE IDENTIFICATION
Fig. 2
6
7
4
10
3
2
8
5
1
11
9

E. PREPARING THE MOTOR HANDPIECE FOR USE
1. Connecting the Power Cord
Securely insert the AC power cord into the
charging stand. Securely insert the AC
power cord into a wall receptacle.
2. Connecting the Battery
1. Remove the plug.
2. Unscrew the battery cover. Lift the battery cover off the back of the handpiece.
3. Remove the battery from the plastic bag.
4. Insert the battery connector into the receptacle inside the battery chamber and
place the battery into the chamber with care so as not to catch the cord.
PRECAUTION
• In case of difficulty inserting the connector into the motor handpiece, make sure the connector
is properly oriented. Do not insert it by force.
5. Close the battery cover and replace the screw and plug. Ensure you charge the
battery before use.
Fig. 3
Fig. 4 Fig. 5
Fig. 6
Plug Screw
Lift here
to remove
battery door
12

3. Charging the Battery
Put the handpiece into the charging stand, the light turns yellow indicating the unit
is charging. When the battery is fully charged, the light will turn green.
PRECAUTION
• Connect to AC 100-240V power only. Otherwise, malfunction will occur.
• The standard charging time is about 1 1/2 hours, but it varies depending on use, condition of
battery, temperature and if the battery is new or old.
• Notice: Older battery shorten both the charging and operating time.
4. Connecting and Disconnecting the Contra-Angle Attachment
• The contra-angle attachment can be connected to
the motor handpiece at 6 adjustable head positions.
Align the positioning pins of the contra-angle
attachment with the positioning slots of the motor
handpiece and insert the head until they click.
• When removing the contra-angle attachment, pull it
straight out. (Fig. 7)
PRECAUTION
• Before attaching and detaching the contra-angle attachment, turn the power off.
• Check that the contra-angle attachment is securely assembled to the motor handpiece.
• Before first use complete the calibration per Section 6.
5. Inserting and Removing the File
File Insertion
• Insert the file into the chuck until it stops.
• Lightly turn the file until it engages with the latch
mechanism.
• Push inwards to click.
File Removal
• Depress the push-button and pull out the file.
PRECAUTION
• Before attaching or detaching the file, turn the power off.
• After the file is locked in place, lightly pull out the file to make sure the file is locked.
• Always clean the shank of the file to be installed. Allowing dirt to enter the chuck could
cause deterioration of chucking force.
Fig. 8
Fig. 7
13

6. Calibration
This function is to decrease fluctuation in the rotation speed of the motor handpiece and
the difference in torque by the contra-angle attachment. The motor handpice calibration
is recommended when using a new/other contra angle or after an extended period of
operation, as the running properties can change with usage,cleaning and sterilization.
• Lubricate the contra-angle attachment with X
–SMART
™spray.
• Turn the motor handpiece power off.
• Attach the contra-angle attachment to the motor handpiece. Warning: (Nothing
should be in the chuck).
• Press and hold the Forward button until the top of the display shows: “ ”
• Press the (-) key to start the calibration.
• The chuck begins to rotate: allow it to rotate until it stops after about 20 seconds.
• When the calibration process is completed, the rotation stops and the display
returns to its original state.
• This process needs to be completed when replacing with different attachments.
F. MAIN DIRECTIONS FOR USE
1. Button Functions
POWER
• Push any button to turn the handpiece on.
• Power automatically turns off after a 3 minutes of non-use. The handpiece may
also be powered-off by pressing and holding the SELECT button for 3 seconds.
FORWARD
• The file will turn forward (clockwise, when the file is pointed away from the
operator) when this button is pressed.
• Press and release to turn the motor On and Off. Press and hold for
momentary operation.
• Torque and speed are shown at current setting on display.
REVERSE
• The file will turn in reverse (counter-clockwise, when the file is pointed away
from the operator) when this button is pressed, and will stop when it is released.
• A tone sounds during reverse rotation.
“-.-“ is displayed in the torque box and sound plays when
performing in reverse.
+ / – INCREMENT
When a setting is selected, these buttons will adjust the settings up (+) or down (–).
Pressing and holding the button will make repeated adjustments.
Display
14
SELECT
When the motor is not running, pressing the SELECT button will highlight the torque,
speed, or auto-reverse box. The function of the selected setting can now be adjusted.
When the motor is running, the SELECT button does not function.
2. Reading the Display
The selected box (torque, speed, or auto-reverse) is highlighted with a double-square.
In Figure 9, torque is selected.
TORQUE
• The torque limit values can be adjusted.
• Torque can be found in the top box.
• If the torque limit is exceeded, the file will stop and “S.t” is shown in the torque
box on the display.
The present torque limit value is displayed. The
torque setting can be adjusted from 0.6 N•cm to
1.0 N•cm in increments of 0.2 N•cm, and from
1.0 N•cm to 4.0 N•cm in increments of 0.5 N•cm.
SPEED
• The rotation speed can be adjusted.
The present rotation speed is displayed in the
middle box on the motor handpiece. The speed
setting can be adjusted from 100 to 800 rpm in
increments of 50 rpm.
Fig. 9
Display
Display
15
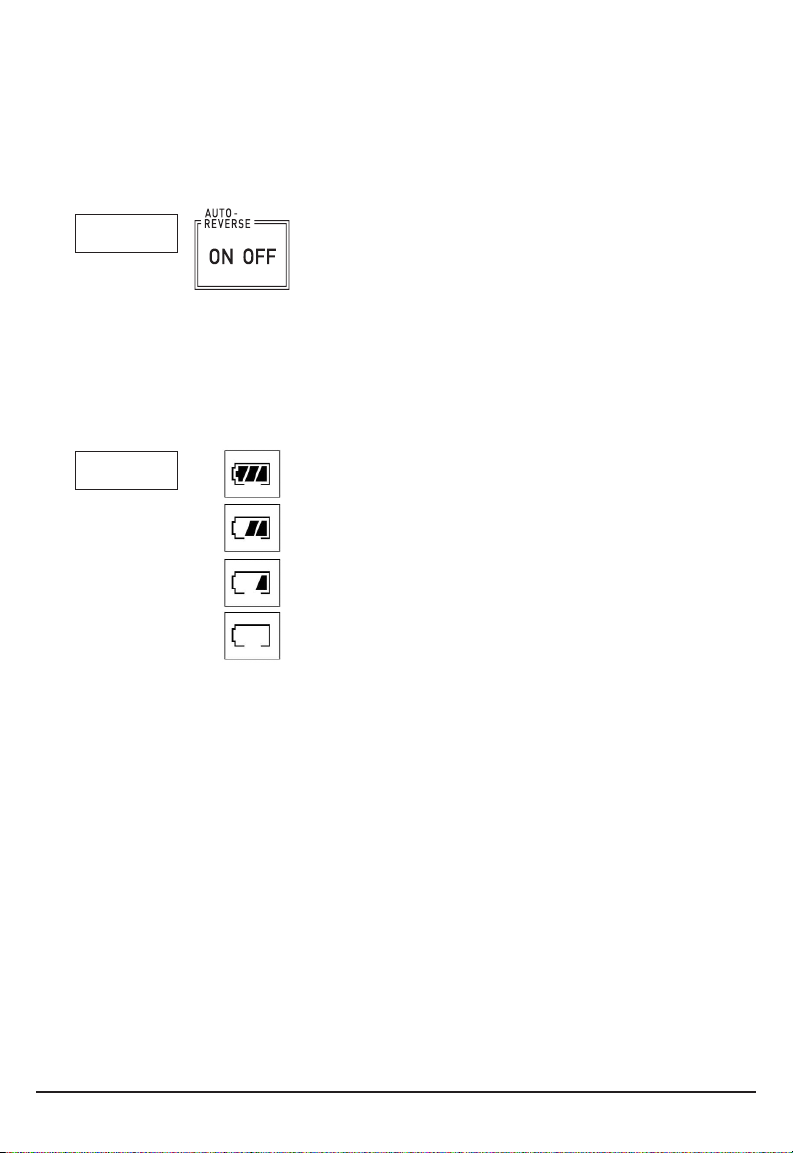
AUTO REVERSE
The auto reverse mode can be selected. (See Auto Reverse Function, section 5.)
The default mode for auto reverse is ON. The last position used for auto reverse (on
or off) is what will be the new default until the user manually changes it. Only the
mode that is currently in use will be displayed.
ON If, during operation, the load reaches the
torque limit, the unit auto-reverses. If the
load is removed after auto reverse rotation,
it stops. See Auto Reverse Function, section 5.
OFF Auto reverse rotation is not activated.
BATTERY INDICATOR
The mark of the present remaining amount of the battery is displayed when the
handpiece is turned on.
Full charge
Approximately 30-80% remains
Less than 30% remains.
Battery is drained. Charge the battery.
• Charging indicator
This lamp will be green when the battery has a full charge and yellow when the
battery is charging.
3. Preparatory Operations
• Charge the battery (See “Charging the Battery” on page 13).
• Press any button to turn the unit on.
• Select Torque – press the SELECT button until the torque box is highlighted with
a double-line. Use the (+) and (-) buttons to adjust to the desired torque level.
• Select Speed Control – press the SELECT button until the speed is highlighted,
use the (+) and (-) buttons to adjust to the desired speed level.
Display
Display
16
4. Operation
• If you press the FORWARD button briefly, the
motor handpiece starts. If you re-press the
FORWARD button, it stops.
• If you hold down the FORWARD button for more
than one second, the motor handpiece starts
and runs while the button is pressed. If you
release the button, it stops.
• If you press the REVERSE button, the motor handpiece operates in the reverse
direction until you release the button.
NOTE: If the plus (+) key or minus (-) buttons are continuously held down, they cycle through the
selection quickly.
5. Auto Reverse Function
To choose the auto reverse function, use the SELECT button to highlight the auto
reverse field and use the minus (–) button to turn on and plus (+) button to turn off.
NOTE: The last position used for auto reverse (on or off) is what will be the default until user
manually changes it.
Auto Reverse On
The motor handpiece stops and does reverse when the load exceeds the preset
Torque Limit Value. The Torque Limit box will show “S.t”. When the load is removed,
the motor handpiece stops.
If you want the file to rotate forward again, press the FORWARD button.
If you want the file to rotate in reverse again, press and hold the REVERSE button.
Reverse
Forward
(Motor ON/OFF)
Fig. 10
Fig. 11
17
Auto Reverse Off
The motor handpiece stops and does not reverse when the load exceeds the preset
Torque Limit Value. The Torque Limit box will show “S.t”.
If you want the file to rotate forward again, press the FORWARD button twice.
If you want the file to rotate in reverse, press and hold the REVERSE button twice.
6. Completion of Medical Treatment
• Remove contra-angle attachment for lubrication and sterilization.
• Wipe down motor handpiece with disinfectant as per the cleaning, disinfection, &
sterilization procedure in Section H.
• Finally, return the motor handpiece to the charging stand.
NOTE: If 3 minutes pass without operation of any key the power turns off automatically.
However, the power does not turn off automatically if the motor handpiece is in motion, even if it
is not used.
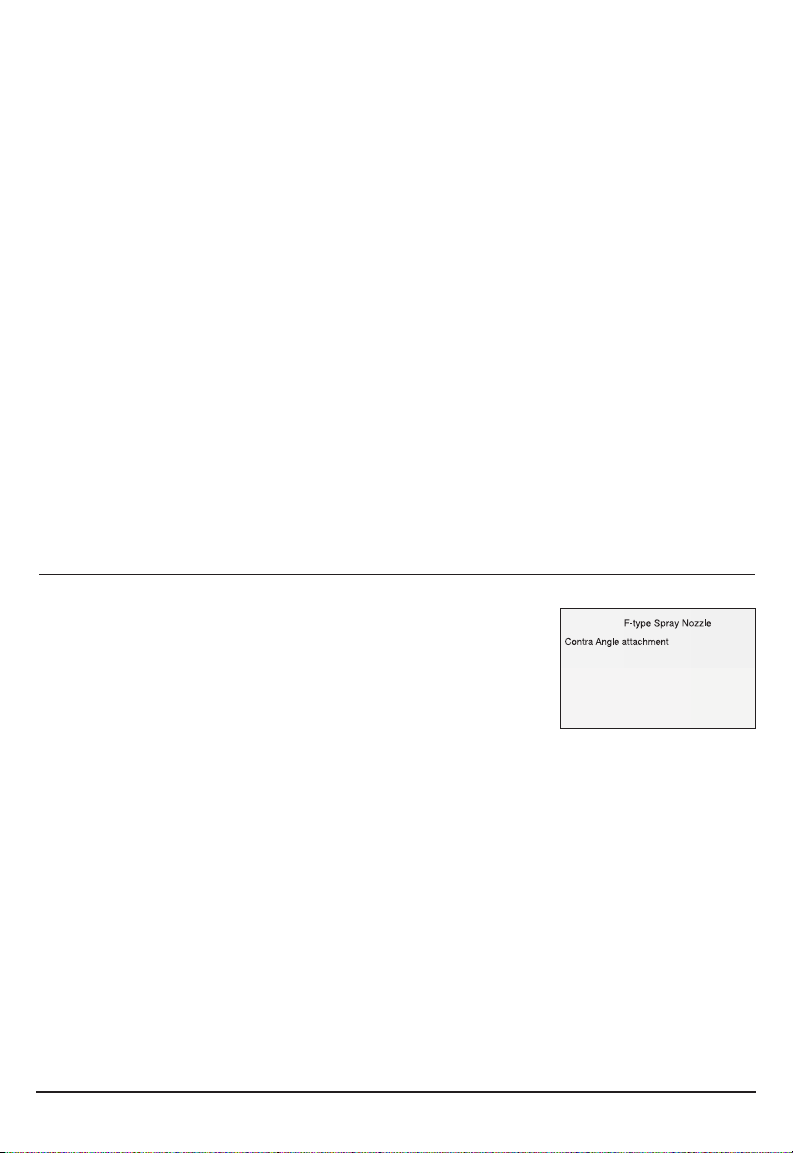
G. LUBRICATING THE CONTRA-ANGLE ATTACHMENT
• Lubricate the contra-angle attachment only.
• Lubricate after each use and before sterilization.
• Screw the spray nozzle onto the Spray by approx.10 turns.
• Insert the spray nozzle into the rear part of the contra-angle
attachment and lubricate for 2-3 seconds until oil comes
out from the attachment head.
• Position attachment vertically so all extra oil will drain out,
and then wipe off outside surfaces.
PRECAUTION
• Do not use a spray can upside down. In such case only spray gas comes out instead of oil.
• To prevent attachment flying off from a spray nozzle – hold it securely.
Fig. 12
18

1 Preparation
2 Automated Cleaning
with washer-disinfector
Remove attachment from the
motor handpiece and detach
the files from the chuck.
Put attachment into the washer-
disinfector (Ao value >3000 or,
at least 5 min at 90°C/194°F).
– Avoid any contact between the attachment
and any instruments, kits, supports or container.
– Follow instructions and observe concentrations
given by the manufacturer (see also general
recommendations).
– Use only approved washer-disinfector according
to EN ISO 15883, maintain and calibrate it
regularly.
– Make sure the attachment is dry before moving
19
H. CLEANING, DISINFECTION AND STERILIZATION
For hygiene and sanitary safety purposes, the contra-angle attachments must be
cleaned, disinfected and sterilized before each usage to prevent any contamination.
This concerns the first use, as well as all subsequent uses.
GENERAL RECOMMENDATION
1. Use only a disinfecting solution which is approved for its efficacy (VAH/
DGHM-listing, CE marking, FDA and Health Canada approval) and in
accordance with the DFU of the disinfecting solution manufacturer.
a. Do not use chloride detergent materials.
b. Do not use bleach or chloride disinfectant materials.
2. For your own safety, please wear personal protective equipment (gloves,
glasses, mask).
3. The user is responsible for the sterility of the product for the first cycle and each
further usage as well as for the usage of damaged or dirty instruments where
applicable after sterility.
4. The water quality has to be convenient to the local regulations especially for the
last rinsing step or with a washer-disinfector.
5. Do not sterilize the motor handpiece, the charging stand or the AC cable. After
each use, all the objects that were in contact with infectious agents should be
cleaned using towels impregnated with a disinfecting and detergent solution
(a bactericidal, fungicidal and aldehyde free solution) approved by VAH/
DGHM-listing, CE marking, FDA and Health Canada.
STEP BY STEP PROCEDURE
For contra-angle attachment only
# Operation Operating Mode Warning

3 Inspection
4 Packaging
5 Sterilization
6 Storage
Inspect attachment and sort out
those with defects.
Pack the attachment in “Sterilization
pouches”.
Steam sterilization at:
134 °C (274 °F) for 18 minutes
Keep attachment in sterilization
packaging in a dry and clean
environment.
– Dirty attachment must be cleaned and
disinfected again.
– Lubricate the attachment with an adequate
spray before packaging.
– Check the validity period of the pouch
given by the manufacturer to determine the
shelf life.
– Use packaging which is resistant to a
temperature up to 141 °C (286 °F) and in
accordance with EN ISO 11607.
– Use only autoclaves that are matching the
requirements of EN 13060, EN 285.
– Use a validated sterilization procedure
according to ISO 17665.
– Respect the maintenance procedure of the
autoclave device given by the manufacturer.
– Use only this recommended sterilization
procedure.
– Control the efficiency (packaging integrity,
no humidity, color change of sterilization
indicators, physico-chemical integrators,
digital records of cycles parameters).
– Maintain traceability of procedure records.
– Sterility cannot be guaranteed if packaging
is open, damaged or wet.
– Check the packaging and the attachment
before using it (packaging integrity, no
humidity and validity period).
20
PROCEDURE continued
For contra-angle attachment only
# Operation Operating Mode Warning
Table of contents
Languages:
Other Dentsply Maillefer Dental Equipment manuals

Dentsply Maillefer
Dentsply Maillefer X-SMART PLUS NE274 User manual

Dentsply Maillefer
Dentsply Maillefer GUTTA CORE A Series Manual

Dentsply Maillefer
Dentsply Maillefer PROPEX II User manual

Dentsply Maillefer
Dentsply Maillefer ProTaper Universal Treatment Manual

Dentsply Maillefer
Dentsply Maillefer WaveOne endo motor User manual

Dentsply Maillefer
Dentsply Maillefer ProTaper Series Manual

Dentsply Maillefer
Dentsply Maillefer THERMAPREP PLUS Manual

Dentsply Maillefer
Dentsply Maillefer X-SMART User manual

Dentsply Maillefer
Dentsply Maillefer X-SMART Plus User manual

Dentsply Maillefer
Dentsply Maillefer CALAMUS DUAL Manual


