CAUTION
Use of controls or adjustmentsor performance
of procedures other than thosespecified herein
may result in hazardous radiationexposure.
This compact disc player isclassified as a
CLASS 1 LASER product.
PRECAUTIONS
To maintaingood performance
Do not use the unitin places which are
extremely hot, cold dusty orhumid, In particular,
do not use or keepthe unit in following places.
in a high humidity areasuch as a bathroom
near a heater
in an area exposed todirect sunlight (e.g.,
inside a parked car,where it can become
extremely hot)
near sources of strong magnetism,such as
televisions, speakers, or magnets
where there is a lotof movement or vibration,
such as on a cardashboard or an unstable
shelf
OPERATING
INSTRUCTIONS 60 SECONDS ANTI-SHOCK
PORTABLE CD PLAYER
DM-60
CLASS 1 LASER PRODUCT
KLASSE 1 LASER PRODUKT
LUOKAN 1 LASER LAITE
KLASS 1 LASER APPARAT
Invisible laser radiation when openand
interlocks defeated. Avoidexposure to
beam.
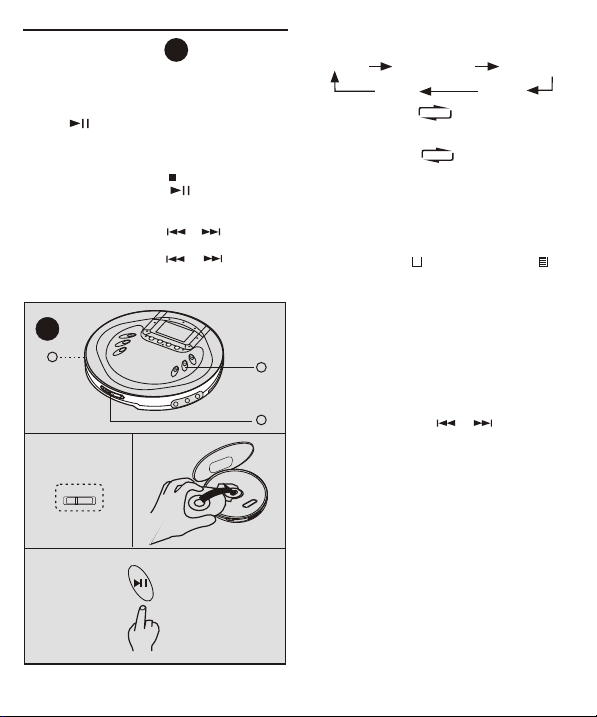
1
For safety
Do not attempt to disassemble thisunit. Laser
rays from the optical pickup aredangerous to
the eyes
Make sure that pins or otherforeign objects
do not get inside the player
Take carenot to drop the unit orsubject it to
strong shocks
To keepdust from the pickup lens, keepthe
disc compartment lid closed after use.Never
touch the lens
If you hear no sound whenplaying a disc, DO
NOT turn the volume uphigh because the
music could suddenly begin at highvolume.
To avoidhurting your ears or damaging the
speakers, turn the volume control tothe level
before starting playback and slowly turnit up
to the desired level
Note on listening with the earphones
listen at moderate volumes to avoidhearing
damage
Do not wear the earphones whiledriving or
cycling. It may create a traffic hazard
You shoulduse extreme caution or temporarily
discontinue use in potentially hazardous
situations, such as walking, jogging, etc
CAUTION
Listening to earphone stereo at fullpower for
extended periods of time can resultin hearing
damage
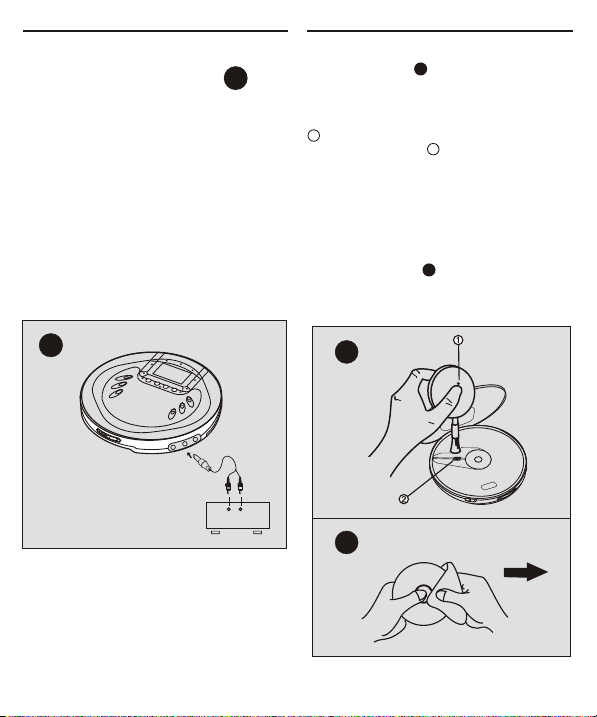
Do not touch pickup lens
Note on condensation
If the unit is suddenly movedfrom a cold place
to a warm one, it maycause in condensation on
the pickup lens and malfunction orplayback
difficulties, should this occur,leavethe unit for
a few hours,then try playback again.