Denver MTW-728 TWIN User manual


1
Introduction
Safety Precautions
Main Features
Unit View
The Monitor
The Remote Control
The Package
Powering and installation
Connecting to themonitor
Connecting with externalspeaker
Basic Operation
System Setup
Specification
Troubleshooting
Introduction
Thank you forchoosing our portableDVD player.It includes
. The unitapplies the latest state of artelectronics and is designed for use at
home, in hotelsand in offices etc for relaxation.The compact sizemakes carrying easier
as well asinstallation. Please read the manual carefully prior to useand keep it well for
later consultation.
Safety Precautions
Warning: To reduce therisk of fire or electric shock,do not expose this apparatus to rain
or moisture.
1) Please readthe instruction manual carefully and followall the requirements of safe
operation to operatethe device.
2) Do notuse this unit near water. Do not place over the unit any container withliquid inside.
3) Do notinstall near any heat sources suchas radiators, heat registers, stoves, or other
apparatus (including amplifiers)that produce heat.
4) Unplug thisunit during lightning storms or whenunused for long time.
5) AboutCleaning: Unplug the system, use onlywet cloth to clean. Do not use liquid
detergent or aerosol.
6) Only useaccessories specified by the manufacturer.
7) Refer allservicing to qualified service personnel, servicingis required when the unit
has been damagedin any way, such aspower supply cord or plug is damaged, liquid
has been spilledor objects have fallen into theunit, exposed to moisture, does not
operate normally.Don't try torepair the machine by yourself because of the danger of
high voltage andelectric shock.
8) Do notuse irregular shaped discs such as heart or star-shaped discs as they may
cause the unitto malfunction.
a main unitand an external
monitor
TABLE OF CONTENTS
Hi-voltage, Don't Openit
Remind user to be careful to
avoid electric shock
1
1
2
2
3
4
5
6
7
8
9
14
17
18

Main Features
Unit View
32
1. Open knob 2. Earphone jack
3. Volumeknob 4. PowerON/OFF switch
5. MODE button 6.MENU button.
7. SETUP button 8. Play/Pause
9. 10.
11. 12.
13. DC IN9V 14. DCOUT
15.AV IN/OUT 16.USB Port
17.SD card slot
High brightness color7”LCD screen
Compatible with discof DVD,VCD,SVCD,MPEG4, etc.
Built-in stereo speaker
Support PALor NTSC system
Support Multi-language OSD,speedforward/backward,repeat function
Zoom in/out function 1
2
3
4
5
6
The Monitor
2.
3. 4.
5. 6.
7. B
Power ON/OFF switch Volume knob
Earphone jack AV IN
DC IN 9V LCD Monitor
rightness knob
7
ON/OFF
BRIGHTNESS
AV IN
VOLUME
DC IN 9V
1
2
3
4
6
5
7
8
9
10
13
14
15
16 17
AVIN/OUT DC OUT
DCIN 9V
MODE
MENUSETUP
OK
OFF/ON
VOLUME
++
--
11
12

The use ofRemote Control
54
Number button
2.TITLE (To display title
information)
3.AUDIO(Toselect audio language)
4.SETUP(Togo to or exit setup menu)
5. / button(To go to
Previous/next chapter or scene during
playing)
6. / button(To scan forward /backward
at 2,4,8,16 or32 times)
7.OSD(Todisplay disc information
during playing suchas elapsed and
remaining)
8.Play/pause
9.Stop(press once tostop playback,
then press toresume playback
from the point where you stopped;
press stop button twice to stop playback
completely.
The Remote Control
10.
11.
12.Menu(Toenter or exit menu root)
13.Subtitle (To select subtitle
language when playing DVD disc)
14.Angle(Tochange viewing angle
when playing disc whih multi-angle)
15.A-B(Repeat a specificportion from
point Ato B,press it again to cancel
repeat playing)
16.Repeat(ToRepeat playing title,
chapter or track)
17.Return(Toreturn to the main menu)
18.
19.VOL+/-(Toadjust the volume)
20.Enter(Toconfirm)
IN/OUT ( To input or output signal)
USB/SD(Toselect the source)
ZOOM(Tozoom in/out the image
during playback)
Note
1.Toavoid falling off or place near damp environment.
2.Toavoid infrared receiving window of the unit being under direct sunlight.
3.Please use anew battery to replace old one if the remote control doesn't work.
The package
1
2
CR2025 CR2025
When using remotecontrol,make sure the
infrared window ispointed to infrared receiving
window of themachine.The distance between
machine and remotecontrol must be within 3
metres.Please refer tothe illustration on the right
0
30
0
30
Remote Control withbattery
AC/DC PowerAdapter
Instruction Manua
Earphone
1
1
1
1
1
1
Audio/Video cable
Cigarette LighterAdapter
Please put thebattery into the remote control as per illustration below.
1
2
3
4
5
6
7
8
9
10
11
12
13
14
15
16
17
18
19
20

76
Connecting to the monitor
The unit canalso be connected to the external LCD monitor.
Powering and installation
Plug one endof the AC/DC power adaptor into the DCIN 9V jack on the right of the
machine,then plug theother end into the AC power receptacle.Please referto the
following illustration.
If using carcigarette lighter adaptor to connect to the power:
Plug one endof the cigarette lighter adaptor into the DC IN9Vjack on the unit,plug the
other end intothe car cigarette lighter socket.See illustration below.
Note
Car cigarette lighteradaptor can't be used to recharge the battery.
Car cigarette lighteradaptor is available to use only when the car
power supply is9-12V.
Connect the unitto power by AC/DC adapter or cigarette lighteradapter.
Then connect theunit DC OUT jack to DC IN 9V Jack of the LCD Monitor by a DC/AV
cable. Alsouse this DC/AV cable toconnect the AV IN/OUTjack of the
unit toAV IN jack of theMonitor.
Please refer tothe illustration below.
AV IN/OUT DC OUT
DC IN 9V
AV IN/OUT DC OUT
DC IN 9V
DC OUTAVIN/OUT
DC IN 9V
ON/OFF
AV IN
VOLUME
DC IN 9V

8
Connecting with external speaker
AMPLIFIRE
Note There is no5.1 channel in the unit,however,after connecting toAPM it
is available tooutput audio in 5.1 channel.
TV
Left front speaker
Centre speaker
Right front speaker
SUBWOFER
Left rear speaker Right rear speaker
AV CABLE
(Not Supplied)
AUDIO IN
VIDEO IN
9
Basic Operation
DVD MPEG4 SVCD VCD CD MP3
1.Connect the unitto the power;
2.Open the unitand adjust the monitor to the best position forviewing.
3.Turn on the unit bysliding the ON/OFF switch to ON,the source menu will be displayed
on the screen:
Press[ ]to enter DVD mode or Media mode and press ENTER toconfirm.
when selecting media, ensure to insert USB or SD/MMC card properly.
4.Open the discdoor by sliding OPEN knob to left and inserta disc into the door with
the label side facing up.
5.Close the discdoor. The unit will loadthe disc and start playing.
6.Press[ ] once to stop playback; then press[ ]to resume playbackfrom the point
where you stopped;press[ ] twiceto stop playback completely.
7.when the playingis finished, please turn off thepower by sliding
ON/OFF switch toOFF.
During playback,press[ ]to pause;press it
again to resumeplayback.
When at pause,stop,orno disc,in about 3 minutes the
unit will beprotected;press any button to exit.
For some DVDdisc with Title or chaptermenu,press MENU
button to entermenu page,and use direction button to
select,Press ENTER toconfirm.
Pause during playback
DVD MPEG4 SVCD VCD CD MP3
Note
Play DVD discwith title or chapter menu
Play/pause
MenuTitle
Cursor button
ENTER
DVD
MEDIA
Playing disc ofDVD,MPE4,SVCD,VCD,CD,MP3
AV IN/OUT DC OUT
DC IN 9V

10
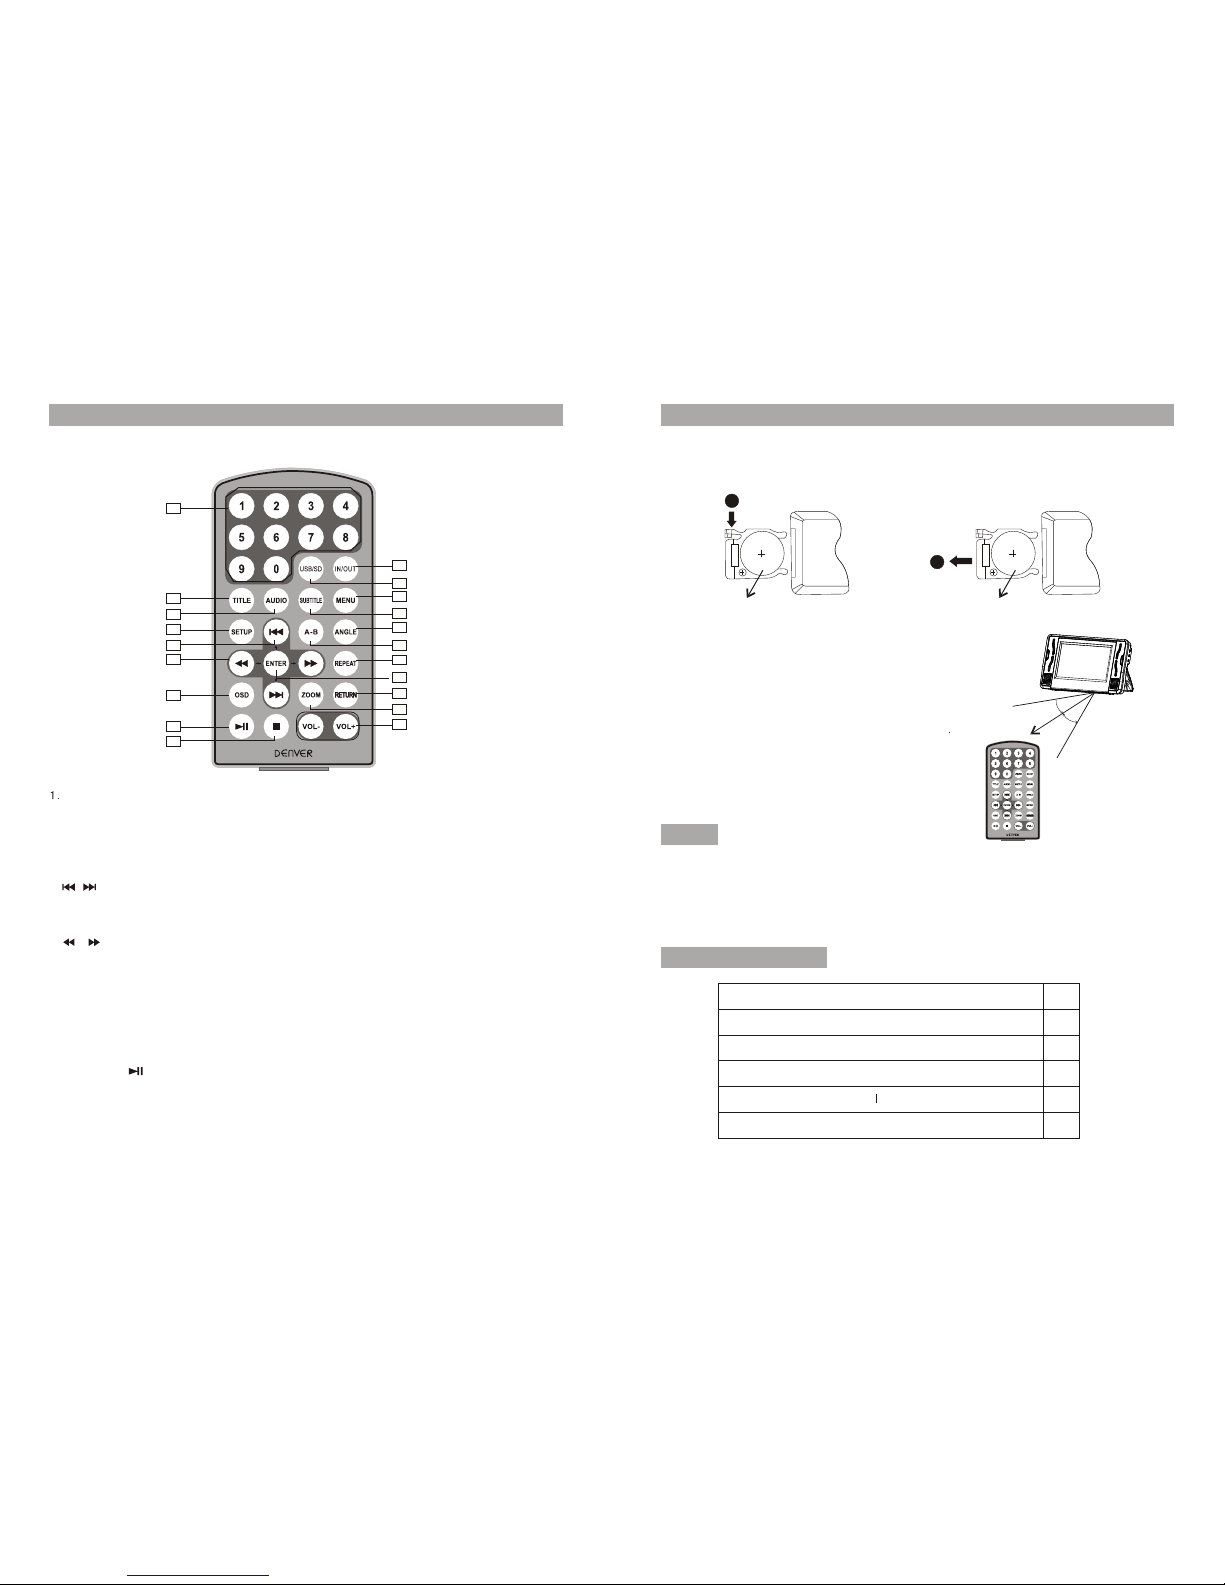
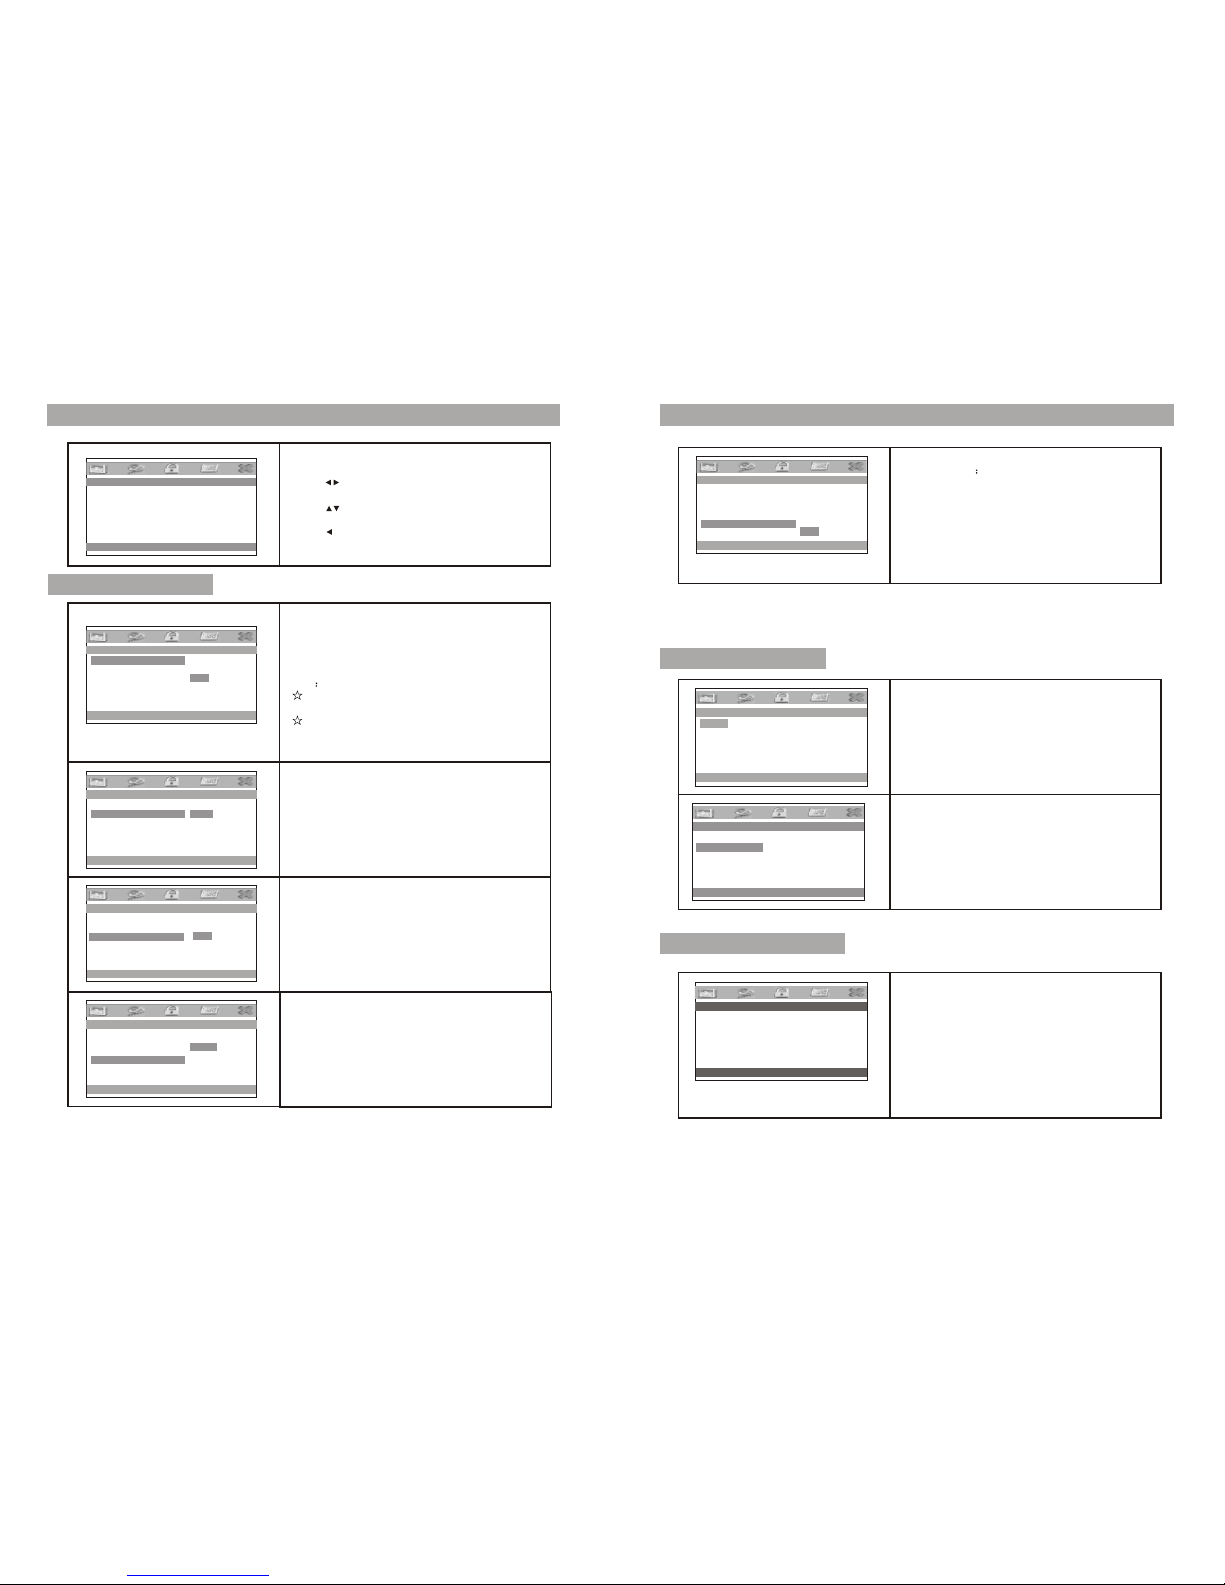
Fast forward and fast backward
Basic Operation
DVD MPEG4 SVCD VCD CD
When playing discof DVD,MPEG4,SVCD,VCD,CD,the unit can search forward or
backward.
1.Press[ ] ,theunit will search backward.Press it repeatedly,the unit will play
at 2,4,8,16,32 timesof speed.
2.press[ ],the unitsearch backward.Press itrepeatedly,
the unit willplay at 2,4,8,16,32 times of speed
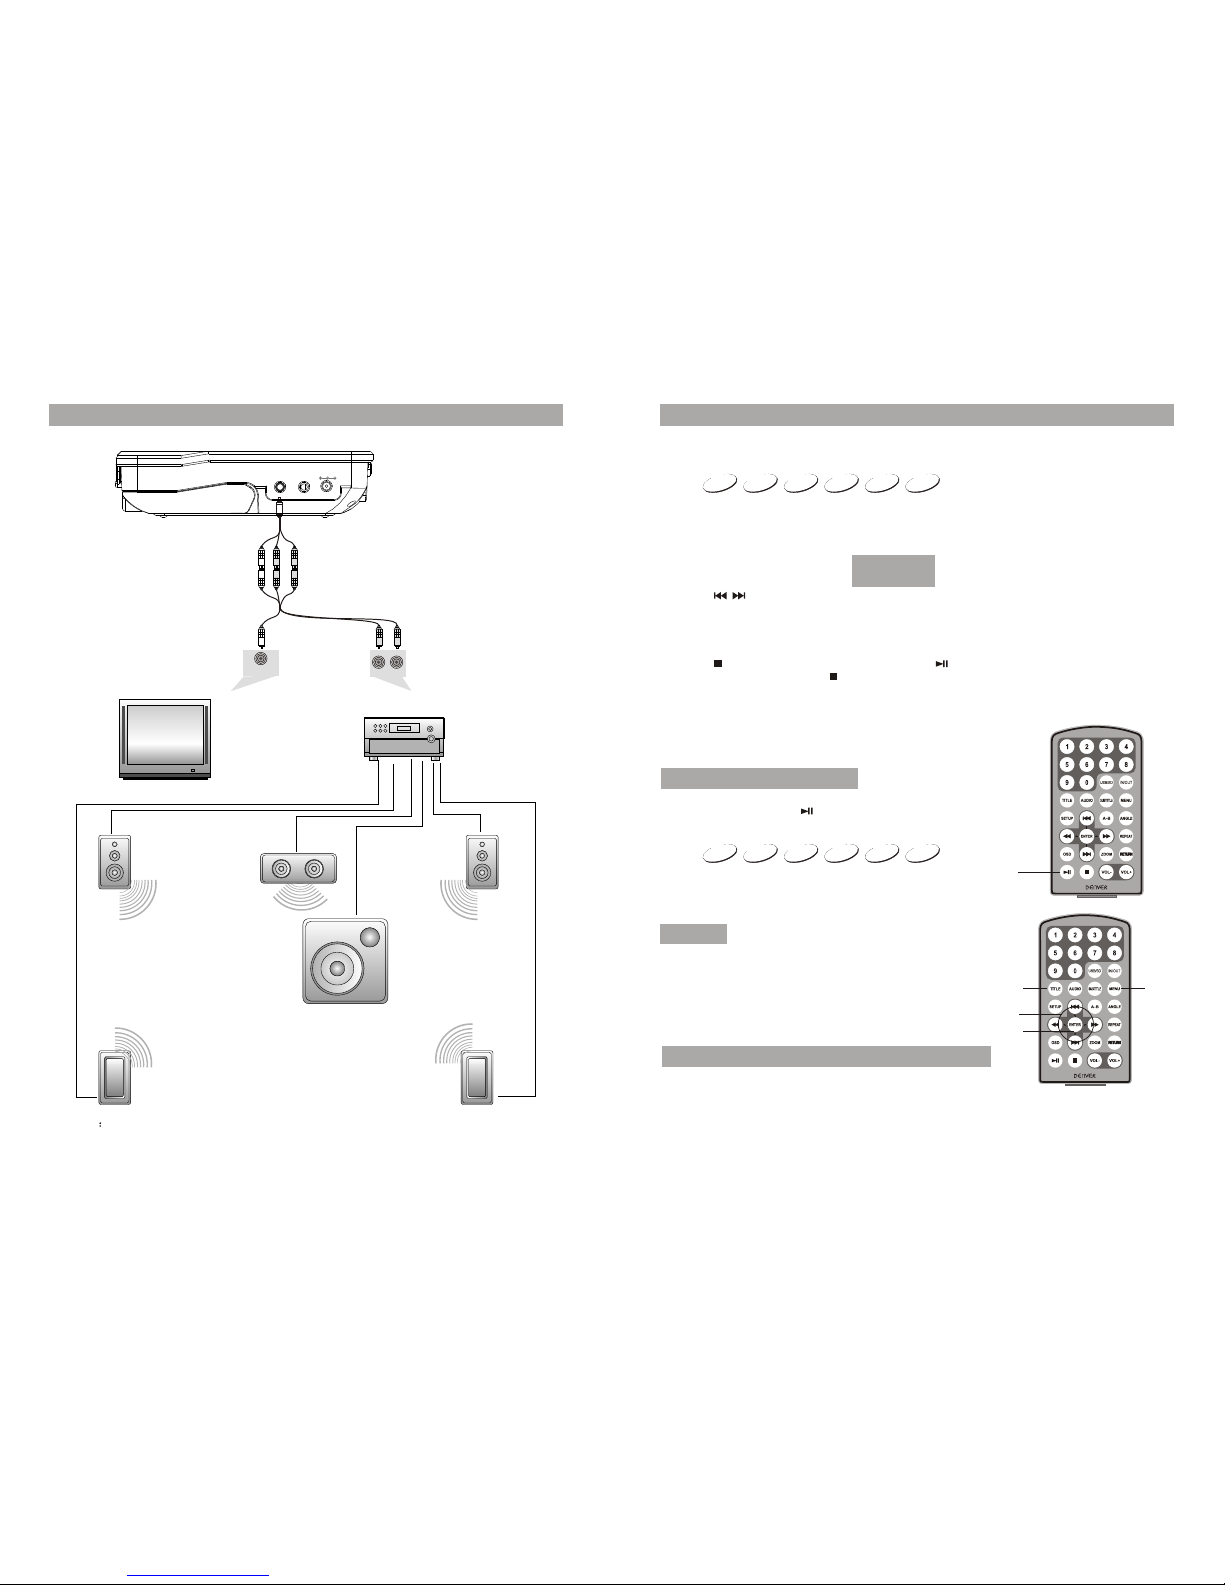
When playing discof DVD,MPEG4,SVCD,VCD,CD, user can repeat playing one
chapter, titleor the whole disc.
For DVD disc,press repeat button to repeat playing one Chapter,press it again to
repeat playing Title; press it third time to repeat playing the whole disc ;Press it again
to cancel repeatfunction.
2X 4X
8X16X32X
2X 4X
8X16X32X
Repeat playing
DVD MPEG43 SVCD VCD CD
Chapter Title All Repeat off
Repeat one Repeat folder
Track All
Repeat off
Repeat off
For CD/VCD disc,press Repeatrepeatedly to repeat thetrack and the wholedisc
For Mp3 disc,pressREPEAT to repeat playing current file;press it again to repeat
playing the folder;pressit third time to cancel repeat function.
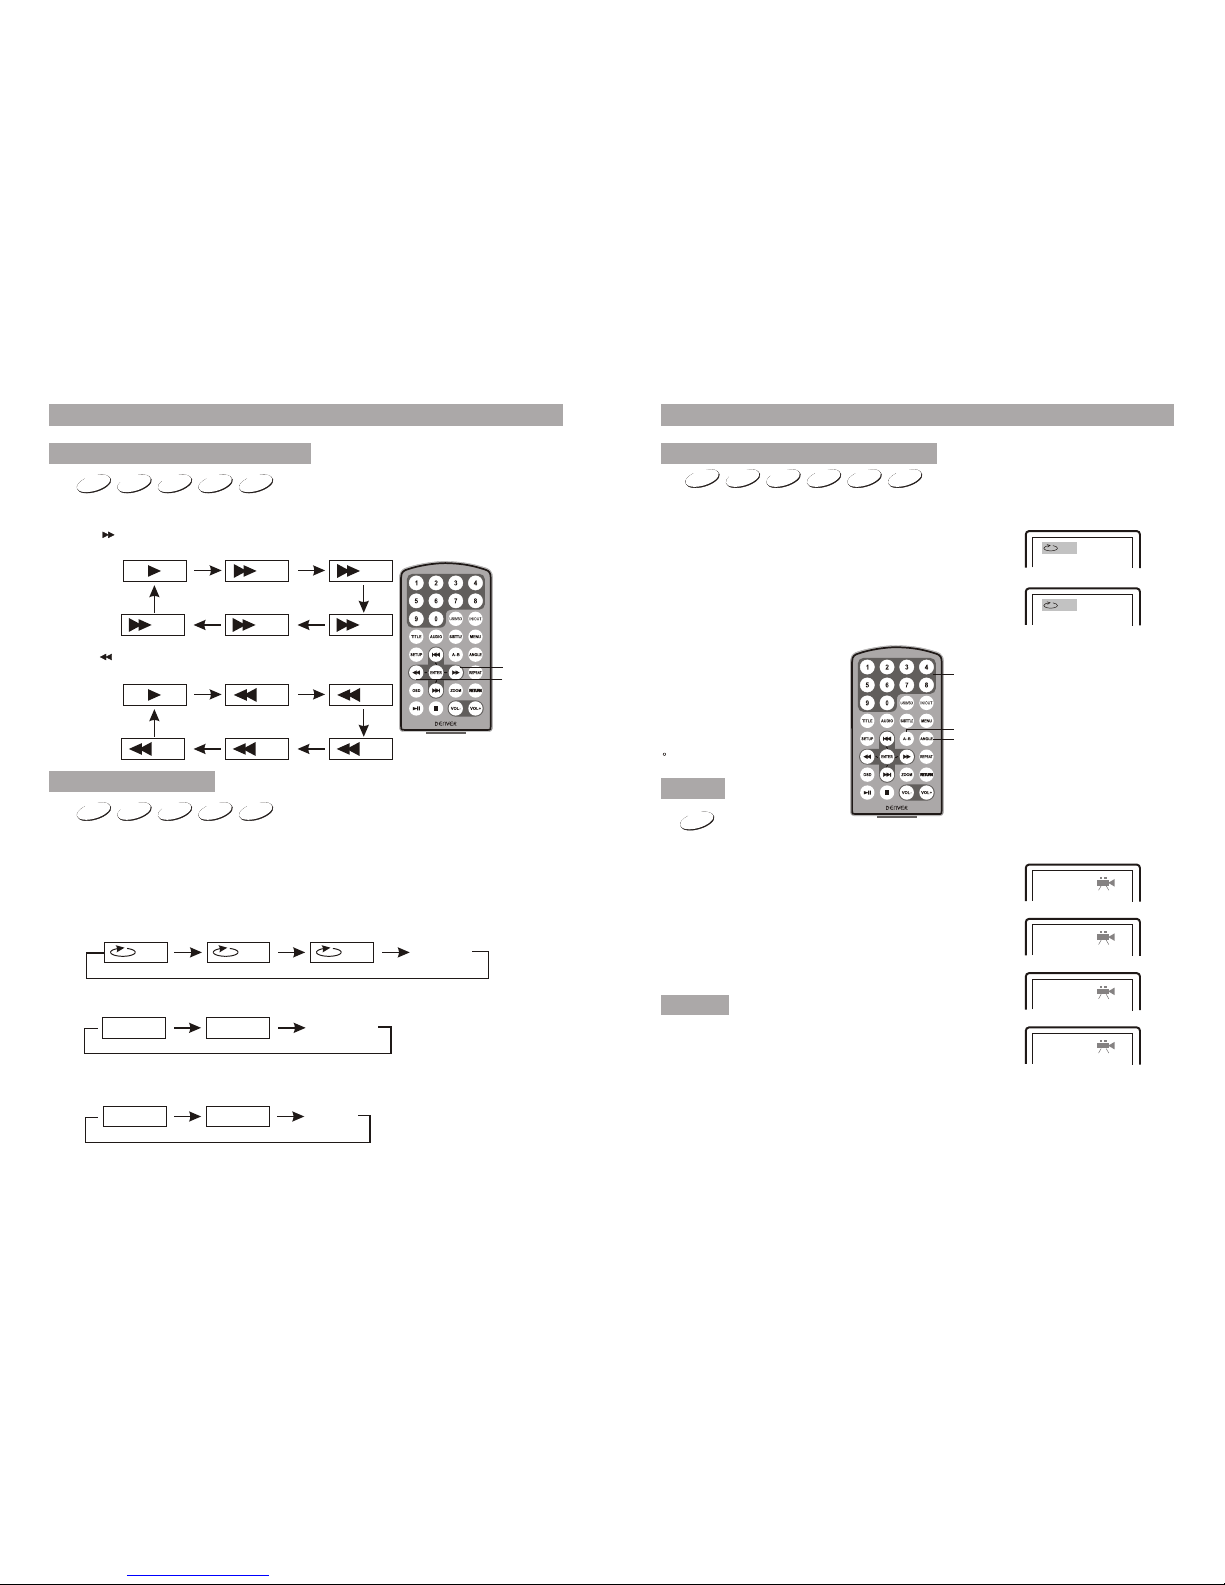
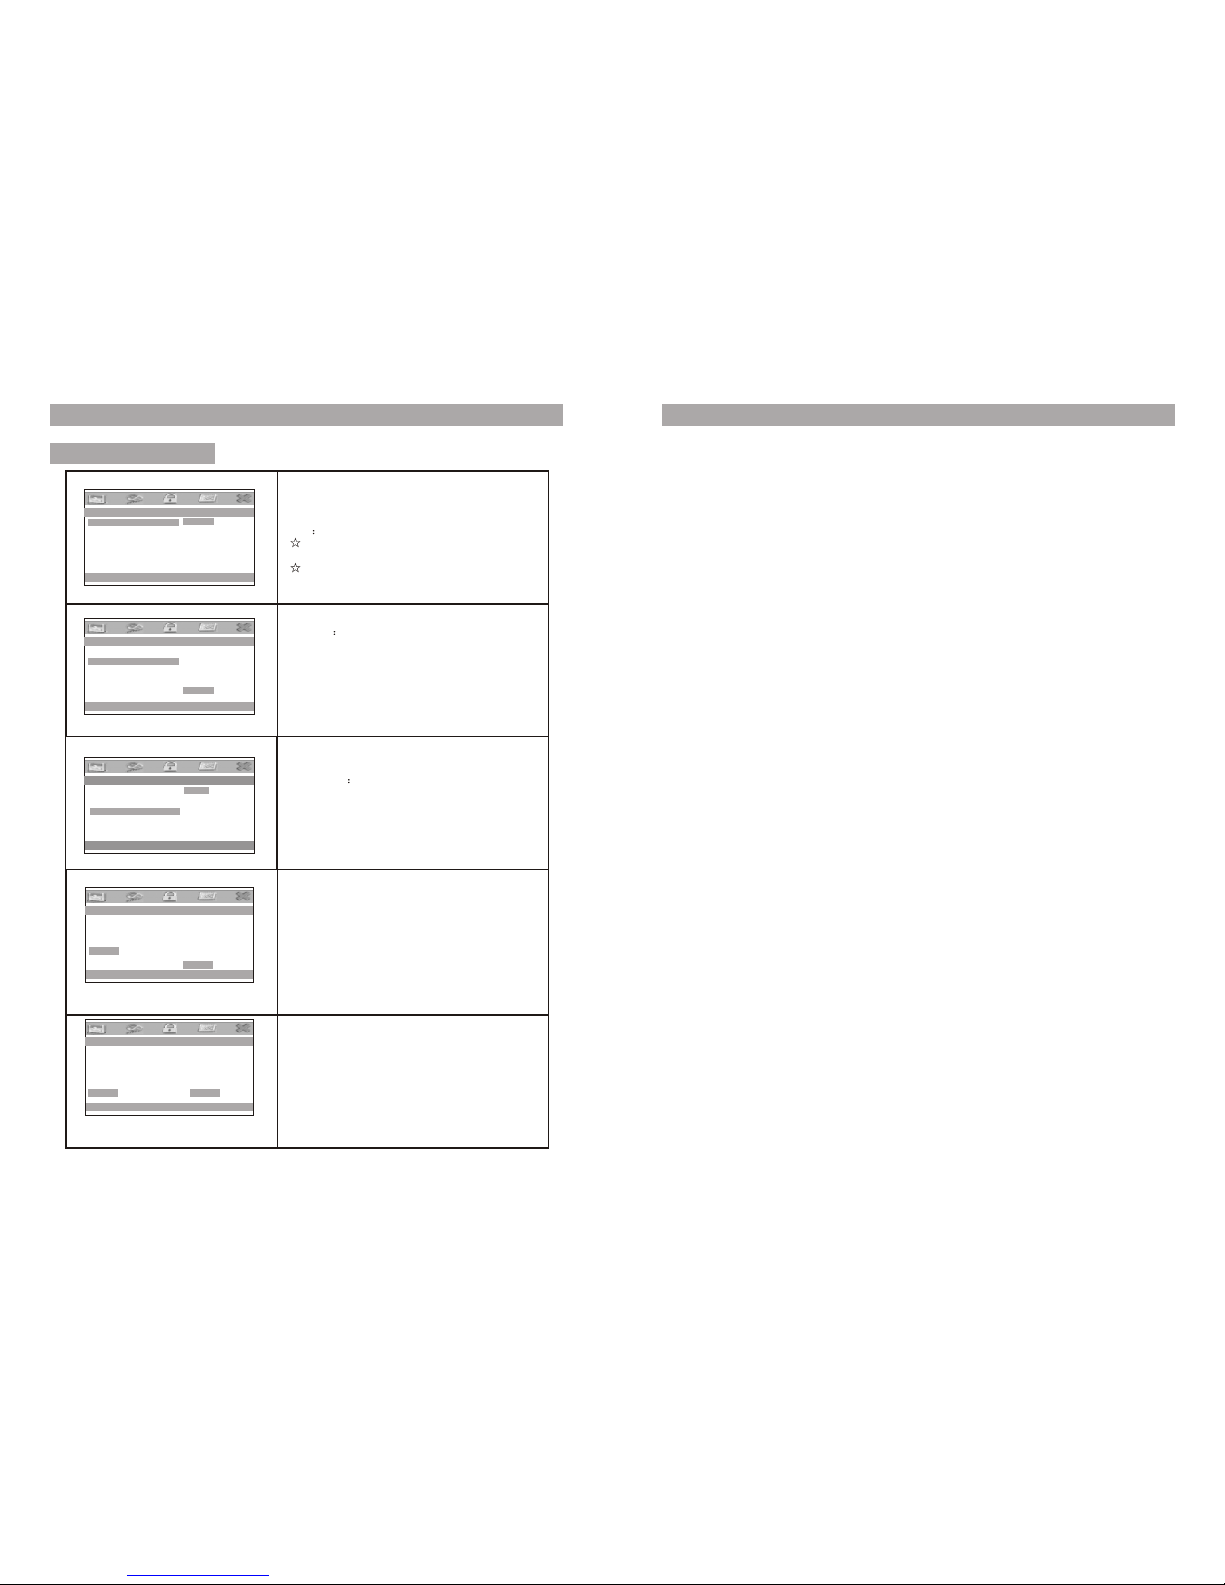
Repeat playing offavorite scene
Basic operation
DVD MPEG4 SVCD VCD CD MP3
When playing discof DVD,MPEG4,SVCD,VCD,CD,MP3,user can repeatedly
play a specificsection.
During playback,pressA-B button at a point A,then press
this button againin point B,the unit will automatically repeat
playing the partbetweenA-B
Press it thethird time,the unitwill return to normal playback
During playing DVDdisc with multi-angle,press “Angle”,
button,the followings willbe displayed on screen.
Press number buttonsto select the angle you desire
Toreturn to normal playing,please press “Angle”
the unit willplay the disc in the default angle.
A
AB
Angle
DVD
1 /4
Note
2 /4
3 /4
4 /4
11
The function isavailable only for discs with multi-angle.
A-B
Angle
Number
Search forward
Search backward

Zoom in/out
Basic operation
DVD MPEG4 SVCD VCD
When playing discof DVD ,MPEG4,SVCD,VCD,
user can zoomin or zoom out the image
During playback,press Zoombutton,the image will be
enlarged;press it againthe image will be enlarged again;
press it fourthtime,the image will zoom out,press it
repeatedly and the image will return to normal status.
When the imageis enlarged,user can press[ ]to move
the image.
2X
3X
4X
1 /2X
1 /3X
1 /4X
12 13
Basic operation
1 Put a JPGdisc into the tray,the unitwill start reading and play.
2 Press "MENU"to browseJPG file.
3 When viewing JPGfile,press[ ],pictures willbe displayed in thumbnail mode,
press[ ] orOK button to select one picture to view.
4 Press[ ] andOK button to select a JPG file from themenu.
5 Tobrowse JPG file selected,press[ ] orOK button.
6 Torotate the picture counter-clockwise,press[ ];Press[ ] to rotatethe picture
clockwise.
7 Press[ ] to reverse the picturehorizontally and press[ ] to reverse the picture
vertically.
8 Press OSD buttonwhen viewing pictures,you can select differentrefresh mode
as follows:
a.from top tobottom
b.from bottom totop
c.from left sideto right side
d.from right sideto left side
e.from left topto right bottom
f.from right topto left bottom
g.from left bottomto right top
h.from right bottomto left top
1.Place Mp3 discinto the disc door .
2.Press [ ] or OK button to select a Mp3 file;Press [ ] or OK button to
play the fileselected.
Playing JPG file
Play Mp3 file
00 36 03 43
Dir 001
\Ctyy\
......
Mp3 TRACK01
Mp3 TRACK02
Mp3 TRACK03
Mp3 TRACK04
Mp3 TRACK05
9.During viewing files“ ”may appearwhen press “Angle”or“Subtitle”or
“Audio”or“A-B”or“Title”etc;in this situationthese options areunavailable to
operate.
I.from horizontal centreto both sides
j.from vertical centreto both sides
k.from top andbottom to centre
l.from right andleft to centre
m.from four windowtop side to bottom side
n.from four windowleft side to right side
o.from four edgesto centre
Zoom in/out

System setup
--General Setup Page--
TV Display Wide
TV Type PAL
Angle Mark ON
OSD Lang ENG
Screen Saver O N
Last Memory ON
Go to Video Setup Page
14
--General Setup Page--
Go to Video Setup Page
TV Display Wide
TV Type PAL
Angle Mark ON
OSD Lang ENG
Screen Saver ON
Last Memory O N
Normal/PS
Normal/LB
Wide
General setup page
TV display:
Enter this option,usercan set screen display
format(Nomal/PS,Nomal/LS,Wide)
The default is"Wide"
Note
The function dependson the display ratio
with which theDVD disc is recorded.
Please choose “Wide(16:9)"when using a
16:9 wide screen TV set16:9
--General Setup Page--
Go to Video Setup Page
TV Display Wide
TV Type PAL
Angle MArk OFF
OSD Lang ENG
Screen Saver ON
Last Memory ON
PAL
NTSC
TV Type:
Enter this optionto select TVtype(PAL,NTSC)
The default isPAL.
--General Setup Page--
Go to Video Setup Page
TV Display Wide
TV Type PAL
Angle Mark OFF
OSD Lang ENG
Screen Saver ON
Last Memory ON
OFF
ON
Angle Mark:
When available,a camerasymbol will appear on
the screen whenvarious angles are available on
the DVD.Select "OFF"andthe camera symbol
will disappear
--Video Setup Page--
Go to Video Setup Page
TV Display Wide
TV Type PAL
Angle Mark ON
OSD Lang ENG
Screen Saver ON
Last Memory ON
English
Danish
German
Spanish
OSD Language:
In the optionuser can set OSD menu language
(English,German,Danish,Spanish).
The default:English
Press”Setup”button,the main menuwill be
displayed on thescreen
Press button tohighlight this item.
Press OK buttonto access.
Press button toselect the setting.
Press OK buttonto confirm your selection.
Press button to exit.
System Setup
Video setup page
Password Setup Page
15
--General Setup Page--
Go To Video Setup Page
TV Display Wide
TV Type PAL
Angle Mark OFF
OSD Lang ENG
Screen Saver ON
Last Memory ON
OFF
ON
Screen Saver
Select On toactivate the screen saver function,
when you activatethis function,a moving DVD
symbol appears onthe screen when the unit is
stopped or whenit shows a still picture for
several minutes.Select”Off”to cancel this
function.The default is“ON”
--Video Setup Page--
Quality
Panel Quality
Go to Video Setup Page
Enter this option,usercan adjust picture quality
of video output.Fourare three items available
to be adjusted:Brightness,contrast,Hue and
Saturation.For all theseFour item the default is
00
Enter this option,youcan set a password
(four numbers).All parentalControl features
are password protected.
The default is 8888.
--Password Setup Page--
Password
Go To Password Setup Page
--Video Setup Page--
Quality
Panel Quality
Go to Video Setup Page
Enter this option,usercan adjust picture quality
of unit screen.Thereare three items available to
be adjusted:Brightness,contrast,Hue and
Saturation.For all thesethree item the default
is 00

System Setup
16
Preference page
Audio:
Enter this option,user can select your preferred
audio language for DVDs,The default is English.
Note
The audio language depend on the material
on each disc.
User can also change the audio language
during playback by pressing theAudio button.
--Preference Page--
Load Factory Setting
Audio ENG
Subtitle OFF
Disc Menu ENG
Parental
Default Reset
--Preference Page--
Preference Audio Language
Audio ENG
Subtitle ENG
Disc Menu ENG
Parental
Default
English
Danish
German
Spanish
--Preference Page--
Preferred Subtitle Language
Audio ENG
Subtitle OFF
Disc Menu ENG
Parental
Default
English
Danish
German
Spanish
OFF
Subtitle
Select your preferredlanguage to show the
subtitles on thescreen.The subtitle languages
depend on theinformation available on each
disc,You canalso change thesubtitle language
during playback bypress the SUBTITLE button.
--Preference Page--
Preferred Menu Language
Audio ENG
Subtitle ENG
Disc Menu ENG
Parental
Default
English
Danish
German
Spanish
Disc Menu
This function allowsyou to choose the menu
language stored onthe disc.The default is
English.The function isonly available for DVD
--Preference Page--
Set Parental Control
Audio ENG
Subtitle ENG
Disc Menu ENG
Paretal
Default
1 KID SAFE
2 G
3 PG
4 PG 13
5 PGR
6 R
7 NC 17
8 ADULT
Parental:
Enter this option,usercan set child lock to
prevent children watchingsome unsuitable
content in DVDdisc.This function is
disc-dependent.The default is“Off”
Default:
Select this itemand press OK button to resetall
settings to theoriginal factory settings.
17
Specification
Compatible disc: DVD/VCD/CD/Mp3/MPEG4
Signal system: PAL/NTSC
Panel size: 7inch
Frequency response: 20Hz to 20 kHz
Video output: 1Vp-p/75 Ohm, unbalanced
Audio output:1.4Vrms/10kOhm
Audio S/N:Better than 80 dB
Dynamic range: Betterthan 85 dB
Laser: Semiconductor Laser, Wave Length: 650 nm/795nm
Power source: DC9-12V
Power consumption: 10W
Operating temperature: 5~40°C
Weight: 0.7kg
Dimensions (W xD x H): 255x 146 x 36mm
Note:
1.The quality andspeed for reading JPEG photos depend on the resolution and
compression ratio ofthe photos. Some JPEG photo maynot be played due to
the disc qualityand the formats.
2.Some DVD+R/RW,DVD-R/RW,CD-R/RW disc maynot be played due to the quality
on burning conditions.

Troubleshooting
18
Owing to continuousimprovement,noprior notice will be given regarding
changes on above featureand spec.
PROBLEM SOLUTION
No sound or
distorted sound
Make sure themachine is connected properly.
Make sure allcables are securely inserted into
the appropriate jacks.
The icon
appears on
screen
Can't advance
through a movie
Picture is distorted
No forward or
reverse scan
You can't advance throughthe opening credits
and warning informationthat appears at the
beginning of moviesbecause the disc is
programmed to prohibitthat action.
The feature oraction cannot be completed at
this time because:
1. The disc'ssoftware restricts it.
2. The disc'ssoftware doesn't support the
feature (e.g., angles)
3. The featureis not available at the moment.
4. You've requested a title or chapter number
that is out of range.
Some discs havesections that prohibit rapid
scanning or chapterskip;
If you tryto skip through the warning information
and credits atthe beginning of a movie, you
won't be ableto. This part of the movie is often
programmed to prohibitskipping through it.
The disc mightbe damaged. Try another disc;
It is normalfor some distortion to appear during
forward or reversescan.
Instructions on environmentprotection
www.denver-electronics.com
Do not disposeof this product in the usual household garbage at
the end ofits lifecycle; hand it over at a collection pointfor the
recycling of electricaland electronic appliances. The symbol on
the product, theinstructions for use or the packing will inform about
the methods fordisposal.
The materials arerecyclable as mentioned in this marking. By recycling,
material recycl ingor other forms of re-utilization of old appliances, you
are making animportant contribution to protect our environment.
Please inquire atthe community administration for the authorized
disposal location .
Table of contents
Other Denver Portable DVD Player manuals

Denver
Denver MT-1150T2H User manual

Denver
Denver MT-738 User manual

Denver
Denver MT-986NB User manual

Denver
Denver DFT-714M User manual

Denver
Denver MT-902 User manual

Denver
Denver MT-910 User manual

Denver
Denver MTW-727 TWIN User manual

Denver
Denver MT-768 User manual

Denver
Denver MT-783 User manual

Denver
Denver MT-752 User manual

Denver
Denver MTW-756TWINNB User manual

Denver
Denver MTW-1098 User manual

Denver
Denver MTW-747 TWIN User manual

Denver
Denver MT-772DVBT User manual

Denver
Denver MT-979 User manual

Denver
Denver MT-776 WHITE User manual

Denver
Denver MT-979DVBT User manual

Denver
Denver MT-980T2H User manual

Denver
Denver MT-779 User manual

Denver
Denver MT-732B User manual