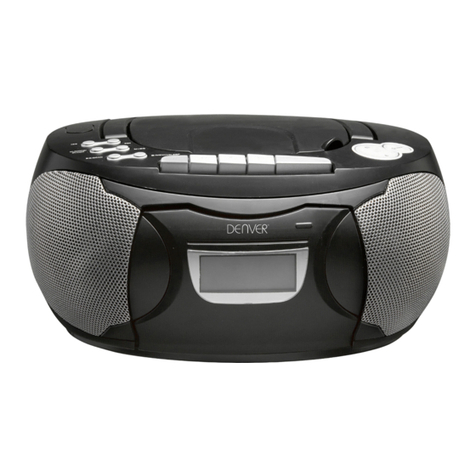
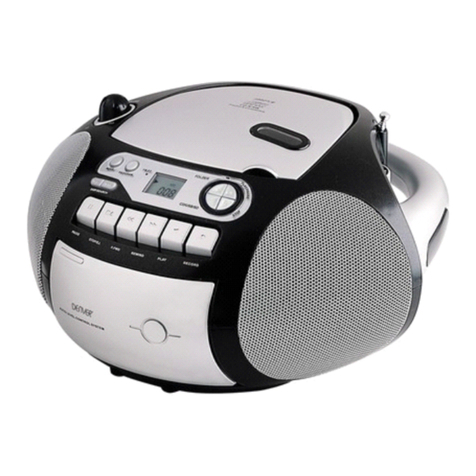
Denver TCD-32C User manual

INSTRUCTION MANUAL
TCD - 32C

IMPORTANT SAFETY INSTRUCTIONS
1. Read these instructions – All the safety and operating instructions should be read before this
product is operated.
2. Keep these instructions – The safety and operating instructions should be retained for future
reference.
3. Heed all warnings – All warnings on the appliance and in the operating instructions should be
adhered to.
4. Follow all instructions – All operating and use instructions should be followed.
5. Do not use this apparatus near water – The appliance should not be used near water or
moisture – for example, in a wet basement or near a swimming pool, and the like.
6. Clean only with dry cloth.
7. Do not block any ventilation openings. Install in accordance with the manufacture’s instructions.
8. Do not install near any heat sources such as radiators, heat registers, stoves, or other
apparatus (including amplifiers) that produce heat.
9. Do not defeat the safety purpose of the polarized or grounding plug. A polarized plug has two
blades with one wider than the other. A grounding plug has two blades and a third grounding
prong. The wide blade or the third prong is provided for your safety. If the provided plug does
not fit into your outlet, consult an electrician for replacement of the obsolete outlet.
10. Protect the power cord from being walked on or pinched particularly at the plugs, convenience
receptacles, and at the point where they exit from the apparatus.
11. Only use attachments/accessories specified by the manufacturer.
12. Use only with the cart, stand, tripod, bracket, or table specified by the
manufacturer, or sold with the apparatus. When a cart or rack is used, use
caution when moving the cart/apparatus combination to avoid injury from tip-over.
13. Unplug the apparatus during lightning storms or when unused for long periods of time.
14. Refer all servicing to qualified personnel. Servicing is required when the apparatus has been
damaged in any way, such as power supply cord or plug is damaged, liquid has been spilled
or objects have fallen into the apparatus has been exposed to rain or moisture, does not
operate normally, or has been dropped.
15.Please keep the unit in a good ventilation environment.
16.CAUTION: These servicing instructions are for use by qualified service personnel only. To
reduce the risk of electric shock, do not perform any servicing other than that contained in
the operating instructions unless you are qualified to do so.
17. WARNING: Please use and install the exclusive supply apparatus only according to
manufacturer’s instruction.
18. WARNING: Please refer the information on exterior bottom enclosure for electrical and safety
information before installing or operating the apparatus.
19. WARNING: To reduce the risk of fire or electric shock, do not expose theis apparatus to rain
or moisture. The apparatus shall not be exposed to dripping or splashing and that no objects
filled with liquids,such as vases, shall not be placed on apparatas.
20. WARNING: For the terminals marked with symbol of “ “ may be of sufficient magnitude to
constitute a risk ot electric shock. The external wiring connected to the terminals requires
installation by an instructed person or the used of ready- made leads or cords.
21. CAUTION: Danger of explosion if battery is incorrectly replaced. Replace only with the same
or equivalent type.
22. WARNING: To prevent injury, this apparatus must be securely attached to the floor/wall in
accordance with the installation instruction.
23. WARNING: The battery (battery or batteries or battery pack) shall not be exposed to
excessive heat such as sunshine, fire or the like.
24. WARNING: The CRT in this apparatus employs a protective film on the face. This film must not
be removed as it serves a safety function and removal will increase the risk of serious injury.
25. WARNING: Excessive sound pressure from earphones and headphones can cause hearing
loss.
26. -- WARNING: The mains plug/appliance coupler/direct plug-in adapter is used as
disconnect device, the disconnect device shall remain readily operable.
27. WARNING: Only use attachments/accessories specified or provided by the manufacturer
(such as supply adapter, battery etc).
28. This apparatus is for commercial and professional use only.
29. This is CLASS II apparatus with double insulation, and no protective earth provided.
30.
- This lightning flash with arrowhead symbol within an equilateral triangle is intended to alert the
user to the presence of non-insulated “dangerous voltage” within the product’s enclosure that
may be of sufficient magnitude to constitute a risk of electric shock.
- Warning: To reduce the risk of electric shock, do not remove cover (or back) as there are no
user-serviceable parts inside. Refer servicing to qualified personnel.
- The exclamation point within an equilateral triangle is intended to alert the user to the presence
of important operating and maintenance instructions in the literature accompanying the appliance.
31. Invisible laser radiation when open and interlocks defeated. Avoid exposure to beam of
laser.
32.Minimum distances of 5 cm around the apparatus for sufficient ventilations.
33.Do not install this equipment in a confined space such as a book case or similar unit. The
ventilation should not be impeded by covering the ventilation openings with items such as
newspaper, table-cloths, curtains etc.
34.No naked flame sources, such as lighted candles, should be placed on the apparatus.
35. Attention should be drawn to environmental aspects of battery disposal.
CAUTION
RISK OF ELECTRIC SHOCK
DO NOT OPEN
23

1
4
1
English CONTROLS POWER SUPPLY
Power Supply
Top and front panels (See 1. )
Whenever convenient, use the power supply if you
want to conserve battery life. Make sure you remove
the plug from the set and wall outlet before inserting
batteries.
Batteries ( not included)
open the battery compartment and insert eight
batteries, type LR-14,UM-2 or C-cells, (preferably
alkaline) with the correct polarity as indicated by the
“ + “and “-“. symbols inside the compartment.
Batteries contain chemical substances, so they
should be disposed of properly.
Incorrect use of batteries can cause electrolyte
leakage and will corrode the compartment or cause
the batteries to burst. Therefore:
. Do not mix battery types: e.g. alkaline with carbon
zinc. Only use batteries of the same type for the
set.
. When inserting new batteries, do not try to mix old
batteries with the new ones.
. Remove the batteries if the set is not to be used
for a long time.
Using AC Power
1 . Check if the power voltage, as shown on the type
plate located on the bottom of the set, corresponds
to your local AC power supply. If it does not,
consult your dealer or service centre.
2 . Connect the power cord to the AC MAINS inlet
and the wall outlet. The power supply is now
connected and ready for use.
3 . To switch off completely, unplug the power cord
from the wall outlet.
Unplug the power cord from the wall outlet to
protect your set during heavy thunderstorms.
8 x R14 UM-2 C-CELL••
1. STEREO HEADPHONE JACK
- 3.5mm ster eo headphone jack
2. VOLUME
- adjusts volume level.
3. FUNCTION SELECTOR
- selects the function CD, TAPE(OFF) or FM
4. DBBS (Dynamic Bass Boost)
- enhances bass response.
5. CASSETTE RECORDER KEYS
RECORD - starts recording.
PLAY - starts playback.
F.FWD/REW - fast winds / rewinds the tape
STOP/EJECT - stops the tape;
- opens the cassette compartment.
PAUSE - interrupts recording or playback.
. CD DOOR
- open or close the CD door.
7. HANDLE
- carrying the device
8. TUNING CONTROL
- select the FM station.
9. DISPLAY
- shows the CD functions.
10. PROG.
CD - programs and reviews programmed
track numbers.
11. REREAT
- repeats a track/CD.
12. SKIP / , /
CD: - skips track backwards or forward.
13. STOP
- stops CD playback,
- Delete program playback.
14. PLAY/ PAUSE
- starts or pauses CD play.
6
Back Panel (See 1 )
15 TELESCOPIC ANTENNA
- to improve FM reception.
16. BATTERY DOOR
- to open battery compartment
17. AC MAINS
- inlet for power cord
.
5
2345678
9
10 11 12 13 14
15 16 17

Switching on/off: Save energy
Whether you are using mains or battery supply,
toavoid unnecessary energy consumption always
adjust the source selector to off.
General operation
1 . To select your sound source adjust the source
selector to CD/ TAPE(OFF)/FM
2 . Adjust the sound with the VOLUME controls.
3. To switch off the set, adjust the source selector
to off position.
RADIO
Radio reception
1. Slide the FUNCTION selector to FM.
2. Rotate the TUNING control to find the
desired stations.
3. When you have finished listening, slide the
FUNCTION selector to the OFF position.
BASIC FUNCTIONS RADIO
67
–For FM, pull out the telescopic antenna. Incline and
turn the antenna. Reduce its length if the signal is
too strong (very close to a transmitter).
PLAYING A CASSETTE
1. Select TAPE source.
To interrupt playback, press . To resume, press the key again.
2. Press STOP •EJECT to open the cassette door.
3. Insert a recorded cassette and close the cassette door.
4. Press PLAY to start playback.
5. PAUSE
By pressing6.
7. To stop the tape, press STOP •EJECT.
•The keys are automatically released at the end of the tape, except if PAUSE has been activated.
or on the set, fast winding of the tape is possible in both directions.
Recording
GENERAL INFORMATION ON RECORDING
•Recording is permissible in so far as copyright or other rights ofthird parties are not infringed.
•This deck is not suitable for recording on CHROME (IEC II ) or METAL (IEC IV ) type cassettes. For recording,
use NORMAL type cassettes (IEC I ) on which the tabs have not been broken.
• The best recording level is set automatically. Altering the VOL and DBB controls will not affect the recording
in progress.
• At the very beginning and end of the tape, no recording will take place during the 7 seconds, when the
leader tape passes the recorder heads.
• To protect a tape from accidental erasure, have the tape i
nfront of you and break out the left tab. Recording on this
side is no longer possible. To record over this side again,
cover the tabs with a piece of adhesive tape.
Recording from the radio
1. Tune to the desired radio station (See TUNING TO RADIO STATIONS ).
2. Press STOP • EJECT to open the cassette door.
3. Insert a suitable cassette into the cassette deck and close the cassette door.
4. Press RECORD to start recording.
5. For brief interruptions, press PAUSE . To resume recording, press PAUSE again.
6. To stop recording, pressSTOP • EJECT.
MAINTENANCE
Tape deck maintenance
To ensure quality recording and playback of the tape
deck, clean parts A,B and C shown in the diagram
below, after approx. 50 hours of operation, or on
average once a month. Use a cotton bud slightly
moistened with alcohol or a special head cleaning fluid to clean the deck.
1. Open the cassette door by pressing STOP • EJECT.
2. Press and clean the rubber pressure rollers C .
3. Press PAUSE and clean the magnetic heads A and also the Capstan B .
4. After cleaning, press STOP • EJECT.
Note: Cleaning of the heads can also be done by playing a cleaning cassette through once.
AABC

Precautions & General Maintenance
Place the set on a hard and flat surface so that the
system does not tilt.
Do not expose the set, batteries or CDs to
humidity,rain,sand or excessive heat caused by
heating equipment or direct sunlight.
Do not cover the set. Adequate ventilation
with a minimum gap of 6 inches between the
ventilation holes and surrounding surfaces is
necessary to prevent heat build-up.
The mechanical parts of the set contain self-
lubricating bearings and must not be oiled
or lubricated.
To clean the set, use a soft dry cloth. Do not
use any cleaning agents containing alcohol,
ammonia,benzene or abrasives as these may
harm the housing.
The lens of the CD player should never betouched!
Sudden changes in the surrounding temperature can cause condensation to form and the lens of your CD
player to cloud over. Playing a CD is then not possible. Do not attempt to clean the lens but leave the set in a
warm environment until the moisture evaporates.
Always close the CD door to keep the CD compartment dust-free. To clean,dust the compartment
with a soft dry cloth.
To clean the CD, wipe in a straight line from the centre towards the edge using a soft, lint-free cloth. Do not
use cleaning agents as they may damage the disc.
Never write on a CD or attach any stickers to it.
CD player and CD handling
X
MAINTENANCE & SAFETY
89
CD PELAYER
Playing a CD
This CD-player can play Audio Discs, CD-R
andCD-Rewritable.Do not try to playCD-ROM,
CDi, VCD, DVD or computer CD.
1. Adjust the source selector to CD.
Display: shows “cd” Briefly.
2. To open the CD door, press the CD door at
the edge marked OPEN.
3. Insert a CD , CD-R or CD-RW with the
printed side facing up and press the CD door
gently close.
4. Press PLAY/PAUSE on the set to start play
back.
5. To pause playback press PLAY / PAUSE to
resume, press PLAY/PAUSE again.
6. To stop CD playback, press STOP
.
Note: CD play will also stop when:
- you open the CD compartment;
- you select RADIO sound source;
- the CD has reached to the end.
During playback you can use or to select a
particular track.
If you have selected a track number in the stop
or pause position , press PLAY/PAUSE to
start playback.
Press once briefly for the next track, or
press repeatedly until the desired track number
appears in the display.
Press once briefly to return to the beginning
of a current track.
Press more than once briefly for a previous
track.
Different play modes:
REPEAT
- plays the current track continuously
REPEAT ALL
- plays the entire CD continuously
Programming track numbers
You may store up to20tracks in the desired
sequence . If you like, store any track more
than once.
1. In the PROG mode, press or for your
desired track.
2. When your chosen track number appears,
press PROG once to store the track.the
display shows prog and prog brieflyfollowed
by your selected track number.
3. Repeat steps 1to 2 to select and store all
desired tracks in this way.
4. To play your program, press PLAY/PAUSE .
Reviewing your set program
After playing at least one programmed track,
press or , the display will show your
stored track numbers
Erasing a program
You can erase the contents of the memory by:
- opening the CD door;
- slide the function selector to OFF source.
CD Player

Specifications :
GENERAL
Power supply : AC 230V~50Hz
Power consumption : 14 Watts
Dimensions of unit : 230(W) X 231 (H) X161 (L) mm.
Frequency range : FM 88 - 108 MHz.
AUDIO SECTION
Output Power (RMS) : 2 x 1W R.M.S.
Speaker : 8 Ohms
Specification subjects to be changed without notice.
SPECIFICATION
10 11
– Problem
• Solution
No sound /power
– Volume not adjusted
• Adjust the VOLUME
– power cord not securely connected
• Connect the AC power cord properly
– Batteries dead/ incorrectly inserted
• Insert (fresh) batteries correctly
Display does not function properly/
No reaction to operation of any of
the controls
– Electrostatic discharge
• Switch off and unplug the set. Reconnect after a
few seconds
no disc indication
– No CD inserted
• Insert a CD, CD-R or CD-RW
– CD badly scratched or dirty
• Replace/ clean CD, see Maintenance
– Laser lens steamed up
• Wait until lens has cleared
– CD-R is blank or the disc is not finalized
•Use a finalized CD-R
CD playback does not work
– CD badly scratched/ dirty
• Replace/ clean CD (see maintenance)
– Laser lens steamed up
• Wait until lens has adjusted to room temperature
The CD skips tracks
– CD damaged or dirty
• Replace or clean CD
– Program is active
• Quit Program mode(s)
Troubleshooting
If a fault occurs, first check the points listed below before taking the set for repair.
Do not open the set as there is a risk of electric shock.
If you are unable to remedy a problem by following these hints, consult your dealer or service center.
WARNING: Under no circumstances should you try to repair the set yourself, as this will invalidate the
warranty.
Environmental information
We have done our best to reduce the packaging and make it easy to separate into 3 materials: cardboard,
paper pulp and expandable polyethylene.
Your set consists of materials which can be recycled if disassembled by a specialized company. Please observe
the local regulations regarding the disposal of packaging, dead batteries and old equipment..
Troubleshooting
Poor cassette sound quality
– Dust and dirt on the heads, etc.
• Clean deck parts etc., see Maintenance
– Use of incompatible cassette types (METAL
or CHROME)
• Only use NORMAL (IEC
Recording does not work
– Cassette tab(s) may be broken
• Apply a piece of adhesive tape over the
missing tab space
I) for recording
Do not dispose of this product in the usual household garbage at the end of
its lifecycle; hand it over at a collection point for the recycling of electrical
and electronic appliances. The symbol on the product, the instructions for
use or the packing will inform about the metthods for disposal.
The materials are recyclable as mentioned in this marking. By recycling,
material recycling or other forms of re-utilization of old appliances, you are
making an important contribution to protect our environment.
Please inquire at the community administration for the authorized
disposal location.
www.denver-electronics.com
COPY RIGHT DENVER ELECTRONICS A/S
ALL RIGHTS RESERVED
Do not dispose of this product in the usual household garbage at the end of
its lifecycle; hand it over at a collection point for the recycling of electrical
and electronic appliances. The symbol on the product, the instructions for
use or the packing will inform about the metthods for disposal.
The materials are recyclable as mentioned in this marking. By recycling,
material recycling or other forms of re-utilization of old appliances, you are
making an important contribution to protect our environment.
Please inquire at the community administration for the authorized
disposal location.

SUBJECT TO MODIFICATION WITHOUT NOTICE!
Other manuals for TCD-32C
1
Table of contents
Other Denver Portable Stereo System manuals

Denver
Denver TDC-250 User manual

Denver
Denver TCD-50 User manual

Denver
Denver TCS-86 User manual

Denver
Denver TCD-85 User manual

Denver
Denver TCD-31 User manual

Denver
Denver TCD-47 User manual

Denver
Denver TC-19C User manual

Denver
Denver TCD-54 User manual

Denver
Denver TCD-53 User manual

Denver
Denver TCD-33C User manual

Denver
Denver TC-17C User manual

Denver
Denver TCD-29 User manual

Denver
Denver TCU-209 User manual

Denver
Denver TCL-212BT User manual

Denver
Denver TCD-56 User manual

Denver
Denver TDA-60 User manual

Denver
Denver TCL-212BTPINK User manual

Denver
Denver TC-18C User manual

Denver
Denver TDC-250 User manual

Denver
Denver TCP-35 User manual