DER EE DE-33 User manual

HCA003300-00020R
ELECTRICAL INSTRUMENT CO., LTD.
7F-2, NO.351, SEC.2, CHUNG SHAN ROAD.,
CHUNG HO CITY, TAIPEI HSIEN, TAIWAN
TEL : 886-2-2226-6789(REP.) FAX : 886-2-2226-7979
E-mail: deree@ms21.hinet.net
http://www.deree.com.tw
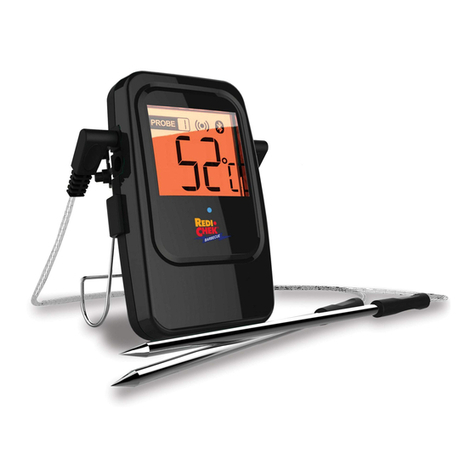
Thanks for purchasing K-type Wireless Thermometer DE-33.
Please read the operation manual carefully before using and
keep it properly for contingent use and reference. Thanks!
Model No. DE-33
Instruction Manual
K-Type Wireless Thermometer

...........................................01~02
..........03~07
.............03
.................................04
..... ...05~07
..... ..... ...... . .... . . .... . . .... . 08~13
..............................08~11
......................09~11
.............................12~13
.........................14~25
..................14~15
......................16
.........................17~19
..........................20
.................21
.............................22
...23
......................24
.......................................25
..........26~28
Catalogue
Ⅰ. Features
Ⅱ. Introduction of main unit and sensor unit
(A). Main unit – appearance and functions
(B). Main unit – display
(C). Sensor unit – appearance and placing
Ⅲ. Power on process
(A). Battery installation
(B). Set up I.D. (identity code)
(C). Set up time (clock)
Ⅳ. Application of thermometer
(A). Function and operation of key
(B). Measurement of temperature
(C). Set up alarm function
(D). Read temperature record
(E). Search temperature of sensor unit
(F). Max / Min temperature
(G). Low battery symbol of main unit and sensor unit
(H). Trouble shooting of main unit
(I). Function table
Ⅴ. Specification of main unit and sensor unit

● Main unit with big LCD display and easy for read.
● Simultaneous display 2 sets of temperature measured
through sensor unit.
● Temperature data detected by sensor unit transmits to main
unit placed at remote position from sensor unit (maximum
distance is around 100M in open space). The thermometer is
suitable to apply indoor or outdoor use by user’s need.
● 24 hours clock.
● Auto data logging for 12 hours with 24 sets data.
Temperature and clock time are recorded every 30 minutes
on the hour.
● Main unit automatically records and refreshes MAX
(maximum) and MIN (minimum) temperatures with real time
detected by sensor unit.
K-Type WIREL ESS THER MOMETER
DE-3 3R
MODE
OC LGR CALL
SEARCH MAX / MI N
RESET PUSH 2sec
DE -3 3T
K-Type
WIRELESS
THERMOMETER
TRANSMITTER
-01- -02-
Ⅰ. Features ● Sensor unit is equipped with 2 thermocouples to detecting the
temperature change of environment, water or soil at the same
time.
● Temperature alarm function to alert the temperature is
beyond the range set by the user.
● K-type temperature range: - 200°C ~ +1370°C
● Main unit and sensor unit each has 8 identity codes (1 ~ 8
and I.D. for short). The I.D. provides the protection from
interference of transmission where have two sets or more
thermometer using at the same time in the same radius area.
● Audible alarm of main unit alerts 4 possible status –
1.Battery power is low at main unit or sensor unit.
2.Temperature is over the range set by the user.
3.Transmission is disconnected.
4.In measuring mode but main unit displays “no”.
CH1 temperature
(CH1 = A plug of
sensor unit)
CH2 temperature
(CH2 = B plug of
sensor unit)
K-type thermocouple
Clock
main unit
sensor unit

K-Type WIREL ESS THER MOMETER
DE-3 3R
MODE
OC LGR CALL
SEARCH MAX / MI N
RESET PUSH 2sec
① ② ③ ④
②
③
①OC
MODE
LGR CALL
SEARCH
-03-
MAX / MIN
RESET
PUSH 2sec
⑤
⑥
⑦
⑧
⑨
⑩
⑪
⑫
⑬
⑭
⑮
⑯
CH1
⑤
⑥
⑦
⑧
⑨
⑩
⑪
⑫
⑬
⑭
⑮
⑯
⑰
⑱
⑳
⑱
⑲
⑭
⑮
Ⅱ. Introduction of main unit and sensor unit
(A) Main unit – appearance and functions
(B) Main unit – display
MODE key: (function change key)
a. CH1 & CH2 in measuring mode.
b. Alarm set for CH1 & CH2 (initial set is 180°C at manufactory)
c. Call out temperature data from memory.
d. Clock setting.
◎ Refer to page 14 ◎
SEARCH key:
a. Search the transmission signal from sensor unit and display
data at main unit.
b. Push SEARH key to search the signal from sensor unit if no
signal or interruption. Each search is lasting 5 minutes.
◎ Refer to page 21 ◎
MAX/MIN key: (maximum / minimum temperature recording)
a. Simultaneously record maximum (MAX) & minimum (MIN)
temperature from CH1 & CH2.
b. Each memory comes with real time.
c. Shift reading MAX and MIN value at CH1 & CH2
◎ Refer to page 22 ◎
RS-232 socket
(equipped PC use
RS-232 adaptor
socket) – optional
a. Connect RS-232 cable to link with PC and recording
the temperature change and form in graphic.
b. Refer to Help in PC software operation for relevant
operation.
④
● Main unit – key function
hanger hole beeper hole
battery door
stand rack
Attention: do not attempt to
loose those 4 screws. ● Description of symbol on display:
Upper layer : display CHI temperature and functions from sensor unit
Middle layer: display CH2 temperature and functions from sensor unit
Bottom layer: display clock (24 hours)
Total 8 I.D. codes for set (from 1 to 8)
Antenna symbol in moving means main unit is searching the
transmission signal from sensor unit
Battery power at sensor unit is low and need to replace with new
batteries
Recording symbol to indicate 24 records of temperature change at
CH1 in past 12 hours.
Shift reading MAX & MIN temperature value measured at CH1
Display CH1 temperature
Indicate data received from CH1 (A plug) and CH2 (B plug) of
sensor unit
Blinking and beeping indicates temperature at CH1/CH2 is
over (higher or lower) the range set by user.
Battery power at main unit is low and need to replace with new
batteries
-04-
Temperature

1. Check battery power of main unit and sensor unit before
using. Do not place sensor unit and main unit from each other
over the limit distance to prevent the fail transmission. And
keep away from the interference objects or signals.
2. The limit distance between main unit and sensor unit is
typically 100M (330 feet) in open space.
3. The distance between main unit and sensor unit is shorter
than 100M while there are barriers between the set up
positions of units. The optimum distance depends on the
material of barrier or the construction of building.
-05- -06-
DE - 33 T
K-Type
WIRELESS
THERMOMETER
TRANSMITTER
A B
1 2 3 4
O
N
S G M
5
3
1
2
3
4
5
6
7
8
1 2 3
(C) Sensor unit – appearance and placing
⑰
⑱
⑲
⑳CH2
Recording symbol to indicate 24 records of temperature change at
CH2 in past 12 hours.
Indicate temperature range set at HI or LO at CH1 & CH2
Display CH2 temperature
Shift reading MAX & MIN temperature value measured at CH2
Temperature
K-type thermocouple
4. Do not put sensor unit into fridge or the metallic sealed
equipment (enclosure) directly for measurement. Because the
signal of sensor unit is blocked and can't transmit to main unit
successfully.
5. For measuring fridge temperature only put the thermocouple
wire tip in fridge.
6. A & B input socket (A → as CH1 on main unit display and B →
as CH2) can take 2 K-type thermocouples for measurement.
Apply the different temperature range of K-type thermocouple
to work with the need. The applicable range is -200°C ~
+1370°C.
7. Set up I.D. of sensor unit
※ 8. Install batteries -– always install main unit first and complete
I.D. set from panel keys and then install batteries into
sensor unit and complete I.D. set from switch in battery slot.
The I.D. code of main and sensor unit should be the same.
9. To ensure the data to be captured by the main unit the initial
transmission from sensor unit acts aggressively by every 6
seconds once set up. After the 9th data, the transmission of
sensor unit and the receiving of main unit is parallel
corresponding to each other.
Attention: do not attempt to
loose those 2 screws.
hanger
battery door
switch 4 is void
I.D. switch in battery slot
I.D. code
(1 ~ 8)
switch
in transmission
the light is blinking

N
N
W
-07- -08-
DE-3 3 T
K-Type
WIRE LE SS
THER MO ME TE R
TRAN SM IT TE R
●
application environment or barriers where main unit and
sensor unit located. And the electronic interference will affect
the transmission and signal and may display incorrect data on
main unit. Therefore, please prevent those elements may
affect the transmission.
● In extreme high or low temperature environment, the
transmission may be slow or creeping.
● Besides battery door, please do not attempt to loose other
screws in order to make sure the thermometer operates in
good condition.
● Take the batteries out of the thermometer if it will be left idle
for a long time.
Transmission and transmission distance is affected by
Attention:
Ⅲ. Power on process
Demonstration of measurement
water temperature
of aquarium
put thermocouple tip in fridge,
water or soil for measurement
thermocouple tip
Simultaneously measuring and
monitoring temperature of fridge
and aquarium.
(A). Battery installation
Always install main unit first and then sensor unit. Follow
instruction of A & B as below to enable transmitting and
receiving in good work.
1. Battery (alkaline) life time for main and sensor unit is one
year round which mainly depends on the application in
different temperature and environment. Use 2 AA size
alkaline batteries each for main and sensor unit.
2. Battery life time depends on the working condition. Such
as repeat search for signal (because of interruption) or
frequent alarm will cut down the battery life time. Need
to replace the new batteries while the low battery symbol
(sensor unit) or (main unit) display.
3. Do not attempt to loose the screws marked on drawing.
4. Main unit has no power switch and can be power off from
removing batteries exclusively.
5. Contact the maker or deliver the thermometer back to the
maker for checking if it can't work after the batteries
installation process is completed.
+
+
AA (1.5V )No .3
AA (1.5V )No.3
A. Battery installation of main unit
1. Open battery door and install batteries.
Attention: do not attempt to loose
those 4 screws.
follow arrow direction to
pull out the battery door
AA size battery (1.5V)
install batteries with
correct polarity marked
in battery slot
sensor unit with
thermocouple

-09- -10-
B. Battery installation of sensor unit
Follow the steps from dwg#1 to dwg# 7 to complete the
installation.
(1) Loose 2 screws on battery door with Philips screw driver.
(2) Do not attempt to loose 4 crews marked on dwg#2.
(3) Choose I.D. by changing the switch in the battery slot before
installing batteries. I.D. code from 1 to 8 (refer to page 6
(C)-7.). The I.D. should be the same as the main unit for
transmitting and receiving recognition.
(4) Fasten screws on battery door after installing batteries.
(1.5V AA size battery * 2) Be sure to put with the correct
polarity as marked in the slot.
(5) After battery installation, the light on sensor unit is flashing to
identify I.D. Then the light is flashing every 6 seconds and
transmitting the data of each flashing. After the 9th data, the
transmission of sensor unit and the receiving of main unit is
corresponding to each other and go into regular cycle by
transmission/receiving every 3 minutes. Each flash of light
means transmission is working and main unit refresh display
of CH1 & CH2 every 3 minutes as well.
(6) In 1 minute after battery installation, check main unit if
display any reading of temperature from sensor unit. If not,
please make sure if I.D. of main and sensor unit is the same.
And check if batteries are well installation and light is
flashing during transmission of data. If all those are positive
but still can’t find any reading on main display, please
contact the maker for problem remove or deliver the
thermometer back to the maker for checking.
2. Once batteries are installed the full segment will display on LCD
for 2 seconds.
CH1 temperature
CH2 temperature
clock
If display as above means no signal
is received and clock is not set yet.
3. Push MODE key to shift the display from (1) to (3)
display (1) display (2) display (3)
If no reading on display of main unit after the batteries are
installed completely which means sensor unit is not ready.
(refer to page 10)
The bottom layer is clock (refer to page 12 for clock set).
Check the battery installation is correct or not If can't shift the
display from (1) to (3). If the installation is surely correct
please contact the maker for problem remove or deliver the
instrument back to the maker for checking if necessary.
(B). Set up I.D. (identity code)
Choose I.D. of main unit:
Push MODE & MAX/MIN keys simultaneously for 3 sec. until
display and flashing. Push MAX/MIN key to choose
I.D. code from 1 to 8. Push MODE key to complete setting
after chosen.
1

1 2 3 4
O
N
S G M
5
3
1 2 3 4
O
N
SGM
5
3
DE-3 3 T
K-Type
WIRE LESS
THER MOMET ER
TRAN SMITT ER
-11- -12-
+
+
dwg#1
dwg#5
dwg#6 dwg#7
set I.D.
(1~8)
Attention: Do not attempt to
loose the screws marked.
light of transmission:
one flashing to identify I.D. after batteries are
installed and flashing every 6 seconds in
transmission. After the 9th data the
transmission become stable on regular basis
with transmission / receiving every 3 minutes.
Main unit automatically
searches signal from sensor
unit (or push SEARCH key
for manual search)
Main unit automatically searches
signal from sensor unit in 5 minutes
if no reading on display. Refer to
page 5 Sensor unit appearance and
placing
Set up time
(refer to page 12)
(C). Set up time (clock)
After power on must set up clock immediately enable to work
with the relevant functions
1. Hold MODE key for 3 seconds to access time set function
as dwg#2.
2. Push MAX/MIN key to adjust time and push SEARCH to
change position. Set hour and minute as dwg# 2 & 3
(clock starting from 00:00 with 24 hours).
3. Push MODE key to complete time set or if no pushing
MODE key, it will automatically confirm the time set in 15
sec. as dwg#4.
4. Push MODE key to shift display and check if clock
displays in good condition in different mode as dwg#5. If
not, please operate from step 1 to 3 again.
dwg#1dwg#2
dwg#3dwg#4
dwg#5
no symbol
display is in
normal operation
push MODE key for 3 seconds
until display as dwg#2 .
push SEARCH key
to change position
push MAX/MIN key to adjust time
push MODE key to complete time
set as dwg.#4
push MODE key to check
clock if display in different
mode.
push MODE key to shift display as dwg#5 to check clock display
hour minute
dwg#2
dwg#3 dwg#4

(A) Key function:
MODE key shift 4 modes display
1. Simple measuring mode - CH1 and CH2 temperature
display (°C) (dwg#1)
It's set as the initial display at manufactory. To operate
any other function must go back to the simple measuring
mode first.
2. Activate temperature alarm function ( ) (dwg#2)
3. Read data in memory LGR symbol display (dwg#3)
4. Time setting (page 15 dwg#1 & 4)
-13- -14-
《ATTENTION》
a. Time set can only operate in simple measuring mode as
dwg#1. In MAX/MIN, LGR or alarm mode can't operate time
set as dwg.#6.
b. In case, accidentally push MAX/MIN key MAX, MIN symbol
display on LCD and get into MAX/MIN mode. Hold MAX/MIN
key for 2 sec. to cancel MAX/MIN mode as dwg#7.
c. Set sensor unit in position where is in the limit distance range
from main unit. If main unit can't receive the data from sensor
unit please check the distance if over the limit or having
interference. Refer to page 5~6 II-(C) Sensor unit
appearance and placing.
dwg#6 dwg#7
MAX, MIN symbol display
can't operate time set.
Hold MAX/MIN key for 2 seconds
to cancel MAX/MIN mode and
MAX, MIN symbol disappear.
(simple measuring mode).
if LGR symbol display
push MODE key
one time to resume
simple measuring
mode
push MODE key twice to
resume simple measuring
mode
if symbol display
In MAX/MIN, LGR or alarm mode can't operate time set.
Ⅳ. Application of thermometer
(1) CHI & CH2 temperature display ( C)°
simple measuring
mode display
dwg#1
dwg#2
dwg#3
push MODE key
one time
push MODE key
push MODE key
(resume to simple
measuring mode display).
(2) temperature alarm mode
(3) read data in memory (LGR CALL)
push SEARCH key to read the data at different time.

(B) Measurement of temperature
a. Change display to the simple measuring mode as dwg#1
below.
b. Upper layer display of CH1 is for the temperature
measured by the thermocouple at A socket. Middle layer
display of CH2 is for the temperature measured by the
thermocouple at B socket. Temperature unit is Celsius.
Bottom layer display is indicating clock.
c. The transmission from sensor unit is every 3 minutes and
refresh the data on main unit display.
d. I.D. set is from 1 to 8 by option. Hold MODE & MAX/MIN
key simultaneously for 3 seconds to enter I.D. setting.
I.D. number is flashing and ready for set. Push
MAX/MIN key to choose I.D. and push MODE key to
confirm the setting or no push MODE key in 15 seconds
will confirm the setting automatically.
e. is antenna symbol (dwg#1). “ ” is signal
disconnection (dwg#2) and need to push SEARCH key
to search signal. Check sensor unit location where has
interference or not. Refer to page 5~7 II-(C) Sensor unit
appearance and placing.
f. If push MAX/MIN key accidentally, the setting will
disable. Hold MAX/MIN key for 2 seconds to cancel
MAX/MIN mode and go back to the simple measuring
mode. (dwg#1)
《ATTENTION》
a. Before going ahead any function or setting, please always go
back to the simple measuring mode first. (dwg.#1)
b. If push MAX/MIN key, MAX/MIN symbol display and enter
MAX/MIN mode. Hold MAX/MIN key for 2 seconds to cancel
the function and back to the simple measuring mode. (dwg#1)
-15-
(1) CH1 & CH2 temperature display ( C)°
(4) time set
simple measuring
mode display
dwg#1
dwg#4
refer to page 12 III-(C)
SET up time (clock).
Hold MODE key
>3 seconds
Hold MODE key
>3 seconds
Push MODE key
once again
(1) CH1 & CH2 simple measuring mode ( C)°
Quick note of MODE key operation
push MODE key once
(2) Activate alarm function ( )
push MODE key again
(3)Reading data in memory (LGR CALL)
(4)Clock Settting
I.D. number
dwg#1
dwg#2
upper layer display for CH1 temperature no symbol
display is in
the simple
measuring
mode
I.D and antenna symbol
middle layer display for CH2 termperature
bottom layer display is clock
signal disconnection
Push SEARCH key to search signal. Check
sensor unit location where has interference
or not or too far from main unit. Refer to
page 21 IV-(E) search temperature of sensor
unit
-16-

e. Set HI or LO temperature:
● Only one option to set alarm range at HI or LO
temperature.
● Set temperature only from dwg#1 to dwg#2. HI or LO
symbol is flashing and ready for setting. Push
MAX/MIN key to choose HI or LO (ex. set at LO)
● Push SEARCH key to change position and push
MAX/MIN key to choose number. (ex. 25°C).
(available temperature range for setting : -199.9°C ~
1372°C)
● Push MODE key or no push MODE key in 15 seconds
will confirm the setting automatically.
-17- -18-
(C) Set up alarm function ( ) :
(1) Set up temperature alarm of CH1 and CH2: in condition
of the temperature reaches and higher beyong ( ≧HI )
the temperature set at HI or lower below ( ≦LO ) the
temperature set at LO, the alarm function activates and
emit beep sound to alert the user.
(2) Go to alarm temperature set and alarm:
a. Hold MODE & SEARCH key simultaneously for 3
seconds to enter setting mode of CH1 as dwg#2:
temperate alarm range display.
b. If no push any key or MODE key in 15 seconds, it will
resume to the simple measuring mode automatically
as dwg#1.
c. Hold MODE & SEARCH key simultaneously for 6
seconds to enter setting mode of CH2 as dwg#3:
temperate alarm range display.
d. The initial temperature range is set 180°C at
manufactory.
no symbol display is
the simple measuring
mode.
dwg#1
dwg#2 dwg#3
Hold MODE & SEARCH key simultaneously
3 seconds. 6 seconds.
set HI or LO
push MODE key back to dwg#1 push MODE key back to dwg#1
dwg#1
dwg#2
no symbol display
is in the simple
measuring mode
set alarm at LO
set alarm temperature
point at 25 C°
follow (2)-a. enter CH1 or CH2 setting mode,
push SEARCH to change position and push
MAX/MIN to choose LO or HI.

(D) Read temperature record (LGR CALL)
(1) 12 hours auto data logging for CH1 and CH2
temperature corresponds with real time record.
Recording is every 30 minutes with 24 sets maximum.
Once capacity is full will start over the recording cycle
from the beginning and the old record will be replaced.
(Note: The record is made on every 30 minutes clock
time. If initial clock time set at 13:52, the first data is at
14:00 and if the initial time is 12:17 the first data is 12:30
and the 2nd is at 13:00 and so on.).
(2) Push MODE key twice to switch from dwg#1 to dwg#2.
The auto data logging function actuates once clock time
is set.
(3) Push SEARCH key to read the previous data in memory.
(dwg#2~4).
(4) Push MODE key back to the simple measuring mode.
f. Activate alarm function ( display):
● Push MODE key to switch dwg#1 to dwg#2
● Alarm function is available simultaneously at CH1
and CH2. Once activate alarm function (as dwg#2), if
temperature at CH1 or CH2 is over the temperature
alarm point (higher or lower) the audible beeper will
be on and lasting 2 minutes. Beeper will stop in 2
minutes automatically or push SEARCH key by
manual stop. Push MODE key twice to return the
simple measuring mode as dwg#1.
● Once temperature at CH1 or CH2 meets the alarm
condition will activate audible beeper and “ ” and
“HI” or “LO” symbols are flashing. Even stop beeping
(automatically or manually) , the symbols are
remained flashing to alert the user the temperature
ever exceeds the alarm point. If the next coming
data is still over the alarm point the beeper will
generate again to repeat beep for 2 minutes and
symbols are flashing.
-19- -20-
dwg#1
CH1 temperature
Ch2 temperature
push MODE key to dwg#2
dwg#2
flashing in beeping
dwg#1 dwg#2
dwg#3 dwg#4
push MODE key twice to dwg#2 push SEARCH key to dwg#3
push SEARCH key to dwg#4 push MODE key to back to dwg#1
(5) In LGR mode, push MODE key to go back to the simple
measuring mode. Or it will shift back to the simple
measuring mode automatically if no operation in 5
minutes.
(6) If display “no” at CH1 or CH2 means the poor contact of
the thermocouple, disconnection of thermocouple or
temperature is over the maximum range 1372°C.

(E) Search temperature of sensor unit
(1) Push SEARCH key for manual search of signal from
sensor unit. Every search is lasting 5 minutes. If 5
minutest search is failed the radius symbol ( )
disappears which means the transmission or receipt
interrupts. Push SEARCH key once again to activate
manual search function until the signal can be found.
(2) Once power on main unit and sensor unit, if no signal
( ) in transmission the auto search function will
generate in 30 minutes and regenerate every 30
minutes if still can't find signal. Manual search is also
available for option.
(3) Antenna radius symbol ( ) in flashing means main unit
receives signal from sensor unit in good condition. If
the radius symbol stops flashing means in searching for
signal (search for 5 minutes).
(4) In normal operation if transmission is temporarily
interrupted or change location of main unit or sensor
unit to cause the interruption of signal, CH1 and CH2
temperature display becomes “---“. Need to check if
have any interference while change the location of units
and remove the problem.
-21- -22-
(F) MAX / MIN temperature
(1) Maximum / Minimum temperature recording function
(set clock before entering MAX/MIN mode). Set
MAX/MIN mode starting from dwg#1.
(2) Push MAX/MIN key, MAX/MIN symbol display and start
recording maximum / minimum temperature.
(3) Push MAX/MIN key to shift reading MAX/MIN
temperature at CH1 & CH2 respectively. (dwg# 3→6).
(4) After reading 4 values will back to MAX/MIN recording
mode (dwg#2). During reading MAX/MIN temperature,
if no push MAX/MIN key for 15 seconds will go back to
MAX/MIN recording mode automatically.
(5) Hold MAX/MIN key for 2 seconds to exit MAX/MIN mode
and back to the simple measuring mode (dwg#1).
《ATTENTION》
In MAX/MIN mode, other functions disable. To enable
other modes or functions must exit MAX/MIN mode by
holding MAX/MIN key for 2 seconds if in MAX/MIN mode.
dwg#1
dwg#2
(A) While1st disconnection once
power on will have auto
searching in 30 minutes.
(B) flashing ( ) is in
good receiving of signal
(C) stop flashing is in search of
signal from sensor unit (5
minutes).
no radius
symbol moving
is interruption
no temperature display
antenna symbol
stop moving is in
searching signal. push SEARCH key to search
signal from sensor unit and refer to
page 6 II-(C) sensor unit-
appearance and placing for
problem remove.
dwg#1 dwg#2
dwg#3 dwg#4
upper layer display -
CHI temperature
middle layer display -
CH2 temperatur
bottom layer display -
clock push MAX/MIN key
push MAX/MIN key
back to dwg#2
push MAX/MIN key
CH1 maximum temperature CH1 minimum temperature

(H) Trouble shooting of main unit
(1) Either in MAX/MIN mode, alarm mode or reading
temperature record (LGR) mode, can't operate
temperate range alarm setting or clock set. All functions
only enable at the simple measuring mode. (as below
drawing status 1 ~ 3)
(2) Before operating other functions (ex. temperate alarm
setting, clock, LGR) or go to MAX/MIN recording mode
must go back to the simple measuring mode first.
(G) Low battery symbol of main unit and sensor unit
(1) (sensor unit) or (main unit) symbol display
means battery power of sensor unit or main unit is low
and constant audible beep sounds to alert the user to
replace new batteries. To ensure operation in good
condition, replace 2 batteries of unit at the same time.
(2) Apply 2 AAA batteries (1.5V).
-23- -24-
dwg#5 dwg#6
CH2 maximum temperature CH2 minimum temperature
push MAX/MIN key push MAX/MIN key
push MAX/MIN key
back to dwg#2
low battery indication
of sensor unit
low battery indication
of main unit
status 1 status 2 status 3
status 4 status 5 status 6
simple
measuring
mode
hold MAX/MIN key to
cancel MAX/MIN mode
and MAX/MIN symbol
disappear
in alarm mode, push
MODE key twice to
back simple measuring
mode.
in LGR mode, push
MODE key to back
simple measuring
mode.
ready for setting all kinds of
function.
in simple measuring mode, push
MAX/MIN key to enter MAX/MIN
recording mode.
push MODE key to
back simple measuring
mode
push MODE key to
back simple measuring
mode
push MODE key to
back simple measuring
mode

-25- -26-
(I) Function table
Function Key Operation
Dwg#1
CH1 & CH2
simple
measuring
mode
Dwg#2
alarm function
activate
Dwg#3
LGR mode
Dwg#4
MAX/MIN
temperature at
CH1 & CH2
Dwg#5
Temperature
alarm set at
CH1
Dwg#6
Set clock
Initial setting of simple measuring mode to check CH1 & CH2
current temperature. To set dwg#2~6 must go back to
dwg#1. Main unit display temperatures measured at two
channels of sensor unit. Main unit is not equipped
temperature detecting function.
At dwg#1, push MODE key twice to activate alarm function.
Push SEARCH key to stop beeping. Push MODE key twice
to back simple measuring mode (dwg#1)
At dwg#1, push MODE key to enter reading data mode
(LGR). Push SEARCH to shift reading data in memory .
After reading, push MODE key to back simple measuring
mode (dwg#1)
At dwg#1, push MAX/MIN key to enter MAX/MIN recording
mode. Push MAX/MIN key to shift reading maximum &
minimum temperature at CH1 & CH2. Hold MAX/MIN key for
2 seconds to exit MAX/MIN mode and enable operating other
functions.
At dwg#1, hold MODE & SEARCH keys simultaneously for 3
seconds (6 seconds for CH2) to enter alarm setting at CH1.
After setting the temperature point, in 15 seconds will go
back to simple measuring mode (dwg#1) automatically. (or
push MODE to complete setting).
At dwg#1, hold MODE key for 3 seconds to enter clock set
mode. In 15 seconds will go back to simple measuring mode
(dwg#1) automatically. (or push MODE to complete setting).
dwg#1 dwg#2 dwg#3
dwg#4 dwg#5 dwg#6
Ⅴ. Specification of main unit and sensor unit
(1) LCD display: clock, CH1 & CH2 temperature
(2) Transmission / Receiving interval time: every 3 minutes.
(3) Clock: 24 hours
(4) Features: MAX/MIN simultaneous recording with real time.
Auto data logging, Beeper function for over temperature
range.
(5) RF frequency: approx. 433MHz (depends on frequency set at
manufactory).
(6) Temperature range: -200°C~1370°C
(7) Power: AA battery (1.5V) x 2 pcs
(8) Dimension / Weight: 120(L) x 100(W) x 28.5(H)mm,
approx. 160g (without batteries)
K-Type WIRELE SS THERM OMETE R
DE-3 3R
MODE
OC LGR CALL
SEARCH MAX / MI N
RESET PUSH 2sec
DE -3 3T
K-Typ e
WIREL ESS
THERM OMETER
TRANS MITTER
main unit
sensor unit
main unit
sensor unit
(1) Featurs: 2 channels, transmit data to main unit.
(2) RF frequency: approx. 433MHz (depends on frequency set at
manufactory).
(3) Transmitting distance: approx. 100M (330 feet) in open
space.
(4) Power: AA battery (1.5V) x 2 pcs
(5) Dimension / Weight: 179(L) x 72(W) x 32(H)mm,
approx. 155g (without batteries)

Instruction manual .......................................................................1
AA batteries ................................................................................ 4
K-type thermocouple (NR-39B) ................................................... 2
Optional accessories (equipped with RS-232 plug at main unit)
RS-232 cable .............................................................................. 1
PC software CD .......................................................................... 1
※ PC software operation-refer to operation on PC software CD.
(6) Accuracy (23 )
(7) K-type thermocouple: NR-39B temperature probe is
applicable to -50°C~200°C (-58°F~392°F). For higher
temperature measurement need to contact manufacturer for
other option.
(8) Range: -199.9°C ~ 1370°C
(9) Input limit: max. 60VDC or 24Vrms AC
(10) Socket: applicable to standard thermocouple.
(11) Operation temp./humidity: 0°C~50°C (32°F~122°F) /
below 80% R.H. (no condensation)
(12) Storage temp./humidity: -10°C~60°C (-14°F~140°F) /
below 70% R.H. (no condensation)
(13) Pre-caution:
To avoid danger and damage happened during operation,
please read the instruction manual thoroughly before using
the thermometer. Put the instruction manual with the
thermometer together for reference in the future.
°C ± 5°C, 80% R.H. MAX.
-27- -28-
Type Measurement
Ranges(°C) Resolution
(°C) Accuracy
(%rdg+°C)
-199.9~0.0
0~199.9
200~1370
0.1
0.1
1
±(0.5+1)
±(0.2+0.5)
±(0.2+1)
K
WARNING
TO AVOID ELECTRICAL SHOCK, DO NOT APPLY INPUT
VOLTAGE OVER DC60V OR AC24V
WARNING
TO AVOID DAMAGE OR BURNS, DO NOT PUT THE
THERMOMETER IN MICROWAVE OVENS OR STOVE
F O R M E A S U R E M E N T O R A P P LY F O R T H E
MEASUREMENT OF ELECTRICAL USE.
Attention
The repeated sharp flexing can break the thermocouple
leads. To prolong lead lifetime, avoid sharp bend in the
leads, especially for the cable relief to connector.
ACCESSORIES
Maintance
Do not attempt to open case of sensor unit or main unit
(except battery door) to avoid the inaccuracy of
measurement. Keep dry hands while replacing batteries. Do
not use organic solvent to clean the thermometer but with soft
cloth if necessary.
Specifications and external appearance of the product may be
revised for modification without prior notice
Please contact our agents or distributors for a variety of
measuring instrument we produce under the strict quality
control requirement of ISO 9001
Table of contents
