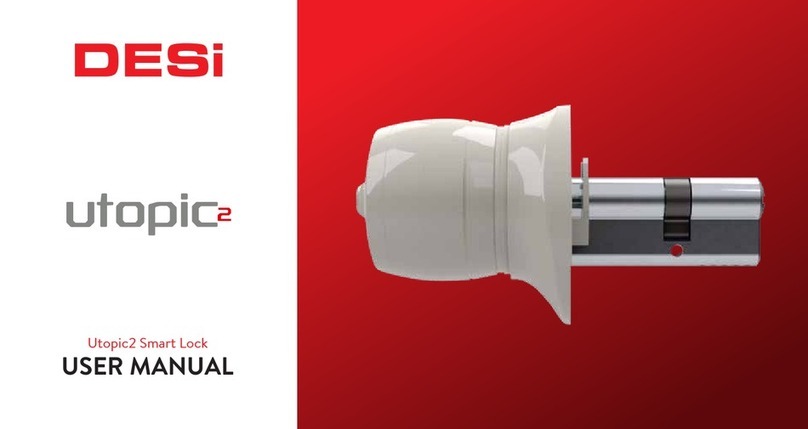
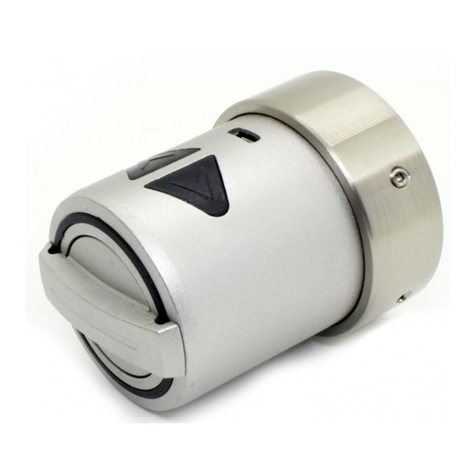
DESi Utopic2 Series User manual

Wireless Motorized Cylinder with
Wireless Keypad
USER
MANUAL
UKC 60 / UKBC 60 Images on this manual are for referance only.

!
1. GENERAL INFORMATIONS and WARNINGS
- For emergancy conditions, we recommend you to put the keys to an accessible place (like car, bag etc.)
- If there is any problem with door or locking mechanism, first of all, those problems need to be solved. Door's mechanical
parts and locking mechanism should be working properly.
- If there is a problem with the device, first look to the troubleshooting part of this manual. If you cannot solve the
problem, contact with your dealer.
- Replace the batteries, if there is a battery warning. RECYCLE EMPTY BATTERIES!
- All the system need to be protected from water and shocks.
- Place the batteries after installation of the system to the door. If the batteries are placed before the installation, auto-
rotating parts may cause injuries. WATCH YOUR FINGERS!
We would like to thank you for choosing this patented product. We hope you to enjoy it.
DESi Alarm and Security System Inc.

Controlling Options and Compatible Accessories
Wireless Fingerprint Reader
Remote Controller
Wireless Auto-Locking Module
Wireless Home Automation Interface
Wireless Secretary Button
Remote Access Module
3
1.1. General Features of Devices
Structure
Engraved block alluminum, Zamak and ABS
Cylinder Length (may vary according to model)
(outside) 26 mm | 10 mm | 36 mm (inside)
Inside part can extensile up to 42 mm with extending
parts.
Batteries and Battery Life of Motorized Cylinder
5x 1,5 V AA size Alkaline or Lithium batteries.
According to tests done in DESi labratories, battery life of
the device is measured as follows:
2,5 years standby or 10.000 operations (locking or
unlocking) for 3 rotation locks
Wireless Keypad
434 Mhz Anti-duplicatiion rolling code rf communication.
Bluetooth feature (only for model UKBC 80)
1.2. Box Content (may vary according to model number)
1x Wireless Motorized Cylinder (with keys)
1x Wireless Keypad
1x Installation screw and Hex key

2. PARTS OF WIRELESS MOTORIZED CYLINDER and INSTALLATION
4
Cylinder
Handle
Handle Screw
Hex Screw
The hole
for hex key
DEMOUNTING OF MOTOR AND CYLINDER
- Open “handle screw” and remove the handle by pulling.
- Remove the batteries.
- Rotate “hex screw” to counter-clock wise by using the hex
key out of the box. You will see the cylinder will be
disassembled from the motorized part.
To assemble two parts, combine cylinder and motorized
part in a proper way and rotate hex screw to clock wise.
Metal Extending Parts
(used if needed)
Plastic Cover Cover Spring

5
(Back Cover)
Mounting
Holes
Up to 6 mm
26 10 34
26 10 40
EXTENDING INSIDE PART
OF THE CYLINDER (if needed)
If the door thickness is not
suitable to the cylinder of the
device, inside part of the
cylinder may be extended up
to 6 mm by 2 mm steps.
To extend the cylinder’s inside
part, follow the instructions
below:
- Open “handle screw” and
remove the handle by pulling.
- Remove the batteries.
- Rotate “hex screw” to counter-clock wise by using the hex key
out of the box till the motorized part is disassembled from the
cylinder.
- Add 2 mm metal extending parts as needed.
- Assemble cylinder and motorized part and rotate hex screw to
clock wise direction.
- Install the batteries and check the device if it is working
properly or not.
DisplayTouch Buttons
Locking
Button
Menu
Button
Screw for
Changing
Batteries

6
2.1. Installation of Motorized Cylinder
This is the easiest installation. It is suitable for all kind of doors.
In some security doors, even if you remove cylinder screw, you cannot remove cylinder due to cramped installation of
cylinder defender. Follow the instructions below, for that kind of situations: (Recommended for professional installers.)
- Untighten screws of cylinder defender (don’t remove the screws)
- Remove cylinder screw and take out the old cylinder.
- Disassemble the motozied part from the cylinder. (see. p.5)
- Install the cylinder part to the door and tighten the cylinder screw.
- Tighten the screws of cylinder defender.
- Assemble the motorized part with cylinder. (see. p.5)
1.STEP
Remove
existing
cylinder.
2. STEP
Install
motorized
cylinder and
tighten
the screw
That’s
it!

7
3. ADMINISTRATION ACTIONS / SETTINGS FOR KEYPAD
Two different 5 digit passwords may be defined to the keypad; 1 master, 1 user. Both of the passwords can be use to unlock
and open. For settings, the master password need to be entered. Default master password is “12345". User password is not
set.
WARNING: First fo all, change the default master password.
3.1. Changing Default Master Password
- Wake the keypad up by putting your palm to the touch keys and than touch to “M” button. “A” appears on the display.
- Enter 5 digit master password. After display animation, touch to “M” button again. “b” appears on the display.
- Touch to “1" button and enter the new master password in 5 digit. After display animation, re-enter the new master
password. In this way, the master password will be changed.
CAUTION: Before using your motorized cylinder, Direction of locking/unlocking (p.11) and Number of turns (p.11) should be
adjusted. Otherwise, the device would not work properly.

8
3.2. Defining / Changing User Password
- Wake the keypad up by putting your palm to the touch keys and than touch to “M” button. “A” appears on the display.
- Enter 5 digit master password. After display animation, touch to “M” button again. “b” appears on the display.
- Touch to “2" button and enter the new user password in 5 digit. After display animation, re-enter the new user password.
In this way, the user password will be defined / changed.
3.3. Enrolling Mobile Device (for UKBC 80 only)
Search “Desi Utopic” on stores to download and install mobile application. After installation, run the app, choose desired
language and define a password. You can disable/enable password protection or change password later.
- Wake the keypad up by putting your palm to the touch keys and than touch to “M” button. “A” appears on the display.
- Enter master password. After display animation, touch to “M” button again. “b” appears on the display. Touch to “3".
- Run the app on your mobile and touch to “ ” on main screen. The known devices will be listed. Touch to “ ” located
upper right of the list to see new device.
- Touch to UTOPIC line and enter a name for new device and touch “ ” next to name box. If you see more than one
device in the list, closest device to your mobile will be shown at the top of the list with 3 or 4 signal strength bars.
- Recognizing process will start automatically. If the matching is successful, gray control buttons at the bottom become
colorful.

9
3.4. Clearing All Mobile Devices (for UKBC 80 only)
- Wake the keypad up by putting your palm to the touch keys and than touch to “M” button. “A” appears on the display.
- Enter 5 digit master password. After display animation, touch to “M” button again. “b” appears on the display.
- Touch to “4" button and than touch to any button till the display shows “9". Touch to lock button while “9" is shown. After
that, all the mobile devices will be deleted from keypad.
3.5. Reporting Enrolled Mobile Devices (for UKBC 80 only)
- Wake the keypad up by putting your palm to the touch keys and than touch to “M” button. “A” appears on the display.
- Enter 5 digit master password. After display animation, touch to “M” button again. “b” appears on the display.
- Touch to “5" button. The display will show the number of enrolled mobile devices.
3.6. Factory Reset
After factory reset, keypad’s master password will be “12345". User password and mobile devices will be cleared.
- Wake the keypad up by putting your palm to the touch keys and than touch to “M” button. “A” appears on the display.
- Enter 5 digit master password. After display animation, touch to “M” button again. “b” appears on the display.
- Touch to “6" button and than touch to the “M” button till the display shows “9". Touch to lock button while “9" is shown.
After that, factory reset will be implimented.

10
4. SETTINGS FOR MOTORIZED KNOB
4.1. Enrolling Wireless Controllers to the Motorized Knob
- Wake the keypad up by putting your palm to the touch keys and than touch to “M” button. “A” appears on the display.
- Enter 5 digit master password. After display animation, touch to “6” button. The knob will give a long (5 sec) and a short
warning tone one after the other.
- Just after short warning tone, send from the device you want to enroll to the knob till you hear 2 warning “a RF signal”
tones from the cylinder. In this way, the new controller will be enrolled to the knob.
How to Send from Controllers“a RF Signal”
Remote Controllers: Press any button.
Secretary Button: Press the button.
Fingerprint Reader: Wake up and touch to locking button.
Keypad: Wake up and touch to lock button.
Auto-Closer: Bring the magnet closer to the device and than seperate it from device.
Home-Automation Interface: Short-circuit red and white cables and than open-circuit.

11
4.2. Deleting All Controllers
- Wake the keypad up by putting your palm to the touch keys and than touch to “M” button. “A” appears on the display.
- Enter 5 digit master password. After display animation, touch to “7” button. “d” will be displayed.
- To confirm, touch to lock button. The knob will give a long (10 sec) and two short warning tone one after the other.
In this way, all the controllers (except the master keypad) would be deleted from the knob.
4.3. Adjusting Direction of Locking
- Wake the keypad up by putting your palm to the touch keys and than touch to “M” button. “A” appears on the display.
- Enter 5 digit master password. After display animation, touch to “1” button. “r” or “L” will be displayed.
- Toggle between “r” or “L” by touching lock button and to confirm touch to “M” button.
After first locking or unlocking operation done by master keypad, selected settings will be applied to the motorized knob.
4.4. Adjusting The Number of Turns
- Close the door. Wake the keypad up by putting your palm to the touch keys and touch to “M” button. “A” appears on the
display.
- Enter 5 digit master password. After display animation, touch to “2” button.
- The knob will give a long (3 sec) warning tone and it will lock and unlock the door.
In this way, it learns the number of turns of the lock.

12
4.5. Reporting The Number of Enrolled Controllers
- Wake the keypad up by putting your palm to the touch keys and than touch to “M” button. “A” appears on the display.
- Enter 5 digit master password. After display animation, touch to “8” button.
The knob reports number of enrolled controllers as warning signals.
4.6. Adjusting Buzzer Sound of The Knob
- Wake the keypad up by putting your palm to the touch keys and than touch to “M” button. “A” appears on the display.
- Enter 5 digit master password. After display animation, touch to “3” button. “O” or “C” will be displayed.
- Toggle between “O” and “C” by touching lock button and to confirm touch to “M” button.
After first locking or unlocking operation done by master keypad, selected settings will be applied to the motorized knob.
4.7. Night Mode Availability
- Wake the keypad up by putting your palm to the touch keys and than touch to “M” button. “A” appears on the display.
- Enter 5 digit master password. After display animation, touch to “4” button. “O” or “C” will be displayed.
- Toggle between “O” (enabling “capability to shift night mode”) and “C” (disabling “capability to shift night mode”) by
touching lock button and to confirm touch to “M” button.
After first locking or unlocking operation done by master keypad, selected settings will be applied to the motorized knob.

13
4.8. Adjusting Semi-Automatic Working
- Wake the keypad up by putting your palm to the touch keys and than touch to “M” button. “A” appears on the display.
- Enter 5 digit master password. After display animation, touch to “5” button. “O” or “C” will be displayed.
- Toggle between “O” (enabling semi-automatic working) and “C” (disabling semi-automatic working) by touching lock
button and to confirm touch to “M” button.
After first locking or unlocking operation done by master keypad, selected settings will be applied to the motorized knob.
5. USAGE
5.1. Unlocking and Opening the Door
Wake the keypad up by putting your palm to the touch keys and enter 5 digit user or master password. After display
animation, the door will be unlocked and opened.
5.2. Locking the Door
Close the door and wake keypad up by putting your palm to the touch keys. Touch to Lock Button. The door will be locked.
5.3. Night Mode
Night mode disables wireless controllers temporarily. In this way, the door can only be opened by knob or the key.
To use Night Mode, 4.7 Night Mode Availability and 4.8 Adjusting Semi-Automatic Working settings need to be enabled. If
any of them is disabled, the motorized cylinder cannot shift to Night Mode.

To shift the motorized cylinder to night mode:
- Close the door and turn the knob through locking way. The motorized cylinder will lock the door one turn.
- Turn the knob again through locking way. It will lock all the turns.
In this way, the motorized cylinder will shift to Night Mode. To exit from night mode, turn the knob through unlocking way.
It will automatically unlock the door and shift to normal working mode. You can shift to or exit from night mode by using
key as well.
14

6. MAINTENANCE
You can clean the surfaces with soft fabric. Do not use water or corrosive chemicals. Do not touch to electronic parts of
the device with a conducting metal or sharp object.
6.1. Replacing Batteries of Keypad
Untighten the bottom screw and detach the keypad from base. Change the batteries, place the keypad and tighten it.
Use 1,5 V AAA size high quality alkaline or lithium batteries only.
6.2. Replacing Batteries of Motorized Cylinder
If you hear triple warning tone after any operation (locking/unlocking), or if the motorized cylinder rotates too slowly, you
need to replace the batteries. To change them, open knob screw and remove knob (pull outward), uninstall old batteries and
install new batteries (watch polarities). Put knob back and tighten knob screw.
Use 1,5 AA type high quality alkaline or lithium batteries only. Do not use old and new batteries or different types of
batteries together. Change all the batteries when you hear low battery warning.
15

www.utopic.com.tr
www.desi.com.tr
Desi Alarm and Security Systems Inc.
Topkapı Maltepe Cd. Anadolu Sk. N:1 Bayrampaşa- İstanbul / TURKEY
7. TROUBLESHOOTING
IF THE MOTORIZED CYLINDER CANNOT FULLY LOCK/UNLOCK THE DOOR
There can be high friction on the lock or latch bold. It may be caused by sag of the door or unadjusted locking mechanism.
Check if you can open the lock and latch with a key easily. If there is a problem on door or lock, that need to be fixed.
Batteries of motorized cylinder may be weak. Change with new batteries.
IF DOOR IS NOT OPENED EVEN THE KNOB IS ROTATING
There is a problem related with connection between motor and cylinder. Call your dealer and ask for service.
IF KEYPAD IS NOT CONTROLLING THE MOTORIZED CYLINDER
The motorized cylinder maybe in night mode. (see 5.2)
Other manuals for Utopic2 Series
1
This manual suits for next models
2
Table of contents
Other DESi Lock manuals
