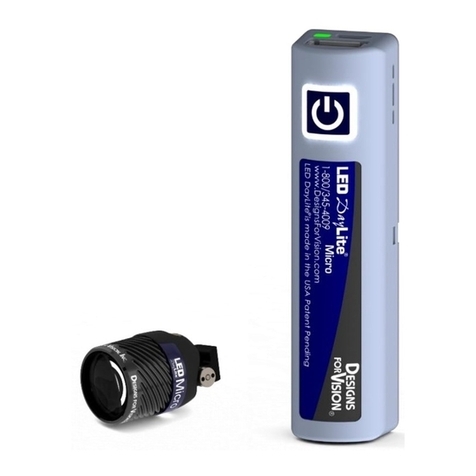
Designs for Vision LED DayLite NanoCam HDi DVI-LEDSC User manual

LED DayLite®
NanoCam HDi™
USER GUIDE
Model: DVI-LEDSC
Ver. 1.18 (En)

2
LED DAYLITE®HDI™USER GUIDE
DATE OF ISSUE:
1-18-2018

3
LED DAYLITE®HDI™USER GUIDE
DESIGNS FOR VISION,INC.LED DAYLITE®HDI™
The Designs for Vision LED DayLite® HDi™Headlights provide
bright, portable light to the surgical environment. They are
designed to be comfortable yet functional. The headlights are
made to clip onto a wide variety of frames and/or headsets.
INDICATIONS FOR USE
The Designs for Vision LED DayLite® HDi™is an illumination
device and video recording device used to aid in visualization
for medical professionals. It is intended to illuminate and
document various tissues and/or body parts. This device is
intended to be used by medical professionals, requiring no
specific training other than what is contained in this manual.
CONTRAINDICATIONS
None known
WARNINGS
Save these instructions. This manual contains
important safety and operating instructions

4
LED DAYLITE®HDI™USER GUIDE
Always examine the unit and accessories for
damage before commencing use. Damaged
accessories must not be used and must be
replaced. Use original Designs for Vision, Inc.
parts and accessories only. The use of
unapproved parts may void the warranty.
To reduce the risk of battery explosion, follow
these instructions and those marked on the
battery
Do not Autoclave
For indoor use only
If the equipment is used in a manner not
specified by Designs for Vision, Inc., the
protection provided by the equipment may be
impaired
A spent battery should not be used. Contact
Designs for Vision Inc. for ordering a
replacement
Replace with Designs for Vision, Inc. battery
only. Using unapproved batteries may not
work and will void the warranty

5
LED DAYLITE®HDI™USER GUIDE
This equipment and accessories do not
contain serviceable parts. All repairs need to
be conducted by Designs for Vision, Inc.
service personnel
Do not let liquids enter openings or ports. Do
not immerse parts in solutions. Allowing
liquids to enter openings or ports may void
warranty.
Equipment not suitable for use in the presence
of a flammable anesthetic mixture with air or
in an oxygen rich environment
Care must be taken when operating this
equipment around other equipment to avoid
reciprocal interference. Potential
electromagnetic or other interference could
occur to this or to the other equipment. Try to
minimize this interference by not using other
equipment in conjunction with this device
No modification of this equipment is allowed.
Performing unauthorized modification on the
equipment, accessories or the product
labelling may void the warranty

6
LED DAYLITE®HDI™USER GUIDE
Remove battery from power pack if this device
is not in use and will be stored for some time.
Maintain storage at environmental conditions
listed below
Improper use of battery may cause them to
get hot, ignite or explode. Always follow all
safety precautions listed in this manual
Never make changes or modifications to the
battery pack
Do not short circuit
Do not expose to fire
When replacing battery, be careful to not
crimp or crush wires inside of power pack
Protect battery from fluids and damp
environments
Charge batteries with supplied charger only
Waste of electrical and electronic equipment
must not be disposed as unsorted municipal
waste. It must be collected separately, and
must be disposed as per local regulations

7
LED DAYLITE®HDI™USER GUIDE
SPECIFICATIONS
POWER REQUIREMENTS
Designs for Vision, Inc.®
LED DayLite®HDi™
Model Number: DVI-LEDSC
A) Cell-Con Charger
Model P/N: 2240
Battery Power :
7.4VDC, 3400mAh
18650 Li-Ion Battery
For Charging :
Input : 100-240VAC, 50/60 Hz,
.35A
Output : 8.4 VDC, 1.3A max
USB Power (NanoCam HD™) :
Input : 5VDC, 0.18A
ILLUMINATION
At 12” measured with a cosine
corrected light meter
NanoCam HDi™Headlight:
0 –38,000 lux 7%
TRANSPORT & STORAGE
TEMPERATURE:
RELATIVE HUMIDITY:
ATMOSPHERIC PRESSURE:
-40OC to 70OC
10% to 100% including
condensation
500 to 1060 hPa

8
LED DAYLITE®HDI™USER GUIDE
ENVIRONMENTAL OPERATING
CONDITIONS
TEMPERATURE:
RELATIVE HUMIDITY:
ATMOSPHERIC PRESSURE:
10OC to 40OC
30% to 75%
700 to 1060 hPa
OVERCURRENT PROTECTION
Firmware Controlled Protection
RECOMMENDED SYSTEM
REQUIREMENTS (NanoCam
HD™):
Operating System:
Available Memory:
Available HD Space:
Minimum CPU Speed:
Available USB Ports:
Windows 7 or better
2GB Preferred
20GB Preferred
1.7GHz or Better
2 Hi-Speed USB2.0
DIMENSIONS
POWER PACK:
WEIGHT:
3.60” x 1.95” x .95”
4.9 oz.
B) NanoCam HDi:
B) WEIGHT:
B) NanoCam HDi™with Headlight:
B) WEIGHT:
1.40” x 1.10” x .90”
.50 oz.
1.40” x 1.10” x 1.68”
1.15 oz.
APPROVALS:
IEC 60601-1, IEC 60601-1-2,
Class A, CISPR 11, IEC 62133,
IEC 62366-1
EQUIPMENT CLASS:
Class II
INGRESS OF WATER:
FOOT PEDAL ONLY:
IPX0 (ordinary equipment)
IPX1

9
LED DAYLITE®HDI™USER GUIDE
MODE OF OPERATION
Continuous
PROTECTION FROM SHOCK:
NO APPLIED PARTS
METHODS OF
STERILIZATION
Not Intended to be Sterilized
OXYGEN RICH
ENVIRONMENT
Not Intended for Oxygen Rich
Environments
PATENTS:
8,851,709; 8,215,791; 7,690,806
HDi™ Technology Patent Pending
A) External charger provided with an approved detachable power supply cord which
can be easily and safely remove from supply mains
B) Dimensions and weight measured without the micro-video lens or locking ring

10
LED DAYLITE®HDI™USER GUIDE
CONTENTS
Device Description ...........................................................................11
Directions for Use ............................................................................13
LED DayLite® HDi™ Initial Setup and charging ...........................13
Holster Operation.......................................................................15
Using the Power Link Feature.....................................................17
Understanding the Status Indicator ...........................................17
Replacing the Battery .................................................................19
Using the NanoCam HD/HDi™.....................................................20
Inspection and Preventative Maintenance......................................29
Description of Various Symbols .......................................................31
Replacement Parts...........................................................................32
Electromagnetic Information...........................................................33
Warranty..........................................................................................42

11
LED DAYLITE®HDI™USER GUIDE
DEVICE DESCRIPTION
The NanoCam HDi™records high resolution 1080p video over
USB. The attached headlight is designed to provide even color
corrected illumination to enhance the images captured. The
light has a correlated color temperature of 5800˚K at an
intensity of up to 38,000 lux. The unit can run on battery
power for up to 12 hours before needing to be recharged.
The LED DayLite® HDi™includes these main components:
Power Pack(s)
Desktop Charger w/Power Cord
NanoCam HDi™ Camera and Headlight
Headlight Cable

12
LED DAYLITE®HDI™USER GUIDE
Accessories include:
Two Holsters w/Belt Clips
Power Link Cable
Hex Drivers
Cable Wrap Kit
Operation Manual
Registration Card
T-Mount Bracket
Carrying Case
USB Extension Cables
2.5x/3.5x/WA µVideo Lens System
USB Foot Pedal
USB Drive w/Camera Software
Focusing Card

13
LED DAYLITE®HDI™USER GUIDE
DIRECTIONS FOR USE
LED DAYLITE®HDI™INITIAL SETUP AND CHARGING
Remove the components from the shipping container,
checking that all parts on the packing
list have been received. Carefully
remove the headlight, power pack(s),
desktop charger and charger cord
from the packaging carton.
The desktop charger is designed to meet multi-national
regulatory requirements and has multi-input voltage
capability to
accommodate various
line voltages from 100-
240 VAC. The unit is to be
charged with the
supplied charger only.
Plug the cord into the
jack connector on the front of the power pack (Fig. 1).
NOTE: The
batteries need to
receive a full
charge before
initial operation
FIG.1
FIG.1

14
LED DAYLITE®HDI™USER GUIDE
Plug the power cord into the charger and connect the desktop
charger to the AC outlet. NOTE: International adapters are
available through Designs for Vision; refer to the list on page
32.
The power button light will start pulsing to indicate the unit is
in “Smart Charge” mode. The
status indicator (Fig. 2) will
display the current state of
charge. The LED will change
colors as the battery charges;
going from RED to ORANGE
to GREEN. When the power
button light remains steady,
the unit is fully charged.
You can now disconnect the
cord from the power pack to run on battery. The belt clip on
the rear of the holster will allow you to carry it around with
you.
FIG.2

15
LED DAYLITE®HDI™USER GUIDE
HOLSTER OPERATION
In addition to the holsters, Ratcheting Belt Clips have been
included to allow for a full 360° rotation of the unit, even
while it is attached to you. To place the belt clip on to the
holster, simply slide it up over the raised circular ratchet disk
until an audible ‘click’ is heard (Fig. 3). The clip on the back of
the leather case is designed to clip onto a belt.
FIG.3

16
LED DAYLITE®HDI™USER GUIDE
Squeeze the clip together to open. Arrow A (Fig. 4) shows
where to press. The power pack can rotate to your desired
position.
Each increment is followed by an audible click. To remove the
power pack from the clip, depress the button on the top of
the belt clip while pulling up on the power pack, which is
shown by arrow B (Fig. 4).
NOTE: Make sure power pack is properly seated before
commencing use.
FIG.4
FIG.5
A
B
B
A

17
LED DAYLITE®HDI™USER GUIDE
USING THE POWER LINK FEATURE
In the event that you require additional run-time, we have
supplied a Power Link Cable which will allow you effectively
double the number of hours your headlight will last. Turn
both power packs on and simply connect two power pack
units together, as shown (Fig. 6), and plug your headlight
into either one. Intensity can be controlled by the power pack
that your headlight is plugged into.
UNDERSTANDING THE STATUS INDICATOR
The LED DayLite® HDi™incorporates an advanced status
monitoring system. The following table describes what each
indication signifies:
FIG.6

18
LED DAYLITE®HDI™USER GUIDE
SOLID GREEN:FULLY CHARGED BATTERY
SOLID/PULSING RED:LOW BATTERY
FAST BLINK RED:GENERAL ERROR.PLEASE
CONTACT DESIGNS FOR VISION,INC.FOR FURTHER
ASSISTANCE
SLOW BLINK RED:BATTERY SPENT.PLEASE
CONTACT DESIGNS FOR VISION,INC.FOR FURTHER
ASSISTANCE
NOTE: A spent battery should not be used. Contact Designs for
Vision Inc. for ordering a replacement.
The LED DayLite® HDi™ also incorporates a Low Battery
Warning system. With approximately ten (10) minutes of
battery power remaining, the headlight will flash three times.
At five (5) minutes remaining, the headlight will flash another

19
LED DAYLITE®HDI™USER GUIDE
three times. At 30 (thirty) seconds remaining, the headlight
will flash continually until the battery is completely depleted.
REPLACING THE BATTERY
At the end of its useful life, the battery will need to be
discarded and replaced with a new one. To accomplish this,
you will need the
hex driver supplied
with the unit.
Loosen the screw at
the bottom of the
power pack until it is removed from the battery door. Slide
the door down and out to expose the battery (Fig. 7).
Unplug the black connector on the
battery on the inside of the unit. Note:
Replace with Designs for Vision, Inc.
battery only. Using unapproved
batteries may not work and will void
the warranty. Insert the new battery being very careful to
NOTE: If the
battery is
installed
improperly, the
unit will not
function
FIG.7

20
LED DAYLITE®HDI™USER GUIDE
install in the proper orientation. Plug the battery into the
connector then place the battery in the pack. Make sure all
wires are tucked into the compartment. Replace door and
tighten screw. NOTE: You will need to fully charge the battery
before the fuel gauge will read properly.
USING THE NANOCAM HD/HDI™
NOTE: Before proceeding, plug the USB flash drive that came
with your NanoCam HD/HDi™into an available PC and run the
setup file. Prior to your first use, you will need to perform the
following steps to properly align and setup the camera, light
(if equipped) and micro-video lens system of your NanoCam
HD/HDi™:
1. MOUNTING NANOCAM HDI™AND INSERTING CABLES
2. ALIGNING NANOCAM HDI™WITH YOUR FIELD OF VIEW
3. FOCUSING YOUR NANOCAM HDI™
4. ALIGNING THE HEADLIGHT WITH YOUR NANOCAM HDI™
Table of contents
Other Designs for Vision Flashlight manuals
Popular Flashlight manuals by other brands

LIVARNO
LIVARNO LUX LAH 55 A2 operating instructions

Milwaukee
Milwaukee M18 IL Original instructions
KRAUSMANN
KRAUSMANN LT40140 Operation manual

Philips
Philips Ultinon Essential LED-HL Series manual
Lincoln Electric
Lincoln Electric PCT 80 Operator's manual
plumBOSS
plumBOSS EXTREME757 operating instructions
