Detect 21101 User manual

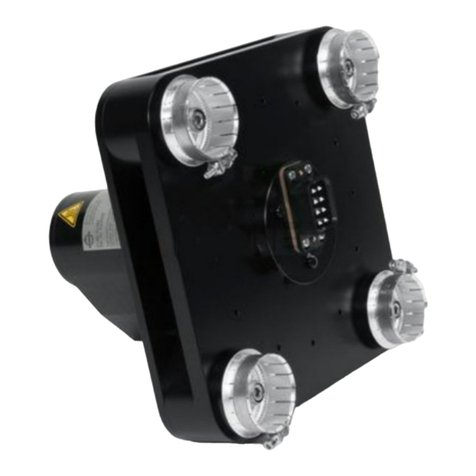
Detect™Hub
User Manual
REF 21101 Eective Date: November 2021
MN00005US Rev A
For in vitro diagnostic use.
For use with the Detect Covid-19 Test.
This product is for use under Emergency Use Authorization
(EUA) only.

Using the Hub for the Detect Covid-19 Test 04
Product Information 06
Proprietary Name 06
Established Product Name 06
Intended Use 06
Hub Information 07
Hub Components 07
Device Diagram 07
Hub Specifications 08
Hub Installation 09
Hub Safety Precautions 10
Cleaning & Maintenance 11
Troubleshooting 12
Legend of Symbols 14
Repeat Use 15
Detect, Inc.
530 Old Whitfield St.
Guilford, CT 06437 USA
+1 (855) 3223692
detect.com
Contents
Trademark, Patents and Copyright Statements
Detect™ is a trademark of Detect, Inc.
The purchase of this product conveys to the buyer the
non-transferable right to use it in accordance with this
user manual. No other rights are conveyed expressly,
by implication or by estoppel. Furthermore, no rights
for resale are conferred with the purchase of this product.
Copyright © Detect, Inc. 2021.
All rights reserved.
This product has not been FDA cleared or approved,
but has been authorized by FDA under an EUA.
This product has been authorized only for the
detection of nucleic acid from SARSCoV2, not for
any other viruses or pathogens.
The emergency use of this product is only authorized
for the duration of the declaration that circumstances
exist justifying the authorization of emergency use
of in vitro diagnostics for detection and/or diagnosis of
COVID19 under Section 564(b)(1) of the Federal Food,
Drug and Cosmetic Act, 21 U.S.C. § 360bbb-3(b)(1),
unless the declaration is terminated or authorization
is revoked sooner.

4 5
1.5 Review the next steps in the Detect App before
removing the Test Tube from the Hub.
2 Using the Hub for the
Detect Covid-19 Test
Caution: Do not insert the Test Tube into
the Hub without powering up.
1.1 To start your test, you need a Detect Covid-19
Test (sold separately) and the Detect App (free
to download). Follow the instructions in the app
to prepare your sample using the Detect test.
At the appropriate step, connect the Hub to a
wall power outlet via the included USBC cable
and the USB power adapter. The Hub will beep
when powered up, and it is ready to use when a
solid green light is visible. 1.4 A solid green LED light and two audible
beeps will indicate completion of the process.
This will take approximately 55 minutes.
1.2 When ready, ensure that the Detect Cap on
the Test Tube is securely tightened. Place the Test
Tube in the Hub until you hear a beep. This
indicates that the processing program has started.
1.3 A blinking green LED light will indicate that
the processing program is in progress.
1
2 beeps

6 7
3 Product Information 4 Hub Information
2.1 Proprietary Name
Detect Hub
2.2 Established Product Name
Detect Hub
2.3 Intended Use
This Hub is intended for use in combination with
the Detect Covid-19 Test for the purpose of
detecting SARSCoV2 nucleic acids in human
anterior nares specimens.
3.1 Hub Components
Each Detect Hub comes with the
following components:
Component Name Quantity
Detect Hub 1
USBC Cable 1
USB Power Adapter 1
Model: SWU
Input: 100V~50/Hz 400mA
Output: 5.V=2000mA
User Manual 1
3.2 Device Diagram
Well for
Test Tube
Red LED
Green LED
USBC
Port
Air
Vents
23

8 9
3.3 Hub Specifications
Model 21101
Input power DC V A Max
Max. power 10 W
Operating environment Indoor Use Only
Operating temperature range 59 °F 86 °F
(15 °C to 30 °C)
Storage temperature range 32 °F 176 °F
(0 °C to 80 °C)
Operating humidity range 25%–80%
Storage humidity range 080%
Max operating altitude 6500 ft (1981.2 m)
Dimensions (L×W×H) 4.3″ x 3.4″ x 2.6″
(109 × 85 × 65 mm)
Net weight 3.3 oz (93 g)
3.4 Hub Installation
Only use the USBC cable and USB power
adapter included with this Detect Hub. Place the
Hub on a level, horizontal surface in a dry
place away from strong sunlight and with good
ventilation around the device.
Attach the USB power adapter to the USBC
cable at the back of the Hub, and plug the other
end of the power cord into an electrical outlet.
The voltage requirement is 100V AC.
100V AC

10 11
5 Hub Safety Precautions Cleaning & Maintenance
Power o the Hub before cleaning. Do not
use corrosive cleaning liquids or fill the well
with cleaning solutions.
Clean the plastic surface with cloth dampened
with isopropyl alcohol. Do not clean the interior
wall of the Hub well.
Please read this manual carefully before using
the device and follow all recommended safety
precautions to avoid personal injury or damage
to the device:
Only use with the included adapter.
Do not place anything besides Detect Test
Tubes into the Hub.
Do not open the Test Tube during or after the
processing step in order to prevent Hub
contamination with biohazardous substance.
Keep the Hub dry, dust-free and with good
ventilation on all sides. Do not place near
a heat source.
Unplug the Detect Hub before cleaning.
Do not attempt to open or repair the Hub. Contact
Detect Customer Support for any questions.
Power o the Hub when not in use by
unplugging from the wall outlet.
If it will be left unused for an extended period
of time, keep the device covered with a cloth
to protect it from dust.
! !
4 5

12 13
Red LED blinks
continuously
while Test Tube
is inside Hub
Red LED blinks
5 times after Test
Tube removal
Solid Red LED
Red LED blinks
very rapidly,
accompanied by
a continuous
series of beeps
Troubleshooting
Hub does not
power on
(no LEDs are lit)
Red LED fades in/
out continuously
Both Red and
Green LED fade in/
out continuously
Check the following connections:
• Hub and USBC cable
• USBC cable and A/C adapter
• A/C adapter to outlet
If problem persists, contact support.
Cause: Hub is not receiving correct
power.
Find the original A/C adapter that
came with the Hub package and use it.
Cause: Hub detects that its internal
and/or external operating temperature
is outside the specified range.
Relocate Hub to an environment where
the temperature is 15 °C 30 °C (59 °F -
86 °F).You may need to wait until Hub
cools down to new temperature before
it is operational again.
If the problem persists, please contact support at:
Cause: Test Tube placed in the Hub
prior to the Hub being plugged in. Take
out the tube and re-insert. If power
was interrupted during processing,
discard the test as it is no longer valid—
start a new test.
Cause: Test Tube removed before
processing step is complete. The test is
no longer valid—do not proceed.
Cause: Hub detects internal error.
Contact support.
Cause: Hub detects a severe
internal error.
Remove Hub from power
immediately. Contact support.
PROBLEM PROBLEMSOLUTION SOLUTION
6

14 15
Legend of Symbols Repeat Use
The Detect Hub is reusable and
can be used with any additional
Detect Tests.
However, if you need to dispose of it, please see
the information below.
This electronics product contains substances
which could damage the environment if not
properly handled. As such, it is not possible to
dispose of it in the regular trash.
Please check with your local government or
electronics store to verify how to recycle your
product. You can also check with your local
electronics store to see if they will be able to
recycle this product for you.
Depending on the solution chosen, fees may apply.
This symbol certifies that
the electromagnetic
interference from the device
is under limits approved by
the Federal Communications
Commission.
This symbol indicates that the
device has been tested to
applicable standards by
Underwriters Laboratory (UL).
This symbol indicates direct
current (DC) voltage.
For In Vitro Diagnostics Use.
This symbol indicates that
caution is necessary when
operating the device in order
to avoid undesirable
consequences. See Section 4
of this manual to see the
full list of safety precautions.
This symbol indicates the
date on which the device
was manufactured.
This symbol identifies the
manufacturer of the device.
This symbol indicates
that the instruction manual
should be consulted.
This symbol indicates that
the device should be kept
in dry conditions.
This symbol indicates that
the device is fragile and
shall be handled with care.
This symbol indicates that
the device must not be
used if the package holding
the device is damaged.
This symbol identifies
the manufacturer’s
catalogue number.
This symbol identifies
the manufacturer’s serial
number.
This symbol identifies
that the electronics device
meets the safety
requirements specified for
Class II equipment
according to IEC 61140.
78
Table of contents

