manuals.online logo
Brands
  1. Home
  2. •
  3. Brands
  4. •
  5. Hama
  6. •
  7. Switch
  8. •
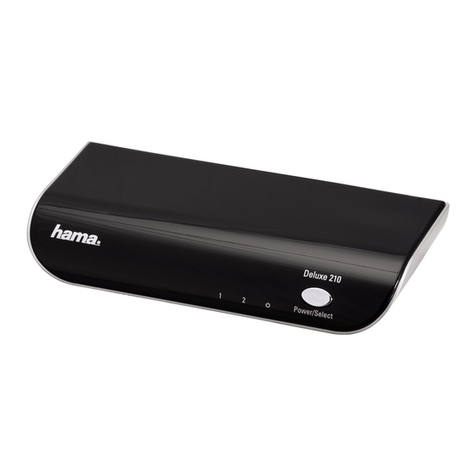
  9. Hama S2110 User manual

Hama S2110 User manual

00052349/05.08
All listed brands are trademarks of the corresponding companies. Errors and omissions excepted,
and subject to technical changes. Our general terms of delivery and payment are applied.
Hama GmbH & Co KG
D-86651 Monheim/Germany
www.hama.com
00052349bda.indd Abs1:2
00052349bda.indd Abs1:2 10.07.2008 13:52:04 Uhr
10.07.2008 13:52:04 Uhr
All manuals and user guides at all-guides.com
all-guides.com
S2110 2-Port KVM Switch
Datenumschalter
Data Switch
Commutateur de données
COMPUTER
00052349
00052349bda.indd Abs2:1
00052349bda.indd Abs2:1 10.07.2008 13:52:05 Uhr
10.07.2008 13:52:05 Uhr
All manuals and user guides at all-guides.com
2
Voraussetzungen
Konsole
• Ein VGA-, SVGA- oder Multisync-Monitor, der in der Lage ist, die höchste Auflösung darzustellen, die Sie auf einem der zu
installierenden Computer verwenden möchten
• Eine USB-Tastatur
• Eine USB-Maus
Computer
Auf den Computern, die mit dem System verbunden werden sollen, muss mindestens folgendes installiert sein:
• Eine VGA-, SVGA- oder Multisync-Grafikkarte
• Ein USB-Anschluss Typ A
Hardwareübersicht
1. Port-LEDs
2. KVM-Kabel
3. Lautsprecherbuche
4. Konsolports
5. USB-Mausanschluss
6. USB-Tastaturanschluss
7. Lautsprecherstecker
8. Stecker für Grafiksignal
Installation
Wichtig
1. Schalten Sie vor der Installation alle anzuschließenden Geräte aus. Bei Computern, die sich über die Tastatur einschalten lassen,
müssen Sie den Netzstecker ziehen. Anderenfalls wird der Switch vom Computer gespeist.
2. Um eine Beschädigung Ihrer Geräte zu vermeiden, müssen alle angeschlossenen Geräte ordnungsgemäß geerdet sein.
Zur Installation des S2110 müssen Sie die folgenden Schritte durchführen:
1. Verbinden Sie Tastatur, Maus, Monitor und Lautsprecher mit den Konsolports des S2110.
Jede Buchse ist durch ein entsprechendes Symbol gekennzeichnet.
2. Verbinden Sie die Lautsprecher mit der dafür vorgesehenen Buchse am S2110. Dieser Schritt ist optional.
3. Verbinden Sie die am Gerät angebrachten KVM-Kabel für Tastatur, Monitor, Maus und Lautsprecher mit den entsprechenden
Ports der zu installierenden Computer.
4. Schalten Sie Ihren Computer ein
Hinweis: Standardmäßig schaltet der S2110 auf den ersten Computer um, der eingeschaltet wird.
dBedienungsanleitung
&
(
/
%
!
"
$
§
$
00052349bda.indd Abs2:2
00052349bda.indd Abs2:2 10.07.2008 13:52:05 Uhr
10.07.2008 13:52:05 Uhr
All manuals and user guides at all-guides.com
3
Bedienung
1. Portauswahl per Hotkey
Die Portumschaltung per Hotkey erfolgt grundsätzlich durch doppeltes Betätigen der Taste „Strg “.
[Strg] [Strg]
2. Startet den Autoscan-Modus
Startet die automatische Umschaltung. Drücken Sie die Taste [Left Shift], und drücken Sie [Right Shift].
[Left Shift] [Right Shift]
Umschaltintervall
Setzt das Intervall für den Autoscan-Modus auf n Sekunden, wobei n für eine Zahl zwischen 1 und 4 steht.
[Left shift] [Right shift] [n]
Hinweis: Dabei steht n für die Wartezeit in Sekunden, bis auf den anderen Port umgeschaltet wird.. Ersetzen Sie n durch ein Zahl
zwischen 1 und 4, wenn Sie diese Hotkey-Tastenkombination verwenden. (Siehe die folgende Tabelle.)
Tabelle Umschaltintervall
nSekunden
13Sekunden
25Sekunden. (Standard)
310 Sekunden
420 Sekunden
Beendet den Hotkey-Modus und die automatische Umschaltung
[Esc] oder [Leertaste]
Hotkey-Tastenkonfiguration
Nachdem Sie den Hotkey-Modus [Strg] + [F12] aktiviert haben, drücken Sie eine der folgenden Tasten, um die entsprechende
Funktion aufzurufen:
Taste Funktion
[F1] Erkennt und speichert die hardwareseitige Tastaturumgebung.
[F2] Verwendet die Mac-kompatible Tastaturumgebung.
[F3] Verwendet die Sun-kompatible Tastaturumgebung.
[F4] Druckt die aktuelle Belegung für Hotkeys, Tastaturplattform und
Spracheinstellung aus.
R > [Enter] Setzt die Hotkey-Einstellungen auf die Standardwerte zurück.
00052349bda.indd Abs2:3
00052349bda.indd Abs2:3 10.07.2008 13:52:07 Uhr
10.07.2008 13:52:07 Uhr
All manuals and user guides at all-guides.com
4
Problemlösung
Symptom Mögliche Ursache Maßnahme
Tastatur bzw. Maus
funktioniert nicht
Tastatur bzw. Maus muss zurückgesetzt
werden.
Falsche Tastenkombination gedrückt.
Switch muss zurückgesetzt werden.
Trennen Sie die Tastatur bzw. Maus vom entspre-
chenden Konsolport, und schließen Sie sie erneut an.
Versuchen Sie es erneut: drücken Sie die Tasten
einzeln in der angegebenen Reihenfolge.
Schalten Sie die Computer aus, warten Sie 5
Sekunden, und schalten Sie sie wieder ein.
Anzeigeprobleme Auflösung bzw. Bildwiederholfrequenz
zu hoch.
Wählen Sie eine kleinere Auflösung bzw. Bandbreite.
Technische Daten
Funktion S2110
Computeranschlüsse 2
Portauswahl Hotkey
Tastatur
Konsole Bildschirm
Maus
Lautsprecher
Anschlüsse
Tastatur/Maus
KVM-Ports Bildschirm
Lautsprecher
1 x USB Typ A Weiblein (schwarz)
1 x HDB-15 Weiblein (blau)
1 x USB Typ A Weiblein (schwarz)
1 x Mini-Stereo-Buchse, Weiblein (grün)
2 x USB Typ A Männlein (schwarz)
2 x HDB-15 Männlein (blau)
2 x Mini-Stereo-Stecker, Männlein (grün)
LED-Anzeigen Ausgewählt 2 (grün)
Kabellänge Computer 1,2 m
Emulation Tastatur/Maus USB
Bildschirm 2048 x 1536; DDC2B
Umschaltintervall 5 Sekunden
Betriebstemperatur
Umgebung Lagertemperatur
Feuchtigkeit
Gehäuse
Gewicht
Abmessungen (L x B x H)
0 -50°C
-20 -60°C
0 -80% rel. Luftfeuchte, nicht kondensierend
Kunststoff
0,40 kg
2,40 x 7,30 x 7,20 cm
Hinweis: Bei Anschluss an DVI-I-Monitore wird ein zusätzlicher Adapter benötigt. (z. Bsp. Hama 45073 und/oder 45074)
Ports
Physische
Eigenschaften
00052349bda.indd Abs2:4
00052349bda.indd Abs2:4 10.07.2008 13:52:07 Uhr
10.07.2008 13:52:07 Uhr
All manuals and user guides at all-guides.com
5
Matching List for Sun and Windwos
Sun Keyboard Windows Keyboard
[Stop] [Ctrl] > [T]
[Again] [Ctrl] > [F2]
[Props] [Ctrl] > [F3]
[Undo] [Ctrl] > [F4]
[Front] [Ctrl] > [F5]
[Copy] [Ctrl] > [F6]
[Open] [Ctrl] > [F7]
[Paste] [Ctrl] > [F8]
[Find] [Ctrl] > [F9]
[Cut] [Ctrl] > [F10]
[Compose] [Application]
[][Windows]
[Ctrl] > [1]
[Ctrl] > [2]
[Ctrl] > [3]
[Ctrl] > [4]
[Help] [Ctrl] > [H]
00052349bda.indd Abs2:5
00052349bda.indd Abs2:5 10.07.2008 13:52:08 Uhr
10.07.2008 13:52:08 Uhr
All manuals and user guides at all-guides.com
all-guides.com
6
Matching List for Mac und Windwos
Mac Keyboard Windows Keyboard
[Shift] [Shift]
[Control] [Ctrl]
[Win]
[Ctrl] > [1]
[Ctrl] > [2]
[Ctrl] > [3]
[Ctrl] > [4]
Left [alt/option] [Alt]
[F13] [Print Screen]
[F14] [Scroll Lock]
[ = ]
[return] [Enter]
[delete] [Back Space]
[help] [Ins]
[F15] [Ctrl] * [Windows]
00052349bda.indd Abs2:6
00052349bda.indd Abs2:6 10.07.2008 13:52:08 Uhr
10.07.2008 13:52:08 Uhr
All manuals and user guides at all-guides.com
7
Requirements
Console
• A VGA, SVGA, or Multisync monitor capable of the highest resolution that you will be using on any computer in the installation
• A USB Keyboard
• Eine USB Mouse
Computers
The following equiment must be installed on each computer that is to be connected to the system:
• A VGA, SVGA or Multisync video port
• A USB Type A port
Hardware Review
1. Port LEDs
2. KVM Cables
3. Speaker Jack
4. Console Ports
5. USB mouse connector
6. USB keyboard connector
7. Speaker Plug
8. Video Connector
Installation
Important
1. Before you begin, make sure that the power to all the devices you will be connecting has been turned off. You must unplug the
power cords of any computers that have the Keyboard Power On function. Otherwise, the switch will receive power from the
computer.
2. To prevent damage to your equipement, make sure that all the devices you will be connecting are properly grounded.
Installing your new S2110 involves the following steps:
1. Plug your keyboard, monitor, mouse and speaker into the Console ports on the S2110. Each port is labeled with an appropriate icon.
2. Plug your speakers into the S2110’s speaker jack. Note: This step is optional.
3. Plug the attached KVM cables’ keyboard, monitor, mouse and speaker connectors into their respective ports on the computers you
are installing.
4. Turn on the power to the computers.
Operation
Invoking Hotkey Mode:
All Hotkey operations begin by invoking Hotkey Mode. Invoking Hotkey Mode takes three steps.
1. Press and hold down the Num Lock key.
2. Press and release the minus [-] key.
3. Release the Num Lock key.
gOperating Instruction
&
(
/
%
!
"
$
§
$
00052349bda.indd Abs2:7
00052349bda.indd Abs2:7 10.07.2008 13:52:08 Uhr
10.07.2008 13:52:08 Uhr
All manuals and user guides at all-guides.com
8
Operation
1. Hotkey Port Selection
All hotkey port switches begin with tapping the Ctrl key twice.
[Ctrl] [Ctrl]
2. Invokes Auto Scan Mode
Starts Auto Scan. Press and release the [Left Shift] key, and then press the [Right Shift] key.
[Left Shift] [Right Shift]
Scan Interval
Sets the Auto Scan interval to n second intervals - where n is a number from 1 – 4.
[Left shift] [Right shift] [n]
Note: The n stands for the number of seconds that the focus dwells on a port before switching to the other one.
Replace the n with a number between 1 and 4 when entering this hotkey combination. (See the table, below.)
Scan Interval Table
nScan Interval
13Sec.
25Sec. (default)
310 Sec.
420 Sec.
Terminates the hotkey mode and the automatic switch-over
[Esc] or [space bar]
Hotkey key configuration
When you have activated the hotkey mode [Strg] + [F12], press one of the following buttons to invoke the corresponding function:
Key Operation
[F1] Recognizes and stores the hardware sided keyboard environment.
[F2] Uses the Mac compatible keyboard environment.
[F3] Uses the Sun compatible keyboard environment.
[F4] Prints out the current assignment for hotkeys, keyboard platforms
and language setting.
R > [Enter] Resets the hotkey settings to the standard values.
00052349bda.indd Abs2:8
00052349bda.indd Abs2:8 10.07.2008 13:52:10 Uhr
10.07.2008 13:52:10 Uhr
All manuals and user guides at all-guides.com
9
Troubleshooting
Symptom Possible Couse Action
Keyboard and/or Mouse
Not Responding
Keyboard/Mouse needs to be
reset.
Hotkey sequence input incorrectly
Switch needs to be reset
Unplug the keyboard/mouse from the Console
Keyboard Port, then plug it back in
Resend the Hotkey command - press and release
each key in the sequence individually
Turn off the computers; wait 5 seconds; turn the
computers back on
Video Problems Resolution and/or Refresh rat set too
high
Select a lower resolution and/or bandwidth
Specifications
Functions S2110
Computer Connections 2
Port Selection Hotkey
Keyboard
Console Video
Mouse
Speaker
Connectors
Keyboard/Mouse
KVM-Ports Video
Speaker
1 x USB Typ A Female (black)
1 x HDB-15 Female (blue)
1 x USB Typ A Female (black)
1 x Mini Stereo Jack Female (green)
2 x USB Typ A Male (black)
2 x HDB-15 Male (blue)
2 x Mini Stereo Plug Male (green)
LEDs Selected 2 (green)
Cable Length Computers 1.2 m
Emulation Keyboard/Mouse USB
Video 2048 x 1536; DDC2B
Scan Intervall 5 Seconds
Operating Temp.
Environment Storage Temp.
Humidity
Housing
Weight
Dimensions (L x W x H)
0 -50°C
-20 -60°C
0 -80% RH, Non-condensing
Plastic
0.40 kg
2.40 x 7.30 x 7.20 cm
Note: An additional adapter is required to connect to a DVI-I monitor. (for example Hama 45073 and/or 45074)
Ports
Physical
Properties
00052349bda.indd Abs2:9
00052349bda.indd Abs2:9 10.07.2008 13:52:11 Uhr
10.07.2008 13:52:11 Uhr
All manuals and user guides at all-guides.com
10
Matching List for Sun and Windwos
Sun Keyboard Windows Keyboard
[Stop] [Ctrl] > [T]
[Again] [Ctrl] > [F2]
[Props] [Ctrl] > [F3]
[Undo] [Ctrl] > [F4]
[Front] [Ctrl] > [F5]
[Copy] [Ctrl] > [F6]
[Open] [Ctrl] > [F7]
[Paste] [Ctrl] > [F8]
[Find] [Ctrl] > [F9]
[Cut] [Ctrl] > [F10]
[Compose] [Application]
[][Windows]
[Ctrl] > [1]
[Ctrl] > [2]
[Ctrl] > [3]
[Ctrl] > [4]
[Help] [Ctrl] > [H]
00052349bda.indd Abs2:10
00052349bda.indd Abs2:10 10.07.2008 13:52:11 Uhr
10.07.2008 13:52:11 Uhr
All manuals and user guides at all-guides.com
all-guides.com
11
Matching List for Mac und Windwos
Mac Keyboard Windows Keyboard
[Shift] [Shift]
[Control] [Ctrl]
[Win]
[Ctrl] > [1]
[Ctrl] > [2]
[Ctrl] > [3]
[Ctrl] > [4]
Left [alt/option] [Alt]
[F13] [Print Screen]
[F14] [Scroll Lock]
[ = ]
[return] [Enter]
[delete] [Back Space]
[help] [Ins]
[F15] [Ctrl] * [Windows]
00052349bda.indd Abs2:11
00052349bda.indd Abs2:11 10.07.2008 13:52:11 Uhr
10.07.2008 13:52:11 Uhr
All manuals and user guides at all-guides.com
12
Configuration minimale
Console
• Un moniteur VGA, SVGA ou Multisync prenant en charge la plus élevée des résolutions utilisées sur les ordinateurs de l‘installation
• Un clavier USB
• Un souris USB
Ordinateurs
Les composants suviants dolvent être installés sur chaque ordinateur qui sera connecté au systéme :
• Un port videó VGA, SVGA ou Multisync
• Un port USB de type A
Aperçu du matériel
1. Voyants des ports
2. Câbles KVM
3. Prise (femelle) de haut-parleurs
4. Ports de console
5. Connecteur de souris USB
6. Connecteur de clavier USB
7. Prise (mâle) de haut-parleurs
8. Prise vidéo
Installation
Important
1. Avant de commencer, vérifiez que tous les périphériques à connecter ont été éteints. Vous devez débrancher les câbles
d‘alimentation des ordinateurs disposant de la fonction de mise sous tension à patir du clavier. Sinon, le commutateur sera
alimenté par l‘ordinateur.
2. Pour éviter d‘endommager votre appareil, assurez-vous que tous les périphériques connectés sont correctement mis à la terre.
Pour installer votre nouveau S2110, suivez ces étapes :
1. Branchez votre clavier, votre écran, votre souris et votre haut-parleurs dans les ports de console du S2110.
La fonction de chaque port est indiquée par un pictogramme.
2. Branchez vos haut-parleurs dans la prise de haut-parleurs du S2110. Remarque : Cette étape est facultative.
3. Branchez les connecteurs clavier, écran, souris et haut-parleurs des câbles KVM liés dans leurs ports respectifs sur les
ordinateurs avec lesquels vous utiliserez KVM.
4. Allumez les ordinateurs.
Fonctionnement
Toutes les opérations de raccourcis clavier doivent s‘effectuer en mode de raccourcis clavier, en procédant comme suit :
All Hotkey operations begin by invoking Hotkey Mode. Invoking Hotkey Mode takes three steps.
1. Appuyez sur la touche Verr Num en maintenez-la enfoncée
2. Appuyez brièvement sur la touche moins
3. Relâchez la touche Verr Num
fMode d‘emploi
&
(
/
%
!
"
$
§
$
00052349bda.indd Abs2:12
00052349bda.indd Abs2:12 10.07.2008 13:52:12 Uhr
10.07.2008 13:52:12 Uhr
All manuals and user guides at all-guides.com
13
Fonctionnement
1. Sélection de ports à l’aide de raccourcis clavier
Pour sélectionner un port à l’aide de raccourcis clavier, vous devez dans un premier temps appuyer deux fois sur la touche Ctrl.
[Ctrl] [Ctrl]
2. Invoque le mode Recherche automatique
Démarre la recherche automatique. Appuyez sur la touche [Left Shift], et appuyez sur [Right Shift]
[Left Shift] [Right Shift]
Intervalle de recherche
Définit l‘intervalle de recherche automatique sur n secondes, où n est un nombre compris entre 1 et 4.
[Left shift] [Right shift] [n]
Remarque : la lettre n représente l’intervalle de temps (en secondes) avant le passage d’un port à l’autre. Remplacez la lettre n par un
chiffre compris entre 1 et 4 lorsque vous appuyez sur une combinaison de touches de raccourci (voir le tableau ci-dessous).
Tabelau Intervalle de commutation
nScan Interval
13Sec.
25Sec. (default)
310 Sec.
420 Sec.
Termine le mode de combinaison de touches et la commutation automatique [Esc] ou [touche d’espacement]
Configuration des touches d’activation
Après avoir activé le mode de combinaison de touches [Strg] + [F12], veuillez appuyer sur une des touches suivantes pour
appeler la fonction correspondante :
Toche Fonction
[F1] Reconnaît et mémorise l’environnement clavier côté du matériel.
[F2] Utilise l’environnement clavier compatible avec Mac.
[F3] Utilise l’environnement clavier compatible avec Sun.
[F4] Imprime l’occupation actuelle pour les touches d’activation, le
plate-forme clavier et les réglages de langue.
R > [Enter] Modifie les ajustements des touches d’activation sur les valeurs
standard.
00052349bda.indd Abs2:13
00052349bda.indd Abs2:13 10.07.2008 13:52:14 Uhr
10.07.2008 13:52:14 Uhr
All manuals and user guides at all-guides.com
14
Dépannage
Symptôme Cause possible Action
Clavier et/ou souris ne
produsiant pas d‘effect
Le clavier / la souris doit être
réinitialisé(e)
Le séquence de touches de raccourci
saisie est incorrecte
Le commutateur doit être réinitialisé
Débranchez le clavier / la souris du port clavier de la
console, puis rebranchez
Saisissez à nouveau les touches de raccourci et
relâchez les touches de la séquence l‘une après l‘autre
Eteignez les ordinateurs ; attendez 5 secondes et
rallumez-les
Problèmes d‘affichage Réglage de résolution et/ou de fréquence
de rafraîchissement trop élevé
Sélectionnez une résolution et/ou une bande passante
moins élevée
Spécifications
Fonction S2110
Connexions de l‘ordinateur 2
Sélection de ports Raccourcis
Clavier
Ports de Moniteur
Souris
Haut-parleurs
Connecteurs
Clavier/Souris
Ports KVM Moniteur
Haut-parleurs
1 connecteur USB femelle de type A (noir)
1 connecteur HDB femelle à 15 broches (bleu)
1 connecteur USB femelle de type A (noir)
1 mini-connecteurs stéréo mâles (vert)
2 connecteurs USB mâles de type A (noir)
2 connecteur HDB mâle à 15 broches (bleu)
2 mini-connecteurs stéréo mâles (vert)
Voyants Sélectionné 2 (vert)
Longeur de câble
Ordinateurs 1.2 m
Émulation Clavier/Souris USB
Moniteur 2048 x 1536; DDC2B
Intervalle de recherche 5 secondes
Température de fonctionnement
Environnement Température de stockage
Humidité
Boîtier
Poids
Dimensions (L x P x H)
0 à 50°C
-20 à 60°C
HR de 0 à 80%, sans condensation
Plastique
0.40 kg
2.40 x 7.30 x 7.20 cm
Remarque : Un adaptateur est indispensable en cas de raccordement à des moniteurs DVI-I (Hama 45073 et/ou 45074, etc.).
console
Propriétés
physiques
00052349bda.indd Abs2:14
00052349bda.indd Abs2:14 10.07.2008 13:52:14 Uhr
10.07.2008 13:52:14 Uhr
All manuals and user guides at all-guides.com
15
Matching List for Sun and Windwos
Sun Keyboard Windows Keyboard
[Stop] [Ctrl] > [T]
[Again] [Ctrl] > [F2]
[Props] [Ctrl] > [F3]
[Undo] [Ctrl] > [F4]
[Front] [Ctrl] > [F5]
[Copy] [Ctrl] > [F6]
[Open] [Ctrl] > [F7]
[Paste] [Ctrl] > [F8]
[Find] [Ctrl] > [F9]
[Cut] [Ctrl] > [F10]
[Compose] [Application]
[][Windows]
[Ctrl] > [1]
[Ctrl] > [2]
[Ctrl] > [3]
[Ctrl] > [4]
[Help] [Ctrl] > [H]
00052349bda.indd Abs2:15
00052349bda.indd Abs2:15 10.07.2008 13:52:14 Uhr
10.07.2008 13:52:14 Uhr
All manuals and user guides at all-guides.com
all-guides.com
16
Matching List for Mac und Windwos
Mac Keyboard Windows Keyboard
[Shift] [Shift]
[Control] [Ctrl]
[Win]
[Ctrl] > [1]
[Ctrl] > [2]
[Ctrl] > [3]
[Ctrl] > [4]
Left [alt/option] [Alt]
[F13] [Print Screen]
[F14] [Scroll Lock]
[ = ]
[return] [Enter]
[delete] [Back Space]
[help] [Ins]
[F15] [Ctrl] * [Windows]
00052349bda.indd Abs2:16
00052349bda.indd Abs2:16 10.07.2008 13:52:15 Uhr
10.07.2008 13:52:15 Uhr
All manuals and user guides at all-guides.com
17
00052349bda.indd Abs2:17
00052349bda.indd Abs2:17 10.07.2008 13:52:15 Uhr
10.07.2008 13:52:15 Uhr
All manuals and user guides at all-guides.com

Other manuals for S2110

2

This manual suits for next models

1

Other Hama Switch manuals

Hama USB 2.0 / Fire Wire Combo User manual

Hama

Hama USB 2.0 / Fire Wire Combo User manual

Hama 00079091 User manual

Hama

Hama 00079091 User manual

Hama 78496 User manual

Hama

Hama 78496 User manual

Hama USB Hub User manual

Hama

Hama USB Hub User manual

Hama 00042042 User manual

Hama

Hama 00042042 User manual

Hama 2x1 User manual

Hama

Hama 2x1 User manual

Hama USB 2.0 / Fire Wire Combo User manual

Hama

Hama USB 2.0 / Fire Wire Combo User manual

Hama Matrix 420 User manual

Hama

Hama Matrix 420 User manual

Hama 102197 User manual

Hama

Hama 102197 User manual

Hama 39776 User manual

Hama

Hama 39776 User manual

Hama 75122224 User manual

Hama

Hama 75122224 User manual

Hama AV-750S User manual

Hama

Hama AV-750S User manual

Hama Uni Quattro LNB User manual

Hama

Hama Uni Quattro LNB User manual

Hama 53183 User manual

Hama

Hama 53183 User manual

Hama 00078472 User manual

Hama

Hama 00078472 User manual

Hama S2110 User manual

Hama

Hama S2110 User manual

Hama 78499 User manual

Hama

Hama 78499 User manual

Hama 176551 User manual

Hama

Hama 176551 User manual

Hama 00200136 User manual

Hama

Hama 00200136 User manual

Hama Premium Silver USB 2.0 Hub 1:4 User manual

Hama

Hama Premium Silver USB 2.0 Hub 1:4 User manual

Hama Super Speed USB 3.0 Hub User manual

Hama

Hama Super Speed USB 3.0 Hub User manual

Hama 2R198803 User manual

Hama

Hama 2R198803 User manual

Hama Standby off switch User manual

Hama

Hama Standby off switch User manual

Hama 00176551 User manual

Hama

Hama 00176551 User manual

Popular Switch manuals by other brands

Kramer 6241N user manual

Kramer

Kramer 6241N user manual

GoMax Electronics SW-5004IZ user manual

GoMax Electronics

GoMax Electronics SW-5004IZ user manual

Nortek Security & Control 500 Series instruction manual

Nortek Security & Control

Nortek Security & Control 500 Series instruction manual

HP StorageWorks 64 - SAN Director Switch Cli reference guide

HP

HP StorageWorks 64 - SAN Director Switch Cli reference guide

SELET A01F Series quick start guide

SELET

SELET A01F Series quick start guide

Pulsar S116 quick start guide

Pulsar

Pulsar S116 quick start guide

Ubiquiti ES-24-250W quick start guide

Ubiquiti

Ubiquiti ES-24-250W quick start guide

Baxall DVS14 Installation and operating manual

Baxall

Baxall DVS14 Installation and operating manual

ZyXEL Communications ES-2000 Series Specifications

ZyXEL Communications

ZyXEL Communications ES-2000 Series Specifications

SMC Networks PF2A7 Series Operation manual

SMC Networks

SMC Networks PF2A7 Series Operation manual

D-Link DWS-3024 user manual

D-Link

D-Link DWS-3024 user manual

Elko iNELS RFUS-11 manual

Elko

Elko iNELS RFUS-11 manual

Kramer VP-28 user manual

Kramer

Kramer VP-28 user manual

ALTA LABS S24-POE quick start guide

ALTA LABS

ALTA LABS S24-POE quick start guide

Siemens SIRIUS 3SF11 Series operating instructions

Siemens

Siemens SIRIUS 3SF11 Series operating instructions

ZyXEL Communications GS1915 Series user guide

ZyXEL Communications

ZyXEL Communications GS1915 Series user guide

Magnetrol STI Echotel Trident 91S Instruction manual and parts list

Magnetrol

Magnetrol STI Echotel Trident 91S Instruction manual and parts list

SmartH SmartH Installation instruction

SmartH

SmartH SmartH Installation instruction

manuals.online logo
manuals.online logoBrands
  • About & Mission
  • Contact us
  • Privacy Policy
  • Terms and Conditions

Copyright 2025 Manuals.Online. All Rights Reserved.