manuals.online logo
Brands
  1. Home
  2. •
  3. Brands
  4. •
  5. Kramer
  6. •
  7. Switch
  8. •
  9. Kramer SWT3-21-H User manual

Kramer SWT3-21-H User manual

SWT3-21-H, SWT-41-H Quick Start
P/N:
2901- 301605QS
Rev:
1
SWT3-21-H and SWT3-41-H Quick Start Guide
This guide helps you install and use your SWT3-21-H, SWT-41-H for the first time.
Go to www.kramerav.com/downloads/SWT3-21-H, SWT-41-H to download the latest user manual and
check if firmware upgrades are available.
Step 1: Check what’s in the box
SWT3-21-H / SWT3-41-H HDMI Switcher
1 Bracket set
1 Quick start guide
1 Power adapter and cord
4 Rubber feet
Step 2: Get to know your SWT3-21-H, SWT-41-H
#
Feature
Function
1
IN Buttons
Press to select an HDMI input (LED button lights orange). (2 for SWT3-21-H, 4 for
SWT3-41-H).
When referring to SWT3-41-H in this document, it also applies to
SWT3-21-H.
2
DISPLAY ON Button
Press to turn display On (LED button lights orange) or Off.
VOL Push
Buttons
-
Press to decrease audio output volume.
3
+
Press to increase audio output volume.
MUTE
Push Button
Press to MUTE and press again to UNMUTE
4
LED
Lights red when audio output is muted.
5
NET LED
LED Status
Indicates
Dark
No IP address acquired.
Lights green
A valid IP address has been acquired.
Flashes green for 60s
A means to identify the device in a
system, using command #IDV.
Flashes red/green
IP fallback address has been acquired.
6
STATUS LED
LED Status
Indicates
Dark
Power is off
lights white
PSU-powered on (only).
Note: This is applicable when power
supply is PoE mode.
Lights green
Power is on and an active source and
acceptor are connected.
Lights blue
Power is on and an active source is
connected.
7
HDMI IN Connectors
Connect to an HDMI source (2 for SWT3-21-H, 4 for SWT3-41-H).
8
HDMI OUT Connector
Connect to an HDMI acceptor.
9
AUDIO OUT 5-pin Terminal Block
Connector
Connect to a balanced stereo audio acceptor.
#
Feature
Function
10
Terminal block Connector
(S1-S6)
Connect to:
•Input-triggering devices (for example, remote buttons or sensors), OR
•Output-triggered devices (for example, remote alarm LED indication).
These GPIO ports may be configured as a digital input, digital output, or analog
input ports.
11
ETHERNET RJ-45 Connector
Connect to LAN to accept power, control and manage the device.
12
RESET Recessed Button
For restoring factory default settings, press the RESET button and connect
power to device (keep pressing longer than 6sec after power connection)
13
5V DC Power Connector
Connect to the power supply and to the mains electricity.
14
RS-232 3-pin Terminal Block Connector
Connect to an RS-232 controller.
Step 3: Mount SWT3-41-H
Install SWT3-41-H using one of the following methods:
•Attach the rubber feet and place the unit on a flat surface.
•Fasten a bracket (included) on each side of the unit and attach it to a flat surface
(see www.kramerav.com/downloads/SWT3-21-H, SWT-41-H SWT3-41-H ).
•Mount the unit in a rack using the recommended rack adapter
(see www.kramerav.com/product/SWT3-21-H, SWT-41-H
SWT3-41-H ).
•Ensure that the environment (e.g., maximum ambient temperature &
air flow) is compatible for the device.
•Avoid uneven mechanical loading.
•Appropriate consideration of equipment nameplate ratings should be
used for avoiding overloading of the circuits.
•Reliable earthing of rack-mounted equipment should be maintained.
•Maximum mounting height for the device is 2 meters.
Step 4: Connect inputs and outputs
Always switch OFF the power on each device before connecting it to your SWT3-41-H.For best results, we recommend that
you always use Kramer high-performance cables to connect AV equipment to the SWT3-41-H.
Connect the Audio Output:
To a balanced stereo
audio acceptor:
To an unbalanced
stereo audio acceptor:
For optimum range and performance use the recommended Kramer cables available at www.kramerav.com/product/SWT3-21-H, SWT-41-
H SWT3-41-H
Step 5: Connect power
If not PoE-powered, connect the power cord to SWT3-41-H and plug it into the mains electricity.
Safety Instructions (See www.kramerav.com for updated safety information)
Caution:
•For products with relay terminals and GPI\O ports, please refer to the permitted rating for an external connection, located next to the terminal or in the User Manual.
•There are no operator serviceable parts inside the unit.
Warning:
•Use only the power cord that is supplied with the unit.
•Disconnect the power and unplug the unit from the wall before installing.
Step 6: Control SWT3-41-H
Operate SWT3-41-H:
•Remotely, by IP or RS-232
serial commands transmitted by
a touch screen system, PC, or
other serial controller.
•Embedded web pages via the
Ethernet.
RS-232 Control / Protocol 3000
Baud
Rate:
115,200
Parity:
None
Stop Bits:
1
Data Bits:
8
Command Format:
ASCII
Example: (Switch video input 2 to the output): #ROUTE 1,1,2<CR>
Default IP Parameters –Set to DHCP On
Fallback IP Address:
192.168.1.39
UDP Port #:
50000
Fallback Subnet
Mask:
255.255.255.0
TCP Port #:
5000
Fallback Gateway:
192.168.1.1
User/Password:
Admin/Admin
Host name
SWT3-41-H-xxxx (where xxxx are the last 4 digits of the S/N)
When using SWT3-41-H for the first time, the fallback IP address is set until DHCP server is discovered and a new IP address is acquired.
For further details, check the Resources tab on the product page of the website.

This manual suits for next models

1

Other Kramer Switch manuals

Kramer WP-20CT User manual

Kramer

Kramer WP-20CT User manual

Kramer DIP-22 User manual

Kramer

Kramer DIP-22 User manual

Kramer ScaleMagix 2 VP-740HC User manual

Kramer

Kramer ScaleMagix 2 VP-740HC User manual

Kramer VP-773A User manual

Kramer

Kramer VP-773A User manual

Kramer KIT-401 User manual

Kramer

Kramer KIT-401 User manual

Kramer VS-21HDCP-IR User manual

Kramer

Kramer VS-21HDCP-IR User manual

Kramer VP-211DS User manual

Kramer

Kramer VP-211DS User manual

Kramer VS-21DPIR User manual

Kramer

Kramer VS-21DPIR User manual

Kramer VS-801USB User manual

Kramer

Kramer VS-801USB User manual

Kramer 4x1V User manual

Kramer

Kramer 4x1V User manual

Kramer VP-23N User manual

Kramer

Kramer VP-23N User manual

Kramer 6241 User manual

Kramer

Kramer 6241 User manual

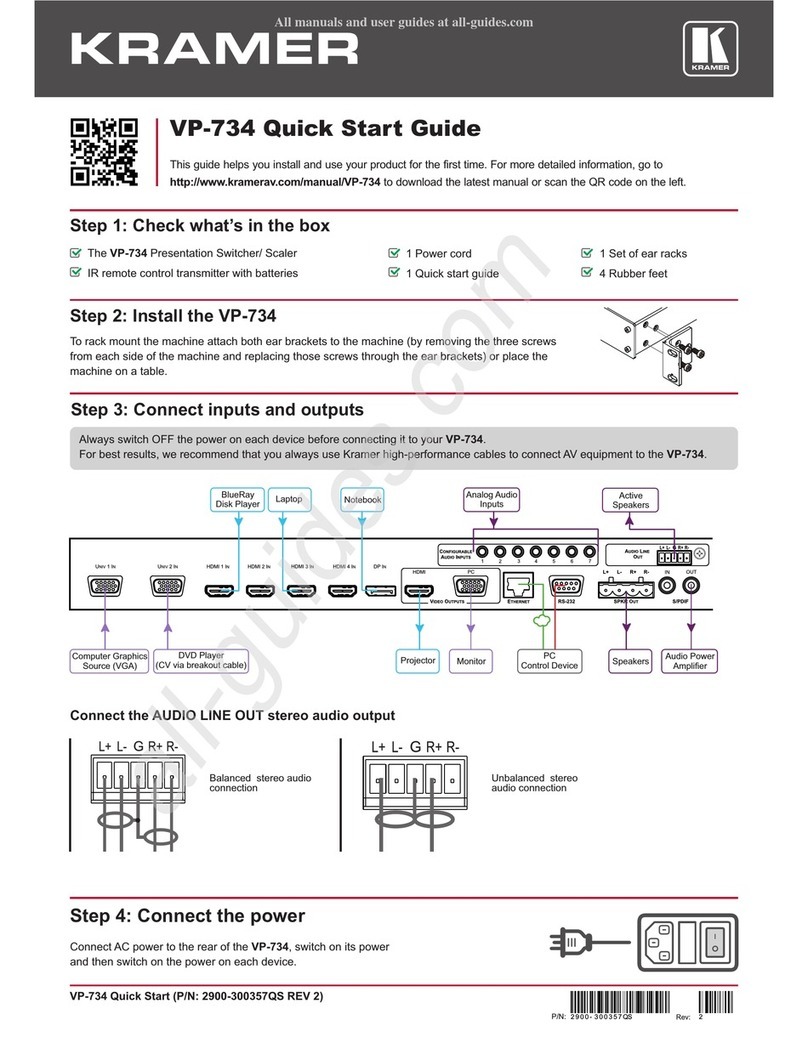
Kramer VP-734 User manual

Kramer

Kramer VP-734 User manual

Kramer DIP-31M User manual

Kramer

Kramer DIP-31M User manual

Kramer VP-444 User manual

Kramer

Kramer VP-444 User manual

Kramer VP-429H2 User manual

Kramer

Kramer VP-429H2 User manual

Kramer VP-720DS User manual

Kramer

Kramer VP-720DS User manual

Kramer VP-436 User manual

Kramer

Kramer VP-436 User manual

Kramer VS-2016 User manual

Kramer

Kramer VS-2016 User manual

Kramer VP-734 User manual

Kramer

Kramer VP-734 User manual

Kramer RC-21TB User manual

Kramer

Kramer RC-21TB User manual

Kramer VS-41H2 User manual

Kramer

Kramer VS-41H2 User manual

Kramer VP-23 User manual

Kramer

Kramer VP-23 User manual

Kramer VS-28 User manual

Kramer

Kramer VS-28 User manual

Popular Switch manuals by other brands

IOGear GCL1908 quick start guide

IOGear

IOGear GCL1908 quick start guide

Aluratek AKSP04 quick start guide

Aluratek

Aluratek AKSP04 quick start guide

PTN WUH4ARC-8K user manual

PTN

PTN WUH4ARC-8K user manual

H3C H3C S5100-SI Operation manual

H3C

H3C H3C S5100-SI Operation manual

TRENDnet TEG-S50G Quick installation guide

TRENDnet

TRENDnet TEG-S50G Quick installation guide

Cabletron Systems 9E106-06 user guide

Cabletron Systems

Cabletron Systems 9E106-06 user guide

Siemens RUGGEDCOM RS910W installation manual

Siemens

Siemens RUGGEDCOM RS910W installation manual

H3C S7500 Series manual

H3C

H3C S7500 Series manual

Allied Telesis AT-FS716 installation guide

Allied Telesis

Allied Telesis AT-FS716 installation guide

SMC Networks TigerStack II SMC8926EM Specifications

SMC Networks

SMC Networks TigerStack II SMC8926EM Specifications

Giovenzana FGR2 instruction manual

Giovenzana

Giovenzana FGR2 instruction manual

NETGEAR ProSAFE GS105PE installation guide

NETGEAR

NETGEAR ProSAFE GS105PE installation guide

Cisco IE 3000 Hardware installation guide

Cisco

Cisco IE 3000 Hardware installation guide

ADTRAN NetVanta 1224 PoE Specification sheet

ADTRAN

ADTRAN NetVanta 1224 PoE Specification sheet

Rosewill RC-409LX user manual

Rosewill

Rosewill RC-409LX user manual

Extron electronics System 8 Plus user manual

Extron electronics

Extron electronics System 8 Plus user manual

D-Link DGS-3630-28TC Quick installation guide

D-Link

D-Link DGS-3630-28TC Quick installation guide

Pacific Antenna Easy TR Switch quick start guide

Pacific Antenna

Pacific Antenna Easy TR Switch quick start guide

manuals.online logo
manuals.online logoBrands
  • About & Mission
  • Contact us
  • Privacy Policy
  • Terms and Conditions

Copyright 2025 Manuals.Online. All Rights Reserved.